
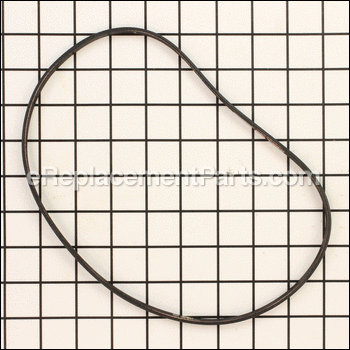
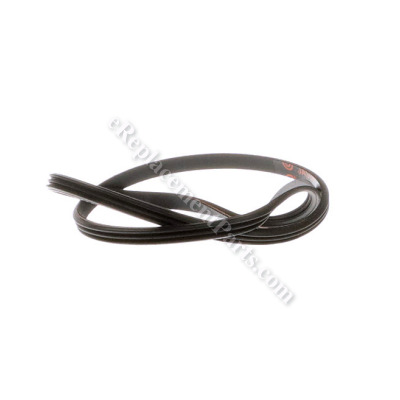


This is an authentic Delta replacement part. Package includes one belt designed for easy installation.
• Belt Width – 1/4"
• Belt Length – 25-1/2"
Clean the pulleys off before installing the new belt to ensure top performance and longevity with your new belt. Inspect belts periodically and replace them when worn to maintain peak performance.
V-belt 1340949
OEM part for: Delta
Part Number: 1340949
$93.42
In Stock
Product Description ?
- Classification: Part
- Weight: 0.01 lbs.
- Shipping: Ships Worldwide
Compatibility
This part will fit the following 3 machines
Delta
LA200 Type 1 Lathe View Diagrams & Manuals
46-250 Type 1 Midi-Lathe View Diagrams & Manuals
46-250 Type 2 Midi-Lathe View Diagrams & Manuals
This item works with the following types of products:
- Lathe Parts
Customer Part Reviews ?
Average Rating (out of 5):
Click to filter by ratings:
5 stars
4
4 stars
1
3 stars
0
2 stars
0
1 stars
0
< PREV
- 1
Replacement belt
We are older people and not computer smart..so wasnt sure what belt we needed. We called them. actually could talk to a real person that person was very helpful and knew exactly what they were doing!! Thanks!
Guest -
October 3, 2023
Verified Purchase
Easy to order
The belt was easy to order and fit perfectly.
Good quality
Guest -
December 30, 2019
Verified Purchase
Great work!
Although I had to wait a long time to receive this fan belt, it was worth it!! eReplacementParts.com is the only place in the world that can deliver hard-to-find parts! No one else had it in stock. Thanks!
Larry -
December 7, 2019
Verified Purchase
Easy to order. Arrived quickly.
Received the correct part in a timely manner. No issues.
Guest -
September 21, 2019
Verified Purchase
Solved my problem
It was the exact replacement and arrived timely.
Guest -
May 25, 2019
Verified Purchase
t
t
t -
t days ago
Verified Purchase
eReplacementParts Team
t
Questions & Answers ?
Our customer Service team is at the ready daily to answer your part and product questions.

Ask our Team
We have a dedicated staff with decades of collective experience in helping customers just like you purchase parts to repair their products.
Does this fit my product?Questions & Answers for V-belt
No questions have been asked yet
Customer Repair Instructions ?
All our customer repair instructions are solicited directly from other customers just like you who have purchased and replaced this exact part.
The drive belt between the pulleys failed after years of faithful service.
Thomas - July 31, 2017
👍 3 of 3 people found this instruction helpful
Tool Type
Lathe
Difficulty
Easy
Time
Less than 15 minutes
Tools Used
, Allen wrench to remove hand wheel
Parts Used
1. Remove the hand wheel by loosening set screws.
2. Unscrew the hand wheel from the shaft.
3. Knock the drive shaft out to remove the old belt.
4. Install the new one.
5. Put the drive shaft back in through the bearing.
6. Loosen the motor bracket and release the tension.
7. Loop the bottom of the belt over the motor pulley.
8. Replace the hand wheel and tighten set screws.
Did you find this story helpful?
Thanks for voting and helping fellow customers!
drive belt broke
Robert - November 10, 2015
👍 3 of 4 people found this instruction helpful
Tool Type
Lathe
Difficulty
Easy
Time
Less than 15 minutes
Tools Used
, Allen wrench
Parts Used
Removed the pulley shaft, replaced the belt & tightened the motor hanger to tension belt.
Did you find this story helpful?
Thanks for voting and helping fellow customers!
Belt was old and broken
Rick - March 8, 2017
👍 1 of 1 people found this instruction helpful
Tool Type
Lathe
Difficulty
Medium
Time
Less than 15 minutes
Tools Used
, Hex tool
Parts Used
Loosen the hex nuts on the left side of the belt drive. I removed the reverse thread spinner on the outside of the lathe. Loosened the hex nuts on the belt wheels. I gently drove the axle out of the lathe. Looped on the new belt on the motor wheel. Looped over the loose axle and reassembled. I had to realign the belt wheel on the axle that drives the lathe and turns the spindle.
Did you find this story helpful?
Thanks for voting and helping fellow customers!
Drive belt on the Delta Midi-Lathe had dry rotten and need to be replaces
Woody - November 11, 2016
👍 1 of 1 people found this instruction helpful
Tool Type
Lathe
Difficulty
Medium
Time
30-60 minutes
Tools Used
Wrench Set, Allen wrench, soft face mallet
Parts Used
Open the access doors
Loose the lock handle that locks the motor
Pull up on the handle to loosen the belt
Loosen the set crews from the handwheel and remove it
Loosen the set screw in the step pulley
With a mallet, hit the spindle far enough out to remove the belt from the spindle pulley
Remove the belt from the motor pulley.
Put it all back in reverse order
Disconnect machine from power source
.
2. Open the two access doors (A) Fig. 27.
3. Hold the handle (B) Fig. 27, and loosen the locking lever (C). Pull up on the handle (B) to remove tension on the drive belt
and then tighten locking lever (C).
4. Loosen the two set screws (D) Figs. 27 and 28, and remove the handwheel (E).
5. Loosen the set screw (G) Fig. 28 on the spindle pulley (H).
. Use a soft mallet (J) Fig. 29 to carefully tap the spindle shaft (K) thru the bearing. Tap it far enough to move the
spindle shaft to the right to remove the spindle pulley (H), and spindle shaft (K), (Fig. 30).
IMPORTANT:
Be careful not to drop the metal key (M) Fig. 31 into the hub of the spindle pulley (H).
7. Remove the drive belt (A) Fig. 30 from the motor pulley (B).
8. Replace the drive belt and the spindle assembly in reverse order. Apply proper tension to the drive belt. Refer to
section
“CHANGING SPINDLE SPEEDS”
.
9.
IMPORTANT:
When attaching the spindle
and handwheel, make certain that the set screws in the spindle pulley are
tightened against the flat surface of the spindle. Check the spindle pulley to see if it is aligned with the motor pulley.
Adjust if necessary
Did you find this story helpful?
Thanks for voting and helping fellow customers!
Drive belt broke ( V-Belt)
Daniel - June 7, 2021
Tool Type
Lathe
Difficulty
Easy
Time
15-30 minutes
Tools Used
, Allen Wrench
Parts Used
Loosen the set screws on the hand spindle and remove (Left handed threats) loosen set screw on the belt pully on the spindle. Remove the face plate, then the front collar, a spanner wrench works best, but anything that will fit it the openings / holes, it will unscrew, tap the spindle through till there is room for the belt to fit on the pulley and reassemble.
Did you find this story helpful?
Thanks for voting and helping fellow customers!
Lathe belt replacement on model no longer made.
Russ - February 10, 2020
Tool Type
Lathe
Difficulty
Easy
Time
30-60 minutes
Tools Used
, soft hammer, Allen wrench
Parts Used
Remove Headstock Hand Wheel. Strike Hand Wheel Mount with Soft hammer to push assembly forward enough to mount new Belt. Tap assembly back into place and reinstall Headstock Hand Wheel. Pretty easy.
Did you find this story helpful?
Thanks for voting and helping fellow customers!
V drive belt broke
Jon - October 31, 2018
Tool Type
Lathe
Difficulty
Easy
Time
30-60 minutes
Tools Used
, Allen wrenches
Parts Used
Cleaned pulleys--lessened motor mount---removed lathe shaft--replaced belt ---replaced lathe shaft--tighten belt--back in operation
Did you find this story helpful?
Thanks for voting and helping fellow customers!
Broken V-belt
EDMUND - June 11, 2018
Tool Type
Lathe
Difficulty
Easy
Time
15-30 minutes
Tools Used
, Hex wrench
Parts Used
Remove old belt that melted on the pulley.
Replaced with new belt.
Replaced with new belt.
Did you find this story helpful?
Thanks for voting and helping fellow customers!
V-belt disintegrated from advanced age and use.
DOUGLAS - March 10, 2018
Tool Type
Lathe
Difficulty
Easy
Time
30-60 minutes
Tools Used
, Spanner, allen wrenches, soft face mallet.
Parts Used
1. Allen screws loosen on outboard flywheel.
2. Use hook spanner against unscrewing flywheel.
3. Allen screws loosen on step pulley.
4. Drive shaft through to release pulley.
5. Clean up step pulley grooves.
6. Place new belt around motor side step pulley and main shaft pulley
7. Replace shaft through headstock, pulley.
8. Thread flywheel onto main shaft against hook spanner.
9. Tighten Allen screws on step pulley and flywheel.
10. Tension belt as needed.
Did you find this story helpful?
Thanks for voting and helping fellow customers!
V-belt on midi lathe broke
Ron - May 3, 2017
Tool Type
Lathe
Difficulty
Medium
Time
15-30 minutes
Tools Used
Socket set, Metric hex key, hard face mallet, oversize socket
Parts Used
Losen nut on external shaft. Loosen two hex screws on shaft of lathe. Gently tap lathe shaft, the bearing on the drive side housing will slip out, do not panic. Drive the shaft out far enough to slip the belt off of the upper step pulley, take care while driving the shaft out as the metal of the pulley is fragile and can be forced into the shaft housing and cause damage some of the pulley. Once the belt is free replace with the new one.
The entire shaft, pulley and bearings need to be brought back into alignment. this is accomplished with gentle persuasion from a hard face(not metal) hammer and an over-sized socket. Be sure to align the pulley key way, tap the shaft back to the home position, at this time the inboard bearing will need to be seated. use an over-sized socket to cover the entire bearing and gently tap into the raceway. DO NOT use any other pointed object, screwdriver, to drive the bearing home you can damage and ruin the bearing.
Fine tune the alignment, A bit of trial and error will achieve fine results.
At first the belt will feel tight and seem to not fit, it will stretch with time.
Did you find this story helpful?
Thanks for voting and helping fellow customers!
Load More Install Stories
OEM stands for Original Equipment Manufacturer and means the part you’re buying is sourced directly from the manufacturer who made your product. At eReplacementParts, we sell only genuine OEM parts, guaranteeing the part you’re purchasing is of better design and of higher quality than aftermarket parts.
Our product descriptions are a combination of data sourced directly from the manufacturers who made your product as well as content researched and curated by our content & customer service teams. This content is edited and reviewed internally before being made public to customers.
Our customer service team are at the ready daily to answer your part and product questions. We have a dedicated staff with decades of collective experience in helping customers just like you purchase parts to repair their products.
All our part reviews are solicited directly from other customers who have purchased this exact part. While we moderate these reviews for profanity, offensive language or personally identifiable information, these reviews are posted exactly as submitted and no alterations are made by our team.
All our customer repair instructions are solicited directly from other customers just like you who have purchased and replaced this exact part. While we moderate these reviews for profanity, offensive language or personally identifiable information, these reviews are posted exactly as submitted and no alterations are made by our team.
Based on data from past customer purchasing behaviors, these parts are most commonly purchased together along with the part you are viewing. These parts may be necessary or helpful to replace to complete your current repair.
All our installation videos are created and produced in collaboration with our in-house repair technician, Mark Sodja, who has helped millions of eReplacementParts customers over the last 13 years repair their products. Mark has years of experience in selling and repairing both commercial and residential products with a specialty in gas-powered equipment.
This data is collected from customers who submitted a repair instruction after replacing this exact part. Customers can rate how easy the repair was to complete and how long it took. We aggregate this data to provide a repair rating that allows customers to quickly determine the difficulty and time needed to perform their own repair.