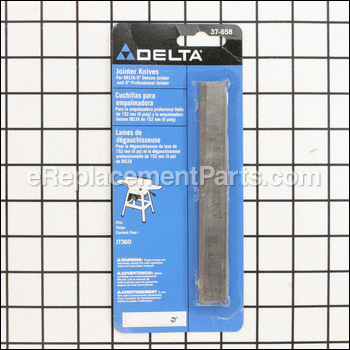
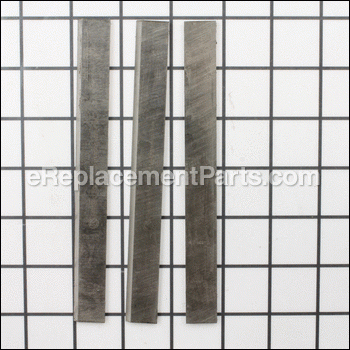
This is an authentic Delta replacement part manufactured for use with jointers. Blades wear out over time and may require replacement. The pack of jointer knives comes in a set of three, and the pack is sold individually.
Jointer Knives (3 Pack) 37-658
OEM part for: Delta
Part Number: 37-658
7 - 12 business days
Compatibility
This part will fit the following 16 machines
Delta
This item works with the following types of products:
- Jointer Parts
This part replaces obsolete part #: 37-155
Customer Part Reviews ?
- 1
Questions & Answers ?
Our customer Service team is at the ready daily to answer your part and product questions.

Ask our Team
We have a dedicated staff with decades of collective experience in helping customers just like you purchase parts to repair their products.
Does this fit my product?Questions & Answers for Jointer Knives (3 Pack)
Customer Repair Instructions ?
All our customer repair instructions are solicited directly from other customers just like you who have purchased and replaced this exact part.
dull blades
Tool Type
Jointer
Difficulty
Medium
Time
1-2 hours
Tools Used
Wrench Set, Allen wrench and a straight edge
Parts Used
2. Clean out slot for the blades and make sure the lifting pieces under the hex wrench move freely. I had a couple that were packed with saw dust and didn't want to lower after being raised. It just took a little motion the free them up again.
3. Install new blade and tighten just enough so they won't fall out as you rotate cutter head by hand to move to the next blade. Install the other 2 blades.
4. I set up the straight edge on out-feed table on the end of the blade closest to me. With the hex wrench slowly raise the blade till it just scrapes the straight edge without lifting it. Then repeat on the rear of the blade. Then check the center.
5. The only hard part is if you raise the blade too high you have to loosen the bolts to drop the knife and start again. Sometimes if the difference in height is too much, when you lift the rear of the blade after setting the front, the front is now too high. After each blade is set lock them in place before starting on the next.
6. After each blade is locked in place check each blade again to assure locking them down did not move anything. If everything looks good you should be ready to go.
Note. This was my first set of new blades so the replacement blades were shorter than the original blades. If the blades you are installing are identical to your blades you are removing I would lower the height adjustment at step 3 so you don't start out already too high.
OEM stands for Original Equipment Manufacturer and means the part you’re buying is sourced directly from the manufacturer who made your product. At eReplacementParts, we sell only genuine OEM parts, guaranteeing the part you’re purchasing is of better design and of higher quality than aftermarket parts.
Our product descriptions are a combination of data sourced directly from the manufacturers who made your product as well as content researched and curated by our content & customer service teams. This content is edited and reviewed internally before being made public to customers.
Our customer service team are at the ready daily to answer your part and product questions. We have a dedicated staff with decades of collective experience in helping customers just like you purchase parts to repair their products.
All our part reviews are solicited directly from other customers who have purchased this exact part. While we moderate these reviews for profanity, offensive language or personally identifiable information, these reviews are posted exactly as submitted and no alterations are made by our team.
All our customer repair instructions are solicited directly from other customers just like you who have purchased and replaced this exact part. While we moderate these reviews for profanity, offensive language or personally identifiable information, these reviews are posted exactly as submitted and no alterations are made by our team.
Based on data from past customer purchasing behaviors, these parts are most commonly purchased together along with the part you are viewing. These parts may be necessary or helpful to replace to complete your current repair.
All our installation videos are created and produced in collaboration with our in-house repair technician, Mark Sodja, who has helped millions of eReplacementParts customers over the last 13 years repair their products. Mark has years of experience in selling and repairing both commercial and residential products with a specialty in gas-powered equipment.
This data is collected from customers who submitted a repair instruction after replacing this exact part. Customers can rate how easy the repair was to complete and how long it took. We aggregate this data to provide a repair rating that allows customers to quickly determine the difficulty and time needed to perform their own repair.


