A Primer for Hanging Wallpaper Like a Pro

The origins of wall coverings and wallpaper can be traced back millennia. But this home decor trend has come a long way and is now more en vogue than ever. Gone are the days of thick paste, incredibly difficult removal, and garish patterns! Wallpaper has been brought into the 21st century with upgrades to application and removal techniques, as well as color, pattern, and texture.
You might be tired of paint and looking to add a serious design element to a room. If that’s the case, read on – because wallpaper might be just the project for you.
Types of Wallpaper
In general, there are two basic types of wallpaper: pre-pasted and unpasted (also known as “paste the wall”) Pre-pasted wallpaper comes with paste already on the reverse that simply needs to be activated in order to stick to the wall. Unpasted paper tends to be more expensive and ornate, and requires the homeowner to purchase special wall paste.
There is a third kind of wallpaper, but it’s technically a wall covering – removable vinyl. This is essentially a heavy-duty sticker that can be peeled on and off and is a great option for renters.
Pattern Matching and Measuring for Waste
There are hundreds of online retailers for wallpaper these days, and many will send you large samples in the mail before you make your final purchase. This is a great idea because color lots can look quite different on a computer screen compared to reality. Most of these online retailers will also have a calculator that will estimate how much paper you need to finish your job. In general, the rule of thumb is to account for at least 20 percent in paper waste, especially when you are dealing with a pattern.
There are two categories of wallpaper patterns – straight set and offset. Straight-set patterns are those that you can cut off the roll and have the next strip line up perfectly no matter what; think a large vertical stripe, grasscloth, or vertical faux bead board.
Most papers, however, fall into the offset category, where waste will be a reality when cutting strips to fit the wall. Trellis patterns, tile patterns, horizontal stripes, florals, and geometrics are all likely to be offset and represent the ideal scenario for the “measure twice, cut once” adage.
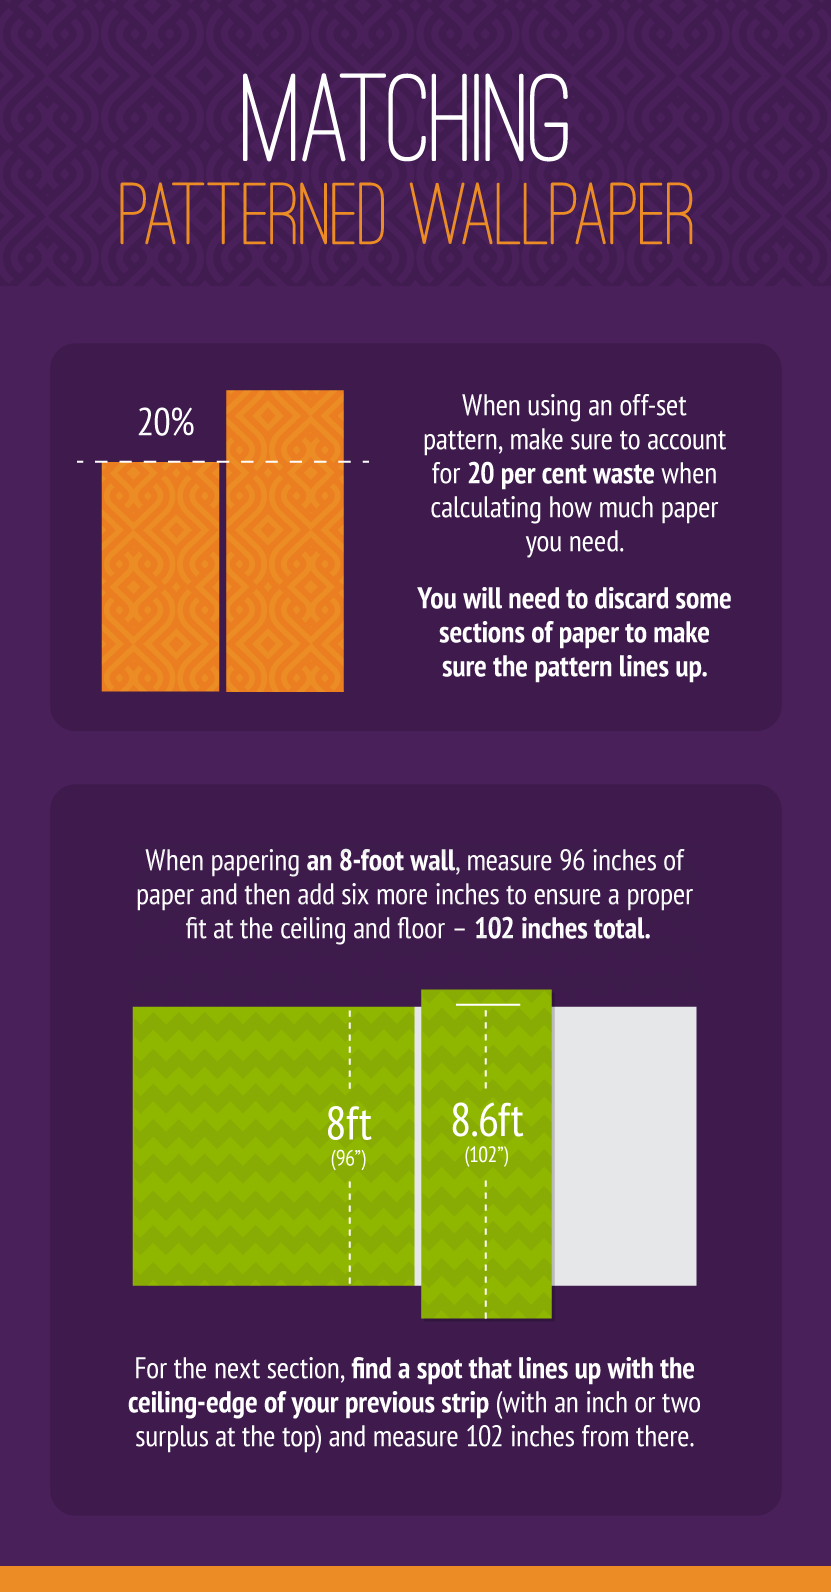
Let’s assume you are papering a standard eight-foot wall. You’d measure 96 inches of paper and then add six more inches to ensure a proper fit at the ceiling and floor – so 102 inches total. Cut a straight line using a ruler and sharp scissors. If the pattern is offset, it’s highly unlikely that your cut will allow you to simply measure another 102-inch piece to hang next on the wall. More likely, you will have to match the pattern side to side on the wall before making your next cut. This probably means your second piece will be longer than 102 inches and will require more trimming – hence, you need to account for significant paper waste when ordering offset-pattern wallpaper.
Hanging Your Wallpaper
Now that you’ve figured out how to measure and cut your paper based on your selected pattern, you need to know how to properly hang it on the wall.
If your paper is pre-pasted, you’ll need a trough of lukewarm water, a rag, and a wallpaper-smoothing tool. Cut your first measured piece (it’s a good idea to always start in a corner and work your way out) and then roll it up with the backside facing out. Immerse your roll into the lukewarm water so that it all gets wet, but not soaking.
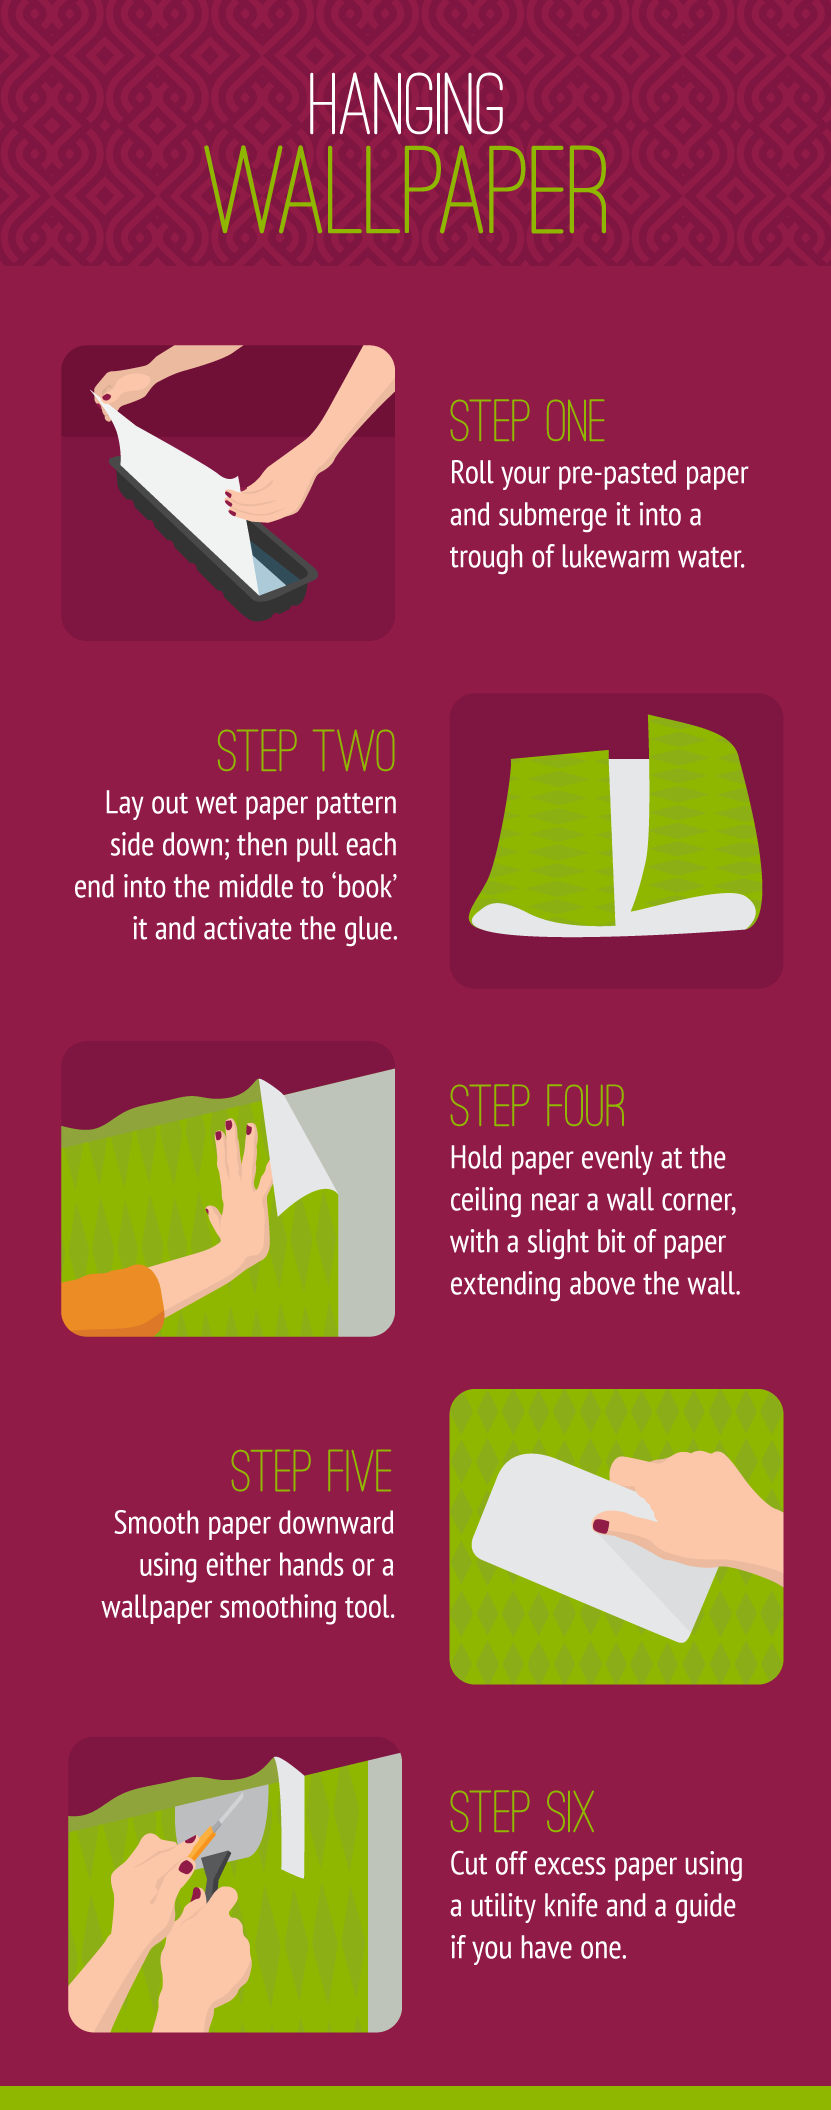
Now completely unfurl your dampened paper pattern-side-down on a hard surface such as a long table or the floor. You might even be able to feel the glue loosening at this point; that’s okay. Working somewhat quickly, grab one end of the paper and gently fold it into the center. Do the same with the other end so they meet in the middle. Don’t actually fold the paper or make a crease, just gently “book” the ends together. This will help the water activate the glue.
After your paper strip has been “booked” for four or five minutes, you’re ready to hang it up. Taking the top end in both hands, press it evenly into the ceiling, smoothing down and out with your hands and your smoothing tool as you go. Gently un-book the bottom half of your paper as you straighten it and continue to smooth it out. Make sure to push any excess glue out the sides of your paper and wipe them up as quickly as possible with a rag. Being careful not to tug too hard on the still-wet paper (which could cause it to tear), push it into the floor or baseboard crease. Now you can move on to measuring the next piece that will go beside it!
The process for unpasted paper is essentially the same, with the exception of the water trough and the booking. If your paper has no paste, purchase a can at the hardware store. Cut your measured paper and use a synthetic brush to apply an even coat of paste to the portion of the wall you will be covering. Then hang your paper on the pasted section using the same technique – start at the ceiling, smoothing it down and out as you make your way toward the floor, wiping up any excess glue that squishes out as soon as possible.
In both cases, once your glue and paper are dry, you can run a utility knife along the ceiling, corners, and floor to create a nice, clean, finished edge.
Removing Wallpaper
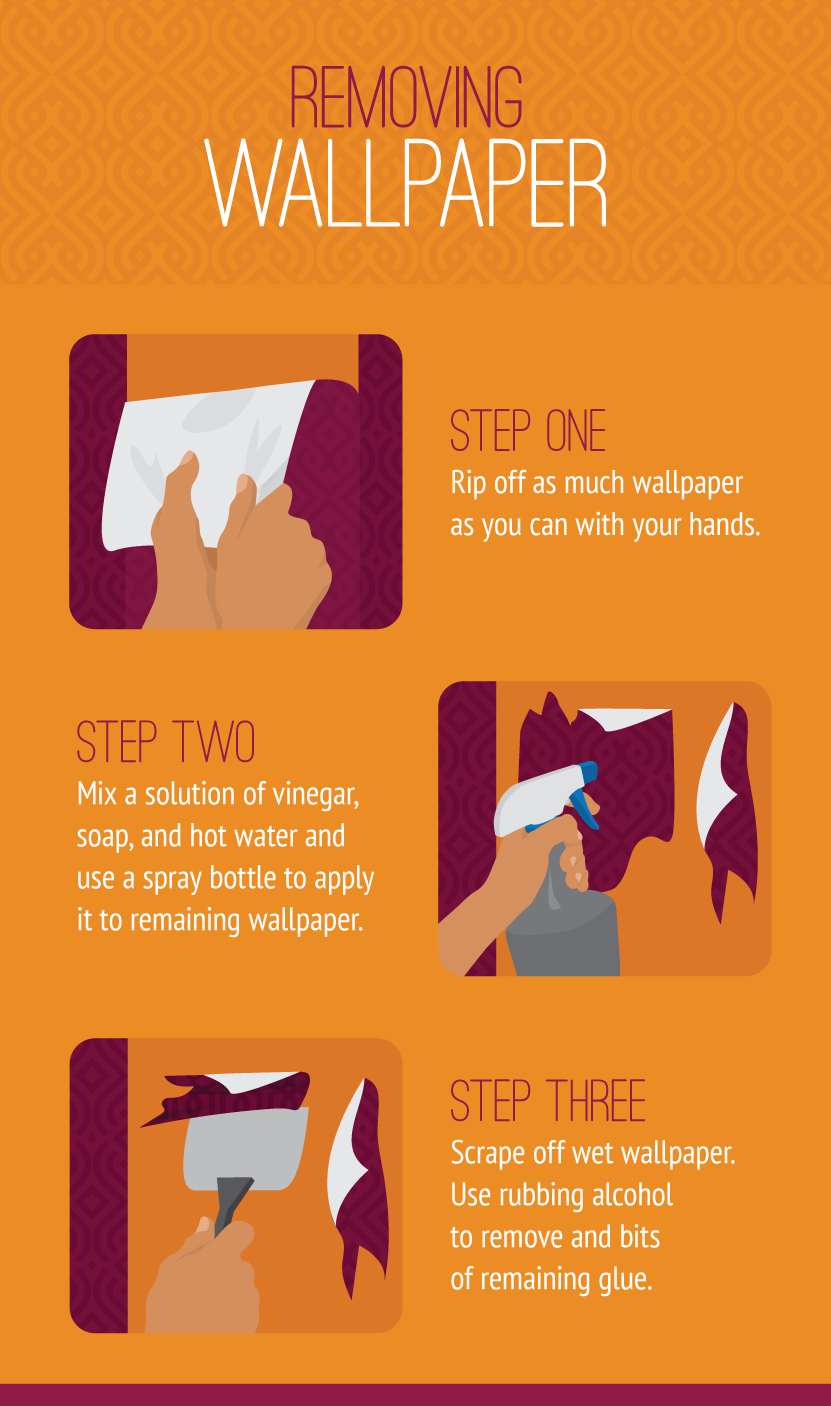
Removing wallpaper can be quite tedious, depending on what you are removing and how much there is. If it’s older paper – from the 1990s or prior – you’ll want to peel away as much as possible by hand and then use a spray bottle with vinegar, soap, and water and a scraper to help loosen the glue. Don’t be fooled; this will be a long process, so bring your patience!
If the paper is newer (or something you have hung yourself!) it should come off a bit more easily. The newer pastes aren’t nearly as tough to remove as the older type. The same technique applies here – pull away what you can by hand and then use a solution of soap, vinegar, and water to assist in removing the rest. Once it’s all down, rubbing alcohol will help remove any residual glue from the wall. In a worst-case scenario, a clothing steamer run along the wall can also help loosen unwanted paper bits.
I have used wallpaper in a number of spots in my home. It is a relatively easy way to add drama and style to your space. Good luck!
Embed the article on your site