


Genuine OEM replacement part, this item is sold individually.
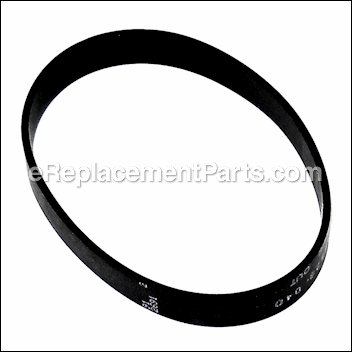
The purpose of this belt is to rotate the Brush Roll on the vacuum models shown below. This belt is Style 23.
Depending on the model you have, it can be installed in different ways.
If possible look how the old belt was installed so it will be easier to replace it.
Vacuum Brush Belt (style 23) H-38528040
OEM part for: Dirt Devil, Hoover
Part Number: H-38528040
$3.99
In Stock
Jump To:
Product Description ?
- Classification: Part
- Weight: 0.15 lbs.
- Shipping: Ships Worldwide
Frequently Purchased Together ?

Compatibility
This part will fit the following 196 machines
Hoover
C1415 Perfect For Hotels View Diagrams & Manuals
C1404 Elite View Diagrams & Manuals
C1412-900 Elite View Diagrams & Manuals
C1414-900 Elite View Diagrams & Manuals
C1700-900 Soft Guard View Diagrams & Manuals
C1702-900 Soft Guard View Diagrams & Manuals
C1660-900 Commercial Twin Chamber View Diagrams & Manuals
C1710-900 Commercial Twin Chamber View Diagrams & Manuals
UH40155 Fold Away Vacuum View Diagrams & Manuals
U5265-900 Empower View Diagrams & Manuals
U5180-900 Fusion View Diagrams & Manuals
U5185-900 Fusion Power Max Mach 3 View Diagrams & Manuals
U5180-910 Fusion Power Max Mach 3 View Diagrams & Manuals
U5182-900 Fusion Power Max Mach 3 View Diagrams & Manuals
U5183-900 Fusion Power Max Mach 3 View Diagrams & Manuals
UH70005B Fusion Power Max Mach 3 View Diagrams & Manuals
U5172-900 Fold Away Vacuum View Diagrams & Manuals
U5175-900 Fold Away Vacuum View Diagrams & Manuals
UH40185 Fold Away With Fold Down Handle View Diagrams & Manuals
UH40190 Fold Away Vacuum View Diagrams & Manuals
U5262-910 EmPower View Diagrams & Manuals
U5269-900 EmPower View Diagrams & Manuals
U5507-900 Elite Rewind View Diagrams & Manuals
U5507-950 Elite Rewind View Diagrams & Manuals
U5509-900 Elite Rewind View Diagrams & Manuals
U5509-950 Elite Rewind View Diagrams & Manuals
U5511-900 Elite Rewind View Diagrams & Manuals
U5512-900 Elite Rewind View Diagrams & Manuals
UH40070 Elite Rewind View Diagrams & Manuals
UH40150HD Elite Rewind View Diagrams & Manuals
UH70060 Agility Cyclonic Bagless Upright Vacuum View Diagrams & Manuals
UH70070 Agility Cyclonic Bagless Upright Vacuum View Diagrams & Manuals
CH50025 Elite Upright Vacuum View Diagrams & Manuals
U5268970 EmPower Turbo Power Bagless View Diagrams & Manuals
U5161-900 Fold Away Bagless Upright Vacuum View Diagrams & Manuals
U5173900 Upright Vacuum View Diagrams & Manuals
U5043930 Upright Vacuum View Diagrams & Manuals
U5073930 Upright Vacuum View Diagrams & Manuals
U5164900 Fold Away Upright View Diagrams & Manuals
C1401 Industrial Upright View Diagrams & Manuals
C1409-910 Commercial Upright View Diagrams & Manuals
C1413-910 Commercial Upright View Diagrams & Manuals
C1413-930 Commercial Upright View Diagrams & Manuals
U4245 Elite Upright View Diagrams & Manuals
U4245-030 Elite Upright View Diagrams & Manuals
U4245-930 Elite Upright View Diagrams & Manuals
U4247-016 Elite/ Legacy Upright View Diagrams & Manuals
U4247-900 Elite/ Legacy Upright View Diagrams & Manuals
U4253-930 Elite II Upright View Diagrams & Manuals
U4256-900 Elite II Upright View Diagrams & Manuals
U4257-930 Sprint Upright View Diagrams & Manuals
U4258-930 Elite II Upright View Diagrams & Manuals
U4260-930 Elite II Upright View Diagrams & Manuals
U4262-930 Sprint Upright View Diagrams & Manuals
U4264-930 Elite II Upright View Diagrams & Manuals
U4266-930 Elite II Upright View Diagrams & Manuals
U4266-960 Elite II Upright View Diagrams & Manuals
U4268-930 Elite II Upright View Diagrams & Manuals
U4270-930 Elite II Upright View Diagrams & Manuals
U4270-940 Elite II Upright View Diagrams & Manuals
U4272-930 Elite II Upright View Diagrams & Manuals
U4283-970 Elite Upright View Diagrams & Manuals
U4293-930 Elite II Upright View Diagrams & Manuals
U4295-930 Elite II Upright View Diagrams & Manuals
U4299-930 Elite II Upright View Diagrams & Manuals
U4299-980 Elite II Upright View Diagrams & Manuals
U4455 Elite Upright View Diagrams & Manuals
U4459 Elite/ Legacy Upright View Diagrams & Manuals
U4459-940 Elite/ Legacy Upright View Diagrams & Manuals
U4461-9 Elite/ Legacy Upright View Diagrams & Manuals
U4463-9 Elite/ Legacy Upright View Diagrams & Manuals
U4467 Elite Upright View Diagrams & Manuals
U4467-960 Elite Upright View Diagrams & Manuals
U4467-970 Elite Upright View Diagrams & Manuals
U4467-980 Elite Upright View Diagrams & Manuals
U4471 Elite Upright View Diagrams & Manuals
U4483 Elite Upright View Diagrams & Manuals
U4509 Elite Upright View Diagrams & Manuals
U4533-9 Elite Upright View Diagrams & Manuals
U4249 Upright Vacuum View Diagrams & Manuals
U4250 Upright Vacuum View Diagrams & Manuals
U4251 Upright Vacuum View Diagrams & Manuals
U4253 Upright Vacuum View Diagrams & Manuals
U4257 Upright Vacuum View Diagrams & Manuals
U4258 Upright Vacuum View Diagrams & Manuals
U4260 Upright Vacuum View Diagrams & Manuals
U4262 Upright Vacuum View Diagrams & Manuals
U4264 Upright Vacuum View Diagrams & Manuals
U4266 Soft And Light Supreme View Diagrams & Manuals
U4268 Upright Vacuum View Diagrams & Manuals
U4270 Upright Vacuum View Diagrams & Manuals
U4272 Upright Vacuum View Diagrams & Manuals
U4293 Encore Supreme Energy View Diagrams & Manuals
U4295 Upright Vacuum View Diagrams & Manuals
U4299 Upright Vacuum View Diagrams & Manuals
U5014 Upright Vacuum View Diagrams & Manuals
U5016 Upright Vacuum View Diagrams & Manuals
U5018 Bagged Upright View Diagrams & Manuals
U5019 Upright Vacuum View Diagrams & Manuals
U5023 Upright Vacuum View Diagrams & Manuals
U5025 Sprint Bagless Upright View Diagrams & Manuals
U5046 Upright Vacuum View Diagrams & Manuals
U5055 Upright Vacuum View Diagrams & Manuals
U5057 Upright Vacuum View Diagrams & Manuals
U5059 Upright Vacuum View Diagrams & Manuals
U5061 Upright Vacuum View Diagrams & Manuals
U5062 Upright Vacuum View Diagrams & Manuals
U5063 Upright Vacuum View Diagrams & Manuals
U5064 Upright Vacuum View Diagrams & Manuals
U5066 Upright Vacuum View Diagrams & Manuals
U5067 Upright Vacuum View Diagrams & Manuals
U5068 Upright Vacuum View Diagrams & Manuals
U5072 Upright Vacuum View Diagrams & Manuals
U5074 Upright Vacuum View Diagrams & Manuals
U5076 Upright Vacuum View Diagrams & Manuals
U5102 Upright Vacuum View Diagrams & Manuals
U5104 Upright Vacuum View Diagrams & Manuals
U5106 Upright Vacuum View Diagrams & Manuals
U5110 Upright Vacuum View Diagrams & Manuals
U5111 Upright Vacuum View Diagrams & Manuals
U5112 Upright Vacuum View Diagrams & Manuals
U5114 Upright Vacuum View Diagrams & Manuals
U5115 Upright Vacuum View Diagrams & Manuals
U5117 Upright Vacuum View Diagrams & Manuals
U5130 Upright Vacuum View Diagrams & Manuals
U5131 Upright Vacuum View Diagrams & Manuals
U5132 Upright Vacuum View Diagrams & Manuals
U5133 Upright Vacuum View Diagrams & Manuals
U5134 Upright Vacuum View Diagrams & Manuals
U5135 Upright Vacuum View Diagrams & Manuals
U5161 Fold Away Bagless Upright View Diagrams & Manuals
U5162 Upright Vacuum View Diagrams & Manuals
U5163 Upright Vacuum View Diagrams & Manuals
U5164 Upright Vacuum View Diagrams & Manuals
U5165 Upright Vacuum View Diagrams & Manuals
U5167 Turbopower Fold Away View Diagrams & Manuals
U5170 Fold Away Widepath Bagless View Diagrams & Manuals
U5171 Upright Vacuum View Diagrams & Manuals
U5172 Foldaway Widepath Bagless View Diagrams & Manuals
U5173 Upright Vacuum View Diagrams & Manuals
U5174 Upright Vacuum View Diagrams & Manuals
U5175 Foldaway Bagless View Diagrams & Manuals
U5176 Upright Vacuum View Diagrams & Manuals
U5177 Upright Vacuum View Diagrams & Manuals
U5178 Upright Vacuum View Diagrams & Manuals
U5179 Upright Vacuum View Diagrams & Manuals
U5180 Upright Vacuum View Diagrams & Manuals
U5180, Fusion Cyclonic Bagless Upright View Diagrams & Manuals
U5182 Upright Vacuum View Diagrams & Manuals
U5183 Upright Vacuum View Diagrams & Manuals
U5185 Upright Vacuum View Diagrams & Manuals
U5242 Upright Vacuum View Diagrams & Manuals
U5243 Upright Vacuum View Diagrams & Manuals
U5244 Upright Vacuum View Diagrams & Manuals
U5246 Upright Vacuum View Diagrams & Manuals
U5248 Upright Vacuum View Diagrams & Manuals
U5250 Upright Vacuum View Diagrams & Manuals
U5251 Upright Vacuum View Diagrams & Manuals
U5252 Upright Vacuum View Diagrams & Manuals
U5253 Upright Vacuum View Diagrams & Manuals
U5254 Upright Vacuum View Diagrams & Manuals
U5255 Upright Vacuum View Diagrams & Manuals
U5256 Upright Vacuum View Diagrams & Manuals
U5258 Upright Vacuum View Diagrams & Manuals
U5260 Upright Vacuum View Diagrams & Manuals
U5262 Upright Vacuum View Diagrams & Manuals
U5263 Upright Vacuum View Diagrams & Manuals
U5264 Turbopower Bagged View Diagrams & Manuals
U5265 Upright Vacuum View Diagrams & Manuals
U5266 Upright Vacuum View Diagrams & Manuals
U5267 Upright Vacuum View Diagrams & Manuals
U5268 Upright Vacuum View Diagrams & Manuals
U5269 Upright Vacuum View Diagrams & Manuals
U5271 Upright Vacuum View Diagrams & Manuals
U5272 Upright Vacuum View Diagrams & Manuals
U5273 Upright Vacuum View Diagrams & Manuals
U5280 Windtunnel Supreme View Diagrams & Manuals
U5288 Upright Vacuum View Diagrams & Manuals
U5290 Upright Vacuum View Diagrams & Manuals
U5294 Upright Vacuum View Diagrams & Manuals
U5296 Upright Vacuum View Diagrams & Manuals
U5298 Upright Vacuum View Diagrams & Manuals
U5507 Elite Rewind Upright Bagless View Diagrams & Manuals
U5509 Elite Rewind Upright Bagless View Diagrams & Manuals
U5511 Elite Rewind Upright Bagless View Diagrams & Manuals
U5512 Elite Rewind Upright Bagless View Diagrams & Manuals
UH40150 Upright Vacuum View Diagrams & Manuals
C1412 Commercial Bagged Upright View Diagrams & Manuals
C1414 Commercial Bagged Upright View Diagrams & Manuals
C1660 Commercial Bagless Twin Chamber Upright View Diagrams & Manuals
C1700 Commercial Bagged Upright View Diagrams & Manuals
C1702 Commercial Bagged Upright View Diagrams & Manuals
C1710 Commercial Bagless Twin Chamber Upright View Diagrams & Manuals
Dirt Devil
UD70065 Vision Pet Cyclonic Bagless Upright Vacuum View Diagrams & Manuals
UD70090 Power Reach Multi-Cyclonic Bagless Vacuum View Diagrams & Manuals
UD70095 Power Reach Pet Multi-Cyclonic Bagless Vacuum View Diagrams & Manuals
Show More Compatible Models
This item works with the following types of products:
- Vacuum Parts
This part replaces obsolete part #: 38528040
Customer Part Reviews ?
Average Rating (out of 5):
Click to filter by ratings:
5 stars
8
4 stars
0
3 stars
0
2 stars
0
1 stars
0
< PREV
- 1
Easy repair. Great part. Works like new.
Just got around to putting it on. Works great. Thanks
Guest -
July 22, 2022
Verified Purchase
fast helpful service, thank you
Fast shipping helped to put my appliance back in service quickly.
Guest -
May 4, 2022
Verified Purchase
Easy repair worked as it should
Arive in in good condition
Guest -
December 14, 2021
Verified Purchase
Great retail supplier
I am retired, and as a hobby, restore vacuum cleaners left on the curb....most of them relatively new, filthy, and stuffed with pet hair. Rather than expend the energy to clean them, folks toss them. I tear them apart, clean completely, and restore/repair them, then give them to college students, or occasionally as gifts to "needy" newlyweds. When the vac has a broken or missing part, I can usually count on ereplacementparts to have it, even if the vac is older, or in some cases, obsolete. Very responsive on ship times. The item is almost always at my door in 2-3 days, sometimes sooner. Great company....thanks!!!
Guest -
June 19, 2021
Verified Purchase
Great experience
Correct part/fast shipping/good price/will buy from again
Guest -
January 11, 2021
Verified Purchase
vacuum belt replacement
replacement belt arrived in a very timely matter and fit perfect - will order again from this place if ever the need arises
Guest -
January 29, 2020
Verified Purchase
Easy repair
Perfect fit, vacuum working fine!
Guest -
July 10, 2019
Verified Purchase
Perfect fit
Really enjoyed the product but not the delivery. Product came two days later than it was supposed to. My customer was not happy with the delay
Guest -
June 17, 2019
Verified Purchase
t
t
t -
t days ago
Verified Purchase
eReplacementParts Team
t
Questions & Answers ?
Our customer Service team is at the ready daily to answer your part and product questions.

Ask our Team
We have a dedicated staff with decades of collective experience in helping customers just like you purchase parts to repair their products.
Does this fit my product?Questions & Answers for Vacuum Brush Belt (style 23)
I am trying to replace belt drive. Current belt is Hoover 160147 F2 Is this belt available
David L Metzger
for model number S3530
asked on 2022-11-08
Hello David, Thank you for your inquiry. We have researched the model number that you have provided and show the compatible belt as part# H-38528011. We hope this helps and if you need help placing an order for a part, customer service is open 7 days a week. Please feel free to give us a call. We look forward to hearing from you!
eReplacementParts Team November 08, 2022
Customer Repair Instructions ?
All our customer repair instructions are solicited directly from other customers just like you who have purchased and replaced this exact part.
Belt broken
Marcella - February 9, 2018
👍 2 of 2 people found this instruction helpful
Tool Type
Vacuum
Difficulty
Hard
Time
30-60 minutes
Tools Used
Screwdriver
Parts Used
My husband and I tried desperately to replace the belt. I thought it was the wrong belt. It was like 2 inches too short. After 1/2 hour, I contacted your customer service and was advised to put the belt in hot water and let it soak, get pliable and it would be easier to install. Thank you for having such intelligent employees. Without the young woman I spoke to, I would have ordered a larger belt. My 40 year old vacuum is like new. I apologize for not remembering the young woman's name. But please tell her she was so patient and represented your company in an outstanding way. Very customer oriented. She is an asset to your organization. Again, Thank you
Did you find this story helpful?
Thanks for voting and helping fellow customers!
Broken fan, warn out belt and old seal
James - June 14, 2017
👍 2 of 2 people found this instruction helpful
Tool Type
Vacuum
Difficulty
Easy
Time
15-30 minutes
Tools Used
Screwdriver
Dismantled the vacuum cleaner to find out what was broken.
Listed parts
Ordered parts
Waited a short time
Unpacked the new parts
Spun the new fan on the motor shaft
Repaired a crack in the fan cover with an industrial adhesive - NOT superglue
Placed the cover back on and screwed in the screws
Replaced the seal
Replaced the belt
Finished reassembling
Plugged it in and had to help the brush to spin until the belt seated be careful not to use fingers when power is on
Vacuumed the living room
Did you find this story helpful?
Thanks for voting and helping fellow customers!
Floor brush belt broke.
J - September 15, 2021
Tool Type
Vacuum
Difficulty
Easy
Time
Less than 15 minutes
Tools Used
Screwdriver
Parts Used
Two screws out; belt on; two screws in!! No brain!!!
Did you find this story helpful?
Thanks for voting and helping fellow customers!
Vacuum belt broken
lawrence - June 21, 2021
Tool Type
Vacuum
Difficulty
Easy
Time
15-30 minutes
Tools Used
Screwdriver
Parts Used
1)Turn vacuum over so that cover plate over brush/belt facing you.
2) Remove Phillips head screws holding cover plate.
3) Remove brush roller and CLEAN it!!
4) Place new belt around motor drive shaft and roller brush.
5) Replace roller brush by inserting both ends in slots, as you stretch belt by exerting pressure.
6) Replace screws.
7) Turn on power and check for roller brush function.
Did you find this story helpful?
Thanks for voting and helping fellow customers!
Belt broke.
DAVID - May 26, 2020
Tool Type
Vacuum
Difficulty
Easy
Time
Less than 15 minutes
Tools Used
Screwdriver
Parts Used
Removed cover. Installed belt.
Did you find this story helpful?
Thanks for voting and helping fellow customers!
Bristle Brush Broke
Emily - April 1, 2019
Tool Type
Vacuum
Difficulty
Easy
Time
30-60 minutes
Tools Used
Screwdriver
The repair man at camp fixed it.
Did you find this story helpful?
Thanks for voting and helping fellow customers!
The upright vacuum cleaner roller froze and the belt got burned and stuck on it.
Tarlock - May 1, 2018
Tool Type
Vacuum
Difficulty
Easy
Time
15-30 minutes
Tools Used
Screwdriver
Removed the old Brush and replaced with new Roller Brush and belt.
Job done.
Unfortunately Hoover Instructions for this Vacuum cleaner had no part number for these items. I had to look at the bottom of the Vacuum cleaner for model number and then find the part number in ereplacementparts.
Thanks,
Tarlock
Job done.
Unfortunately Hoover Instructions for this Vacuum cleaner had no part number for these items. I had to look at the bottom of the Vacuum cleaner for model number and then find the part number in ereplacementparts.
Thanks,
Tarlock
Did you find this story helpful?
Thanks for voting and helping fellow customers!
Would not fluff carpet up or clean
Mark - February 16, 2017
👍 1 of 2 people found this instruction helpful
Tool Type
Vacuum
Difficulty
Easy
Time
30-60 minutes
Tools Used
Screwdriver
Replaced the agitator/ brush roll assembly
Replaced the belt for the agitator brush
New vacuum bag with proper fitting ones.
Replaced the belt for the agitator brush
New vacuum bag with proper fitting ones.
Did you find this story helpful?
Thanks for voting and helping fellow customers!
Broken belt on upright vacuum
Brian - January 27, 2017
👍 1 of 2 people found this instruction helpful
Tool Type
Vacuum
Difficulty
Medium
Time
Less than 15 minutes
Tools Used
Screwdriver
Parts Used
Removed guard, replaced belt
Did you find this story helpful?
Thanks for voting and helping fellow customers!
OEM stands for Original Equipment Manufacturer and means the part you’re buying is sourced directly from the manufacturer who made your product. At eReplacementParts, we sell only genuine OEM parts, guaranteeing the part you’re purchasing is of better design and of higher quality than aftermarket parts.
Our product descriptions are a combination of data sourced directly from the manufacturers who made your product as well as content researched and curated by our content & customer service teams. This content is edited and reviewed internally before being made public to customers.
Our customer service team are at the ready daily to answer your part and product questions. We have a dedicated staff with decades of collective experience in helping customers just like you purchase parts to repair their products.
All our part reviews are solicited directly from other customers who have purchased this exact part. While we moderate these reviews for profanity, offensive language or personally identifiable information, these reviews are posted exactly as submitted and no alterations are made by our team.
All our customer repair instructions are solicited directly from other customers just like you who have purchased and replaced this exact part. While we moderate these reviews for profanity, offensive language or personally identifiable information, these reviews are posted exactly as submitted and no alterations are made by our team.
Based on data from past customer purchasing behaviors, these parts are most commonly purchased together along with the part you are viewing. These parts may be necessary or helpful to replace to complete your current repair.
All our installation videos are created and produced in collaboration with our in-house repair technician, Mark Sodja, who has helped millions of eReplacementParts customers over the last 13 years repair their products. Mark has years of experience in selling and repairing both commercial and residential products with a specialty in gas-powered equipment.
This data is collected from customers who submitted a repair instruction after replacing this exact part. Customers can rate how easy the repair was to complete and how long it took. We aggregate this data to provide a repair rating that allows customers to quickly determine the difficulty and time needed to perform their own repair.