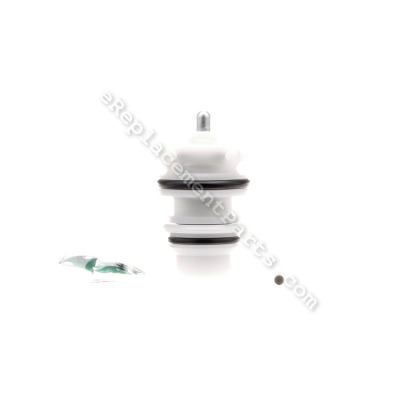
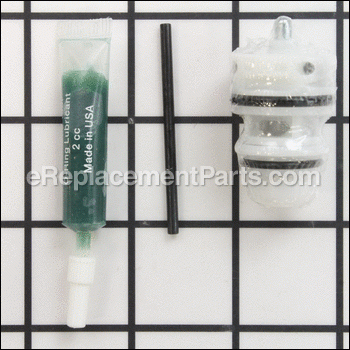
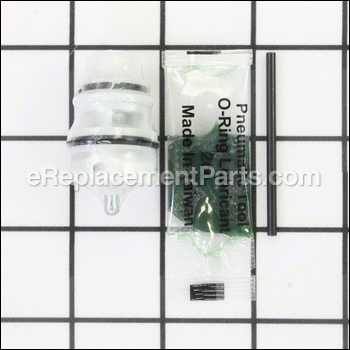
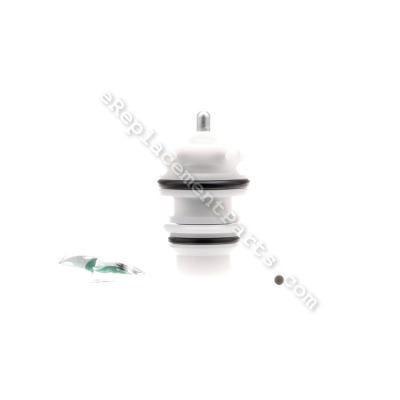
Trigger Valve Kit TVA6
Part Number: TVA6
Order within the next 14 hours
and your part ships today!
and your part ships today!
*This part replaces obsolete part #: TVA5, TVA6-1 and TVA1.
Product Information
Description:
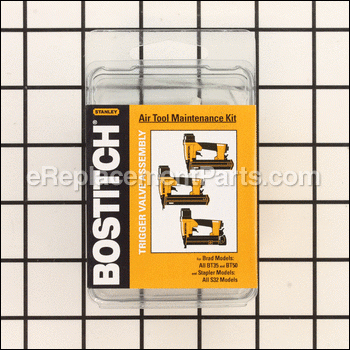
| This is a genuine Bostitch replacement part that fits all BT brad nailers and all S32 staplers. If trigger leaks air or if tool misfires often, try replacing trigger valve. This kit contains one (1) each of: valve assembly (including both O-rings), lubricant, spring pin punch, and repair instructions. Please note that two (2) O-rings are included but can also be purchased separately as parts # 106967 and # 86459. O-rings are easily damaged and worn out, causing tool issues, so it\\\'s a good idea to have a backup or two on hand. Only a hammer is needed for this repair. |
Frequently Purchased With
Compatibility
the 150+ compatible machines
This part is compatible with the following machines:
Bostitch
650S4 Pneumatic Stapler
650S5 Pneumatic Stapler
750S4 Pneumatic Stapler
BT35B Brad Nailer
BT50B Brad Nailer
CF15 Corrugated Tool
F21PL Pneumatic Stick Nailer
F21PL2 Pneumatic Stick Nailer
F28WW Pneumatic Stick Nailer
F33PT Pneumatic Stick Nailer
WM45B Pneumatic Coil Nailer
T55S5 Pneumatic Stapler
T50S4 Pneumatic Stapler
T50S2 Pneumatic Stapler
T40SX-LM Pneumatic Stapler
T40SX Pneumatic Stapler
T40S5-SF Pneumatic Stapler
S32SXLP Pneumatic Stapler
S32SXLM Pneumatic Stapler
S32SX-BHF-2 Pneumatic Stapler
S32SX-BHF Pneumatic Stapler
S32SX-BF-KIT Pneumatic Stapler
S32SX Pneumatic Stapler
N89RH17 Pneumatic Stick Nailer
N89C Coil-Fed Pneumatic Framing Nailer
N86C Coil-Fed Pneumatic Nailer
N80CBMLPAL Coil-Fed Pneumatic Nailer
N80CB-1ML Coil-Fed Pneumatic Nailer
N80CB Coil-Fed Pneumatic Nailer
SDN11RH Pneumatic Stick Nailer
SDN11PTB Pneumatic Stick Nailer
SDCN14B Coil-Fed Pneumatic Nailer
N57C Coil-Fed Pneumatic Nailer
SDCN14 Coil-Fed Pneumatic Nailer
N50FN Angle Stick Pneumatic Finish Nailer
N130C Coil-Fed Pneumatic Nailer
N100S Pneumatic Stick Nailer
N100C Coil-Fed Pneumatic Nailer
S32SLLM Pneumatic Stapler
S32SL Pneumatic Stapler
S3297-LHF-2 Pneumatic Stapler
S3297-LHF Pneumatic Stapler
S3297 Pneumatic Stapler
N75C Coil-Fed Pneumatic Sheathing Nailer
RN46 Coil-Fed Pneumatic Roofing Nailer
RN45B Coil-Fed Pneumatic Roofing Nailer
PC5000 Pneumatic Stapler
N95162 Pneumatic Stick Nailer
N89RH17-2MCN Pneumatic Stick Nailer
N70CBPAL Coil-Fed Pneumatic Nailer
N70CBM Coil-Fed Pneumatic Nailer
N66C Coil-Fed Pneumatic Nailer
N66BC Cap Nailer
N64C Coil-Fed Pneumatic Nailer
N64084-N64099 Coil-Fed Pneumatic Nailer
N63CP Coil-Fed Pneumatic Nailer
N60FN Angle Stick Pneumatic Finish Nailer
N66BC-1 (Type 0) Cap Nailer
863S4 Pneumatic Stapler
N75C-1 Type 0 Coil Sheathing/Siding Nailer
N89C-1P Type 0 Heavy Duty Pallet, Fence Nailer
N80S Type 0 Stick Nailer
N59FN Pneumatic Finish Nailer
RN46-1 Coil-Fed Pneumatic Roofing Nailer
N55C Coil-Fed Nailer
750S5 (Type 0) Pneumatic Stapler
850S4 (Type 0) Pneumatic Stapler
S32SL-OC (Type 0) Pneumatic Stapler
LPF21PL (Type 0) 21 Degrees Low Profile Plastic Collated Framing Nailer
LPF28WW (Type 0) 28 Degrees Low Profile Wire Weld Framing Nailer
LPF33PT (Type 0) 30 Degrees Low Profile Paper Collated Framing Nailer
651S5 (Type 0) 16 GA - 7/16" Construction Stapler
N66C-1 (72400000) 15 Degrees Coil Siding Nailer
N89C (140020000) Framing Nailer
N89C-HQ (Type 0) Framing Nailer
N89C-HQ (140020000) Framing Nailer
N55CD (Type 0) Coil-Fed Nailer
N58C (Type 0) Coil-Fed Nailer
S32SX (Type 0) Pneumatic Stapler
S32SX-2 (Type 0) Pneumatic Stapler
S32SX-3 (Type 0) Pneumatic Stapler
S32SX-BF (Type 0) Pneumatic Stapler
T55S4 (Type 0) Pneumatic Stapler
F33PTSM (Type 0) Stick Nailer
F33PTSM (Type 140020000 and Higher) Stick Nailer
IC60-1 (Type 1) Industrial Coil Nail
IC60-1 (Type 16180001 and Higher) Industrial Coil Nail
BT50B-2 (Type 0) Bt Brad Nailer-St
N400C-1 (Type 0) Coil-Fed Nailer
N401C-1 (Type 0) Coil-Fed Nailer
N80CB-1 (Type 0) Angle Coil Nailer
N80CB-HQ (Type 0) Coil-Fed Nailer
RN90PLEX (Type 0) Round Head Duplex Na
BT35B-2 (Type 0) Bt35b Sideload Magaz
765S5-1E (Type 0) Bostacker,S5,65mmmax
N71C (Type 0) Coil-Fed Nailer
N89C-1 (Type 0) Coil Framing Nailr
N89C-1 (Type 140020000 and higher) Coil Framing Nailr
PC5000 (Type 0) Nailer Power Tool
S3297-LHF-2 (Type 0) Pneumatic Stapler Power Tool
S3297-LHF (Type 0) Pneumatic Stapler Power Tool
S3297 (Type 0) Pneumatic Stapler Power Tool
S32SLLM (Type 0) Pneumatic Stapler Power Tool
S32SX-BHF-2 (Type 0) Pneumatic Stapler Power Tool
S32SX-BHF (Type 0) Pneumatic Stapler Power Tool
S32SXLM (Type 0) Pneumatic Stapler Power Tool
S32SXLP (Type 0) Pneumatic Stapler Power Tool
T40S5-SF (Type 0) Pneumatic Stapler Power Tool
T40SX-LM (Type 0) Pneumatic Stapler Power Tool
T40SX (Type 0) Pneumatic Stapler Power Tool
T50S2 (Type 0) Pneumatic Stapler Power Tool
T50S4 (Type 0) Pneumatic Stapler Power Tool
T55S5 (Type 0) Pneumatic Stapler Power Tool
BRN175A (Type 1) Shell 15 Degree Coil Roof Power Tool
F21PL (140020000 and Higher) Nailer Power Tool
F21PL (Type 0) Nailer Power Tool
F21PL2 (140020000 and Higher) Stick Nailer Power Tool
F21PL2 (Type 0) Stick Nailer Power Tool
F28WW (140020000 and Higher) Nailer Power Tool
F28WW (Type 0) Nailer Power Tool
F33PT (140020000 and Higher) Nailer Power Tool
F33PT (Type 0) Nailer Power Tool
N100S (Type 0) Stick Nailer Power Tool
N130C (Type 0) Coil-Fed Nailer Power Tool
N50FN (Type 0) Finish Nailer Power Tool
N55C (Type 0) Coil-Fed Nailer Power Tool
N57C (Type 0) Coil-Fed Nailer Power Tool
N59FN (Type 0) Finish Nailer Power Tool
N60FN (Type 0) Finish Nailer Power Tool
N63CP (Type 0) Coil-Fed Nailer Power Tool
N64C (Type 0) Coil-Fed Nailer Power Tool
N66C-1 (072400000 and Higher) Nailer Power Tool
N66C-1 (17300 000 and Higher) Nailer Power Tool
N66C-1 (62860000 and Higher) Nailer Power Tool
N70CBM (Type 0) Coil-Fed Nailer Power Tool
N80CB-1ML (Type 0) Coil-Fed Nailer Power Tool
N80CB (Type 0) Coil-Fed Nailer Power Tool
N80CBMLPAL (Type 0) Pallet Nailer Power Tool
N86C (Type 0) Coil-Fed Nailer Power Tool
N89C-HQ (140020000 and Higher) Framing Nailer Power Tool
N89C (140020000 and higher) Framing Nailer Power Tool
N89C (Type 0) Framing Nailer Power Tool
N95162 (Type 0) Stick Nailer Power Tool
RN45B (Type 0) Roofing Nailer Power Tool
DeWALT
DW325PT (Type 0) 30 Deg Pt Frame Nail
DW325C (Type 1) 15 D Coi Frame Nailr
DW325PL (Type 0) 21 Deg Frame Nailer
DW325C (Type 1) 15 D Coi Frame Nailr
DW325PL (Type 0) 21 Deg Frame Nailer
Porter Cable
Products Compatibility
This item works with the following types of products:
- • Nailer
- • Stapler
Questions & Answers for Trigger Valve Kit
What about the hole in my trigger valve stem? Not in replacement?
Brian
for model number T50S4
asked on 2023-03-03
Hi Brian,
Thank you for your question. From reviewing your model number, this would be the correct trigger valve kit for your nailer It has replaced previous versions of this part. If you would like to place an order for it, please call our customer service line and anyone will be happy to assist you. We look forward to hearing from you!
eReplacementParts Team March 03, 2023
My old valve stem has a hole through it , why don't I see a hole in your replacement part ?
Lloyd
for model number T50S4
asked on 2022-04-27
Hello Lloyd, thank you for your question. This is a genuine Bostitch replacement part that fits all BT brad nailers and all S32 staplers. We hope this helps. If you need help placing an order, our customer service is open 7 days a week. Please feel free to give us a call. We look forward to hearing from you!
eReplacementParts Team April 27, 2022
Repair Instructions: Submitted by Customers Like You
118 of 120 people found this instruction helpful
Tool Type:
Nailer
Parts Used:
Repair Difficulty:
Medium
Time Spent Repairing:
1-2 hours
Tools Used:
, punches, air compressor, various cleaners, good lighting,...
Trigger valve air leak and dirty nail gun
First thoroughly clean your nail gun [ I use various little brushes, compressed air, carb. cleaner, rags and then air tool oil ]. Set up an area with good lighting and work over a surface where you will not lose any small parts. "Cradle" the nail gun on some rags and carefully use a hammer and a small straight punch of the correct size to remove the roll pin that holds the trigger and its spring in place, next do the same to remove the roll pin that holds the valve assembly, make a bag full of rags as a "catchers mitt" - put this around the trigger valve location,put on safety glasses or face shield , briefly attach the air hose at less than 90 p.s.i. !!! [ start at a lower p.s.i. ], this should pop out the old valve assembly into your "catchers mitt". Inspect that the nailer is clean inside this opening, lightly oil this area, Apply a uniform thin layer of grease to the valve assembly then make absolutely sure that the new valve goes in "square" / straight to the opening and that the retaining pin hole lines up with where the roll pin must go back [ USE THE SUPPLIED ALIGNMENT PIN TOOL ! ]. Gently reinstall the roll pin, make sure the trigger and its spring are clean and reinstall these and the retaining roll pin that hold them. Of course visually inspect everything along the way : that new valve assembly is complete [ o=rings in place, no housing cracks in gun frame, no debris inside gun, etc... ]. *** using too high of air pressure to pop out valve during repair can hurt you or others - as it will fly out like a bullet or shatter plastic parts ***
Did you find this story helpful?
Thanks for voting and helping fellow customers!
35 of 37 people found this instruction helpful
Tool Type:
Nailer
Parts Used:
Repair Difficulty:
Easy
Time Spent Repairing:
Less than 15 minutes
Tools Used:
, Air chuck, punch, and hammer
Bad trigger valve
Use punch to push trigger pin out. Remove trigger. Hold rag over trigger valve, connect air for brief second which pops valve out. Oil new valve liberally, replace in pocket careful to line up correctly. Replace trigger and pin. Done
Did you find this story helpful?
Thanks for voting and helping fellow customers!
27 of 29 people found this instruction helpful
Tool Type:
Nailer
Parts Used:
Repair Difficulty:
Easy
Time Spent Repairing:
15-30 minutes
Tools Used:
, Pin punch/Small hammer
Gun leaking air around trigger.
1.Took pin punch and removed pin that holds trigger and spring in place.
2.Removed trigger and spring.
3.With pin punch removed pin that held trigger valve in place. Didn't drive either pin completely out but drove out just far enough to remove trigger and trigger valve.
4.Removed trigger valve by using a small awl to force out. Instruction say to hold rag over it and hook up to air and let it force it out but it came out without any problem using awl. I wasn't worried about damaging valve since I was going to be replacing it anyway.
5.Lubed new valve assembly, cleaned trigger housing and checked for burrs, and reassembled
in reverse order.
6.Works like a new gun. Complete repair including tear down took less than 30 minutes.
Did you find this story helpful?
Thanks for voting and helping fellow customers!
19 of 20 people found this instruction helpful
Tool Type:
Nailer
Parts Used:
Repair Difficulty:
Easy
Time Spent Repairing:
15-30 minutes
Tools Used:
Pliers, small ball peen hammer
Air leak at the trigger.
Using a small hammer & a flat bottom punch, removed the roll pin holding the trigger in place. Using the punch again I removed the roll pin retaining the trigger valve,& covering the old trigger valve with a rag I hooked up the nail gun to the air supply & it popped out the old trigger valve into the rag. Using the supplied grease I lubed the o - rings on the new trigger valve & installed it into the gun, & then reinstalled the roll pin retaining the new trigger valve.
Did you find this story helpful?
Thanks for voting and helping fellow customers!
7 of 7 people found this instruction helpful
Tool Type:
Nailer
Parts Used:
Repair Difficulty:
Easy
Time Spent Repairing:
Less than 15 minutes
Tools Used:
, Small punch, hammer
Trigger was leaking air
I followed the instructions that were included with the kit. The repair was completed in no time.
Thank you for the quick delivery.
Thank you for the quick delivery.
Did you find this story helpful?
Thanks for voting and helping fellow customers!
6 of 6 people found this instruction helpful
Tool Type:
Nailer
Parts Used:
Repair Difficulty:
Easy
Time Spent Repairing:
Less than 15 minutes
Tools Used:
, Hammer
Air would leak passed the trigger assy and the plunger would not reset/return to original position.
I opened the package, followed the step by step instructions, used the long pin provided to push out the pins holding my trigger assy (I also used a hammer to drive/push the long pin - the instructions didn't suggest this.), used (some of) the packet of grease supplied, reassembled the tool with the new part and now everything works like a dream. Things took me longer because I'm a bonehead and took the trigger apart. Do NOT take the trigger apart - it has small parts that are assembled by people with 6 hands - a total PITA.
I will definitely use ereplacementparts again.
I will definitely use ereplacementparts again.
Did you find this story helpful?
Thanks for voting and helping fellow customers!
2 of 2 people found this instruction helpful
Tool Type:
Nailer
Parts Used:
Repair Difficulty:
Easy
Time Spent Repairing:
Less than 15 minutes
Tools Used:
Pliers, Small hammer
The trigger on my Bostitch nailer began leaking air continuously
1. Drove out the pins holding the trigger and the trigger valve with the enclosed pin driver.
2. Pulled the trigger valve out gently with the pliers.
3. Made sure all of the "O" rings were lubricated properly.
4. Slid the new trigger valve into place.
5. Reinstalled the pins holding the trigger valve and the trigger.
6. Went back to work using the Nailer.
2. Pulled the trigger valve out gently with the pliers.
3. Made sure all of the "O" rings were lubricated properly.
4. Slid the new trigger valve into place.
5. Reinstalled the pins holding the trigger valve and the trigger.
6. Went back to work using the Nailer.
Did you find this story helpful?
Thanks for voting and helping fellow customers!
2 of 2 people found this instruction helpful
Tool Type:
Nailer
Repair Difficulty:
Easy
Time Spent Repairing:
15-30 minutes
Tools Used:
, Allen wrench
Air was leaking from head and trigger
Had to dismantle the trigger assembly, it came with instructions. Clean and then replace all o-ring lube up and then reassemble.
Did you find this story helpful?
Thanks for voting and helping fellow customers!
2 of 2 people found this instruction helpful
Tool Type:
Nailer
Parts Used:
Repair Difficulty:
Easy
Time Spent Repairing:
15-30 minutes
Tools Used:
Pliers, HAMMER PUNCH
Nailer leaked air at the trigger
Followed the installation instructions that were included with the trigger kit.
Did you find this story helpful?
Thanks for voting and helping fellow customers!
Tool Type:
Nailer
Parts Used:
Repair Difficulty:
Easy
Time Spent Repairing:
Less than 15 minutes
Tools Used:
, Hammer
Nail gun developed an air leak at the trigger.
1. Use the included punch to remove the roll pin holding the trigger.
2. Remove the trigger and spring and set aside.
3. Remove the roll pin holding the trigger valve in place, pay close attention to the position of the trigger valve.
4. Carefully attach the air hose to blow the trigger valve from the gun.
5. Lube the o-rings of the new trigger valve with the included lubricant.
6. Insert the new trigger valve, paying attention to the roll pin location.
7. Tap the roll pin for the trigger valve back into place.
8. Position the trigger and spring and replace the roll pin, to complete the repair.
Did you find this story helpful?
Thanks for voting and helping fellow customers!
show more
Reviews
31 Reviews
Average Rating (out of 5):
Click to filter by ratings:
5 stars
26
4 stars
2
3 stars
1
2 stars
1
1 stars
1
< PREV
- 1
- 2
- 3
Perfect
The part worked as described... The best part was that the item was recommended based on the problem....
Guest -
April 14, 2023
Verified Purchase
The part is exactly what is displayed and excellent quality
Order the part the representative guaranteed the fit and it worked perfect cured the problem back in business thank you to everyone involved
Guest -
February 3, 2023
Verified Purchase
Great part
My nail gun is now working like new again.
Guest -
October 25, 2022
Verified Purchase
Valve kit for Bosch roofing nailer
I received the valve 2 days sooner than I thought. My only complaint would be a lack of instructions. Thank heavens for YouTube. The replacement of the old valve with the new valve took about 10 minutes and the air leak at the trigger was fixed. Finished installing 5 squares of shingles and the valve worked like it was supposed to. Thanks.
Guest -
September 29, 2022
Verified Purchase
Easy checkout Fast Delivery
Part came in as described and arrived 2 weeks a head of schedule
iGlobal -
June 10, 2022
Verified Purchase
Parts
Both parts I bought worked perfectly and installed in minutes. I’m back to using my equipment
Guest -
September 9, 2021
Verified Purchase
Five Minute Repair, and Works Great!
I'm thankful this part was available for my ancient nailgun! Haha! The gun works like new.
Guest -
August 16, 2021
Verified Purchase
Fast, easy repair!
The part arrived quickly. Instructions were clear & concise making installation a snap! My pneumatic nailer works like new.
Guest -
November 17, 2020
Verified Purchase
Quick and easy, perfect part!
The kit arrived quickly. Good quality, it has everything that you need to replace the defective part. Took around 10 minutes!
Mike -
November 8, 2020
Verified Purchase
Easy Repair
Part fit and tool is back operational.
Lee -
October 23, 2020
Verified Purchase
Verified Purchase
eReplacementParts Team
< PREV
- 1
- 2
- 3
Product Information

