


This is a genuine Porter Cable replacement part, sold individually.
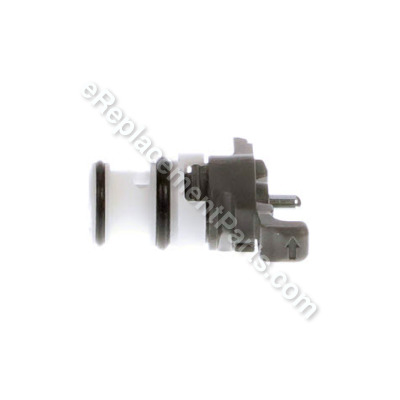
The Trigger Valve Assembly regulates the compressed air via the trigger to your Nailer.
Repair is fairly easy, requiring a small hammer and a punch pin. Remove trigger pin with punch pin, remove trigger, remove pins and valve assembly, clean area and lubricate o-ring is recommended, replace valve assembly and trigger.
This part is compatible with the Nailers shown below.
Trigger Valve Assembly 647620-00
OEM part for: Porter Cable
Part Number: 647620-00
$18.85
In Stock
Jump To:
Product Description ?
- Classification: Part
- Weight: 0.01 lbs.
- Shipping: Ships Worldwide
Frequently Purchased Together ?


Compatibility
This part will fit the following 5 machines
Porter Cable
FN250C Type 1 16 Ga. 2-1/2" Finish Nailer Kit View Diagrams & Manuals
DA250C Type 1 15 Ga. 2-1/2" Angle Finish Nailer View Diagrams & Manuals
DA250C (Type 2) Finish Nailer Power Tool View Diagrams & Manuals
FN250C (Type 2) Finish Nailer Power Tool View Diagrams & Manuals
FN250C (Type 3) Finish Nailer Power Tool View Diagrams & Manuals
This item works with the following types of products:
- Nailer Parts
This part replaces obsolete part #: 647620-00SV
Customer Part Reviews ?
Average Rating (out of 5):
Click to filter by ratings:
5 stars
61
4 stars
2
3 stars
0
2 stars
0
1 stars
1
< PREV
- 1
- 2
- 3
Right part delivered quick
The online tools helped me get the right part quickly. Shipping was fast.
Doing business with this company is really easy.
Chuck -
October 31, 2023
Verified Purchase
Had exactly what i needed
Guest -
October 11, 2023
Verified Purchase
Worked great back to work Ty Bill
Nail gun is like new
Guest -
June 29, 2023
Verified Purchase
Easy repair. Worked as expected!
This part saved me from saving hundreds of dollars on a new nail gun! The gun wasn't firing, but after replacing this trigger assembly it works like new! Installation only took a few minutes.
Guest -
December 1, 2022
Verified Purchase
Great repair
The part worked correctly and was easy to install. Wish there was an o-ring kit to replace the one bad o-ring.
Very fast service.
Guest -
October 21, 2022
Verified Purchase
Easy repair, great service
Received the trigger in a couple of days and the replacement took about 5 minutes.
Guest -
September 13, 2022
Verified Purchase
Quick fix!
Replacement trigger assembly fit perfect! Easy repair!
Guest -
August 30, 2022
Verified Purchase
Correct part, reasonable pricing.
Your site helped to determine correct part I needed to repair my air nailer. Pricing was good, have tool back working. Very satisfied.
Guest -
July 26, 2022
Verified Purchase
Easier than I thought!
Parts fit perfectly
Daniel -
June 28, 2022
Verified Purchase
Quick and easy repair
Arrived fast
David -
June 2, 2022
Verified Purchase
t
t
t -
t days ago
Verified Purchase
eReplacementParts Team
t
Questions & Answers ?
Our customer Service team is at the ready daily to answer your part and product questions.

Ask our Team
We have a dedicated staff with decades of collective experience in helping customers just like you purchase parts to repair their products.
Does this fit my product?Questions & Answers for Trigger Valve Assembly
No questions have been asked yet
Customer Repair Instructions ?
All our customer repair instructions are solicited directly from other customers just like you who have purchased and replaced this exact part.
replaced trigger valve assy.
Stephen - December 4, 2015
👍 74 of 75 people found this instruction helpful
Tool Type
Nailer
Difficulty
Easy
Time
Less than 15 minutes
Tools Used
, pin punch , small hammer
Parts Used
This job was so easy, the hardest part was removing the old trigger valve assy. At first I was intimidated by the task at hand, but when you follow the steps below it is simple.
1... remove small roll pin from trigger with a punch pin or use the head of a medium size finnish nail (tapping the point with hammer until pin moves). There will be a small plastic o ring , do not destroy this you will need it.
2... remove trigger and set aside with pin and small plastic retaining o ring from step one.
3... tap out the two roll pins that hold the trigger valve assy in place and set asside. My gun had one pin longer than the other.
4... wrap a heavy cloth or small towel around your hand and place it in front of the trigger valve and hook the gun up to the air source.
The valve will pop out fast and hard, so be ready.
Replacement steps...
1... place new trigger valve assy in the gun. Be sure to line up the slots for the roll pins.
2... tap longer roll pin into the thicker part of the gun, and the smaller pin in next. There was no o ring for theese pins.
3... place trigger in gun as it came out, making sure to place wire spring over trigger pin.
4... tap in roll pin through gun trigger and back out through gun.
5... place small plastic o ring on pin.
6... place a couple drops of air tool oil in the air inlet of gun and connect air source. You should be good to go.
It probably took me longer to write these steps than it did to do the job.
Did you find this story helpful?
Thanks for voting and helping fellow customers!
Air nail gun stopped working. Leaked air at trigger.
Jack - July 9, 2016
👍 13 of 14 people found this instruction helpful
Tool Type
Nailer
Difficulty
Easy
Time
15-30 minutes
Tools Used
, Pin Punch
1. Drove out roll pins.
2. Removed trigger and valve.
3. Installed new valve and reinstalled trigger.
4. Replaced pins.
Note: the excellent troubleshooting on the Web site let me buy only parts I needed instead of a full rebuild kit.
2. Removed trigger and valve.
3. Installed new valve and reinstalled trigger.
4. Replaced pins.
Note: the excellent troubleshooting on the Web site let me buy only parts I needed instead of a full rebuild kit.
Did you find this story helpful?
Thanks for voting and helping fellow customers!
Air leaking around o-ring seals in the trigger
Charles - November 30, 2015
👍 7 of 7 people found this instruction helpful
Tool Type
Nailer
Difficulty
Medium
Time
30-60 minutes
Tools Used
Pliers, Small punch to remove spiral pins
Parts Used
The key to the repair is removing the spiral pins and the small pin (held by rubber washer) on the trigger. The use of a small punch simplifies the repair. Once the 3 pins are removed the trigger assembly pulls out with some pressure. The reassembly is a matter of lining up the pins and trigger assembly and pressing the pins back in place.
Did you find this story helpful?
Thanks for voting and helping fellow customers!
Trigger valve wet bad
Jeff - April 6, 2016
👍 4 of 4 people found this instruction helpful
Tool Type
Nailer
Difficulty
Easy
Time
15-30 minutes
Tools Used
Screwdriver, Pliers
Very easy replacement . Instructions where right on .
Did you find this story helpful?
Thanks for voting and helping fellow customers!
Would not shoot a nail when you pressed the trigger
Michael - March 16, 2017
👍 2 of 2 people found this instruction helpful
Tool Type
Nailer
Difficulty
Easy
Time
Less than 15 minutes
Tools Used
, Small punch and a hammer
Parts Used
Drive the roll pin out of the nailer used a small screwdriver to pry the trigger assembly applied 3 in 1 oil on the new trigger assembly went in smooth drove the roll pins back in hooked the air up and shot nails perfectly.
Did you find this story helpful?
Thanks for voting and helping fellow customers!
O-ring on trigger valve cracked
david - November 16, 2015
👍 2 of 2 people found this instruction helpful
Tool Type
Nailer
Difficulty
Medium
Time
Less than 15 minutes
Tools Used
Pliers, hammer, punch
Parts Used
Take out roll pins holding trigger and valve assemblies. Use fine long nose pliers to pull out trigger valve assembly and replace.
Did you find this story helpful?
Thanks for voting and helping fellow customers!
Air leak at trigger
tom - April 29, 2017
👍 1 of 1 people found this instruction helpful
Tool Type
Nailer
Difficulty
Easy
Time
Less than 15 minutes
Tools Used
Screwdriver
Parts Used
Remove the 3 roll pins from the trigger, pull out the trigger, then put the new trigger back in and the roll pins roll pins from the trigger
Did you find this story helpful?
Thanks for voting and helping fellow customers!
Malfunctioning Trigger Valve Assembly
David - March 29, 2017
👍 1 of 1 people found this instruction helpful
Tool Type
Nailer
Difficulty
Easy
Time
Less than 15 minutes
Tools Used
, Hammer
Parts Used
ReplacementParts sent the exact part I ordered. It arrived expeditiously. I used an instruction video from Youtube and after the repair it worked like a champ.
Did you find this story helpful?
Thanks for voting and helping fellow customers!
Trigger was leaking air when firing!
DANIEL - February 25, 2017
👍 1 of 1 people found this instruction helpful
Tool Type
Nailer
Difficulty
Easy
Time
15-30 minutes
Tools Used
, punch and light hammer and pliers
Removed pins from trigger. Then used compressor to push out old damaged trigger assembly. Oiled o-rings placed new trigger back on to the gun along with pins. Gun started working again! Better than buying a New finish gun.
Did you find this story helpful?
Thanks for voting and helping fellow customers!
Trigger o rings were missing
Alejos - February 15, 2017
👍 1 of 1 people found this instruction helpful
Tool Type
Nailer
Difficulty
Easy
Time
Less than 15 minutes
Tools Used
, Hammer and center punch
Parts Used
1- Center punch to pins
2- Remove trigger
3- Replace new trigger number four replace pins
2- Remove trigger
3- Replace new trigger number four replace pins
Did you find this story helpful?
Thanks for voting and helping fellow customers!
Load More Install Stories
OEM stands for Original Equipment Manufacturer and means the part you’re buying is sourced directly from the manufacturer who made your product. At eReplacementParts, we sell only genuine OEM parts, guaranteeing the part you’re purchasing is of better design and of higher quality than aftermarket parts.
Our product descriptions are a combination of data sourced directly from the manufacturers who made your product as well as content researched and curated by our content & customer service teams. This content is edited and reviewed internally before being made public to customers.
Our customer service team are at the ready daily to answer your part and product questions. We have a dedicated staff with decades of collective experience in helping customers just like you purchase parts to repair their products.
All our part reviews are solicited directly from other customers who have purchased this exact part. While we moderate these reviews for profanity, offensive language or personally identifiable information, these reviews are posted exactly as submitted and no alterations are made by our team.
All our customer repair instructions are solicited directly from other customers just like you who have purchased and replaced this exact part. While we moderate these reviews for profanity, offensive language or personally identifiable information, these reviews are posted exactly as submitted and no alterations are made by our team.
Based on data from past customer purchasing behaviors, these parts are most commonly purchased together along with the part you are viewing. These parts may be necessary or helpful to replace to complete your current repair.
All our installation videos are created and produced in collaboration with our in-house repair technician, Mark Sodja, who has helped millions of eReplacementParts customers over the last 13 years repair their products. Mark has years of experience in selling and repairing both commercial and residential products with a specialty in gas-powered equipment.
This data is collected from customers who submitted a repair instruction after replacing this exact part. Customers can rate how easy the repair was to complete and how long it took. We aggregate this data to provide a repair rating that allows customers to quickly determine the difficulty and time needed to perform their own repair.