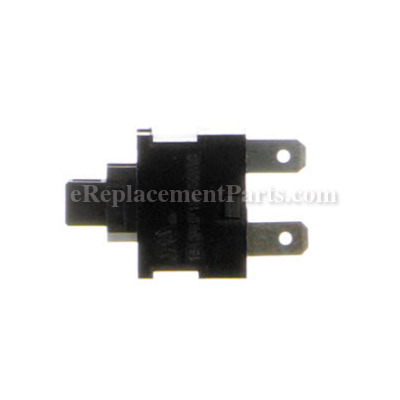
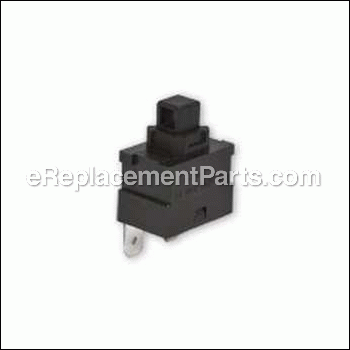
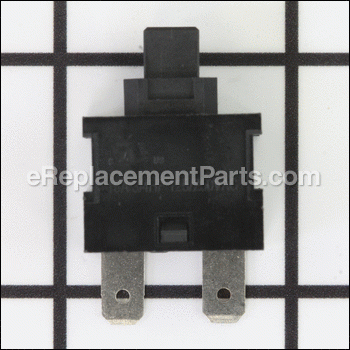
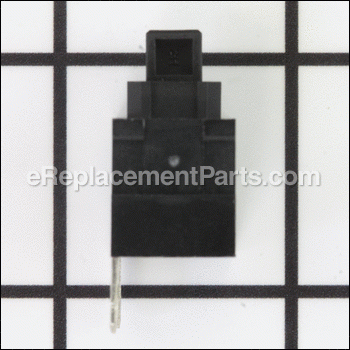
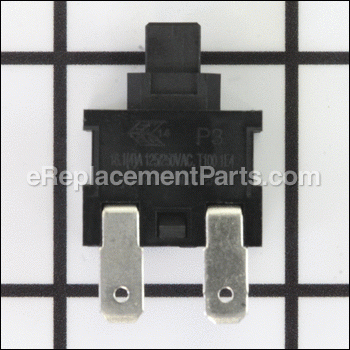
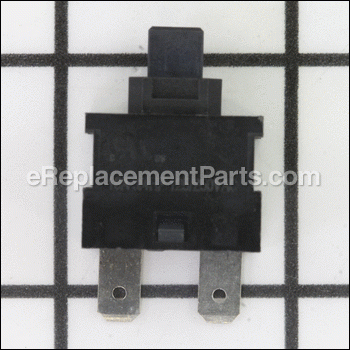


This part is an OEM from the Dyson manufacturer. The metal and plastic switch is made for use with several upright vacuums. This item is fastened inside the switch cover assembly, allowing the operator to (de)activate the engine. The switch is sold individually, and a screwdriver is needed for the installation.
Switch DY-91898902
OEM part for: Dyson
Part Number: DY-91898902
$5.87
In Stock
Jump To:
Frequently Purchased Together ?

Compatibility
This part will fit the following 5 machines
Dyson
DC66 Cinetic Big Ball Upright Vacuum View Diagrams & Manuals
DC65 Cinetic Big Ball Upright Vacuum View Diagrams & Manuals
DC41 Upright Vacuum View Diagrams & Manuals
DC40 Upright Vacuum View Diagrams & Manuals
DC33 Upright Vacuum View Diagrams & Manuals
This item works with the following types of products:
- Vacuum Parts
This part replaces obsolete part #: 918989-02
Customer Part Reviews ?
Average Rating (out of 5):
Click to filter by ratings:
5 stars
3
4 stars
1
3 stars
0
2 stars
0
1 stars
0
< PREV
- 1
Easy repair with correct part
The Dyson vacuum cleaner switches that I received easily and quickly fixed the original equipment failure.
Guest -
June 20, 2023
Verified Purchase
worked as expected
Received this switch for my Dyson vacuum. Watched a YouTube video on how to install it. Very easy & now it works great. This is the second part I ordered from this company & no issues whatsoever. A lot cheaper than replacing the vacuum or taking it to a repair shop.
Guest -
April 16, 2023
Verified Purchase
Dyson DC41 vacuum power switch
I needed to replace the power switch on our Dyson DC41 vacuum which fails yearly. I received the part quickly. There are no real changes in the design or function to the switch so it is the same wimpy plastic switch. I know the failure rate of this switch so I ordered 2 so I have a spare in the future.
Guest -
July 16, 2019
Verified Purchase
easy repair
the only problem i had was the new switch was i had to make an adjustment on the vacuum it kept on shutting off
Guest -
August 5, 2020
Verified Purchase
t
t
t -
t days ago
Verified Purchase
eReplacementParts Team
t
Questions & Answers ?
Our customer Service team is at the ready daily to answer your part and product questions.

Ask our Team
We have a dedicated staff with decades of collective experience in helping customers just like you purchase parts to repair their products.
Does this fit my product?Questions & Answers for Switch
No questions have been asked yet
Customer Repair Instructions ?
All our customer repair instructions are solicited directly from other customers just like you who have purchased and replaced this exact part.
Power switch broke; vacuum wouldn't run.
Ward - February 14, 2019
👍 2 of 2 people found this instruction helpful
Tool Type
Vacuum
Difficulty
Easy
Time
15-30 minutes
Tools Used
Screwdriver, DeWalt Torq T15 bit
Parts Used
Dyson DC41 Animal 1. Followed video, https://www.youtube.com/watch?v=4R0gs3vC-cU, but replaced power switch Part Number: DY-91898902, not the brush switch as in the video. The switch is the same. This switch can't be bought from the Dyson company as it's not a user replacement according to an agent I talked to. On investigation, I found screwdriver bit DeWalt Torq T15 bit was necessary to remove 2 screws.
Did you find this story helpful?
Thanks for voting and helping fellow customers!
Thought the switch was bad. But it wasn’t the switch. I now believe the motor might be going out
gary - February 13, 2020
Tool Type
Vacuum
Difficulty
Easy
Time
15-30 minutes
Tools Used
, Torques
Parts Used
Replaced the switch, which was really easy. It was located in the handle. Just a couple Tourte screws and unplug the wires
Did you find this story helpful?
Thanks for voting and helping fellow customers!
beater bar did not work
Dennis - January 16, 2020
Tool Type
Vacuum
Difficulty
Medium
Time
15-30 minutes
Tools Used
Screwdriver
Parts Used
removed the switch cover. unplugged the switch and plugged the replacement switch and reinstalled the switch cover.
Did you find this story helpful?
Thanks for voting and helping fellow customers!
Defective switch
Peter - April 4, 2019
Tool Type
Vacuum
Difficulty
Easy
Time
Less than 15 minutes
Tools Used
Screwdriver
Parts Used
Removed 4 screws to remove cover to expose switches.
Pulled 2 wires from defective switch
Put wires onto new switch
Replaced cover and screws
Very easy
Pulled 2 wires from defective switch
Put wires onto new switch
Replaced cover and screws
Very easy
Did you find this story helpful?
Thanks for voting and helping fellow customers!
clutch was slipping for beater bar and switch was intermittant
Leo - December 23, 2018
Tool Type
Vacuum
Difficulty
Medium
Time
1-2 hours
Tools Used
Screwdriver, Pliers, torx driver
there was prying involved to fit the new belts
Did you find this story helpful?
Thanks for voting and helping fellow customers!
The switch to shut the rotating brush no longer worked.
Harold - February 9, 2017
Tool Type
Vacuum
Difficulty
Easy
Time
15-30 minutes
Tools Used
Screwdriver
Parts Used
Removed the four screws holding the switch housing in place. Pulled the connections off the old switch, put the connections on the new switch and reassembled the switch housing.
Did you find this story helpful?
Thanks for voting and helping fellow customers!
Power switch went bad
charles - November 30, 2018
👍 0 of 1 people found this instruction helpful
Tool Type
Vacuum
Difficulty
Easy
Time
Less than 15 minutes
Tools Used
Screwdriver
Parts Used
Googled how to replace switch followed the instructions EASY REPAIR I
also replaced brush switch at the same time,
also replaced brush switch at the same time,
Did you find this story helpful?
Thanks for voting and helping fellow customers!
OEM stands for Original Equipment Manufacturer and means the part you’re buying is sourced directly from the manufacturer who made your product. At eReplacementParts, we sell only genuine OEM parts, guaranteeing the part you’re purchasing is of better design and of higher quality than aftermarket parts.
Our product descriptions are a combination of data sourced directly from the manufacturers who made your product as well as content researched and curated by our content & customer service teams. This content is edited and reviewed internally before being made public to customers.
Our customer service team are at the ready daily to answer your part and product questions. We have a dedicated staff with decades of collective experience in helping customers just like you purchase parts to repair their products.
All our part reviews are solicited directly from other customers who have purchased this exact part. While we moderate these reviews for profanity, offensive language or personally identifiable information, these reviews are posted exactly as submitted and no alterations are made by our team.
All our customer repair instructions are solicited directly from other customers just like you who have purchased and replaced this exact part. While we moderate these reviews for profanity, offensive language or personally identifiable information, these reviews are posted exactly as submitted and no alterations are made by our team.
Based on data from past customer purchasing behaviors, these parts are most commonly purchased together along with the part you are viewing. These parts may be necessary or helpful to replace to complete your current repair.
All our installation videos are created and produced in collaboration with our in-house repair technician, Mark Sodja, who has helped millions of eReplacementParts customers over the last 13 years repair their products. Mark has years of experience in selling and repairing both commercial and residential products with a specialty in gas-powered equipment.
This data is collected from customers who submitted a repair instruction after replacing this exact part. Customers can rate how easy the repair was to complete and how long it took. We aggregate this data to provide a repair rating that allows customers to quickly determine the difficulty and time needed to perform their own repair.