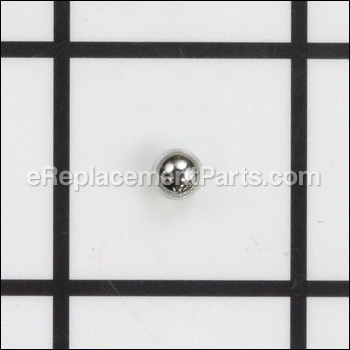
This genuine OEM steel ball measures 5.6mm in diameter and is used in the ball bearing mechanisms or detent systems of your handheld power tools. It minimizes friction between moving parts, allowing them to move smoothly without causing excessive wear or resistance. It can also provide a reliable locking mechanism in the detent system, ensuring that adjustable parts stay securely in place during operation. Typically, you can find this steel ball inside the main housing of your power tool. It facilitates smooth rolling or sliding movements in various components like compression springs, cam clutches, barrels, or spindles. Signs of a worn or damaged steel ball include increased vibration or inconsistent locking. To check if the steel ball requires replacement, visually inspect it for any signs of wear or damage. If you are unsure about how to replace the steel ball in your machine, it is recommended to consult your user manual for instructions. Please note that this replacement part is sold individually, as your tool may need multiple steel balls. It is also crucial to make sure you have the correct size of steel ball for your specific repair.
Steel Ball 216011-7
OEM part for: Makita
Part Number: 216011-7
7 - 12 business days
Jump To:
Frequently Purchased Together ?
Compatibility
This part will fit the following 317 machines
Makita
This item works with the following types of products:
- Cordless Drill Parts
- Drill Parts
- Impact Driver Parts
- Chain Saw Parts
- Saw Parts
- Screwdriver Parts
- Impact Wrench Parts
- Demolition Hammer Parts
- Rotary Hammer Parts
- Planer Parts
- Hammer Drill Parts
- Jig saw Parts
- Engine Parts
Customer Part Reviews ?
Questions & Answers ?
Our customer Service team is at the ready daily to answer your part and product questions.

Ask our Team
We have a dedicated staff with decades of collective experience in helping customers just like you purchase parts to repair their products.
Does this fit my product?Questions & Answers for Steel Ball
Customer Repair Instructions ?
All our customer repair instructions are solicited directly from other customers just like you who have purchased and replaced this exact part.
Impact main spring had broken.
Tool Type
Impact Driver
Difficulty
Medium
Time
15-30 minutes
Tools Used
, Small three jaw puller, grease & foam swab to put grease on.
Compression spring on top of the flat washer ,Then I proceeded to put main shaft with the cup washer on it through the compression spring.I used the three jar puller to compress the spring in the assembly so shaft would push out through the hammer allowing me to put the two larger ball bearings in the two groves in the shaft. Once they were in place I released the pressure on the hammer spring and the assembly was now ready to it back in drill, be sure to apply a small amount of grease on the assembly before putting it back in the drill. Put the assembly back on the drill ,put the four screws back in tighten them down and you're done. I was very pleased with all the parts I received .Note : I downloaded the parts assembly of the hammer drill to make sure of the order which the parts went back in.
ball and spring flew out
Tool Type
Demolition Hammer
Difficulty
Easy
Time
15-30 minutes
Tools Used
Wrench Set
replace bad parts on demoliition jack hammer
Tool Type
Demolition Hammer
Difficulty
Medium
Time
30-60 minutes
Tools Used
Pliers, Socket set, Nutdriver
OEM stands for Original Equipment Manufacturer and means the part you’re buying is sourced directly from the manufacturer who made your product. At eReplacementParts, we sell only genuine OEM parts, guaranteeing the part you’re purchasing is of better design and of higher quality than aftermarket parts.
Our product descriptions are a combination of data sourced directly from the manufacturers who made your product as well as content researched and curated by our content & customer service teams. This content is edited and reviewed internally before being made public to customers.
Our customer service team are at the ready daily to answer your part and product questions. We have a dedicated staff with decades of collective experience in helping customers just like you purchase parts to repair their products.
All our part reviews are solicited directly from other customers who have purchased this exact part. While we moderate these reviews for profanity, offensive language or personally identifiable information, these reviews are posted exactly as submitted and no alterations are made by our team.
All our customer repair instructions are solicited directly from other customers just like you who have purchased and replaced this exact part. While we moderate these reviews for profanity, offensive language or personally identifiable information, these reviews are posted exactly as submitted and no alterations are made by our team.
Based on data from past customer purchasing behaviors, these parts are most commonly purchased together along with the part you are viewing. These parts may be necessary or helpful to replace to complete your current repair.
All our installation videos are created and produced in collaboration with our in-house repair technician, Mark Sodja, who has helped millions of eReplacementParts customers over the last 13 years repair their products. Mark has years of experience in selling and repairing both commercial and residential products with a specialty in gas-powered equipment.
This data is collected from customers who submitted a repair instruction after replacing this exact part. Customers can rate how easy the repair was to complete and how long it took. We aggregate this data to provide a repair rating that allows customers to quickly determine the difficulty and time needed to perform their own repair.


