

*This part replaces obsolete part #: 90588459N.
Product Information
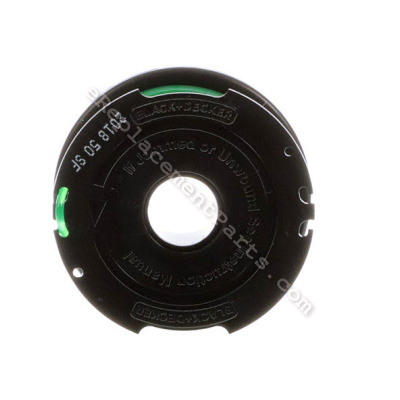
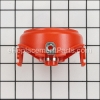
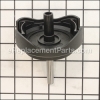
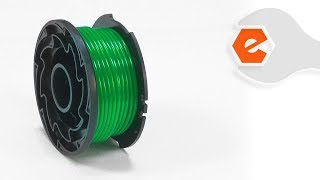
Description:
| This is Genuine OEM replacement part designed for use with Black and Decker String Trimmers. It is the part of the String Trimmer that contains the cutting line. It is made out of Plastic and it is sold individually. Please note the Spool Housing and the Cap are both Sold Separately. When Replacing this item you will not need any tools. • Depress the tabs and remove the spool cap from the spool housing on the trimmer head • Grasp empty spool with one hand and spool cap with other hand and pull spool out • Replace the Spool Assembly • Insert the lines onto the exit holes on the hub • Align the notches with the line exit holes • Press the spool gently into the spool cap and rotate it until you feel it drop into place. • Then push to snap into place. (When in place, the spool will turn a few degrees left and right freely) • Align the spool cap tabs with the slots on the spool housing • Snap the spool cap back on by depressing lugs and pressing into spool housing NOTE: The line should protrude approximately 4-13/16inches (122mm) from the housing. |
Frequently Purchased With


Compatibility
This part is compatible with the following machines:
Products Compatibility
This item works with the following types of products:
- • Trimmer
Repair Guides
![]()

Watch the Repair Video for
Auto Feed Single Line Spool
Questions & Answers for Auto Feed Single Line Spool
No questions have been asked yet
Repair Instructions: Submitted by Customers Like You
9 of 9 people found this instruction helpful
Tool Type:
Hedge Trimmer
Parts Used:
Repair Difficulty:
Easy
Time Spent Repairing:
Less than 15 minutes
Tools Used:
(First this part is for a string trimmer not a hedge trimmer) Worn spool
Press on the sides of the cap and pull it out. Remove the old spool. Install the new spool and let some of the line out of the upper housing. Press the cap back on and you're done
Did you find this story helpful?
Thanks for voting and helping fellow customers!
2 of 2 people found this instruction helpful
Tool Type:
Hedge Trimmer
Repair Difficulty:
Easy
Time Spent Repairing:
Less than 15 minutes
Tools Used:
Screwdriver
Cap was broken need replace ordered and problem solved
Remove the old spool and then installed the new one, and thread some of the line out of the spool housing. Then line up the tabs on the cap to the slots in the spool housing and press it in.
Did you find this story helpful?
Thanks for voting and helping fellow customers!
1 of 1 people found this instruction helpful
Tool Type:
Trimmer
Repair Difficulty:
Easy
Time Spent Repairing:
Less than 15 minutes
Tools Used:
, Hand replaced spool and cap
Trimmer feed and cut line up and my legs.
Removed old cap and spool and replaced with new ones. They work as new ones. I have had this trimmer for several years and it just started to not feed the line out and then would feed it out and cut into small pieces. Also cut my leg and ankle. The new cap and spool worked and fixed this problem.
Did you find this story helpful?
Thanks for voting and helping fellow customers!
Tool Type:
Grass Trimmer
Parts Used:
Repair Difficulty:
Easy
Time Spent Repairing:
Less than 15 minutes
Tools Used:
Screwdriver
cover broke
Remover broken cover and replaced it with the new one
Did you find this story helpful?
Thanks for voting and helping fellow customers!
Tool Type:
Grass Trimmer
Parts Used:
Repair Difficulty:
Easy
Time Spent Repairing:
Less than 15 minutes
Tools Used:
Spool cracked
Threw away broken part. Replacement part fit perfectly.
Did you find this story helpful?
Thanks for voting and helping fellow customers!
Tool Type:
Trimmer
Parts Used:
Repair Difficulty:
Easy
Time Spent Repairing:
Less than 15 minutes
Tools Used:
Screwdriver
Needed new spool
Took out used one replaced with new one eady
Did you find this story helpful?
Thanks for voting and helping fellow customers!
Tool Type:
Trimmer
Parts Used:
Repair Difficulty:
Easy
Time Spent Repairing:
15-30 minutes
Tools Used:
Screwdriver, OPTIONAL: 4mm Allen wrench, 5/16 in
The string trimmer's string got wrapped around some stuff and seized, breaking the spool housing's plastic collar
Detach string spool from spool housing.
OPTIONAL (to lube driveshaft): loosen collar's screw (4mm Allen wrench and 5/16 in socket).
Remove screw securing spool housing to shaft (Phillips head).
Pull out spool housing.
OPTIONAL (to lube driveshaft): detach guard from shaft, pull out driveshaft, wipe clean, and apply grease.
Insert new spool housing.
Install & tighten screw securing spool housing to shaft (Phillips head).
OPTIONAL (if lubed driveshaft): tighten collar (4mm Allen wrench and 5/16 in socket).
Did you find this story helpful?
Thanks for voting and helping fellow customers!
Tool Type:
Trimmer
Parts Used:
Repair Difficulty:
Easy
Time Spent Repairing:
Less than 15 minutes
Tools Used:
, No tools needed
Weed eater cord spool broke
Removed broken spool and replaced it with new spool
Did you find this story helpful?
Thanks for voting and helping fellow customers!
Tool Type:
Grass Trimmer
Repair Difficulty:
Easy
Time Spent Repairing:
Less than 15 minutes
Tools Used:
Screwdriver
The old lever broke and no one locally carried parts
Replaced the lever and put on new string reel and went to work. Took maybe 5 minutes.
Did you find this story helpful?
Thanks for voting and helping fellow customers!
Tool Type:
Trimmer
Parts Used:
Repair Difficulty:
Easy
Time Spent Repairing:
Less than 15 minutes
Tools Used:
, No tools needed
The spoil on my weed trimmer was broken, E replacement had replacement part exactly matched the broken one .
Removed the old spool and replaced it with new one. It is very easy.
Did you find this story helpful?
Thanks for voting and helping fellow customers!
show more
Reviews
29 Reviews
Average Rating (out of 5):
Click to filter by ratings:
5 stars
24
4 stars
4
3 stars
0
2 stars
0
1 stars
1
< PREV
- 1
- 2
- 3
IT FIT.
Ordered part after doing research/other customer reviews. This company was recommended by B&D/Dewalt web site For original approved replacement parts. Placed order, received order within specified time, in excellent shape. put on weed wacker and away I went. Got backyard looking great again. PS. handicapped/physically challenged but still got job done. Thank you EreplacementParts.
Bonnie -
September 27, 2023
Verified Purchase
rapid shipping. Was the right fit
I was surprised by the fast delivery!
Guest -
November 14, 2022
Verified Purchase
Good Service
The parts were received quickly. I would order from you again. Thanks!
Guest -
June 23, 2022
Verified Purchase
These spools arrive ready to use,
The spools arrived in just a few days.
Guest -
April 15, 2022
Verified Purchase
Super Easy to Find Right Part
I needed a new auto feed line on my weed eater. Going to the big stores was a waste of time. With ereplacement parts online I found the exact OEM part I needed within minutes. Thanks for making your site so easy to navigate! God bless you!
Guest -
September 14, 2021
Verified Purchase
Weed trimmer
Arrived earlier than expected fits and works great
Guest -
September 6, 2021
Verified Purchase
Easy repair,good part
Llegó rápido, en buenas condiciones. Volvería a comprar en el futuro.
Juan -
August 23, 2021
Verified Purchase
great parts that fit and work
Great
Guest -
July 25, 2021
Verified Purchase
Great part
New replacement spool which can’t be found even at the place we bought the weed eater from! Ereplacement is the go to place to go. Always has what we need and fast shipment.
Susan -
July 22, 2021
Verified Purchase
snap to repair and install new part work very good
auto feed spool works so good,excellent and professional service from your parts agent thanks
Guest -
June 1, 2021
Verified Purchase
Verified Purchase
eReplacementParts Team
< PREV
- 1
- 2
- 3
Product Information
Repair Guides
![]()
Watch the Repair Video for
Auto Feed Single Line Spool