
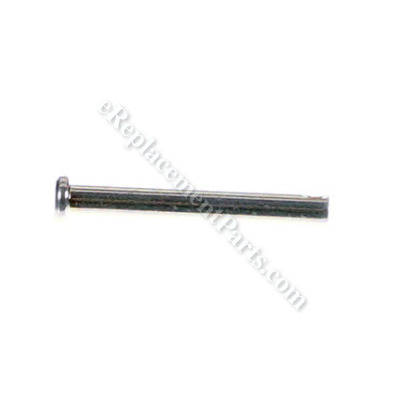


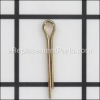
This is a genuine OEM sourced replacement shear pin designed for use with snow blowers/throwers. Shear pins are installed in order to protect your snowblower and it measures 1/4 X 1.750. If the auger gets jammed or clogged, shear bolt is designed to snap at a certain point of pressure, so it will not damage any other part of the unit. This pin is made out of metal and it is sold individually. Please note the cotter pin used to secure this pin is sold separately. In order to install or remove this pin you will need pliers.
Pin, Shear 703063
OEM part for: Murray, Snapper, Simplicity, Craftsman
Part Number: 703063
$4.99
In Stock
Jump To:
Frequently Purchased Together ?


Compatibility
This part will fit the following 910 machines
Murray
1695339-966D (2008) 26" Dual Stage Snowthrower View Diagrams & Manuals
1695340-1171 HST (2008) 28" Dual Stage Snowthrower View Diagrams & Manuals
1695339 (966D)(2007) 26" Dual Stage Snowthrower View Diagrams & Manuals
1695319 (ST8526)(2007) 26" Dual Stage Snowthrower View Diagrams & Manuals
1695320 (ST9528)(2007) 28" Dual Stage Snowthrower View Diagrams & Manuals
1695321 (ST1028S)(2007) 28" Dual Stage Snowthrower View Diagrams & Manuals
1695340 (1171 HST)(2007) 28" Dual Stage Snowthrower View Diagrams & Manuals
1695323 (ST1332S)(2007) 32" Dual Stage Snowthrower View Diagrams & Manuals
1695341 (1381 HST)(2007) 32" Dual Stage Snowthrower View Diagrams & Manuals
1695322 (ST1130S)(2007) 30" Dual Stage Snowthrower View Diagrams & Manuals
1695071 (1171 HST)(2006) 28" Dual Stage Snowthrower View Diagrams & Manuals
1695000 (ST1130S)(2006) 30" Dual Stage Snowthrower View Diagrams & Manuals
1695053 (ST1332S)(2006) 32" Dual Stage Snowthrower View Diagrams & Manuals
1695072 (1381 HST)(2006) 32" Dual Stage Snowthrower View Diagrams & Manuals
1694997 (ST8526)(2006) 26" Dual Stage Snowthrower View Diagrams & Manuals
1695070 (966D)(2006) 26" Dual Stage Snowthrower View Diagrams & Manuals
1694998 (ST9528)(2006) 28" Dual Stage Snowthrower View Diagrams & Manuals
1694999 (ST1028S)(2006) 28" Dual Stage Snowthrower View Diagrams & Manuals
ML761650 (2011) Large Frame Dual Stage Snow Thrower View Diagrams & Manuals
ML761650 (2010) Large Frame Dual Stage Snow Thrower View Diagrams & Manuals
MM691150 (2010) Mid Frame Dual Stage Snow Thrower View Diagrams & Manuals
1696159-00 (BP2132S)(2012) 32" Dual Stage Snowblower View Diagrams & Manuals
1696157-00 (1528HD)(2012) 28" Dual Stage Snowblower View Diagrams & Manuals
1696158-00 (1730HD)(2012) 30" Dual Stage Snowblower View Diagrams & Manuals
1695978 24" Dual Stage Snowthrower View Diagrams & Manuals
1695979 (2011) 24" Dual Stage Snowthrower View Diagrams & Manuals
1696047 (2011) 24-In. Dual Stage Snowthrower View Diagrams & Manuals
107.289850 (2690922)(2010) Pgt9500 Craftsman Prestige, 30hp 54-Inch 2wd View Diagrams & Manuals
7800629 (E20M42)(2010) 20hp Bands W/42-Inch Mower Deck View Diagrams & Manuals
1695623 (LP18978 - 1130SE)(2009) 30-Inch Dual Stage Thrower View Diagrams & Manuals
1695622 (LP18977 - 928E)(2009) Dual Stage Snow Thrower View Diagrams & Manuals
1695624 (LP18979 - 1332PE)(2009) Professional Snow Thrower View Diagrams & Manuals
1695753 (18-2852-30)(2009) 1381 Hst, Dual Stage Snowthrower View Diagrams & Manuals
ZTS 7500 (107.287900)(7800339)(2008) Zts 7500, 26hp Bands W/50-Inchmower Deck View Diagrams & Manuals
1381HST (1695341)(2008) Dual Stage Snow Thrower View Diagrams & Manuals
107.287860 (7800338)(2008) Zts 7500, 21hp Bands W/42-Inch Mower Deck View Diagrams & Manuals
ZTS 7500 (107.287910)(7800340)(2008) Zts 7500, 26hp Kohler W/50-Inchmower Deck View Diagrams & Manuals
ZTS 7500 (107.287860)(7800338)(2008) Zts 7500, 21hp Bands W/42-Inchmower Deck View Diagrams & Manuals
107.267860 (7800341)(2009) Zts 7500, 21hp Bands W/42-Inch Mower Deck California View Diagrams & Manuals
107.289920 (7800514)(2009) Zts 6000, 26hp Bands W/52-Inch Mower Deck View Diagrams & Manuals
107.289930 (7800515)(2009) Zts 6000, 26hp Bands W/52-Inch Mower Deck View Diagrams & Manuals
7800490 (EZM2042)(2009) 20hp Bands W/42-Inchmower Deck View Diagrams & Manuals
107.289860 (7800513)(2009) Zts 6000, 21hp Bands W/42-Inch Mower Deck View Diagrams & Manuals
ZTS 6000 (7800515 - 107.289930)(2009) 26hp Bands W/52" Mower Deck View Diagrams & Manuals
ZTS 6000 (7800538 - C950-60928-0)(2009) 26hp Bands W/52" Mower Deck View Diagrams & Manuals
ZTS 6000 (7800577 - C950-60929-0)(2009) 21hp Bands W/42" Mower Deck View Diagrams & Manuals
ZTS 6000 (950.609280 - 7800538)(2009) 26hp Bands W/52" Mower Deck View Diagrams & Manuals
ZTS 6000 (950.609290 - 7800577)(2009) 21hp Bands W/42" Mower Deck View Diagrams & Manuals
ZTS 6000 (C950-60928-0 - 7800538)(2009) 26hp Bands W/52" Mower Deck View Diagrams & Manuals
ZTS 6000 (C950-60929-0 - 7800577)(2009) 21hp Bands W/42" Mower Deck View Diagrams & Manuals
2690912 Bad Boy, 24hp 46-Inch Aws View Diagrams & Manuals
1695808 (LP25938 - 1028E)(2010) 14.5tp 28-Inch Dual Stage Snow Thrower View Diagrams & Manuals
1695863 (18-2851-31)(2010) Stiga 14.5 Tp 28-Inch 1171hst Dual Stage Snowthrower View Diagrams & Manuals
1695812 (LP25939 - 1330SE)(2010) 16.5tp 30-Inch Dual Stage Thrower View Diagrams & Manuals
107.289851 (2690922A)(2011) Pgt9500 Craftsman Prestige, 30hp 54-Inch 2wd View Diagrams & Manuals
ML761650 (1695912)(2010) 16.5tp 30-Inch Dual Stage Snowthrower, Ce View Diagrams & Manuals
ZTS7000 (107.280063 - 7800753A)(2011) 21hp Bands W/42" Mower Deck View Diagrams & Manuals
ZTS7000 (107.280070)(7800690SN)(2011) 26hp Bands W/52" Mower Deck View Diagrams & Manuals
ZTS7000 (107.280071)(7800690)(2011) 26hp Bands W/52" Mower Deck View Diagrams & Manuals
7800753SN (107.280060)(2011) 21hp Bands W/42" Mower Deck View Diagrams & Manuals
ZTS7000 (107.280061 - 7800753)(2011) 21hp Bands W/42" Mower Deck View Diagrams & Manuals
ZTS7000 (107.280062 - 7800753ASN)(2011) 21hp Bands W/42" Mower Deck View Diagrams & Manuals
1695814 (LP25940 - 1332PE)(2010) 16.5tp 32-Inch Professional Snow Thrower View Diagrams & Manuals
1695864 (18-2852-31)(1381HST)(2010) Stiga 16.5tp 32-Inch Dual Stage Snowthrower, Ce View Diagrams & Manuals
ZTS7000 (107.280072)(7800690ASN)(2011) 26hp Bands W/52" Mower Deck View Diagrams & Manuals
ZTS7000 (107.280073)(7800690A)(2011) 26hp Bands W/52" Mower Deck View Diagrams & Manuals
ZTS7000 (7800690)(107.280071)(2011) 26hp Bands W/52" Mower Deck View Diagrams & Manuals
1695790 (LP25941 - 1338PE)(2010) 16.5tp 38-Inch Professional Snow Thrower View Diagrams & Manuals
ZTS7000 (C950-60107-0 - 7800819)(2011) 26hp Bands W/52" Mower Deck View Diagrams & Manuals
ZTS7000 (7800690A)(107.280073)(2011) 26hp Bands W/52" Mower Deck View Diagrams & Manuals
ZTS7000 (C950-60107-1 - 7800819A)(2011) 26hp Bands W/52" Mower Deck View Diagrams & Manuals
ZTS7000 (7800690ASN)(107.280072)(2011) 26hp Bands W/52" Mower Deck View Diagrams & Manuals
ZTS7000 (7800690SN)(107.280070)(2011) 26hp Bands W/52" Mower Deck View Diagrams & Manuals
ZTS7000 (7800753 - 107.280061)(2011) 21hp Bands W/42" Mower Deck View Diagrams & Manuals
ZTS7000 (7800753A - 107.280063)(2011) 21hp Bands W/42" Mower Deck View Diagrams & Manuals
ZTS7000 (7800753ASN - 107.280062)(2011) 21hp Bands W/42" Mower Deck View Diagrams & Manuals
ZTS7000 (7800753SN - 107.280060)(2011) 21hp Bands W/42" Mower Deck View Diagrams & Manuals
ZTS7000 (7800819 - C950-60107-0)(2011) 26hp Bands W/52" Mower Deck View Diagrams & Manuals
ZTS7000 (7800819A - C950-60107-1)(2011) 26hp Bands W/52" Mower Deck View Diagrams & Manuals
ZTS7000 (7800820 - C950-60106-0)(2011) 21hp Bands W/42" Mower Deck View Diagrams & Manuals
ZTS7000 (7800820A - C950-60106-1)(2011) 21hp Bands W/42" Mower Deck View Diagrams & Manuals
ZTS7000 (950.601060 - 7800820)(2011) 21hp Bands W/42" Mower Deck View Diagrams & Manuals
1695978 (2011) Murray 8tp 24-Inch Dual Stage Snowthrower View Diagrams & Manuals
1696034 (18-2869-31)(2011) Stiga 8tp 24-Inch Dual Stage Snowthrower View Diagrams & Manuals
ZTS7000 (950.601070 - 7800819)(2011) 26hp Bands W/52" Mower Deck View Diagrams & Manuals
ZTS7000 (C950-60106-0 - 7800820)(2011) 21hp Bands W/42" Mower Deck View Diagrams & Manuals
ZTS7000 (C950-60106-1 - 7800820A)(2011) 21hp Bands W/42" Mower Deck View Diagrams & Manuals
1171HST (1696038 - 18-2851-31)(2011) Stiga 14.5tp 28-Inch Dual Stage Snowthrower View Diagrams & Manuals
1696043 (LP37057 - 1028E)(2011) 14.5tp 28-Inch Dual Stage Snow Thrower View Diagrams & Manuals
LP37058 (1696044)(1330SE)(2011) 16.5tp 30-Inch Dual Stage Thrower View Diagrams & Manuals
ML761650 (1696063)(2011) Murray 16.5tp 30-Inch Dual Stage Snowthrower, Ce View Diagrams & Manuals
1381HST (1696039 - 18-2852-31)(2011) Stiga 16.5tp 32-Inch Dual Stage Snowthrower View Diagrams & Manuals
1696045 (LP37059 - 1332PE)(2011) 16.5tp 32-Inch Professional Snow Thrower View Diagrams & Manuals
1696046 (LP37060 - 1338PE)(2011) 16.5tp 38-Inch Professional Snow Thrower View Diagrams & Manuals
ZTS 7500 (2690641 - 107.277900)(2007) 24hp Bands W/50" Mower Deck View Diagrams & Manuals
ZTS 7500 (2690713 - 107.607010,)(2007) 24hp Bands W/50" Mower Deck View Diagrams & Manuals
ZTS 7500 (107.277860 - 2690639)(2007) 20hp Koh W/44" Mower Deck View Diagrams & Manuals
ZTS 7500 (107.277880 - 2690640)(2007) 20hp Koh W/44" Mower Deck View Diagrams & Manuals
ZTS 7500 (107.277900 - 2690641)(2007) 24hp Bands W/50" Mower Deck View Diagrams & Manuals
ZTS 7500 (107.607010 - 2690713)(2007) 24hp Bands W/50" Mower Deck View Diagrams & Manuals
ZTS 7500 (2690639 - 107.277860)(2007) 20hp Koh W/44" Mower Deck View Diagrams & Manuals
ZTS 7500 (2690640 - 107.277880)(2007) 20hp Koh W/44" Mower Deck View Diagrams & Manuals
1696140-00 (2015) 52-Inch Mower Deck View Diagrams & Manuals
1695960 (2011) 54-Inch Mower Deck View Diagrams & Manuals
1695360 Snowthrower, Two Stage, 42-Inch View Diagrams & Manuals
107.250060 (2691087-00)(CTX9500)(2012) Craftsman 26hp, 52-Inch Mower Deck View Diagrams & Manuals
107.250070 (2691088-00)(CTX9500)(2012) Craftsman 30hp, 54-Inch Mower Deck View Diagrams & Manuals
2691041-00 (EZT2042)(2012) 20hp Bands W/42-Inch Mower Deck, Ce View Diagrams & Manuals
107.250040 (2691085-00)(CTX9000)(2012) Ctx9000, 20hp, 42" Mower Deck View Diagrams & Manuals
2691041-01 (EZT2042)(2012) 20hp Bands W/42-Inch Mower Deck, Ce View Diagrams & Manuals
107.250050 (2691086-00)(CTX9000)(2012) Ctx9000 Craftsman 22hp, 46-Inch Mower Deck View Diagrams & Manuals
107.250050 (2691086-00)(2012) Ctx9000 Craftsman 22hp, 46-Inch Mower Deck View Diagrams & Manuals
107.250060 (2691087-00)(2012) Ctx9500 Craftsman 26hp, 52-Inch Mower Deck View Diagrams & Manuals
2691079-00 (RZT26520)(2012) 26hp Bands 52-Inch Murray Zero Turn Rider View Diagrams & Manuals
2691079-01 (RZT26520)(2012) 26hp Bands 52-Inch Murray Zero Turn Rider View Diagrams & Manuals
1696286-00 (18-2869-32)(2012-13) Snow Fox 8tp 24-Inch Stiga Light Duty Dual Stage Snowthrower View Diagrams & Manuals
1696262-00 (18-2851-33)(2012) 1371 Pro, Stiga 16.5tp 28-Inch Dual Stage Snowthrower View Diagrams & Manuals
MH761650SE (1696201-00)(2012) Murray 16.5tp 30-Inch Dual Stage Snowthrower (Ce) View Diagrams & Manuals
BH1730SE (1696256-00)(2012) Bands 16.5tp 30-Inch Dual Stage Snowthrower (Ce) View Diagrams & Manuals
BP2132SE (1696257-00)(2012) Bands 21tp 32-Inch Dual Stage Snowthrower (Ce) View Diagrams & Manuals
1696263-00 (18-2852-33)(2012) 1581 Pro, Stiga 21tp 32-Inch Dual Stage Snowthrower View Diagrams & Manuals
2691041-02 (EZT2042)(2013) 20hp Bands W/42-Inch Mower Deck, Ce View Diagrams & Manuals
MH761650SE (1696201-01)(2013) Murray 16.5 Gross Tp 30-Inch Dual Stage Snowthrower (Ce) View Diagrams & Manuals
BH1730SE (1696256-01)(2013) Bands 16.5 Gross Tp 30-Inch Dual Stage Snowthrower (Ce) View Diagrams & Manuals
1730HD (1696414-00)(2013) Bands 16.5 Gross Tp 30-Inch Dual Stage Snowthrower View Diagrams & Manuals
BP2132S (1696159-01)(2013) Bands 21 Gross Tp 32-Inch Dual Stage Snowthrower View Diagrams & Manuals
BP2132SE (1696257-01)(2013) Bands 21 Gross Tp 32-Inch Dual Stage Snowthrower (Ce) View Diagrams & Manuals
1581 Pro (1696263-01 - 18-2852-33)(2013) Stiga 21tp 32-Inch Dual Stage Snowthrower View Diagrams & Manuals
1696160-01 (BP2138S)(2013) Bands 21 Gross Tp 38-Inch Dual Stage Snowthrower View Diagrams & Manuals
1696413-00 (1226HD)(2013-2015) Bands 11.5 Gross Tp 26-Inch Dual Stage Snowthrower View Diagrams & Manuals
1528HD (1696157-01)(2013) Bands 14.5 Gross Tp 28-Inch Dual Stage Snowthrower View Diagrams & Manuals
1371 Pro (1696262-01 - 18-2851-33)(2013) Stiga 16.5tp 28-Inch Dual Stage Snowthrower View Diagrams & Manuals
BP2132SE (1696482-00)(2015) Bands 21 Gross Tp 32-Inch Dual Stage Snowthrower (Ce) View Diagrams & Manuals
BP2132S (1696525-00)(2015) Bands 21 Gross Tp 32-Inch Dual Stage Snowthrower View Diagrams & Manuals
1226HD (1696413-00)(2013-2015) Bands 11.5 Gross Tp 26-Inch Dual Stage Snowthrower View Diagrams & Manuals
1528HD (1696504-00)(2015) Bands 14.5 Gross Tp 28-Inch Dual Stage Snowthrower View Diagrams & Manuals
BH1730SE (1696481-00)(2015) Bands 16.5 Gross Tp 30-Inch Dual Stage Snowthrower (Ce) View Diagrams & Manuals
MH761650SE (1696487-00)(2015) Murray 16.5 Gross Tp 30-Inch Dual Stage Snowthrower (Ce) View Diagrams & Manuals
MH761650SE (1696487-01)(2015) Murray 16.5 Gross Tp 30-Inch Dual Stage Snowthrower (Ce) View Diagrams & Manuals
1730HD (1696505-00)(2015) Bands 16.5 Gross Tp 30-Inch Dual Stage Snowthrower View Diagrams & Manuals
PA1330ESS (1696572-00)(2015) Parton 16.5 Gross Tp 30-Inch Dual Stage Snowthrower View Diagrams & Manuals
Snapper
10287E (1694603) 28" 10 Hp Two Stage Large Frame Snow Thrower 2005 Series 7 View Diagrams & Manuals
105287E (1694855) 28" 10.5 Hp Two Stage Large Frame Snow Thrower 2006 Series 7 View Diagrams & Manuals
11327E (1694604) 32" 11 Hp Two Stage Large Frame Snow Thrower 2005 Series 7 View Diagrams & Manuals
115327E (1694857) 32" 11.5 Hp Two Stage Large Frame Snow Thrower 2006 Series 7 View Diagrams & Manuals
12387E (1694605) 38" 12 Hp Two Stage Large Frame Snow Thrower 2005 Series 7 View Diagrams & Manuals
13387E (1694859) 38" 13 Hp Two Stage Large Frame Snow Thrower 2006 Series 7 View Diagrams & Manuals
9247E (1694602) 24" 9 Hp Two Stage Large Frame Snow Thrower 2005 Series 7 View Diagrams & Manuals
95247E (1694853) 24" 9.5 Hp Two Stage Large Frame Snow Thrower 2006 Series 7 View Diagrams & Manuals
E10287 (1694607) 28" 10 Hp Two Stage Large Frame Snow Thrower 2005 Euro Series 7 View Diagrams & Manuals
E105287 (1694856) 28" 10.5 Hp Two Stage Large Frame Snow Thrower 2006 Euro Series 7 View Diagrams & Manuals
E11327 (1694608) 32" 11 Hp Two Stage Large Frame Snow Thrower 2005 Euro Series 7 View Diagrams & Manuals
E115327 (1694858) 32" 11.5 Hp Two Stage Large Frame Snow Thrower 2006 Euro Series 7 View Diagrams & Manuals
E12387 (1694609) 38" 12 Hp Two Stage Large Frame Snow Thrower 2005 Euro Series 7 View Diagrams & Manuals
E13387 (1694860) 38" 13 Hp Two Stage Large Frame Snow Thrower 2006 Euro Series 7 View Diagrams & Manuals
E9247 (1694606) 24" 9 Hp Two Stage Large Frame Snow Thrower 2005 Euro Series 7 View Diagrams & Manuals
E95247 (1694854) 24" 9.5 Hp Two Stage Large Frame Snow Thrower 2006 Euro Series 7 View Diagrams & Manuals
105308E (1694995) 30" 10.5 Hp Two Stage Large Frame Snow Thrower Series 8 View Diagrams & Manuals
115328E (1694996) 32" 11.5 Hp Two Stage Large Frame Snow Thrower Series 8 View Diagrams & Manuals
13388E (1695097) 38" 13 Hp Two Stage Large Frame Snow Thrower Series 8 View Diagrams & Manuals
85268E (1694993) 26" 8.5 Hp Two Stage Large Frame Snow Thrower Series 8 View Diagrams & Manuals
95288E (1694994) 28" 9.5 Hp Two Stage Large Frame Snow Thrower Series 8 View Diagrams & Manuals
E105308E (1695095) 30" 10.5 Hp Two Stage Large Frame Snow Thrower Euro Series 8 View Diagrams & Manuals
E115328E (1695096) 32" 11.5 Hp Two Stage Large Frame Snow Thrower Euro Series 8 View Diagrams & Manuals
E13388E (1695098) 38" 13 Hp Two Stage Large Frame Snow Thrower Euro Series 8 View Diagrams & Manuals
E85268E (1695093) 26" 8.5 Hp Two Stage Large Frame Snow Thrower Euro Series 8 View Diagrams & Manuals
E95288E (1695094) 28" 9.5 Hp Two Stage Large Frame Snow Thrower Euro Series 8 View Diagrams & Manuals
1695297 Snowthrower, Single Stage, 42" View Diagrams & Manuals
1695298 Snowthrower, Single Stage, 46" View Diagrams & Manuals
1695360 Snowthrower, Two Stage, 42" View Diagrams & Manuals
1696127-00 - 46" Rotary Mower View Diagrams & Manuals
1696128-00 - 52" Rotary Mower View Diagrams & Manuals
LT2146 (2690978) 46" 21 Hp Lawn Tractor Lt200 Series View Diagrams & Manuals
LT2452 (2690980) 52" 24 Hp Lawn Tractor Lt200 Series View Diagrams & Manuals
LT2246 0) 46" Hydro Drive Lawn Tractor Rmo Lt 300 Series View Diagrams & Manuals
EZT2042 42" (107Cm) 20Hp, 285Z Series Mower View Diagrams & Manuals
RZT21420 (7800795) 42" 21 Hp Rzt Twin Stick Series 285Z View Diagrams & Manuals
RZT26520 (7800632) 52" 26 Hp Rzt Twin Stick 285Z Series View Diagrams & Manuals
RZT27460 (7800578) 46" 27 Hp Rzt Twin Stick 285Z Series View Diagrams & Manuals
SC18330 (7800762) 33" 18.5Hp Zt Twin Stick Rider 150Z Series View Diagrams & Manuals
SC18533 (7800269) 33" 18.5Hp Zt Twin Stick Rider 150Z Series View Diagrams & Manuals
SC2142 (7800386) 42" 21Hp Zt Twin Stick Rider 150Z Series View Diagrams & Manuals
SC21420 (7800763) 42" 18.5Hp Zt Twin Stick Rider 150Z Series View Diagrams & Manuals
SC2450 (7800391) 50" 24Hp Zt Twin Stick Rider 150Z Series View Diagrams & Manuals
SC2650 (7800387) 50" 26Hp Zt Twin Stick Rider 150Z Series View Diagrams & Manuals
SC26520 (7800630) 52" 26Hp Zt Twin Stick Rider 150Z Series View Diagrams & Manuals
NXT19542 (2690846) 42" 19.5 Hp Nxt200 Lawn Tractor Lt125 Series View Diagrams & Manuals
I7242E 24" 7 Hp Two Stage Intermediate Snow Thrower Series 2 View Diagrams & Manuals
EI5223 22" 5 Hp Two Stage Intermediate Snow Thrower Series 3 View Diagrams & Manuals
EI55223 22" 5.5 Hp Two Stage Intermediate Snow Thrower Series 3 View Diagrams & Manuals
EI7243 24" 7 Hp Two Stage Intermediate Snow Thrower Series 3 View Diagrams & Manuals
I4223 22" 4 Hp Two Stage Intermediate Snow Thrower Series 3 View Diagrams & Manuals
I5223 22" 5 Hp Two Stage Intermediate Snow Thrower Series 3 View Diagrams & Manuals
I55223 22" 5.5 Hp Two Stage Intermediate Snow Thrower Series 3 View Diagrams & Manuals
I6223 22" 6 Hp Two Stage Intermediate Snow Thrower Series 3 View Diagrams & Manuals
I7243 24" 7 Hp Two Stage Intermediate Snow Thrower Series 3 View Diagrams & Manuals
EI55224 22" 5.5 Hp Two Stage Intermediate Snow Thrower Euro Series 4 View Diagrams & Manuals
EI7244 24" 7 Hp Two Stage Intermediate Snow Thrower Euro Series 4 View Diagrams & Manuals
I55224 22" 5.5 Hp Two Stage Intermediate Snow Thrower Series 4 View Diagrams & Manuals
I7244 24" 7 Hp Two Stage Intermediate Snow Thrower Series 4 View Diagrams & Manuals
EI5225 (80494) 22" 5 Hp Two Stage Intermediate Snow Thrower Euro Series 5 View Diagrams & Manuals
EI75225 (7800001) 22" 7.5 Hp Two Stage Intermediate Snow Thrower Euro Series 5 View Diagrams & Manuals
EI8245 (80495) 24" 8 Hp Two Stage Intermediate Snow Thrower Euro Series 5 View Diagrams & Manuals
EI85245 (7800018) 24" 8.5 Hp Two Stage Intermediate Snow Thrower Euro Series 5 View Diagrams & Manuals
I5225 (85665) 22" 5 Hp Two Stage Intermediate Snow Thrower Series 5 View Diagrams & Manuals
I75225 (7800000) 22" 7.5 Hp Two Stage Intermediate Snow Thrower Series 5 View Diagrams & Manuals
I8245E (85666) 24" 8 Hp Two Stage Intermediate Snow Thrower Series 5 View Diagrams & Manuals
I85245E (7800017) 24" 8.5 Hp Two Stage Intermediate Snow Thrower Series 5 View Diagrams & Manuals
EI75246 (7800138) 24" 7.5 Hp Two Stage Intermediate Frame Snow Thrower Series 6 View Diagrams & Manuals
EI75246E (7800086) 24" 7.5 Hp Two Stage Intermediate Frame Snow Thrower Euro Series 6 View Diagrams & Manuals
I75246E (7800084) 24" 7.5 Hp Two Stage Intermediate Frame Snow Thrower Series 6 View Diagrams & Manuals
L1226E (1695324) 26" 11.0Gt Two Stage Large Frame Snow Thrower Series 2008 View Diagrams & Manuals
L1226EX (1695325) 26" 11.0Gt Two Stage Large Frame Snow Thrower Euro Series 2008 View Diagrams & Manuals
L1428E (1695328) 28" 13.5Gt Two Stage Large Frame Snow Thrower Series 2008 View Diagrams & Manuals
L1428EX (1695329) 28" 13.5Gt Two Stage Large Frame Snow Thrower Euro Series 2008 View Diagrams & Manuals
L1530E (1695332) 30" 14.5Gt Two Stage Large Frame Snow Thrower Series 2008 View Diagrams & Manuals
L1530EX (1695333) 30" 14.5Gt Two Stage Large Frame Snow Thrower Euro Series 2008 View Diagrams & Manuals
L1632E (1695336) 32" 15.5Gt Two Stage Large Frame Snow Thrower Series 2008 View Diagrams & Manuals
L1632EX (1695337) 32" 15.5Gt Two Stage Large Frame Snow Thrower Euro Series 2008 View Diagrams & Manuals
XL1738E (1695358) 38" 16.5Gt Two Stage Large Frame Snow Thrower Series 2008 View Diagrams & Manuals
XL1738EX (1695359) 38" 16.5Gt Two Stage Large Frame Snow Thrower Euro Series 2008 View Diagrams & Manuals
L1226E (1695571) 26" 11.5Gt Two Stage Large Frame Snowthrower Series 2009 View Diagrams & Manuals
L1226EX (1695671) 26" 11.5Tp Dual Stage Large Frame Snowthrower Ce/Export View Diagrams & Manuals
L1428E (1695572) 28" 13.5Gt Two Stage Large Frame Snowthrower Series 2009 View Diagrams & Manuals
L1428EX (1695673) 28" 13.5Tp Two Stage Large Frame Snowthrower Ce/Export View Diagrams & Manuals
L1630E (1695682) 30" 15.5Tp Two Stage Large Frame Snowthrower View Diagrams & Manuals
L1630EX (1695674) 30" 15.5Tp Dual Stage Large Frame Snowthrower Ce/Export View Diagrams & Manuals
P1732EX (1695738) 32" 17.0Tp Two Stage Large Frame Snowthrower Ce/Export View Diagrams & Manuals
P1738E (1695684) 38" 16.5Tp Two Stage Large Frame Snowthrower View Diagrams & Manuals
P1738EX (1695677) 38" 16.5Tp Dual Stage Large Frame Snowthrower Ce/Export View Diagrams & Manuals
XL1738E (1695476) 38" 16.5Gt Two Stage Large Frame Snowthrower Euro Series 2009 View Diagrams & Manuals
XL1738EX (1695481) 38" 16.5Gt Two Stage Large Frame Snowthrower Euro Series 2009 View Diagrams & Manuals
L1226E (1695847) 26" 11.5Tp Two Stage Large Frame Snowthrower View Diagrams & Manuals
L1226EX (1695853) 26" 11.5Tp Two Stage Large Frame Snowthrower Export View Diagrams & Manuals
L1528E (1695848) 28" 14.5Tp Two Stage Large Frame Snowthrower View Diagrams & Manuals
L1528EX (1695854) 28" 14.5Tp Two Stage Large Frame Snowthrower Export View Diagrams & Manuals
L1730E (1695849) 30" 16.5Tp Two Stage Large Frame Snowthrower View Diagrams & Manuals
L1730EX (1695855) 30" 16.5Tp Two Stage Large Frame Snowthrower Export View Diagrams & Manuals
L1732EX (1695856) 32" 16.5Tp Two Stage Large Frame Snowthrower Export View Diagrams & Manuals
XL1738E (1695850) 38" 16.5Tp Two Stage Large Frame Snowthrower View Diagrams & Manuals
L1226E (1696004) 26" 11.5Tp Large Frame Snowthrower View Diagrams & Manuals
L1226EX (1696010) 26" 11.5Tp Large Frame Snowthrower View Diagrams & Manuals
L1528E (1696005) 28" 14.5Tp Large Frame Snowthrower View Diagrams & Manuals
L1528EX (1696011) 28" 14.5Tp Large Frame Snowthrower View Diagrams & Manuals
L1730E (1696006) 30" 16.5Tp Large Frame Snowthrower View Diagrams & Manuals
L1730EX (1696012) 30" 16.5Tp Large Frame Snowthrower View Diagrams & Manuals
XL1738E (1696007) 38" 16.5Tp Large Frame Snowthrower View Diagrams & Manuals
H1226E 26" 11.5Tp Large Frame Snowthrower View Diagrams & Manuals
H1528SE 28" 14.5Tp Large Frame Snowthrower View Diagrams & Manuals
H1730E 30" 16.5Tp Large Frame Snowthrower View Diagrams & Manuals
P2132E 32" 21Tp Large Frame Snowthrower View Diagrams & Manuals
SNH1528SE 28" 14.5Tp Large Frame Snowthrower View Diagrams & Manuals
SNH1730SE 30" 16.5Tp Large Frame Snowthrower View Diagrams & Manuals
SNP2132SE 32" 21Tp Large Frame Snowthrower View Diagrams & Manuals
SNH1226E 26" 11.5Tp Intermediate Frame Snowthrower View Diagrams & Manuals
I4220 22" 4 Hp Two Stage Intermediate Snow Thrower Series 0 View Diagrams & Manuals
I5240 24" 5 Hp Two Stage Intermediate Snow Thrower Series 0 View Diagrams & Manuals
NI4220 22" 4 Hp Two Stage Intermediate Snow Thrower Series 0 View Diagrams & Manuals
NI6220 22" 6 Hp Two Stage Intermediate Snow Thrower Series 0 View Diagrams & Manuals
NI7240 24" 7 Hp Two Stage Intermediate Snow Thrower Series 0 View Diagrams & Manuals
GI4221B 22" 4 Hp Two Stage Intermediate Snow Thrower Series 1 View Diagrams & Manuals
I4221 22" 4 Hp Two Stage Intermediate Snow Thrower Series 1 View Diagrams & Manuals
I5221 22" 5 Hp Two Stage Intermediate Snow Thrower Series 1 View Diagrams & Manuals
I5241 24" 5 Hp Two Stage Intermediate Snow Thrower Series 1 View Diagrams & Manuals
I7241 24" 7 Hp Two Stage Intermediate Snow Thrower Series 1 View Diagrams & Manuals
GI5242 24" 5 Hp Two Stage Intermediate Snow Thrower Series 2 View Diagrams & Manuals
I4222 22" 4 Hp Two Stage Intermediate Snow Thrower Series 2 View Diagrams & Manuals
I4222E 22" 4 Hp Two Stage Intermediate Snow Thrower Series 2 View Diagrams & Manuals
I5222 22" 5 Hp Two Stage Intermediate Snow Thrower Series 2 View Diagrams & Manuals
I5222E 22" 5 Hp Two Stage Intermediate Snow Thrower Series 2 View Diagrams & Manuals
I5242E 24" 5 Hp Two Stage Intermediate Snow Thrower Series 2 View Diagrams & Manuals
I7222 22" 7 Hp Two Stage Intermediate Snow Thrower Series 2 View Diagrams & Manuals
I7222E 22" 7 Hp Two Stage Intermediate Snow Thrower Series 2 View Diagrams & Manuals
I7242 24" 7 Hp Two Stage Intermediate Snow Thrower Series 2 View Diagrams & Manuals
NXT2242 (2691023) 42" 22 Hp Nxt200 Lawn Tractor Lt125 Series View Diagrams & Manuals
NXT2346 (2690847) 46" 23 Hp Nxt200 Lawn Tractor Lt125 Series View Diagrams & Manuals
NXT2452 (2691010) 52" 24 Hp Nxt200 Lawn Tractor Lt125 Series View Diagrams & Manuals
NXT2652 (2691027) 52" 26 Hp Nxt200 Lawn Tractor Lt125 Series View Diagrams & Manuals
NXT2752 (2690848) 52" 27 Hp Nxt200 Lawn Tractor Lt125 Series View Diagrams & Manuals
924I 1695313 24" 9.0Tp Intermediate Snow Thrower Series 2008 View Diagrams & Manuals
924IE 1695314 24" 9.0Tp Intermediate Snow Thrower Euro Series 2008 View Diagrams & Manuals
924IR 1695411 24" 9.0Tp Intermediate Snow Thrower Euro Series 2008 View Diagrams & Manuals
ZT1842 42" 18 Hp Zt Twin Stick Rider 200Z Series View Diagrams & Manuals
ZT2042 42" 20 Hp Zt Twin Stick Rider 200Z Series View Diagrams & Manuals
ZT2042150ZBVE 2690645 42" 20 Hp Ztr Twin Stick 150Z Series View Diagrams & Manuals
ZT2142 2691031 42" 21 Hp Zt Twin Stick Rider 200Z Series View Diagrams & Manuals
ZT21546 46" 21.5 Hp Zt Twin Stick Rider 200Z Series View Diagrams & Manuals
ZT2246 46" 22 Hp Zt Twin Stick Rider 200Z Series View Diagrams & Manuals
ZT2446 46" 24 Hp 300Z Series Ztr View Diagrams & Manuals
ZT2450150ZBVE 2690647 50" 24 Hp Ztr Twin Stick 150Z Series View Diagrams & Manuals
ZT2752 52" 27 Hp 300Z Series Ztr View Diagrams & Manuals
YT2452 0) 52" 24Hp Hydro Drive Rmo Yard Tractor Yt400 Series View Diagrams & Manuals
YT2452F 2690938 52" 24 Hp Hydro Drive Rmo Yard Tractor Yt400 Series View Diagrams & Manuals
CSC18533 7800392 33" 18.5Hp Zt Twin Stick Rider 150Z Series View Diagrams & Manuals
CSC2142 7800393 42" 21Hp Zt Twin Stick Rider 150Z Series View Diagrams & Manuals
CSC2650 7800394 50" 26Hp Zt Twin Stick Rider 150Z Series View Diagrams & Manuals
ESC20420 2690716 42" 20Hp Zt Twin Stick Rider 150Z Series Ce/Export View Diagrams & Manuals
RZT26520 7800765 52-In. 26 Hp Rzt Twin Stick 285Z Series View Diagrams & Manuals
1694295 Snowthrower, Single Stage, 42-Inch View Diagrams & Manuals
1695360-01 Snowthrower Attachment, Two Stage, 42-Inch View Diagrams & Manuals
1695313 - 924I (Series 2008) 24-Inch 9.0tp Intermediate Snow Thrower View Diagrams & Manuals
924IE (Euro Series)(1695314)(2008) 24-Inch 9.0tp Intermediate Snow Thrower Euro View Diagrams & Manuals
924IR (Euro Series)(1695411)(2008) 24-Inch 9.0tp Intermediate Snow Thrower Euro View Diagrams & Manuals
9247E (Series 7)(1694602)(2005) 24-Inch 9 Hp Two Stage Large Frame Snow Thrower View Diagrams & Manuals
10287E (Series 7)(1694603)(2005) 28-Inch 10 Hp Two Stage Large Frame Snow Thrower View Diagrams & Manuals
11327E (Series 7)(1694604)(2005) 32-Inch 11 Hp Two Stage Large Frame Snow Thrower View Diagrams & Manuals
12387E (Series 7)(1694605)(2005) 38-Inch 12 Hp Two Stage Large Frame Snow Thrower View Diagrams & Manuals
SNH1226E (1696223-00) 26-Inch 11.5tp Intermediate Frame Snowthrower (Ce/Export) View Diagrams & Manuals
SNH1226E (1696223-01) 26-Inch 11.5tp Intermediate Frame Snowthrower (Ce/Export) View Diagrams & Manuals
H1528ES (1696925-00)(2019) 14.5 Gross Tp 28-Inch Steerable Dual Stage Snowthrower View Diagrams & Manuals
NI4220 (Series 0)(7080675) 22-Inch 4 Hp Two Stage Intermediate Snow Thrower View Diagrams & Manuals
NI6220 (Series 0)(7080676) 22-Inch 6 Hp Two Stage Intermediate Snow Thrower View Diagrams & Manuals
NI7240 (Series 0)(7080677) 24-Inch 7 Hp Two Stage Intermediate Snow Thrower View Diagrams & Manuals
I4220 (Series 0)(83201) 22-Inch 4 Hp Two Stage Intermediate Snow Thrower View Diagrams & Manuals
I5240 (Series 0)(86518) 24-Inch 5 Hp Two Stage Intermediate Snow Thrower View Diagrams & Manuals
I4221 (Series 1)(80158) 22-Inch 4 Hp Two Stage Intermediate Snow Thrower View Diagrams & Manuals
I5241 (Series 1)(86519) 24-Inch 5 Hp Two Stage Intermediate Snow Thrower View Diagrams & Manuals
E12387 (Series 7)(1694609) 38-Inch 12 Hp Two Stage Large Frame Snow Thrower Euro View Diagrams & Manuals
95247E (Series 7)(1694853)(2006) 24-Inch 9.5 Hp Two Stage Large Frame Snow Thrower View Diagrams & Manuals
E95247 (Series 7)(1694854) 24-Inch 9.5 Hp Two Stage Large Frame Snow Thrower Euro View Diagrams & Manuals
105287E (Series 7)(1694855)(2006) 28-Inch 10.5 Hp Two Stage Large Frame Snow Thrower View Diagrams & Manuals
E105287 (Series 7)(1694856) 28-Inch 10.5 Hp Two Stage Large Frame Snow Thrower Euro View Diagrams & Manuals
115327E (Series 7)(1694857)(2006) 32-Inch 11.5 Hp Two Stage Large Frame Snow Thrower View Diagrams & Manuals
E115327 (Series 7)(1694858) 32-Inch 11.5 Hp Two Stage Large Frame Snow Thrower Euro View Diagrams & Manuals
13387E (Series 7)(1694859)(2006) 38-Inch 13 Hp Two Stage Large Frame Snow Thrower View Diagrams & Manuals
E13387 (Series 7)(1694860) 38-Inch 13 Hp Two Stage Large Frame Snow Thrower Euro View Diagrams & Manuals
85268E (Series 8)(1694993) 26-Inch 8.5 Hp Two Stage Large Frame Snow Thrower View Diagrams & Manuals
95288E (Series 8)(1694994) 28-Inch 9.5 Hp Two Stage Large Frame Snow Thrower View Diagrams & Manuals
105308E (Series 8)(1694995) 30-Inch 10.5 Hp Two Stage Large Frame Snow Thrower View Diagrams & Manuals
I7241 (Series 1)(86640) 24-Inch 7 Hp Two Stage Intermediate Snow Thrower View Diagrams & Manuals
I5221 (Series 1)(86659) 22-Inch 5 Hp Two Stage Intermediate Snow Thrower View Diagrams & Manuals
GI4221B (Series 1)(86669) 22-Inch 4 Hp Two Stage Intermediate Snow Thrower View Diagrams & Manuals
I4222E (Series 2)(80002) 22-Inch 4 Hp Two Stage Intermediate Snow Thrower View Diagrams & Manuals
I5242E (Series 2)(80004) 24-Inch 5 Hp Two Stage Intermediate Snow Thrower View Diagrams & Manuals
I7242E (Series 2)(80005) 24-Inch 7 Hp Two Stage Intermediate Snow Thrower View Diagrams & Manuals
GI5242 (Series 2)(80019) 24-Inch 5 Hp Two Stage Intermediate Snow Thrower View Diagrams & Manuals
I7242 (Series 2)(80160) 24-Inch 7 Hp Two Stage Intermediate Snow Thrower View Diagrams & Manuals
I5222E (Series 2)(80243) 22-Inch 5 Hp Two Stage Intermediate Snow Thrower View Diagrams & Manuals
I7222E (Series 2)(80245) 22-Inch 7 Hp Two Stage Intermediate Snow Thrower View Diagrams & Manuals
I5222 (Series 2)(80307) 22-Inch 5 Hp Two Stage Intermediate Snow Thrower View Diagrams & Manuals
I4222 (Series 2)(80356) 22-Inch 4 Hp Two Stage Intermediate Snow Thrower View Diagrams & Manuals
I7222 (Series 2)(80361) 22-Inch 7 Hp Two Stage Intermediate Snow Thrower View Diagrams & Manuals
I4223 (Series 3)(80588) 22-Inch 4 Hp Two Stage Intermediate Snow Thrower View Diagrams & Manuals
I6223 (Series 3)(80589) 22-Inch 6 Hp Two Stage Intermediate Snow Thrower View Diagrams & Manuals
I7243 (Series 3)(80593) 24-Inch 7 Hp Two Stage Intermediate Snow Thrower View Diagrams & Manuals
I5223 (Series 3)(80844) 22-Inch 5 Hp Two Stage Intermediate Snow Thrower View Diagrams & Manuals
I55223 (Series 3)(82496) 22-Inch 5.5 Hp Two Stage Intermediate Snow Thrower View Diagrams & Manuals
13388E (Series 8)(1695097) 38-Inch 13 Hp Two Stage Large Frame Snow Thrower View Diagrams & Manuals
EI55223 (Series 3)(82497) 22-Inch 5.5 Hp Two Stage Intermediate Snow Thrower View Diagrams & Manuals
EI55224 (Series 4)(84678) 22-Inch 5.5 Hp Two Stage Intermediate Snow Thrower Euro View Diagrams & Manuals
I55224 (Series 4)(84712) 22-Inch 5.5 Hp Two Stage Intermediate Snow Thrower View Diagrams & Manuals
E13388E (Series 8)(1695098) 38-Inch 13 Hp Two Stage Large Frame Snow Thrower Euro View Diagrams & Manuals
I7244 (Series 4)(84909) 24-Inch 7 Hp Two Stage Intermediate Snow Thrower View Diagrams & Manuals
EI7244 (Series 4)(84910) 24-Inch 7 Hp Two Stage Intermediate Snow Thrower Euro View Diagrams & Manuals
EI5225 (Series 5)(7080494) 22-Inch 5 Hp Two Stage Intermediate Snow Thrower Euro View Diagrams & Manuals
I75225 (Series 5)(7800000) 22-Inch 7.5 Hp Two Stage Intermediate Snow Thrower View Diagrams & Manuals
EI75225 (Series 5)(7800001) 22-Inch 7.5 Hp Two Stage Intermediate Snow Thrower Euro View Diagrams & Manuals
EI5223 (Series 3)(80867) 22-Inch 5 Hp Two Stage Intermediate Snow Thrower View Diagrams & Manuals
I85245E (Series 5)(7800017) 24-Inch 8.5 Hp Two Stage Intermediate Snow Thrower Euro View Diagrams & Manuals
EI85245 (Series 5)(7800018) 24-Inch 8.5 Hp Two Stage Intermediate Snow Thrower Euro View Diagrams & Manuals
EI8245 (Series 5)(80495) 24-Inch 8 Hp Two Stage Intermediate Snow Thrower Euro View Diagrams & Manuals
I5225 (Series 5)(85665) 22-Inch 5 Hp Two Stage Intermediate Snow Thrower View Diagrams & Manuals
I8245E (Series 5)(85666) 24-Inch 8 Hp Two Stage Intermediate Snow Thrower View Diagrams & Manuals
I75246E (Series 6)(7800084) 24-Inch 7.5 Hp Two Stage Intermediate Frame Snow Thrower View Diagrams & Manuals
EI75246E (Series 6)(7800086) 24-Inch 7.5 Hp Two Stage Intermediate Frame Snow Thrower Euro View Diagrams & Manuals
EI75246 (Series 6)(7800138) 24-Inch 7.5 Hp Two Stage Intermediate Frame Snow Thrower View Diagrams & Manuals
115328E (Series 8)(1694996) 32-Inch 11.5 Hp Two Stage Large Frame Snow Thrower View Diagrams & Manuals
EI7243 (Series 3)(80870) 24-Inch 7 Hp Two Stage Intermediate Snow Thrower View Diagrams & Manuals
E85268E (Series 8)(1695093) 26-Inch 8.5 Hp Two Stage Large Frame Snow Thrower Euro View Diagrams & Manuals
E95288E (Series 8)(1695094) 28-Inch 9.5 Hp Two Stage Large Frame Snow Thrower Euro View Diagrams & Manuals
E105308E (Series 8)(1695095) 30-Inch 10.5 Hp Two Stage Large Frame Snow Thrower Euro View Diagrams & Manuals
E115328E (Series 8)(1695096) 32-Inch 11.5 Hp Two Stage Large Frame Snow Thrower Euro View Diagrams & Manuals
E9247 (Series 7)(1694606) 24-Inch 9 Hp Two Stage Large Frame Snow Thrower 2005 Euro View Diagrams & Manuals
E10287 (Series 7)(1694607) 28-Inch 10 Hp Two Stage Large Frame Snow Thrower 2005 Euro View Diagrams & Manuals
E11327 (Series 7)(1694608) 32-Inch 11 Hp Two Stage Large Frame Snow Thrower 2005 Euro View Diagrams & Manuals
L1226E (Series 2008)(1695324) 26-Inch 11.0gt Two Stage Large Frame Snow Thrower View Diagrams & Manuals
L1226EX (Series 2008)(1695325) 26-Inch 11.0gt Two Stage Large Frame Snow Thrower Euro View Diagrams & Manuals
L1428E (Series 2008)(1695328) 28-Inch 13.5gt Two Stage Large Frame Snow Thrower View Diagrams & Manuals
L1428EX (Series 2008)(1695329) 28-Inch 13.5gt Two Stage Large Frame Snow Thrower Euro View Diagrams & Manuals
L1226E (1695679) 26-Inch 11.0tp Two Stage Large Frame Snow Thrower View Diagrams & Manuals
L1428E (1695681) 28-Inch 13.5tp Two Stage Large Frame Snow Thrower View Diagrams & Manuals
L1530E (Series 2008)(1695332) 30-Inch 14.5gt Two Stage Large Frame Snow Thrower View Diagrams & Manuals
L1530EX (Series 2008)(1695333) 30-Inch 14.5gt Two Stage Large Frame Snow Thrower Euro View Diagrams & Manuals
L1632E (Series 2008)(1695336) 32-Inch 15.5gt Two Stage Large Frame Snow Thrower View Diagrams & Manuals
L1632EX (Series 2008)(1695337) 32-Inch 15.5gt Two Stage Large Frame Snow Thrower Euro View Diagrams & Manuals
XL1738E (Series 2008)(1695358) 38-Inch 16.5gt Two Stage Large Frame Snow Thrower View Diagrams & Manuals
XL1738EX (Series 2008)(1695359) 38-Inch 16.5gt Two Stage Large Frame Snow Thrower Euro View Diagrams & Manuals
XL1738E (Euro Series)(1695476)(2009) 38-Inch 16.5gt Two Stage Large Frame Snow Thrower Euro View Diagrams & Manuals
XL1738EX (Euro Series)(1695481)(2009) 38-Inch 16.5gt Two Stage Large Frame Snow Thrower Euro View Diagrams & Manuals
L1226E (1695571)(2009) 26-Inch 11.5gt Two Stage Large Frame Snow Thrower View Diagrams & Manuals
L1428E (1695572)(2009) 28-Inch 13.5gt Two Stage Large Frame Snow Thrower View Diagrams & Manuals
SNH1528SE (1696011-01) 28-Inch 14.5tp Large Frame Snowthrower (Ce/Export) View Diagrams & Manuals
P2132E (1696179-00) 32-Inch 21tp Large Frame Snowthrower View Diagrams & Manuals
SNP2132SE (1696224-00) 32-Inch 21tp Large Frame Snowthrower (Ce/Export) View Diagrams & Manuals
SNH1730SE (1696012-01) 30-Inch 16.5tp Large Frame Snowthrower (Ce/Export) View Diagrams & Manuals
H1226E (1696176-00) 26-Inch 11.5tp Large Frame Snowthrower View Diagrams & Manuals
SNH1528SE (1696011-02) 28-Inch 14.5tp Large Frame Snowthrower (Ce/Export) View Diagrams & Manuals
H1528SE (1696177-00) 28-Inch 14.5tp Large Frame Snowthrower View Diagrams & Manuals
H1730E (1696178-00) 30-Inch 16.5tp Large Frame Snowthrower View Diagrams & Manuals
SNH1730SE (1696012-02) 30-Inch 16.5tp Large Frame Snowthrower (Ce/Export) View Diagrams & Manuals
H1226E (1696176-01) 26-Inch 11.5tp Large Frame Snowthrower View Diagrams & Manuals
H1528SE (1696177-01) 28-Inch 14.5tp Large Frame Snowthrower View Diagrams & Manuals
H1730E (1696178-01) 30-Inch 16.5tp Large Frame Snowthrower View Diagrams & Manuals
P2132E (1696179-01) 32-Inch 21tp Large Frame Snowthrower View Diagrams & Manuals
SNP2132SE (1696224-01) 32-Inch 21tp Large Frame Snowthrower (Ce/Export) View Diagrams & Manuals
H1226E (1696176-02) 26-Inch 11.5tp Large Frame Snowthrower View Diagrams & Manuals
SNH1528SE (1696489-00) 28-Inch 14.5tp Large Frame Snowthrower (Ce/Export) View Diagrams & Manuals
SNH1730SE (1696490-00) 30-Inch 16.5tp Large Frame Snowthrower (Ce/Export) View Diagrams & Manuals
P2132E (1696491-00) 32-Inch 21tp Large Frame Snowthrower (Ce/Export) View Diagrams & Manuals
H1528SE (1696502-00) 28-Inch 14.5tp Large Frame Snowthrower View Diagrams & Manuals
H1730E (1696503-00) 30-Inch 16.5tp Large Frame Snowthrower View Diagrams & Manuals
P2132E (1696529-00) 32-Inch 21tp Large Frame Snowthrower View Diagrams & Manuals
H1730E (1696706-00) Hd, 30-Inch 16.5tp Large Frame Snowthrower View Diagrams & Manuals
NXT2652 (LT125 Series)(2691027)(NXT200) 52-Inch 26 Hp Lawn Tractor View Diagrams & Manuals
NXT2652 (LT125 Series)(2691028)(NXT200) 52-Inch 26 Hp Lawn Tractor , Canadian View Diagrams & Manuals
NXT2242 (LT125 Series)(2691024)(NXT200) 42-Inch 22 Hp Lawn Tractor, Canadian View Diagrams & Manuals
NXT2548 (LT125 Series)(2691188-00)(NXT200) 48-Inch 25 Gross Hp Lawn Tractor View Diagrams & Manuals
NXT2346 (LT125 Series)(2691025)(NXT200) 46-Inch 23 Hp Lawn Tractor View Diagrams & Manuals
NXT2346 (LT125 Series)(2691026)(NXT200) 46-Inch 23 Hp Lawn Tractor , Canadian View Diagrams & Manuals
NXT300 (LT125 Series)(2691249-00) 46-Inch 724cc Lawn Tractor, Export View Diagrams & Manuals
NXT19542 (LT125 Series)(2690846)(NXT200) 42-Inch 19.5 Hp Lawn Tractor View Diagrams & Manuals
NXT2346 (LT125 Series)(2690847)(NXT200) 46-Inch 23 Hp Lawn Tractor View Diagrams & Manuals
NXT2752 (LT125 Series)(2690848)(NXT200) 52-Inch 27 Hp Lawn Tractor View Diagrams & Manuals
LT2042 (LT9000 Series)(2691143-00) 42-Inch 20 Gross Hp Spx Lawn Tractor View Diagrams & Manuals
LT2246 (LT9000 Series)(2691145-00) 46-Inch 22 Gross Hp Hydro Drive Rmo Tractor View Diagrams & Manuals
NXT19542 (LT125 Series)(2690888)(NXT200) 42-Inch 19.5 Hp Lawn Tractor , Canadian View Diagrams & Manuals
NXT2346 (LT125 Series)(2690889)(NXT200) 46-Inch 23 Hp Lawn Tractor , Canadian View Diagrams & Manuals
NXT2752 (LT125 Series)(2690890)(NXT200) 52-Inch 27 Hp Lawn Tractor, Canadian View Diagrams & Manuals
NXT19542 (LT125 Series)(2690942)(NXT200) 42-Inch 19.5 Hp Lawn Tractor View Diagrams & Manuals
NXT2346 (LT125 Series)(2690943)(NXT200) 46-Inch 23 Hp Lawn Tractor View Diagrams & Manuals
NXT2752 (LT125 Series)(2690944)(NXT200) 52-Inch 27 Hp Lawn Tractor View Diagrams & Manuals
NXT2346 (LT125 Series)(2690984)(NXT200) 46-Inch 23 Hp Lawn Tractor , Ce/Export View Diagrams & Manuals
NXT2346 (LT125 Series)(2690984-01)(NXT200) 46-Inch 23 Hp Lawn Tractor , Ce/Export View Diagrams & Manuals
NXT2452 (LT125 Series)(2691010)(NXT200) 52-Inch 24 Hp Lawn Tractor View Diagrams & Manuals
NXT2242 (LT125 Series)(2691023-00)(NXT200) 42-Inch 22 Hp Lawn Tractor View Diagrams & Manuals
SPX2548 (150 Series)(2691282-00) 48-Inch Fabricated 25 Gross Hp Spx Lawn Tractor View Diagrams & Manuals
LT2246 (LT300 Series)(2691029-00) 46-Inch Hydro Drive Lawn Tractor Rmo Lt View Diagrams & Manuals
LT2246 (LT300 Series)(2691029-01) 46-Inch Hydro Drive Lawn Tractor Rmo Lt View Diagrams & Manuals
YT2452F (YT400 Series)(2690938-00) 52-Inch 24 Hp Hydro Drive Rmo Yard Tractor View Diagrams & Manuals
YT2452 (YT400 Series)(2691030-00) 52-Inch 24hp Hydro Drive Rmo Yard Tractor View Diagrams & Manuals
YT2452F (YT400 Series)(2691047-00) 52-Inch 24 Hp 4wd Hydro Drive Rmo Yard Tractor View Diagrams & Manuals
YT2452 (YTX400 Series)(2691250-00) 52-Inch 24 Hp Hydro Drive Rmo Yard Tractor (Export) View Diagrams & Manuals
NXT19542 (LT125 Series)(2690846) 42-Inch 19.5 Hp Nxt200 Lawn Tractor View Diagrams & Manuals
YT2652 (LT9500 Series)(2691147-00) 52-Inch 26 Gross Hp Hydro Drive Rmo Tractor View Diagrams & Manuals
LT2146 (LT200 Series)(2690978)(130.280110) 46-Inch 21 Hp Lawn Tractor View Diagrams & Manuals
LT2146 (LT200 Series)(2690978A)(130.280111) 46-Inch 21 Hp Lawn Tractor View Diagrams & Manuals
LT2452 (LT200 Series)(2690980)(130.280120) 52-Inch 24 Hp Lawn Tractor View Diagrams & Manuals
LT2452 (LT200 Series)(2690980A)(130.280121) 52-Inch 24 Hp Lawn Tractor View Diagrams & Manuals
EZT2042 (285Z Series)(2691043-00) 42-Inch (107cm) 20hp, Ce/Export) View Diagrams & Manuals
EZT2042 (285Z Series)(2691043-01) 42-Inch (107cm) 20hp, (Ce/Export) View Diagrams & Manuals
ZT2752 (300Z Series)(2691035-01) 52-Inch 27 Hp Ztr View Diagrams & Manuals
SC18533 (150Z Series)(7800269) 33-Inch 18.5hp Zt Twin Stick Rider View Diagrams & Manuals
EZT2042 (285Z Series)(2691043-02) 42-Inch (107cm) 20hp, (Ce/Export) View Diagrams & Manuals
SC2142 (150Z Series)(7800386) 42-Inch 21hp Zt Twin Stick Rider View Diagrams & Manuals
SC2650 (150Z Series)(7800387) 50-Inch 26hp Zt Twin Stick Rider View Diagrams & Manuals
EZT2042 (285Z Series)(2691043-03) 42-Inch (107cm) 20hp, (Ce/Export) View Diagrams & Manuals
EZT2042 (285Z Series)(2691043-04) 42-Inch (107cm) 20hp, (Ce/Export) View Diagrams & Manuals
ZT2042 (200Z Series)(2691135-00) 42-Inch 20 Hp Zt Twin Stick Rider View Diagrams & Manuals
ZT1842 (200Z Series)(2691136-00) 42-Inch 18 Hp Zt Twin Stick Rider View Diagrams & Manuals
ZT1842 (200Z Series)(2691136-01) 42-Inch 18 Hp Zt Twin Stick Rider View Diagrams & Manuals
ZT21546 (200Z Series)(2691137-00) 46-Inch 21.5 Hp Zt Twin Stick Rider View Diagrams & Manuals
ZT21546 (200Z Series)(2691137-01) 46-Inch 21.5 Hp Zt Twin Stick Rider View Diagrams & Manuals
ZT2242 (200Z Series)(2691164-00) 42-Inch 22 Hp Zt Twin Stick Rider View Diagrams & Manuals
ZT2346 (200Z Series)(2691165-00) 46-Inch 23 Hp Zt Twin Stick Rider View Diagrams & Manuals
RZT2552 (2691166-00) 52-Inch 25 Gross Hp Rzt Twin Stick 285z View Diagrams & Manuals
ESC20420 (150Z Series)(7800388) 42-Inch 20hp Zt Twin Stick Rider (Ce/Export) View Diagrams & Manuals
SC2142 (150Z Series)(7800390) 42-Inch 21hp Zt Twin Stick Rider View Diagrams & Manuals
ZT2548 (300Z Series)(2691167-00) 48-Inch Fabricated 25 Gross Hp Ztr View Diagrams & Manuals
SC2450 (150Z Series)(7800391) 50-Inch 24hp Zt Twin Stick Rider View Diagrams & Manuals
CSC18533 (150Z Series)(7800392) 33-Inch 18.5hp Zt Twin Stick Rider View Diagrams & Manuals
CSC2142 (150Z Series)(7800393) 42-Inch 21hp Zt Twin Stick Rider View Diagrams & Manuals
CSC2650 (150Z Series)(7800394) 50-Inch 26hp Zt Twin Stick Rider View Diagrams & Manuals
RZT27460 (285Z Series)(7800578) 46-Inch 27 Hp Rzt Twin Stick View Diagrams & Manuals
SC18533 (150Z Series)(7800620) 33-Inch 18.5hp Zt Twin Stick Rider View Diagrams & Manuals
SC2142 (150Z Series)(7800621) 42-Inch 21hp Zt Twin Stick Rider View Diagrams & Manuals
SC26520 (150Z Series)(7800630) 52-Inch 26hp Zt Twin Stick Rider View Diagrams & Manuals
RZT26520 (285Z Series)(7800632) 52-Inch 26 Hp Rzt Twin Stick View Diagrams & Manuals
SC18330 (150Z Series)(7800762) 33-Inch 18.5hp Zt Twin Stick Rider View Diagrams & Manuals
SC21420 (150Z Series)(7800763) 42-Inch 18.5hp Zt Twin Stick Rider View Diagrams & Manuals
RZT26520 (Series 285Z)(7800765) 52-Inch 26 Hp Rzt Twin Stick View Diagrams & Manuals
RZT26520 (Series 285Z)(7800765-01) 52-Inch 26 Hp Rzt Twin Stick View Diagrams & Manuals
RZT27460 (Series 285Z)(7800767-00) 46-Inch 27 Hp Rzt Twin Stick View Diagrams & Manuals
ZT2042150ZBVE (150Z Series)(2690645) 42-Inch 20 Hp Ztr Twin Stick View Diagrams & Manuals
ZT2450150ZBVE (150Z Series)(2690647) 50-Inch 24 Hp Ztr Twin Stick View Diagrams & Manuals
ESC20420 (150Z Series)(2690716) 42-Inch 20hp Zt Twin Stick Rider (Ce/Export) View Diagrams & Manuals
ZT2142 (200Z Series)(2691031) 42-Inch 21 Hp Zt Twin Stick Rider View Diagrams & Manuals
ZT2246 (200Z Series)(2691032-00) 46-Inch 22 Hp Zt Twin Stick Rider View Diagrams & Manuals
RZT27460 (Series 285Z)(7800767-01) 46-Inch 27 Hp Rzt Twin Stick View Diagrams & Manuals
RZT21420 (Series 285Z)(7800795) 42-Inch 21 Hp Rzt Twin Stick View Diagrams & Manuals
ZT2246 (200Z Series)(2691032-01) 46-Inch 22 Hp Zt Twin Stick Rider View Diagrams & Manuals
ZT2446 (300Z Series)(2691034-00) 46-Inch 24 Hp Ztr View Diagrams & Manuals
ZT2752 (300Z Series)(2691035-00) 52-Inch 27 Hp Ztr View Diagrams & Manuals
Simplicity
1691172 Snowblower View Diagrams & Manuals
1691364 Snowblower View Diagrams & Manuals
1691416 Snowblower View Diagrams & Manuals
1691417 Snowblower View Diagrams & Manuals
71691174 Snowblower View Diagrams & Manuals
71691404 Snowblower View Diagrams & Manuals
2690642 Axion, 20HP Zero Turn Rider View Diagrams & Manuals
2690644 Axion, 24HP Zero Turn Rider View Diagrams & Manuals
2690715 Axion, 20HP Zero Turn Rider View Diagrams & Manuals
2690770 Axion, 20HP Zero Turn Rider View Diagrams & Manuals
2690771 Axion, 24HP Zero Turn Rider View Diagrams & Manuals
7800360 Axion, 18.5HP Zero Turn Rider View Diagrams & Manuals
7800374 Axion, 21HP Zero Turn Rider View Diagrams & Manuals
7800375 Axion, 26HP Zero Turn Rider View Diagrams & Manuals
7800376 Axion, 20HP Zero Turn Rider View Diagrams & Manuals
7800378 Axion, 21HP Zero Turn Rider View Diagrams & Manuals
7800379 Axion, 26HP Zero Turn Rider View Diagrams & Manuals
7800380 Axion, 18.5HP Zero Turn Rider View Diagrams & Manuals
7800381 Axion, 21HP Zero Turn Rider View Diagrams & Manuals
1692469 Sno-Away 860M 24In (Ceexport) View Diagrams & Manuals
1692616 824E, 8Hp 24In Snowthrower (Es View Diagrams & Manuals
1693650 860M, 8Hp 24In Snowthrower View Diagrams & Manuals
1693651 860M, 8Hp 24In Snowthrower (Ce View Diagrams & Manuals
1693652 860Dlx, 8Hp 24In Snowthrower View Diagrams & Manuals
1693653 860Dlx, 8Hp 24In Snowthrower ( View Diagrams & Manuals
1693763 860M, 8Hp 24In Snowthrower View Diagrams & Manuals
1693775 860M, 8Hp 24In Snowthrower (Ce View Diagrams & Manuals
1693984 860M, 8Hp 24In Snowthrower View Diagrams & Manuals
1693985 860M, 8Hp 24In Snowthrower (Ce View Diagrams & Manuals
1694241 860Dlxe, 8Hp 24In Snowthrower View Diagrams & Manuals
1694242 860E, 8Hp 24In Snowthrower View Diagrams & Manuals
1694433 860E, 8Hp 24In Snowthrower View Diagrams & Manuals
1694434 860M, 8Hp 24In Snowthrower (Ce View Diagrams & Manuals
1694435 960M, 9Hp 24In Snowthrower (Ce View Diagrams & Manuals
1694436 1060M, 10Hp 24In Snowthrower ( View Diagrams & Manuals
1694439 960E, 9Hp 24In Snowthrower View Diagrams & Manuals
1694440 1060E, 10Hp 24In Snowthrower View Diagrams & Manuals
1694588 860E, 8Hp 24In (Es) View Diagrams & Manuals
1694589 9560E, 9.5Hp 24In Snowthrower View Diagrams & Manuals
1694590 1060E, 10Hp 24In Snowthrower View Diagrams & Manuals
1694596 860M, 8Hp 24In (Ms) (Ceexport) View Diagrams & Manuals
1694597 9560M, 9.5Hp 24In Snowthrower View Diagrams & Manuals
1694598 1060M, 10Hp 24In Snowthrower ( View Diagrams & Manuals
1694845 8560El, 8.5Hp Ohv 24In Snowthr View Diagrams & Manuals
1694846 8560Ex, 8.5Hp Ohv 24In Snowthr View Diagrams & Manuals
1694847 10560E, 10.5Hp 24In Snowthrowe View Diagrams & Manuals
1694848 10560Ex, 10.5Hp 24In Snowthrow View Diagrams & Manuals
1694867 9560E, 9.5Hp 24In Snowthrower View Diagrams & Manuals
1694914 9560Ex, 9.5Hp 24In Snowthrower View Diagrams & Manuals
1695074 P10524E, 10.5Hp 24In Snowthrow View Diagrams & Manuals
1695075 P10524E, 10.5Hp 24In Snowthrow View Diagrams & Manuals
1695302 924I, 9Tp 24In Snowthrower View Diagrams & Manuals
1695303 P1524E, 14.5Gt 24In Snowthrowe View Diagrams & Manuals
1695304 P1524Ex, 14.5Gt 24In Snowthrow View Diagrams & Manuals
1695311 924Ie, 9Tp 24In Snowthrower (C View Diagrams & Manuals
1695410 924Ir, 9Tp 24In Snowthrower (C View Diagrams & Manuals
2691048-00 0 - Etz20420, 20Hp Rider W42In View Diagrams & Manuals
2691048-01 1 - Etz20420, 20Hp Rider W42In View Diagrams & Manuals
7800579 Zt27460, 27Hp B&S Rider W46In View Diagrams & Manuals
7800633 Zt26520, 26Hp B&S Rider W52In View Diagrams & Manuals
7800766 Zt26520, 26Hp B&S Rider W52In View Diagrams & Manuals
7800766-01 1 - Zt26520, 26Hp B&S Rider W52 View Diagrams & Manuals
7800768 Zt27460, 27Hp B&S Rider W46In View Diagrams & Manuals
7800768-01 1 - Zt27460, 27Hp B&S Rider W46 View Diagrams & Manuals
7800796 Zt21420, 21Hp Rider W42In Mowe View Diagrams & Manuals
1691011 555M, 5Hp 22In Two-Stage Snowblower View Diagrams & Manuals
1691181 755E, 7Hp 22In Two-Stage Snowblower View Diagrams & Manuals
1691411 555M, 5Hp 22In Snowblower View Diagrams & Manuals
1691413 755E, 7Hp 22In Snowblower View Diagrams & Manuals
1691414 755M, 7Hp 22In Snowblower View Diagrams & Manuals
1691518 7Hp, 22In Two-Stage Snowblower View Diagrams & Manuals
1692615 722E, 7Hp 22In Snowblower View Diagrams & Manuals
1692680 555, 5Hp 22In Snowblower View Diagrams & Manuals
1692681 755E, 7Hp 22In Snowblower View Diagrams & Manuals
1692746 755M, 7Hp 22In Snowblower View Diagrams & Manuals
1693161 555M, 5Hp 22In Snowblower View Diagrams & Manuals
1693162 755E, 7Hp 22In Snowblower View Diagrams & Manuals
1693163 555M, 5Hp 22In Snowblower View Diagrams & Manuals
1693164 755M, 7Hp 22In Snowblower View Diagrams & Manuals
1693425 555M, 5Hp 22In Snowblower View Diagrams & Manuals
1693426 755E, 7Hp 22In Snowblower View Diagrams & Manuals
1693646 555M, 22In Snowblower View Diagrams & Manuals
1693647 555M, 5Hp 22In Snowblower View Diagrams & Manuals
1693648 755M 22In Snowblower View Diagrams & Manuals
1693649 755M, 7Hp Ohv 22In Snowblower View Diagrams & Manuals
1693980 555M, 5Hp 22In Snowblower View Diagrams & Manuals
1693981 555M, 5Hp 22In Snowblower View Diagrams & Manuals
1693982 755M, 7Hp 22In Snowblower View Diagrams & Manuals
1693983 755E, 7Hp 22In Snowblower View Diagrams & Manuals
1694587 555M, 5Hp 22In Snowblower View Diagrams & Manuals
1694595 555M, 5Hp 22In Snowblower View Diagrams & Manuals
1694836 7555M, 7.5Hp 22In Snowblower View Diagrams & Manuals
1694837 7555Ex, 7.5Hp 22In Snowblower View Diagrams & Manuals
1694849 11570E, 11.5Hp 28In Snowthrowe View Diagrams & Manuals
1694850 E11570, 11.5Hp 28In Snowthrowe View Diagrams & Manuals
1694985 L9570E, 9.5Hp 28In Snowthrower View Diagrams & Manuals
1695076 P11528E, 11.5Hp 28In Snowthrow View Diagrams & Manuals
1695077 P11528E, 11.5Hp 28In Snowthrow View Diagrams & Manuals
1695083 L9528Ex, 9.5Hp 28In Snowthrowe View Diagrams & Manuals
1695305 P1628E, 15.5Gt 28In Snowthrowe View Diagrams & Manuals
1695306 P1628Ex, 15.5Gt 28In Snowthrow View Diagrams & Manuals
1695330 L1428E, 13.5Gt 28In Snowthrowe View Diagrams & Manuals
1695331 L1428Ex, 13.5Gt 28In Snowthrow View Diagrams & Manuals
1695654 L1428Ex, 13.5Tp 28In Two-Stag View Diagrams & Manuals
1695656 P1628Ex, 15.5Tp 28In Two-Stag View Diagrams & Manuals
1695662 L1428E, 13.5Tp 28In Two-Stage View Diagrams & Manuals
1695666 P1628E, 15.5Tp 28In Two-Stage View Diagrams & Manuals
1695822 L1528E, 14.5Tp 28In Dual Stage View Diagrams & Manuals
1695825 P1728E, 16.5Tp 28In Dual Stag View Diagrams & Manuals
1695844 L1428Ex, 14.5Tp 28In Dual Stag View Diagrams & Manuals
1695903 P1728Ex, 16.5Tp 28In Professi View Diagrams & Manuals
1695903-01 1 - Sip1728Ex, 16.5Tp 28In Prof View Diagrams & Manuals
1695987 L1528E, 14.5Tp 28In Dual Stage View Diagrams & Manuals
1695990 P1728E, 16.5Tp 28In Dual Stag View Diagrams & Manuals
1695996 L1428Ex, 14.5Tp 28In Dual Stag View Diagrams & Manuals
1695996-01 1 - Sih1428Se, 14.5Tp 28In Dual View Diagrams & Manuals
1696237-00 0 - H1528E, 14.5Tp 28In Dual St View Diagrams & Manuals
1696240-00 0 - P1728E, 16.5Tp 28In Profess View Diagrams & Manuals
1694986 L10575E, 10.5Hp 30In Snowthrow View Diagrams & Manuals
1695084 L10530Ex, 10.5Hp 30In Snowthro View Diagrams & Manuals
1695334 L1530E, 14.5Gt 30In Snowthrowe View Diagrams & Manuals
1695335 L1530Ex, 14.5Gt 30In Snowthrow View Diagrams & Manuals
1695655 L1630Ex, 15.5Gt 30In Snowthrow View Diagrams & Manuals
2690566 1825H, 25Hp Hydro Wps Rmo And View Diagrams & Manuals
2690567 1827H, 27Hp Hydro Wps Rmo And View Diagrams & Manuals
1695665 P1524E, 14.5Gt 24In Snowthrowe View Diagrams & Manuals
1695824 P1524E, 14.5Gt 24In Dual Stage View Diagrams & Manuals
1695989 P1524E, 14.5Gt 24In Dual Stage View Diagrams & Manuals
1696239-00 0 - P1524E, 14.5Tp 24In Profess View Diagrams & Manuals
7800085 I7524E, 7.5Hp 24In Snowthrower View Diagrams & Manuals
7800087 I7524Ex, 7.5Hp 24In Snowthrowe View Diagrams & Manuals
1694984 L8565E, 8.5Hp 26In Snowthrower View Diagrams & Manuals
1695082 L8526Ex, 8.5Hp 26In Snowthrowe View Diagrams & Manuals
1695326 L1226E, 11.5Gt 26In Snowthrowe View Diagrams & Manuals
1695327 L1226E, 11.5Gt 26In Snowthrowe View Diagrams & Manuals
1695653 L1226Ex, 11.5Tp 26In Two-Stag View Diagrams & Manuals
1695660 L1226E, 11.5Tp 26In Snowthrow View Diagrams & Manuals
1695820 L1226E, 11.5Tp 26In Dual Stag View Diagrams & Manuals
1695843 L1226Ex, 11.5Tp 26In Dual Stag View Diagrams & Manuals
1695986 L1226E, 11.5Tp 26In Dual Stag View Diagrams & Manuals
1695995 L1226Ex, 11.5Tp 26In Dual Stag View Diagrams & Manuals
1696203-00 0 - Sih1226E, 11.5Tp 26In Dual View Diagrams & Manuals
1696236-00 0 - H1226E, 11.5Tp 26In Dual St View Diagrams & Manuals
1695663 L1630E, 15.5Gt 30In Snowthrowe View Diagrams & Manuals
1695823 L1730E, 16.5Gt 30In Dual Stage View Diagrams & Manuals
1695845 L1730Ex, 16.5Tp 30In Dual Stag View Diagrams & Manuals
1695988 L1730E, 16.5Gt 30In Dual Stage View Diagrams & Manuals
1695997 L1730Ex, 16.5Tp 30In Dual Stag View Diagrams & Manuals
1695997-01 1 - Sih1730Se, 16.5Tp 30In Dual View Diagrams & Manuals
1696238-00 0 - H1730E, 16.5Gt 30In Dual St View Diagrams & Manuals
1690546 1080, 10Hp 32In Two-Stage Snow View Diagrams & Manuals
1690675 10Hp, 32In Snowthrower (Ceexpo View Diagrams & Manuals
1690679 1080Dc,10Hp 32In Two-Stage Sno View Diagrams & Manuals
1690777 1080, 10Hp 32In Two-Stage Snow View Diagrams & Manuals
1690779 1080Dc, 10Hp 32In Two-Stage Sn View Diagrams & Manuals
1690831 10Hp, 12V120V 32In Snowthrower View Diagrams & Manuals
1691371 1080M, 10Hp 32In Snowthrower View Diagrams & Manuals
1691716 1080, 10Hp 32In Snowthrower (C View Diagrams & Manuals
1691776 1080S, 10Hp 32In Snowthrower View Diagrams & Manuals
1691779 1080S, 10Hp 32In Snowthrower View Diagrams & Manuals
1691899 1080S, 10Hp 32In Snowthrower ( View Diagrams & Manuals
1691948 Sno-Away 1080M, 10Hp 32In (Cee View Diagrams & Manuals
1693656 1180M, 11Hp 32In Snowthrower View Diagrams & Manuals
1693657 1180M, 11Hp 32In Snowthrower ( View Diagrams & Manuals
1694244 1180E, 11Hp 32In Snowthrower View Diagrams & Manuals
1694438 1280M, 12Hp 32In Snowthrower ( View Diagrams & Manuals
1694442 1280E, 12Hp 32In Snowthrower View Diagrams & Manuals
1694592 1280E, 12Hp 32In Snowthrower View Diagrams & Manuals
1694600 1280M, 12Hp 32In Snowthrower ( View Diagrams & Manuals
1694851 1380E, 13Hp 32In Snowthrower View Diagrams & Manuals
1694852 E1380, 13Hp 32In Snowthrower ( View Diagrams & Manuals
1694987 L11580E, 11.5Hp 32In Snowthrow View Diagrams & Manuals
1695078 P1332E, 13Hp 32In Snowthrower View Diagrams & Manuals
1695079 P1332E, 13Hp 32In Snowthrower View Diagrams & Manuals
1695307 P1732E, 16.5Gt 32In Snowthrowe View Diagrams & Manuals
1695308 P1732Ex, 16.5Gt 32In Snowthrow View Diagrams & Manuals
1695338 L1632E, 15.5Gt 32In Snowthrowe View Diagrams & Manuals
1695657 P1732Ex, 16.5Gt 32In Snowthrow View Diagrams & Manuals
1695667 P1732E, 16.5Gt 32In Snowthrowe View Diagrams & Manuals
1695826 P1732E, 16.5Gt 32In Dual Stage View Diagrams & Manuals
1695846 P1732Ex, 16.5Gt 32In Dual Stag View Diagrams & Manuals
1695991 P1732E, 16.5Gt 32In Dual Stage View Diagrams & Manuals
1696204-00 0 - Sip2132Se, 21.0Tp 32In Prof View Diagrams & Manuals
1696241-00 0 - P2132E, 21.0Tp 32In Profess View Diagrams & Manuals
1694237 1390E, 38In 13Hp Snowthrower View Diagrams & Manuals
1694266 1390M, 13Hp 38In Snowthrower ( View Diagrams & Manuals
1694443 1390M, 13Hp 38In Snowthrower ( View Diagrams & Manuals
1694444 1390E, 13Hp 38In Snowthrower View Diagrams & Manuals
1694593 1390E, 38In 13Hp Snowthrower View Diagrams & Manuals
1694601 1390M, 13Hp 38In Snowthrower ( View Diagrams & Manuals
1694872 1390E, 13Hp 38In Snowthrower View Diagrams & Manuals
1694915 1390Ex, 13Hp 38In Snowthrower View Diagrams & Manuals
1695080 P1338E, 13Hp 38In Snowthrower View Diagrams & Manuals
1695081 P1338E, 13Hp 38In Snowthrower View Diagrams & Manuals
1695309 P1738E, 16.5Gt 38In Snowthrowe View Diagrams & Manuals
1695310 P1738Ex, 16.5Gt 38In Snowthrow View Diagrams & Manuals
1695658 P1738Ex, 16.5Gt 38In Snowthrow View Diagrams & Manuals
1695668 P1738E, 16.5Gt 38In Snowthrowe View Diagrams & Manuals
1695827 P1738E, 16.5Gt 38In Dual Stage View Diagrams & Manuals
1695992 P1738E, 16.5Gt 38In Dual Stage View Diagrams & Manuals
1696242-00 0 - P2138E, 21.0Tp 38In Profess View Diagrams & Manuals
1690543 560, 5Hp 24In Two-Stage Snowth View Diagrams & Manuals
1690544 760, 7Hp 24In Two-Stage Snowth View Diagrams & Manuals
1690678 870Dc, 8Hp 24In Two-Stage Snow View Diagrams & Manuals
1690775 560, 5Hp 24In Two-Stage Snowth View Diagrams & Manuals
1690776 870, 8Hp 24In Two-Stage Snowth View Diagrams & Manuals
1690778 870Dc, 8Hp 24In Two-Stage Snow View Diagrams & Manuals
1690903 760 M, 7Hp 24In Two-Stage Snow View Diagrams & Manuals
1691023 860E, 8Hp 24In Two-Stage Snowt View Diagrams & Manuals
1691024 860E, 8Hp 24In Two-Stage Snowt View Diagrams & Manuals
1691368 560M, 5Hp 24In Snowthrower View Diagrams & Manuals
1691374 560M, 5Hp 24In Snowthrower View Diagrams & Manuals
1691376 860E, 8Hp 24In Snowthrower View Diagrams & Manuals
1691400 8Hp, 24In Two-Stage Snowthrowe View Diagrams & Manuals
1691401 860E, 8Hp 24In Snowthrower View Diagrams & Manuals
1691403 860, 24In Snowthrower (Ceexpor View Diagrams & Manuals
1691707 860E, 8Hp 24In Snowthrower View Diagrams & Manuals
1691708 860, 8Hp 24In Snowthrower (Ms) View Diagrams & Manuals
1691774 560S, 5Hp 24In Snowthrower View Diagrams & Manuals
1691777 860Se, 8Hp 24In Snowthrower View Diagrams & Manuals
1691778 860S, 8Hp 24In Snowthrower View Diagrams & Manuals
1691900 860E, 8Hp 24In Snowthrower (Sn View Diagrams & Manuals
1691946 860S, 8Hp 24In Snowthrower View Diagrams & Manuals
2691097-00 0 - Zt2321, 21Hp B&S Rider W42I View Diagrams & Manuals
2691098-00 0 - Zt2324, 24Hp B&S Rider W46I View Diagrams & Manuals
7800817 Mrzt26520, 26Hp B&S Rider W52I View Diagrams & Manuals
7800818 Mrzt27460, 27Hp B&S Rider W46I View Diagrams & Manuals
7800850-00 0 - Mrzt26520, 26Hp B&S Rider W View Diagrams & Manuals
7800850-01 1 - Mrzt26520, 26Hp B&S Rider W View Diagrams & Manuals
2690878 2620, 20Hp Hydro Rmo And 46In View Diagrams & Manuals
2690913 2622, 22Hp Hydro Rmo And 44In View Diagrams & Manuals
2690880 2724H, 24Hp Hydro 2Wd Wps Rmo View Diagrams & Manuals
2690914 2724H, 24Hp Hydro 2Wd Wps Rmo View Diagrams & Manuals
2691036-00 0 - Zt2142, 21Hp B&S Rider W42I View Diagrams & Manuals
2691037-00 0 - Zt2246, 22Hp B&S Rider W46I View Diagrams & Manuals
2691037-01 1 - Zt2246, 22Hp B&S Rider W46I View Diagrams & Manuals
2691138-00, 0, Zt2042, 20Hp B&S Rider W42In View Diagrams & Manuals
2691139-00, 0, Zt1842,18Hp Kawasaki Rider W View Diagrams & Manuals
2691140-00, 0, Zt21546, 21.5Hp Kawasaki Rid View Diagrams & Manuals
2691039-00 0 - Zt2446, 24Hp B&S Rider W46I View Diagrams & Manuals
2690568 2825H, 25Hp Hydro Wps Rmo And View Diagrams & Manuals
2690569 2827H, 27Hp Hydro Wps Rmo And View Diagrams & Manuals
2690741 2827H, 27Hp Hydro 2Wd Wps Rmo View Diagrams & Manuals
2690975 Mf2827, 27Hp Hydro 2Wd Wps Rmo View Diagrams & Manuals
2690563 Prestige, 25Hp Hydro Wps Rmo A View Diagrams & Manuals
2690564 Prestige, 25Hp Hydro Wps Rmo A View Diagrams & Manuals
2690565 Prestige, 27Hp Hydro Wps Rmo A View Diagrams & Manuals
2690571 Prestige, 25Hp Hydro Wps Rmo A View Diagrams & Manuals
2690680 Prestige, 27Hp Hydro 4Wd Wps R View Diagrams & Manuals
2690681 Prestige, 27Hp Hydro 4Wd Wps R View Diagrams & Manuals
2690703 Prestige, 27Hp Hydro Wps Rmo A View Diagrams & Manuals
2690737 Prestige, 27Hp Hydro 2Wd Wps R View Diagrams & Manuals
2690792 Prestige, 27Hp Hydro 4Wd Wps R View Diagrams & Manuals
2690814 Broadmoor, 20Hp Hydro Rmo And View Diagrams & Manuals
2690815 Broadmoor, 20Hp Hydro Rmo And View Diagrams & Manuals
2690823 Broadmoor, 22Hp Hydro Rmo And View Diagrams & Manuals
2690816 Conquest, 23Hp Hydro 2Wd Rmo A View Diagrams & Manuals
2690817 Conquest, 24Hp Hydro 2Wd Rmo A View Diagrams & Manuals
2690818 Conquest, 23Hp Hydro 2Wd Wps A View Diagrams & Manuals
2690879 Conquest, 24Hp Hydro 4Wd Wps A View Diagrams & Manuals
2690931 Conquest, 24Hp Hydro 2Wd And 5 View Diagrams & Manuals
2690932 Conquest, 24Hp Hydro 4Wd And 5 View Diagrams & Manuals
2690933 Conquest, 24Hp Hydro 2Wd Wps A View Diagrams & Manuals
2690950 Conquest, 23Hp Hydro 2Wd Wps A View Diagrams & Manuals
2690951 Conquest, 24Hp Hydro 2Wd And 5 View Diagrams & Manuals
2690952 Conquest, 24Hp Hydro 2Wd Wps A View Diagrams & Manuals
2691092-00 0 - Conquest, 26Hp Hydro 2Wd An View Diagrams & Manuals
2690915 2724H, 24Hp Hydro 2Wd Wps Rmo View Diagrams & Manuals
2690923 2724H, 24Hp Hydro 2Wd Wps Rmo View Diagrams & Manuals
2690973 2724H, 24Hp Hydro 2Wd Wps Rmo View Diagrams & Manuals
2690973-01 1 - 2724H, 24Hp Hydro 2Wd Wps R View Diagrams & Manuals
2690974 2724H, 24Hp Hydro 2Wd Rmo And View Diagrams & Manuals
2691094-00 0 - 2726H, 26Hp Hydro 2Wd Wps R View Diagrams & Manuals
2691095-00 0 - 2726H, 26Hp Hydro 2Wd Rmo A View Diagrams & Manuals
2690947 Broadmoor, 22Hp Hydro Rmo And View Diagrams & Manuals
2690947-01 1 - Broadmoor, 22Hp Hydro Rmo A View Diagrams & Manuals
2690948 Broadmoor, 20Hp Hydro Rmo And View Diagrams & Manuals
2690949 Broadmoor, 20Hp Hydro Rmo And View Diagrams & Manuals
2691111-00 0 - Broadmoor, 21Hp Hyrdo Rmo A View Diagrams & Manuals
2691112-00 0 - Broadmoor, 21Hp Hydro Rmo A View Diagrams & Manuals
2691123-00 0 - Broadmoor, 22Hp Hydro Rmo A View Diagrams & Manuals
2691124-00 0 - Broadmoor, 26Hp Hydro Rmo A View Diagrams & Manuals
2691125-00 0 - Broadmoor, 27Hp Hydro Rmo R View Diagrams & Manuals
2690971 2622, 22Hp Hydro Rmo And 44In View Diagrams & Manuals
2690971-01 1 - 2622, 22Hp Hydro Rmo And 44 View Diagrams & Manuals
2690971-02 2 - 2622, 22Hp Hydro Rmo And 44 View Diagrams & Manuals
2690972 2620, 22Hp Hydro Rmo And 46In View Diagrams & Manuals
2691040-00 0 - Zt2752, 27Hp B&S Rider W52I View Diagrams & Manuals
2691040-01 1 - Zt2752, 27Hp B&S Rider W52I View Diagrams & Manuals
2691093-00 0 - Conquest, 26Hp Hydro 2Wd Wp View Diagrams & Manuals
2691126-00 0 - Conquest, 27Hp Hydro 2Wd Wp View Diagrams & Manuals
7800382 Axion, 26Hp Czt2650 Zero Turn View Diagrams & Manuals
7800612 Axion, 21Hp Zt2142 Zero Turn R View Diagrams & Manuals
7800760 Axion, 18.5Hp 150Z Zero Turn R View Diagrams & Manuals
1692569 Sno-Away 970M 28-In. Snowblower View Diagrams & Manuals
1692942 47 Inch Snow Thrower Attachment View Diagrams & Manuals
1693761 46 Inch Snow Thrower Attachment View Diagrams & Manuals
1693762 47 Inch Snow Thrower Attachment View Diagrams & Manuals
1694144 42 Inch Snow Thrower Attachment View Diagrams & Manuals
1694150 46 Inch Snow Thrower Attachment View Diagrams & Manuals
1694157 42 Inch Snow Thrower Attachment View Diagrams & Manuals
1694238 42 Inch Snow Thrower Attachment View Diagrams & Manuals
1694296 46 Inch Snow Thrower Attachment View Diagrams & Manuals
1694403 46 Inch Snow Thrower Attachment View Diagrams & Manuals
1694874 42 Inch Snow Thrower Attachment View Diagrams & Manuals
1695099 42 Inch Snow Thrower Attachment View Diagrams & Manuals
1695175 44 Inch Mower Deck View Diagrams & Manuals
1695177 54 Inch Mower Deck View Diagrams & Manuals
1695179 54 Inch Mower Deck View Diagrams & Manuals
1695266 54 Inch Mower Deck View Diagrams & Manuals
1695393 50 Inch Mower Deck View Diagrams & Manuals
1695424 44 Inch Mower Deck View Diagrams & Manuals
1696326 50 Inch Mower Deck View Diagrams & Manuals
1696412-00 48 Inch Fab Mower Deck View Diagrams & Manuals
1696422-00 47 Inch Two- Stage Snow Thrower View Diagrams & Manuals
1696427 54 Inch Mower Deck View Diagrams & Manuals
1696446-00 50 Inch Mower Deck View Diagrams & Manuals
1696805-00 48 Inch Mower Deck View Diagrams & Manuals
1696805-01 48 Inch Mower Deck View Diagrams & Manuals
1696939-00 38 Inch Mower Deck View Diagrams & Manuals
1696940-00 42 Inch Mower Deck View Diagrams & Manuals
1696941-00 44 Inch Mower Deck View Diagrams & Manuals
1696942-00 48 Inch Mower Deck View Diagrams & Manuals
10560 E (1694847) 24 Inch Snow Thrower 10.5hp View Diagrams & Manuals
1070 M (1691378) 28 Inch Snow Thrower 10hp View Diagrams & Manuals
11570 E (1694849) 28 Inch Snow Thrower 11.5hp View Diagrams & Manuals
1390 E (1694237) 38 Inch Snow Thrower 13hp View Diagrams & Manuals
1390 E (1694444) 38 Inch Snow Thrower 13hp View Diagrams & Manuals
1390 E (1694593) 38 Inch Snow Thrower 13hp View Diagrams & Manuals
1390 E (1694872) 38 Inch Snow Thrower 13hp View Diagrams & Manuals
1690830 12v/120v 28 Inch Snow Thrower 8hp View Diagrams & Manuals
1691402 28 Inch Snow Thrower 10hp View Diagrams & Manuals
7555 M (1694836) 22 Inch Snow Thrower 7.5hp View Diagrams & Manuals
8560 El (1694845) Ohv 24 Inch Snow Thrower 8.5hp View Diagrams & Manuals
928 M (1692617) 28 Inch Snow Thrower 9.5hp View Diagrams & Manuals
H 1528 E (1696237-00) Snow Thrower 14.5hp View Diagrams & Manuals
H 1528 E (1696237-01) 28 Inch Snow Thrower 14.5hp View Diagrams & Manuals
H 1528 E (1696518-00) 28 Inch Snow Thrower 14.5hp View Diagrams & Manuals
H 1528 E (1696518-01) 28 Inch Snow Thrower 14.5hp View Diagrams & Manuals
H 1728 E (1696921-00) 28 Inch Snow Thrower 16.5 Gross Tp View Diagrams & Manuals
I 7524 E (7800085) 24 Inch Snow Thrower 7.5hp View Diagrams & Manuals
P 10524 E (1695074) 24 Inch Snow Thrower 10.5hp View Diagrams & Manuals
P 11528 E (1695076) 28 Inch Snow Thrower 11.5hp View Diagrams & Manuals
P 1332 E (1695078) 38 Inch Snow Thrower 13hp View Diagrams & Manuals
P 1338 E (1695080) 38 Inch Snow Thrower 13hp View Diagrams & Manuals
P 1524 E (1695303) 24 Inch Snow Thrower 14.5hp View Diagrams & Manuals
P 1524 E (1695665) 24 Inch Snow Thrower 14.5hp View Diagrams & Manuals
P 1524 E (1695824) 24 Inch Snow Thrower 14.5hp View Diagrams & Manuals
P 1524 E (1695989) 24 Inch Snow Thrower 14.5hp View Diagrams & Manuals
P 1524 E (1696239-00) Professional Snow Thrower 14.5hp View Diagrams & Manuals
P 1524 E (1696239-01) Professional 24 Inch Snow Thrower 14.5hp View Diagrams & Manuals
P 1524 E (1696520-00) Professional 24 Inch Snow Thrower 14.5hp View Diagrams & Manuals
P 1524 E (1696520-01) Professional 24 Inch Snow Thrower 14.5hp View Diagrams & Manuals
P 1628 E (1695305) 28 Inch Snow Thrower 15.5hp View Diagrams & Manuals
P 1628 E (1695666) 28 Inch Snow Thrower 15.5hp View Diagrams & Manuals
P 1728 E (1695825) 28 Inch Snow Thrower 16.5hp View Diagrams & Manuals
P 1728 E (1695990) 8 Inch Snow Thrower 16.5hp View Diagrams & Manuals
P 1728 E (1696240-00) Professional 28 Inch Snow Thrower 16.5hp View Diagrams & Manuals
P 1728 E (1696240-01) Professional 28 Inch Snow Thrower 16.5hp View Diagrams & Manuals
P 1728 E (1696521-00) Professional 28 Inch Snow Thrower 16.5hp View Diagrams & Manuals
P 1728 E (1696521-01) Professional 28 Inch Snow Thrower 16.5hp View Diagrams & Manuals
P 1732 E (1695307) 32 Inch Snow Thrower 16.5hp View Diagrams & Manuals
P 1732 E (1695667) 32 Inch Snow Thrower 16.5hp View Diagrams & Manuals
P 1732 E (1695826) 32 Inch Snow Thrower 16.5hp View Diagrams & Manuals
P 1732 E (1695991) 32 Inch Snow Thrower 16.5hp View Diagrams & Manuals
P 2128 E (1696928-00) 28 Inch Snow Thrower 16.5 Gross Tp View Diagrams & Manuals
P 2132 E (1696241-01) Professional 32 Inch Snow Thrower 21.0hp View Diagrams & Manuals
P 2132 E (1696527-00) Professional 32 Inch Snow Thrower 21.0hp View Diagrams & Manuals
P 2132 E (1696527-01) Professional 32 Inch Snow Thrower 21.0hp View Diagrams & Manuals
P 2138 E (1696242-00) Professional 38 Inch Snow Thrower 21.0hp View Diagrams & Manuals
P 2138 E (1696242-01) Professional 38 Inch Snow Thrower 21.0hp View Diagrams & Manuals
P 2138 E (1696528-00) Professional 38 Inch Snow Thrower 21.0hp View Diagrams & Manuals
P 2138 E (1696528-01) Professional 38 Inch Snow Thrower 21.0hp View Diagrams & Manuals
SIP 1524 SE (1696496-00) Professional 24 Inch Snow Thrower 14.5hp View Diagrams & Manuals
SIP 1524 SE (1696496-01) Professional 24 Inch Snow Thrower 14.5hp View Diagrams & Manuals
SIP 2132 SE (1696498-00) Professional 32 Inch Snow Thrower 21.0hp View Diagrams & Manuals
SIP 2132 SE (1696498-01) Professional 32 Inch Snow Thrower 21.0hp View Diagrams & Manuals
2691179-00 Conquest 50 Inch Garden Tractor 25hp View Diagrams & Manuals
2691182-00 Prestige 54 Inch Garden Tractor 27hp View Diagrams & Manuals
2691224-00 Prestige 50 Inch Garden Tractor 27hp View Diagrams & Manuals
2691225-00 Prestige 54 Inch Garden Tractor 27hp View Diagrams & Manuals
2691279-00 Broadmoor 48 Inch Lawn Tractor 25hp View Diagrams & Manuals
2691336-00 Broadmoor 48 Inch Lawn Tractor 25hp View Diagrams & Manuals
2691338-00 Conquest 50 Inch Garden Tractor 25hp View Diagrams & Manuals
2691369-00 Broadmoor 48 Inch Lawn Tractor 25hp View Diagrams & Manuals
2691454-00 Regent 38 Inch Lawn Tractor 22 Gross Hp Briggs And Stratton View Diagrams & Manuals
2691455-00 Regent 42 Inch Lawn Tractor 23 Gross Hp Briggs And Stratton View Diagrams & Manuals
2691457-00 Regent S 44 Inch Lawn Tractor 25 Gross Hp Briggs And Stratton View Diagrams & Manuals
2691468-00 Prestige 50 Inch Lawn Tractor 27 Gross Hp View Diagrams & Manuals
7800611-00 Axion 33 Inch Zero-Turn Mower 18.5hp View Diagrams & Manuals
CZT 18533 (7800380) Axion 33 Inch Zero-Turn Mower 18.5hp View Diagrams & Manuals
CZT 2142 (7800381) Axion 42 Inch Zero-Turn Mower 21hp View Diagrams & Manuals
CZT 2650 (7800382) Axion 50 Inch Zero-Turn Mower 26hp View Diagrams & Manuals
ETZ 20420 (2691048-00) 42 Inch Zero-Turn Mower 20hp View Diagrams & Manuals
ETZ 20420 (2691048-01) 42 Inch Zero-Turn Mower 20hp View Diagrams & Manuals
ETZ 20420 (2691048-02) 42 Inch Zero-Turn Mower 20hp View Diagrams & Manuals
ETZ 20420 (2691048-03) 42 Inch Zero-Turn Mower 20hp View Diagrams & Manuals
ETZ 20420 (2691048-04) 42 Inch Zero-Turn Mower 20hp View Diagrams & Manuals
KZT 2242 (2691300-00) Kioti 42 Inch Zero-Turn Mower 22hp Briggs And Stratton View Diagrams & Manuals
KZT 2552 (2691299-00) Kioti 52 Inch Zero-Turn Mower 25hp Briggs And Stratton View Diagrams & Manuals
SLT 200 (2691463-00) 117cm Lawn Tractor Side-Discharge View Diagrams & Manuals
ZT 18533 (7800360) Axion 33 Inch Zero-Turn Mower 18.5hp View Diagrams & Manuals
ZT 21546 (2691140-01) 46 Inch Zero-Turn Mower 21.5hp Kawasaki View Diagrams & Manuals
ZT 2242 (2691160-00) 42 Inch Zero-Turn Mower 22hp Briggs And Stratton View Diagrams & Manuals
ZT 2242 (2691306-00) 42 Inch Zero-Turn Mower 22hp Briggs And Stratton View Diagrams & Manuals
ZT 2346 (2691161-00) 46 Inchzero-Turn Mower 23hp Briggs And Stratton View Diagrams & Manuals
ZT 2548 (2691163-00) 48 Inch Zero-Turn Mower 25hp Briggs And Stratton View Diagrams & Manuals
ZT 2552 (2691162-00) 52 Inch Zero-Turn Mower 25hp Briggs And Stratton View Diagrams & Manuals
ZT 2552 (2691307-00) 52 Inch Zero-Turn Mower 25hp Briggs And Stratton View Diagrams & Manuals
ZT 2650 (7800375) Axion 50 Inch Zero-Turn Mower 26hp View Diagrams & Manuals
Craftsman
ZTS7500 Rear Engine Mower View Diagrams & Manuals
107250040 Lawn Tractor View Diagrams & Manuals
107250050 Lawn Tractor View Diagrams & Manuals
107250060 Lawn Tractor View Diagrams & Manuals
107250070 Lawn Tractor View Diagrams & Manuals
107289850 Lawn Tractor View Diagrams & Manuals
107277860 Lawn Tractor View Diagrams & Manuals
107277880 Zero-Turn Rear Engine Rider View Diagrams & Manuals
Show More Compatible Models
This item works with the following types of products:
- Snowblower Parts
- Lawn Mower Parts
- Lawn Tractor Parts
- Engine Parts
This part replaces obsolete part #: 1668344, 1739295, 1739295YP, 1668344SM
Customer Part Reviews ?
Average Rating (out of 5):
Click to filter by ratings:
5 stars
1
4 stars
0
3 stars
0
2 stars
0
1 stars
0
< PREV
- 1
A+
Came fast, parts were exactly what I ordered and worked great
Cheryl -
October 19, 2019
Verified Purchase
t
t
t -
t days ago
Verified Purchase
eReplacementParts Team
t
Questions & Answers ?
Our customer Service team is at the ready daily to answer your part and product questions.

Ask our Team
We have a dedicated staff with decades of collective experience in helping customers just like you purchase parts to repair their products.
Does this fit my product?Questions & Answers for Pin, Shear
How to replace shear pin
Douglas
asked on 2023-04-26
Hello Douglas, Thank you for writing. Once you remove the Cotter Pin you can pull out the old Sheer Pin and insert the new Sheer Pin and reinstall the Cotter Pin. We hope this helps!
eReplacementParts Team April 26, 2023
I may have lost a sheer pin from my Simplicity snow thrower. There are 2 on one side and 1 on the other. Are there a total of 4 or 3?
Dennis
for model number 1695099
asked on 2022-12-26
Hello Dennis, Thank you for reaching out. There should be a total of 4 Pins for this model. Thank you for your inquiry, good luck with this repair!
eReplacementParts Team December 26, 2022
How many shear pins are there on this machine?
Dennis
for model number 1695099
asked on 2022-12-26
Hello Dennis, Thank you for the question. This Model lists one Shear Pin Part Number: 1668344SM. We hope this helps, good luck with this repair!
eReplacementParts Team December 26, 2022
Customer Repair Instructions ?
All our customer repair instructions are solicited directly from other customers just like you who have purchased and replaced this exact part.
Snowblower sheer pins broke on both sides.
Tony - January 24, 2018
👍 1 of 1 people found this instruction helpful
Tool Type
Snowblower
Difficulty
Easy
Time
Less than 15 minutes
Tools Used
Pliers, Small hammer
Parts Used
Remove cotter pins.
Remove broken pins.
Grease & install new pins.
Attach new cotter pins.
Recheck area & throw that snow.
Remove broken pins.
Grease & install new pins.
Attach new cotter pins.
Recheck area & throw that snow.
Did you find this story helpful?
Thanks for voting and helping fellow customers!
Belts and chute gears were worn due to age. Maintenance repairs long overdue!
Douglas - April 12, 2017
👍 1 of 1 people found this instruction helpful
Tool Type
Snowblower
Difficulty
Medium
Time
1-2 hours
Tools Used
Screwdriver, Pliers, Socket set, Wrench Set, Adjustable Wrench, Cordless drill for easier removal of screws and nuts.
1. Remove bottom gear box cover and pulley cover.
2. Removed the chute handle, removed the old broken gears with handle in a vice, replace the gears and roll pins on both gears. Reassemble.
3. Loosen all belt guards and remove both belts through opening in bottom of snowblower.
4. Replace both belts and re-position belt guards, tighten.
5. Remove both broken shear pins on the blade assembly with hammer and punch; replace with new.
6. Re-install lower gear case cover and pulley cover.
7. Re-install chute handle and mount back on snowblower handle.
8. Check all repairs for tightness and completion.
9. Run snow blower, check blade function and belt engagement on transmission and snowblower auger.
Repairs completed! Prep for winter storage!!
Did you find this story helpful?
Thanks for voting and helping fellow customers!
Broken shear pin
Mark - October 19, 2017
👍 1 of 2 people found this instruction helpful
Tool Type
Snowblower
Difficulty
Easy
Time
Less than 15 minutes
Tools Used
Pliers, Wrench Set
1. Removed broken shear pin
2. Inserted new shear pin
3. Inserted cotter pin in new shear pin
2. Inserted new shear pin
3. Inserted cotter pin in new shear pin
Did you find this story helpful?
Thanks for voting and helping fellow customers!
OEM stands for Original Equipment Manufacturer and means the part you’re buying is sourced directly from the manufacturer who made your product. At eReplacementParts, we sell only genuine OEM parts, guaranteeing the part you’re purchasing is of better design and of higher quality than aftermarket parts.
Our product descriptions are a combination of data sourced directly from the manufacturers who made your product as well as content researched and curated by our content & customer service teams. This content is edited and reviewed internally before being made public to customers.
Our customer service team are at the ready daily to answer your part and product questions. We have a dedicated staff with decades of collective experience in helping customers just like you purchase parts to repair their products.
All our part reviews are solicited directly from other customers who have purchased this exact part. While we moderate these reviews for profanity, offensive language or personally identifiable information, these reviews are posted exactly as submitted and no alterations are made by our team.
All our customer repair instructions are solicited directly from other customers just like you who have purchased and replaced this exact part. While we moderate these reviews for profanity, offensive language or personally identifiable information, these reviews are posted exactly as submitted and no alterations are made by our team.
Based on data from past customer purchasing behaviors, these parts are most commonly purchased together along with the part you are viewing. These parts may be necessary or helpful to replace to complete your current repair.
All our installation videos are created and produced in collaboration with our in-house repair technician, Mark Sodja, who has helped millions of eReplacementParts customers over the last 13 years repair their products. Mark has years of experience in selling and repairing both commercial and residential products with a specialty in gas-powered equipment.
This data is collected from customers who submitted a repair instruction after replacing this exact part. Customers can rate how easy the repair was to complete and how long it took. We aggregate this data to provide a repair rating that allows customers to quickly determine the difficulty and time needed to perform their own repair.