
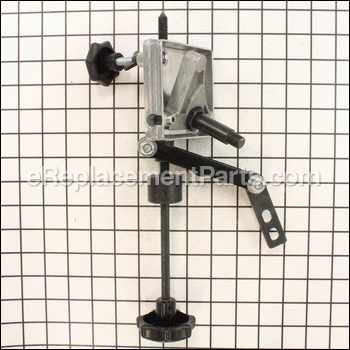

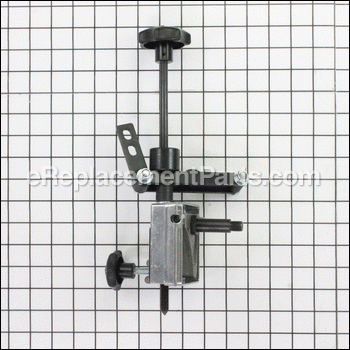
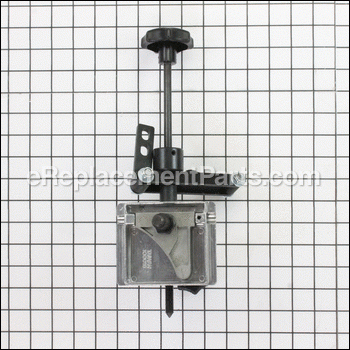
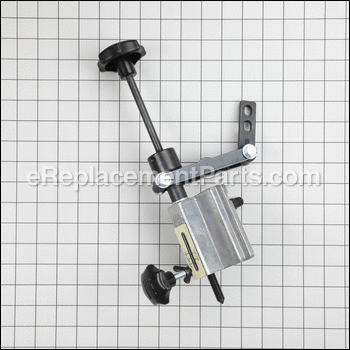
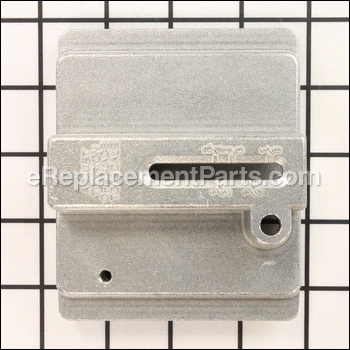

This is an original Jet replacement part. The shaft hinge is designed by the manufacturer for use in a band saw. This part is made of metal, and is used as part of the sliding bracket assembly that holds the wheel. You will require a screwdriver when replacing this item. This part is sold individually.
Shaft Hinge Assy JWBS14DP-49
OEM part for: Jet
Part Number: JWBS14DP-49
$233.48
In Stock
Compatibility
This part will fit the following 1 machine
Jet
JWBS-14DXPRO Delux Pro Band Saw View Diagrams & Manuals
This item works with the following types of products:
- Band Saw Parts
- Saw Parts
This part replaces obsolete part #: JWBS14DP-49-3, JWBS14DP-49-4
Customer Part Reviews ?
Average Rating (out of 5):
Click to filter by ratings:
5 stars
2
4 stars
1
3 stars
0
2 stars
0
1 stars
0
< PREV
- 1
Easy repair
The part arrived sooner than expected and was packaged well. The actual job of replacement went smoothly. With the new shaft hinge assy in place and adjusted the saw ran like new. Very happy with replacementparts.com - saved over a thousand $$ with a small investment and a little time.
Guest -
December 21, 2021
Verified Purchase
Easy replacement on saw
As good or better than original part
Guest -
December 14, 2021
Verified Purchase
This part was lost in shipping.
The person that i spoke with was so helpful and understanding that we will always shop with a company that take our business seriously. Thank again for your quick response in resolving the issue.
Guest -
February 13, 2023
Verified Purchase
t
t
t -
t days ago
Verified Purchase
eReplacementParts Team
t
Questions & Answers ?
Our customer Service team is at the ready daily to answer your part and product questions.

Ask our Team
We have a dedicated staff with decades of collective experience in helping customers just like you purchase parts to repair their products.
Does this fit my product?Questions & Answers for Shaft Hinge Assy
No questions have been asked yet
Customer Repair Instructions ?
All our customer repair instructions are solicited directly from other customers just like you who have purchased and replaced this exact part.
Severely bent and cracked upper hinge
Stephen - April 27, 2017
👍 2 of 2 people found this instruction helpful
Tool Type
Band Saw
Difficulty
Hard
Time
1-2 hours
Tools Used
Screwdriver, Pliers, Adjustable Wrench, Drill press, arbor press
1 Unplug bandsaw
2 Remove blade
3 Remove left blade guard (2 screws)
4 Remove upper door retainer
5 Remove upper blade cover assy (2 screws)
6 Remove blade tension screw (don't loose nut and spring)
7 Flip tension bar out of way and lift hinge shaft assy up and out
8 Loosen hinge angle adjustment setscrew
9 Remove hinge pins (may require drilling a small hole in each, and using small sheet-metal screw to pull)
10 Press new wheel shaft into hinge plate from wheel side of plate (must be straight or wheel adjustment bushing won't thread in)
11 Remove wheel adjustment bushing from old hinge plate
12 Install wheel adjustment bushing to same depth as original setting (be careful not to cross thread - it's easy to damage the threads)
13 Drill through top of hinge plate into shaft for retention pin (oops, needed new pin - you can't do this after assy)
14 Put hinge plate in position and press pins in place
15 Reinstall hinge plate assy onto saw
16 Flip tension device into place and install tension screw, spring and nut
17 Reinstall upper wheel cover and left blade guard and any other housing components
18 Install upper wheel - bearing nut should not be over tightened - proper tension is snug, with no additional drag on bearings (spin the wheel while tightening to verify)
19 Install and adjust blade tracking - low tension with guides out of the way
20 Check that the upper and lower wheel are co-planar by viewing from right side of machine - this affects blade tracking match of upper and lower wheels
21 Adjust planetary, if needed (must remove blade and upper wheel to access front and rear setscrews on hinge plate pin)
22 Reassemble, adjust blade tracking and recheck planetary as needed
23 Adjust blade guides
24 Close covers
24 Plug in
25 Try it
I hope this helps!
Did you find this story helpful?
Thanks for voting and helping fellow customers!
Couldn't adjust tension on a half inch blade
Ronald - August 13, 2022
Tool Type
Band Saw
Difficulty
Medium
Time
30-60 minutes
Tools Used
Pliers, Socket set
Parts Used
Remove the old bracket install the new one and then made adjustments to put tension on the blade
Did you find this story helpful?
Thanks for voting and helping fellow customers!
Hinge broke
William - January 24, 2018
Tool Type
Band Saw
Difficulty
Medium
Time
15-30 minutes
Tools Used
Adjustable Wrench, You need a press to put the wheel shaft in the hinge
The hardest part was getting the hinge out of the support housing. Had to drill the old hinge to get the pins out then it was just matter of putting it back together. If you don't have a press it maybe a bit tricky to hammer the wheel that into the hinge
Did you find this story helpful?
Thanks for voting and helping fellow customers!
OEM stands for Original Equipment Manufacturer and means the part you’re buying is sourced directly from the manufacturer who made your product. At eReplacementParts, we sell only genuine OEM parts, guaranteeing the part you’re purchasing is of better design and of higher quality than aftermarket parts.
Our product descriptions are a combination of data sourced directly from the manufacturers who made your product as well as content researched and curated by our content & customer service teams. This content is edited and reviewed internally before being made public to customers.
Our customer service team are at the ready daily to answer your part and product questions. We have a dedicated staff with decades of collective experience in helping customers just like you purchase parts to repair their products.
All our part reviews are solicited directly from other customers who have purchased this exact part. While we moderate these reviews for profanity, offensive language or personally identifiable information, these reviews are posted exactly as submitted and no alterations are made by our team.
All our customer repair instructions are solicited directly from other customers just like you who have purchased and replaced this exact part. While we moderate these reviews for profanity, offensive language or personally identifiable information, these reviews are posted exactly as submitted and no alterations are made by our team.
Based on data from past customer purchasing behaviors, these parts are most commonly purchased together along with the part you are viewing. These parts may be necessary or helpful to replace to complete your current repair.
All our installation videos are created and produced in collaboration with our in-house repair technician, Mark Sodja, who has helped millions of eReplacementParts customers over the last 13 years repair their products. Mark has years of experience in selling and repairing both commercial and residential products with a specialty in gas-powered equipment.
This data is collected from customers who submitted a repair instruction after replacing this exact part. Customers can rate how easy the repair was to complete and how long it took. We aggregate this data to provide a repair rating that allows customers to quickly determine the difficulty and time needed to perform their own repair.