Product Information
Description:
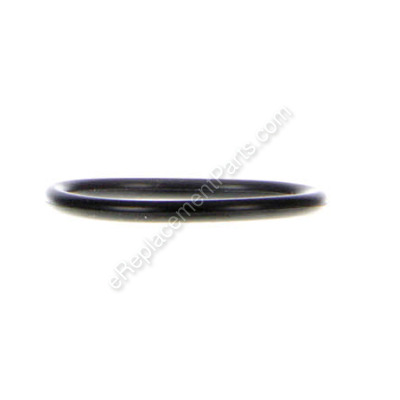
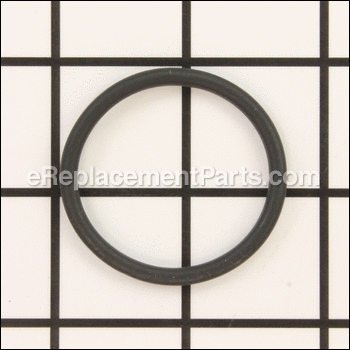
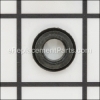
| It is an OEM item which is made for use with Krups espresso makers. This component provides an air-tight seal for the piston. Over time the material will wear out and it may begin to crack eventually requiring a replacement to ensure the unit functions properly. To ensure the correct installation of the new part, refer to the specific diagrams of your model. It is a high-quality seal which is made of durable rubber material and is sold as an individual component. You will need a screwdriver to take the housing apart when performing this repair. |
Frequently Purchased With
Compatibility
the 13 compatible machines
This part is compatible with the following machines:
Krups
XP7200 Espresseria Automatic Espresso Maker
XP7220 Espresseria Automatic Espresso Maker
XP7225J4/70F Expresso Maker Espresseria Automatic
XP7225J4/70G Expresso Maker Espresseria Automatic
XP7230J4/70F Expresso Maker Espresseria Automatic
XP7230J4/70G Expresso Maker Espresseria Automatic
XP7245 Espresseria Automatic Espresso Maker
XP7220 Espresseria Automatic Espresso Maker
XP7225J4/70F Expresso Maker Espresseria Automatic
XP7225J4/70G Expresso Maker Espresseria Automatic
XP7230J4/70F Expresso Maker Espresseria Automatic
XP7230J4/70G Expresso Maker Espresseria Automatic
XP7245 Espresseria Automatic Espresso Maker
Products Compatibility
This item works with the following types of products:
- • Espresso
Questions & Answers for Seal
No questions have been asked yet
Repair Instructions: Submitted by Customers Like You
11 of 12 people found this instruction helpful
Tool Type:
Coffee Maker
Parts Used:
Repair Difficulty:
Easy
Time Spent Repairing:
Less than 15 minutes
Tools Used:
, Torx driver
Dual piston seals on Krups Espresso EA8250 failed
1. Partially dismantled machine. Took off top front allowing access to piston. Took off side bin allowing access to piston. No further dismantling necessary for seal replacement.
2. Cleaned up all parts with clean narrow paintbrushes.
3. Managed to slip on new seals with only fingers and a chopstick as tools.
4. Put all parts back together.
2. Cleaned up all parts with clean narrow paintbrushes.
3. Managed to slip on new seals with only fingers and a chopstick as tools.
4. Put all parts back together.
Did you find this story helpful?
Thanks for voting and helping fellow customers!
7 of 7 people found this instruction helpful
Tool Type:
Coffee Maker
Parts Used:
Repair Difficulty:
Medium
Time Spent Repairing:
1-2 hours
Tools Used:
Screwdriver, Torx driver
Leaking from the piston, pooling coffee beneath the unit
Disassembled the entire case to try and diagnose leak. Discovered a damaged piston seal (x2), and evidence that this was where the leak was coming from. Replacing piston seal was easy, a toothpick made it easy. Assembly was the opposite of disassembly.
You'll need a good set of torx bits and a screwdriver. I have a magnetic setup that made life easy for me. Be careful with disassembly, there is a combination of clips and bolts, so go slow and make sure you aren't missing anything. Otherwise the process was easy, and I have great coffee again.
You'll need a good set of torx bits and a screwdriver. I have a magnetic setup that made life easy for me. Be careful with disassembly, there is a combination of clips and bolts, so go slow and make sure you aren't missing anything. Otherwise the process was easy, and I have great coffee again.
Did you find this story helpful?
Thanks for voting and helping fellow customers!
3 of 3 people found this instruction helpful
Tool Type:
Coffee Maker
Parts Used:
Repair Difficulty:
Medium
Time Spent Repairing:
30-60 minutes
Tools Used:
Screwdriver, Torx drivers, cleaning supplies
Water leaked from the base after making coffees or rinsing
Note: there are some videos on YouTube that go through the basic steps here. Helpful.
1. Removed the cleaning tab tray on top, which allowed me to see that water was escaping from the brew chamber.
2. Use Torx driver (T-15 and T-10 I believe) to remove all the screws for the bean hopper, and the two screws under the water reservoir.
3. Remove the top of the machine - use a flathead driver to release the two tabs in the back, being careful not to snap the plastic.
4. Pull the back and sides off from the rear of the machine, which will expose all the internals.
5. Remove the plunger with the two black rubber seals. Careful not to lose the spring assembly (piece that 'brushes' the coffee grounds chute).
6. Use a toothpick or awl to remove the old seals. Replace both with the new seals.
7. If water was getting up in the machine, it's a good idea to do a good clean while it's taken apart. I used an air compressor to blow loose coffee grounds out, and wiped down everything I could reach with a toothbrush or Q-tip. This is the only reason it took longer than 30 minutes.
8. Reverse steps to reassemble. Before putting the cleaning tab tray back on, run a few rinse cycles and watch to make sure the seals are doing their job. Worked for me.
9. Enjoy a coffee.
Did you find this story helpful?
Thanks for voting and helping fellow customers!
Tool Type:
Coffee Maker
Parts Used:
Repair Difficulty:
Medium
Time Spent Repairing:
1-2 hours
Tools Used:
, torx
leaking at the base
removed all the torx screws, disassembled the body part, removed the plunger and replaced the two seals then reassembled in the reverse order.
The leak stopped! the coffee maker is back in use.
The leak stopped! the coffee maker is back in use.
Did you find this story helpful?
Thanks for voting and helping fellow customers!
Tool Type:
Coffee Maker
Repair Difficulty:
Hard
Time Spent Repairing:
More than 2 hours
Tools Used:
Adjustable Wrench, Torx wrench
Water leaking from bottom of machine
Seal for pressure chamber rod failed. Seals for piston leaking. Had to dismantle the entire unit to get to piston rod seal and clean maachine. Water and coffee grinds throughout machine due to seals leaking.
Did you find this story helpful?
Thanks for voting and helping fellow customers!
Tool Type:
Coffee Maker
Parts Used:
Repair Difficulty:
Medium
Time Spent Repairing:
15-30 minutes
Tools Used:
Screwdriver, Power Drill
Leaking liquid
1. Opened the machine
2. Disassembled the plunger unit
3. Removed the old, worn seals
4. Replaced with new seals
5. Reassembled the unit and machine
2. Disassembled the plunger unit
3. Removed the old, worn seals
4. Replaced with new seals
5. Reassembled the unit and machine
Did you find this story helpful?
Thanks for voting and helping fellow customers!
Tool Type:
Coffee Maker
Parts Used:
Repair Difficulty:
Easy
Time Spent Repairing:
30-60 minutes
Tools Used:
Screwdriver, Pliers
Coffee spilling out of the machines bottom
1. Disassembled all covers.
2. Replaced the broken seal around the piston (replaced both, even though only one was broken)
3. Reassembled it and works fine for now.
2. Replaced the broken seal around the piston (replaced both, even though only one was broken)
3. Reassembled it and works fine for now.
Did you find this story helpful?
Thanks for voting and helping fellow customers!
Tool Type:
Coffee Maker
Parts Used:
Repair Difficulty:
Medium
Time Spent Repairing:
1-2 hours
Tools Used:
Screwdriver
Water leak
Disassembled the machine case. Unscrewed the machine head and replaced the seals. Replaced the brew head and reassembled the case.
Did you find this story helpful?
Thanks for voting and helping fellow customers!
Reviews
4 Reviews
Average Rating (out of 5):
Click to filter by ratings:
5 stars
4
4 stars
0
3 stars
0
2 stars
0
1 stars
0
< PREV
- 1
piston gaskets
perfect fit, 10 min install, coffee machine is working perfectly again.
iGlobal -
September 19, 2022
Verified Purchase
It’s an O Ring !
Quick delivery
iGlobal -
March 18, 2022
Verified Purchase
Exactly what I needed for my krups coffee maker
I couldn’t find my model number in selected list, but the way picture is, I compared sizes and ordered. Received and it fitted perfectly
Guest -
May 5, 2020
Verified Purchase
Perfect!
I've got an awesome Krups all in one coffee/espresso maker they don't make anymore. All the new ones are plastic and very expensive. This little gasket solve a leak issue I was having that most would have just gone out and bought a new one. I really appreciate companies like ereplacementparts.com that are there for DIY'ers like myself. Thank you!
Guest -
April 29, 2020
Verified Purchase
Verified Purchase
eReplacementParts Team
< PREV
- 1
Product Information

