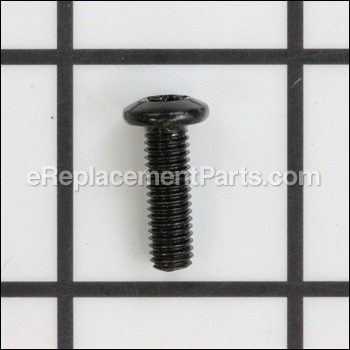
This replacement hardware is a high quality item that is specially manufactured for use on Bostitch air compressors. It is an authentic screw that is used to secure the conrod cover to the connecting rod. Please note this durable metal torx screw is sold individually.
Screw Torx M5x16 Tt AB-9011057
OEM part for: Bostitch
Part Number: AB-9011057
Jump To:
Frequently Purchased Together ?
Compatibility
This part will fit the following 7 machines
Bostitch
This item works with the following types of products:
- Compressor Parts
This part replaces obsolete part #: AB-9011004
Questions & Answers ?
Our customer Service team is at the ready daily to answer your part and product questions.

Ask our Team
We have a dedicated staff with decades of collective experience in helping customers just like you purchase parts to repair their products.
Does this fit my product?Questions & Answers for Screw Torx M5x16 Tt
Customer Repair Instructions ?
All our customer repair instructions are solicited directly from other customers just like you who have purchased and replaced this exact part.
Compressor would not build pressure above 80 psi.
Tool Type
Compressor
Difficulty
Easy
Time
15-30 minutes
Tools Used
Screwdriver, Wrench Set, Nutdriver, Torx bit
Burned off the timing belt and damaged the piston ring during repair.
Tool Type
Compressor
Difficulty
Expert
Time
More than 2 hours
Tools Used
Screwdriver, Power Drill, Socket set, Wrench Set, Nutdriver, torx. propane torch, allen wrenches
Control rod and piston head disintegrated causing the drive belt to break. Second time this has happened since buying the compressor.
Tool Type
Compressor
Difficulty
Medium
Time
30-60 minutes
Tools Used
Screwdriver, Socket set, Adjustable Wrench
2. Removed the broken Control Rod remains of the Conrod Cover (piston head) and inspected the piston well. Had some dents in there but it was still serviceable so I didn't replace it.
3. Assembled the conrod and conrod cover and seal then slid it into the piston housing. Had to use a small screw driver to bend the flexible seal attached it to just enough to allow it to slip in.
4. Reattached the conrod assembly to the motor wheel and tightened it all down.
5. Spent the rest of the hour attempting to get the new drive belt on. That is a PITA but it can be done, don't give up. You will need three hands to do it but a good screw driver in the right place helps keep the belt on the track long enough to get it all the way on. Make sure it is in the center of the wheels before you test it's operation.
6. Tested the repair and tank operations satisfactorily then reassembled the plastic housing to complete the job.
Torx screw failed, piston came apart destroying piston ring and ring cover, also scored cylinder.
Tool Type
Compressor
Difficulty
Easy
Time
1-2 hours
Tools Used
Screwdriver, Socket set, Wrench Set
On disassembly, take photo or do drawing to show where parts go, especially reeds in the head..
Assemble new piston parts, use thread lock on torx screw.
Pass connecting rod up and through new cylinder barrel with connecting rod sticking out the end without the flange. Then hold on flat work surface with piston end down. Stiff piston ring is hard to bend so it will go into cylinder. I put some WD40 on the cylinder to make it easier. push down on cylinder while rocking piston a little until piston ring compresses and piston slides into cylinder. Ring should be concave toward cylinder head.
Assemble piston, connecting rod and cylinder into compressor through the cylinder frame, lightly tap connecting rod onto bearing. Don't let piston slide out of cylinder barrel.
Fix connecting rod to bearing with connecting rod clamping screw, thread lock would be good here too.
Install fan onto crankshaft with socket head screw.
Assemble cylinder head parts, taking care to keep reeds in proper place. Use your photo to make sure you get things right. Use new gaskets. Head parts and gaskets form several layers. While holding layered parts together, install on compressor with cylinder head bolts. Two inside nuts are captive in frame, outside nuts require 10mm box wrench to tighten. Install cylinder-to-tank tube and tighten. Run compressor briefly (keeping body, fingers, etc. away from the fan and connecting rod in case something comes loose) and see that pressure starts to build. If so, reassemble cover halves using the long bolts and screws. You will have to take the hose connection off to get one cover half on so release the pressure in the tank if any. Job done. Would have taken less time, but doubted whether reeds stayed in place and took head apart again. Also make sure you order all gaskets and parts you'll need up front. I didn't and it cost me more for shipping. ereplacementParts was fast on the orders and had the right parts. When a piston lets go, it is best to replace all the parts from connecting rod to piston cover and likely the cylinder too as it gets scored from the piston without ring banging around. Doesn't take much banging to do it.
OEM stands for Original Equipment Manufacturer and means the part you’re buying is sourced directly from the manufacturer who made your product. At eReplacementParts, we sell only genuine OEM parts, guaranteeing the part you’re purchasing is of better design and of higher quality than aftermarket parts.
Our product descriptions are a combination of data sourced directly from the manufacturers who made your product as well as content researched and curated by our content & customer service teams. This content is edited and reviewed internally before being made public to customers.
Our customer service team are at the ready daily to answer your part and product questions. We have a dedicated staff with decades of collective experience in helping customers just like you purchase parts to repair their products.
All our part reviews are solicited directly from other customers who have purchased this exact part. While we moderate these reviews for profanity, offensive language or personally identifiable information, these reviews are posted exactly as submitted and no alterations are made by our team.
All our customer repair instructions are solicited directly from other customers just like you who have purchased and replaced this exact part. While we moderate these reviews for profanity, offensive language or personally identifiable information, these reviews are posted exactly as submitted and no alterations are made by our team.
Based on data from past customer purchasing behaviors, these parts are most commonly purchased together along with the part you are viewing. These parts may be necessary or helpful to replace to complete your current repair.
All our installation videos are created and produced in collaboration with our in-house repair technician, Mark Sodja, who has helped millions of eReplacementParts customers over the last 13 years repair their products. Mark has years of experience in selling and repairing both commercial and residential products with a specialty in gas-powered equipment.
This data is collected from customers who submitted a repair instruction after replacing this exact part. Customers can rate how easy the repair was to complete and how long it took. We aggregate this data to provide a repair rating that allows customers to quickly determine the difficulty and time needed to perform their own repair.


