


Genuine Bosch/Skil replacement part, this item is sold individually.
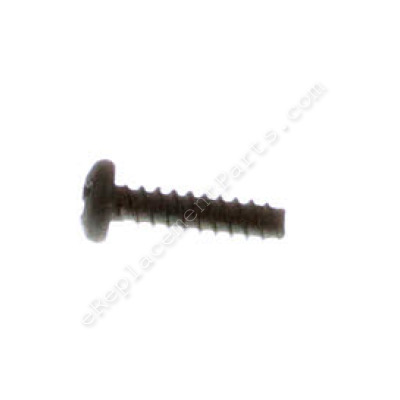
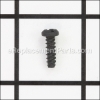
The screw is used in the Circular Saws shown below to secure the switch handle together.
This is a Torx T-25 Screw, but a small flat screwdriver can be used to remove it and install it.
Screw 5610324001
OEM part for: Skil, Bosch
Part Number: 5610324001
$4.99
In Stock
Jump To:
Product Description ?
- Classification: Part
- Weight: 0.01 lbs.
- Shipping: Ships Worldwide
Frequently Purchased Together ?
Compatibility
This part will fit the following 80 machines
Skil
HD5510 TYPE 1 (F012551000) 5-1/2 in. Circular Saw View Diagrams & Manuals
HD5510 (F012551001) 5-1/2 in. Circular Saw View Diagrams & Manuals
5825 TYPE 2 (F01258250A) 6-1/2 in. Worm Drive Saw View Diagrams & Manuals
HD77 Type 17 Worm Drive Saw (Skilsaw 77) View Diagrams & Manuals
5860 (F012586099) Circular Saw View Diagrams & Manuals
HD77M (F012HM7702) 7 1/4" Magnesium Worm Drive Skilsaw View Diagrams & Manuals
SHD77 (F012SD7700) 7 1/4" Worm Drive Skilsaw View Diagrams & Manuals
SHD77 (F012SD7705) 7 1/4" Worm Drive Skilsaw View Diagrams & Manuals
SHD77M (F012SD7702) 7 1/4" Magnesium Worm Drive Skilsaw View Diagrams & Manuals
SHD77M (F012SD7707) 7 1/4" Magnesium Worm Drive Skilsaw View Diagrams & Manuals
HD77M-72 (F012HM7772) 7 1/4" Magnesium Worm Drive Skilsaw View Diagrams & Manuals
HD5860 (F01258600A) Worm Drive Skilsaw View Diagrams & Manuals
HD77-72 7-1/4 Worm Drive Saw w/Twist Lock View Diagrams & Manuals
5865 Power Saw View Diagrams & Manuals
MAG77LT (F012XD7700) Worm Drive Skilsaw View Diagrams & Manuals
MAG77LT (F012XD7701) Worm Drive Skilsaw View Diagrams & Manuals
HD77 (F012HD77LA) Circular Hand Saw View Diagrams & Manuals
SHD77M (F012SD7712) Circular Hand Saw View Diagrams & Manuals
HD77M (F012HM7700) Circular Hand Saw View Diagrams & Manuals
MAG77-75 7-1/4" Skilsaw View Diagrams & Manuals
SHD77-72 7-1/4" Skilsaw Worm Drive Skilsaw with Twist Lock View Diagrams & Manuals
HD 5825 (F01258250A) Circular Hand Saw View Diagrams & Manuals
SPT70WM (F012701000) Circular Hand Saw View Diagrams & Manuals
SPT70WM (F012701001) Circular Hand Saw View Diagrams & Manuals
SPT70V (F012703001) Circular Saw View Diagrams & Manuals
SPT77W (F012771000) Circular Saw View Diagrams & Manuals
SPT77W (F012771001) Circular Saw View Diagrams & Manuals
SPT77WM (F012771100) Circular Saw View Diagrams & Manuals
SPT77WML (F012771200) Circular Saw View Diagrams & Manuals
SPT77WML (F012771201) Circular Saw View Diagrams & Manuals
HD 7780 (F012HD77PM) Un-Hd Port. Circular Saw View Diagrams & Manuals
SHD77M72 (F012SD7703) Circular Hand Saw View Diagrams & Manuals
SHD77M72 (F012SD7713) Circular Hand Saw View Diagrams & Manuals
MAG7777 (F012SD7715) Circular Hand Saw View Diagrams & Manuals
77 (F012007799) Circular Hand Saw View Diagrams & Manuals
SPT55-11 Saw 16 In. Worm Drive Sawsquatch Carpentry Chainsaw View Diagrams & Manuals
SPT70V-11 Saw 16-5/16 In. Magnesium Super Sawsquatch Worm Drive Saw View Diagrams & Manuals
SPT70WM-01 Saw 10-1/4 In. Magnesium Sawsquatch Worm Drive Saw; Saw Blade View Diagrams & Manuals
SPT77W-01 Saw 7-1/4 In. Worm Drive Saw; Sawblade View Diagrams & Manuals
SPT77W-22 Saw 7-1/4 In. Worm Drive Saw View Diagrams & Manuals
SPT77WM-22 Saw 7-1/4 In. Magnesium Worm Drive Saw View Diagrams & Manuals
SPT77WML-01 Saw 7-1/4 In. Lightweight Worm Drive Saw View Diagrams & Manuals
SPT77WML-22 Saw 7-1/4 In. Lightweight Magnesium Worm Drive Saw View Diagrams & Manuals
SPT77WML-72 Saw 7-1/4 In. Lightweight Worm Drive Saw With Twist Lock Plug View Diagrams & Manuals
SPT78MMC-01 Saw 8 In. Outlaw Worm Drive For Metal; Sawblade View Diagrams & Manuals
SPTH77M-01 Saw 7-1/4 In. Truehvl Cordless Worm Drive Saw, Saw Blade, Tool Only View Diagrams & Manuals
SPTH77M-02 Saw 7-1/4 In. Truehvl Cordless Worm Drive Saw, Diablo Blade, Tool Only View Diagrams & Manuals
SPTH77M-11 Saw 7-1/4 In. Truehvl Cordless Worm Drive Saw Kit With Truehvl Battery, Saw Blade View Diagrams & Manuals
SPTH77M-12 Saw 7-1/4 In. Truehvl Cordless Worm Drive Saw Kit With Truehvl Battery, Diablo Blade View Diagrams & Manuals
SPTH77M-21 Saw 7-1/4 In. Truehvl Cordless Worm Drive Saw Kit With 2 Truehvl Batteries, Saw Blade View Diagrams & Manuals
SPTH77M-22 Saw 7-1/4 In. Truehvl Cordless Worm Drive Saw Kit With 2 Truehvl Batteries, Diablo Blade View Diagrams & Manuals
SPT70WM-22 Circular Saw View Diagrams & Manuals
SPT70WM-72 Circular Saw View Diagrams & Manuals
SPT78MMC-22 Circular Saw View Diagrams & Manuals
SPT78W-01 Circular Saw View Diagrams & Manuals
SPT78W-22 Circular Saw View Diagrams & Manuals
SPTH70M-01 Circular Saw View Diagrams & Manuals
SPTH70M-02 Circular Saw View Diagrams & Manuals
SPTH70M-11 Circular Saw View Diagrams & Manuals
SPTH70M-12 Circular Saw View Diagrams & Manuals
SPTH70M-21 Circular Saw View Diagrams & Manuals
SPTH70M-22 Circular Saw View Diagrams & Manuals
SPT70WM-71 (A) 10-1 4 In. Magnesium Worm Drive Skil With Twist Lock View Diagrams & Manuals
SPT77W-71 (A) 7-1 4 In. Worm Drive Skil With Twist Lock Plug View Diagrams & Manuals
SPT77WML-71 (A) 7-1 4 In. Lightweight Worm Drive Skil With Twist Lock Plug View Diagrams & Manuals
Bosch
1677M (0601677039) 7-1/4" Worm Drive Saw View Diagrams & Manuals
1678A (0601678039) 7-1/4" Worm Drive Saw View Diagrams & Manuals
1677MD (0601677139) Circular Saw View Diagrams & Manuals
1677MDT (0601677239) Circular Saw View Diagrams & Manuals
1677C-100 (0601677168) Circular Saw View Diagrams & Manuals
1677DC-100 (0601677190) Circular Saw View Diagrams & Manuals
1678 (0601678039) Un-Hd Port. Circular Saw View Diagrams & Manuals
CSW41 (3601F6D010) Circular Saw View Diagrams & Manuals
CSW41 (3601F6D011) Circular Hand Saw View Diagrams & Manuals
SPT78MMC (F012782000) Circular Hand Saw View Diagrams & Manuals
HD77 (F012HD7720) Circular Saw View Diagrams & Manuals
SHD77 (F012SD7720) Circular Saw View Diagrams & Manuals
SHD77 (F012SD7721) Circular Saw View Diagrams & Manuals
MAG77 (F012SD7722) Circular Saw View Diagrams & Manuals
MAG77 (F012SD7723) Circular Saw View Diagrams & Manuals
Show More Compatible Models
This item works with the following types of products:
- Circular Saw Parts
- Saw Parts
Customer Part Reviews ?
Average Rating (out of 5):
Click to filter by ratings:
5 stars
3
4 stars
0
3 stars
0
2 stars
0
1 stars
0
< PREV
- 1
worked well ,thank you for the parts ,they all worked fine!
screws and other parts worked well and were sent very fast, will use your parts again when needed !
Guest -
April 7, 2022
Verified Purchase
Piensas correctas
Excelente servicio envío rápido. Muchas gracias lo recomiendo 👍
Guest -
October 24, 2020
Verified Purchase
exact replacement,perfect fit
Saw handle bolted right on. Repair made simple.
Stanley -
March 7, 2020
Verified Purchase
t
t
t -
t days ago
Verified Purchase
eReplacementParts Team
t
Questions & Answers ?
Our customer Service team is at the ready daily to answer your part and product questions.

Ask our Team
We have a dedicated staff with decades of collective experience in helping customers just like you purchase parts to repair their products.
Does this fit my product?Questions & Answers for Screw
No questions have been asked yet
Customer Repair Instructions ?
All our customer repair instructions are solicited directly from other customers just like you who have purchased and replaced this exact part.
Handle was cracked, two screws missing.
Timm - March 7, 2024
Tool Type
Circular Saw
Difficulty
Easy
Time
Less than 15 minutes
Tools Used
Screwdriver, Power Drill
Parts Used
Well, first of all, I ordered these parts so long ago it took me a while to remember what they were for. I think I ordered them in late summer--and it's now late winter.
The repair was simple and went fine. Parts all fit like new. The old Skilsaw lives again!
The repair was simple and went fine. Parts all fit like new. The old Skilsaw lives again!
Did you find this story helpful?
Thanks for voting and helping fellow customers!
Pistol Grip Handle Broke When Saw Fell Off Sawhorse
Shawn - February 26, 2019
Tool Type
Circular Saw
Difficulty
Medium
Time
15-30 minutes
Tools Used
Screwdriver, Wrench Set, Torques Screwdriver / Allen Wrenches
1. Removed Remaining Broken Handle Pieces From Saw
2. Removed Trigger Assembly From Broken Handle Pieces
3. Installed Trigger Assembly Into New (Pistol Grip Handle)
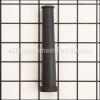
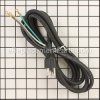
4. Installed Cord And Anti-Kink Into New (Pistol Grip Handle)
5. Reassemble New (Pistol Grip Handle) With New (Torques Screws)
6. Reattach New (Pistol Grip Handle) To Saw With New (Shoulder Bolts)
7. Test Saw With New Saw Blade Installed With (Blade Bolt Wrench)
8. Works Beautifully Thanks Guys
( )=Newly Purchased Parts
2. Removed Trigger Assembly From Broken Handle Pieces
3. Installed Trigger Assembly Into New (Pistol Grip Handle)
4. Installed Cord And Anti-Kink Into New (Pistol Grip Handle)
5. Reassemble New (Pistol Grip Handle) With New (Torques Screws)
6. Reattach New (Pistol Grip Handle) To Saw With New (Shoulder Bolts)
7. Test Saw With New Saw Blade Installed With (Blade Bolt Wrench)
8. Works Beautifully Thanks Guys
( )=Newly Purchased Parts
Did you find this story helpful?
Thanks for voting and helping fellow customers!
Table bent after dropping saw. Handle cracked. Trigger was not working correctly causing a safety issue.
duane - July 27, 2018
Tool Type
Circular Saw
Difficulty
Easy
Time
15-30 minutes
Tools Used
Screwdriver, Torks tip screw driver
Unscrew handle halves. Remove screws holding handle to saw and remove. Unscrew wires to trigger and remove. Screw handle half to saw that holds trigger. Install trigger wires to new switch and install into handle. Tuck in the wires as not to get pinched and install second half of handle and screw together. Install screws to a fix handle to saw. Table or foot repair starts with removing depth adjustment screw by removing retaining clip then handle and increasing nut. Remove nut at front of saw at the table. Remove table. Position table onto saw body and screw front screw and nut. Position rear adjustment arch into threaded stud and replace nut. Adjust the nut so the Table can go up and down. Position the lever so down is tight and up loosens enough to adjust depth. Install keeper e clip. On old table remove adjustment nut and install on new table. Just reverse the process to install. Done. Now the saw will cut square and the honey dos will go easy.
Did you find this story helpful?
Thanks for voting and helping fellow customers!
Bad switch and missing screws
greg - June 5, 2016
Tool Type
Circular Saw
Difficulty
Easy
Time
Less than 15 minutes
Tools Used
Screwdriver
Remove the right handle half from the saw. Make a wiring diagram if you like to. Remove the wires from the switch and remove the switch and cord relief. Connect the wires to the new switch and attach the switch to the handle. Install the cord relief. Then screw the handle half to the saw.
Did you find this story helpful?
Thanks for voting and helping fellow customers!
OEM stands for Original Equipment Manufacturer and means the part you’re buying is sourced directly from the manufacturer who made your product. At eReplacementParts, we sell only genuine OEM parts, guaranteeing the part you’re purchasing is of better design and of higher quality than aftermarket parts.
Our product descriptions are a combination of data sourced directly from the manufacturers who made your product as well as content researched and curated by our content & customer service teams. This content is edited and reviewed internally before being made public to customers.
Our customer service team are at the ready daily to answer your part and product questions. We have a dedicated staff with decades of collective experience in helping customers just like you purchase parts to repair their products.
All our part reviews are solicited directly from other customers who have purchased this exact part. While we moderate these reviews for profanity, offensive language or personally identifiable information, these reviews are posted exactly as submitted and no alterations are made by our team.
All our customer repair instructions are solicited directly from other customers just like you who have purchased and replaced this exact part. While we moderate these reviews for profanity, offensive language or personally identifiable information, these reviews are posted exactly as submitted and no alterations are made by our team.
Based on data from past customer purchasing behaviors, these parts are most commonly purchased together along with the part you are viewing. These parts may be necessary or helpful to replace to complete your current repair.
All our installation videos are created and produced in collaboration with our in-house repair technician, Mark Sodja, who has helped millions of eReplacementParts customers over the last 13 years repair their products. Mark has years of experience in selling and repairing both commercial and residential products with a specialty in gas-powered equipment.
This data is collected from customers who submitted a repair instruction after replacing this exact part. Customers can rate how easy the repair was to complete and how long it took. We aggregate this data to provide a repair rating that allows customers to quickly determine the difficulty and time needed to perform their own repair.