
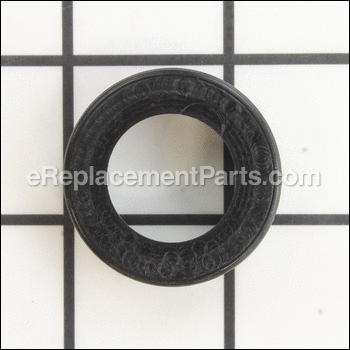


This is a Genuine Manufacturer Approved replacement part used on certain Bosch Miter Saws. This part is made out of Rubber and is Sold Individually. This Ring helps to secure a Ball Bearing used with Armature.
Rubber Ring 1619PA5609
OEM part for: Bosch
Part Number: 1619PA5609
$5.19
In Stock
Jump To:
Frequently Purchased Together ?


Compatibility
This part will fit the following 43 machines
Bosch
4000 (0601476139) Table Saw View Diagrams & Manuals
4412 (0601665039) 12" Miter Saw View Diagrams & Manuals
3915 (0601475039) 10 Inch Slide Miter Saw View Diagrams & Manuals
B3915 (0601475035) 10" Slide Miter Saw View Diagrams & Manuals
4212L () 12" Dual-Bevel Upfront Control & Laser Tracking Compound Miter Saw View Diagrams & Manuals
5412L (0601665239) 12" Laser Tracking Dual-Bevel Slide Miter Saw View Diagrams & Manuals
4410L 10" Upfront Control & Laser Tracking Dual-Bevel Slide Miter Saw View Diagrams & Manuals
4212 (060166F035) Miter Saw View Diagrams & Manuals
4410 (060166E139) Miter Saw View Diagrams & Manuals
4212L (060166F239) Miter Saw View Diagrams & Manuals
4100 (0601B13010) Table Saw View Diagrams & Manuals
4100DG-09 (0601B13010) 10" Worksite Table Saw View Diagrams & Manuals
4100DG-09 (3601L13010) 10" Worksite Table Saw View Diagrams & Manuals
4100-09 (0601B13010) 10" Worksite Table Saw View Diagrams & Manuals
4100-09 (3601L13010) 10" Worksite Table Saw View Diagrams & Manuals
4405 (0601475061) 10" Single-Bevel Slide Miter Saw View Diagrams & Manuals
5412 (0601665239) 12 in. Dual-Bevel Slide Miter Saw View Diagrams & Manuals
5412 (06016651A9) 12 in. Dual-Bevel Slide Miter Saw View Diagrams & Manuals
5312 12" Dual-Bevel Slide Miter Saw View Diagrams & Manuals
4310 10" Dual-Bevel Slide Miter Saw View Diagrams & Manuals
GTS 10 XC (3601L30440) Table Saw View Diagrams & Manuals
GTS 10 XC (3601L30490) Table Saw View Diagrams & Manuals
GTS1041A (3601M13510) Table Saw View Diagrams & Manuals
GCM 10 SD (0601B22532) Slide Mitre Saw View Diagrams & Manuals
GCM 10 SD (0601B22541) Slide Mitre Saw View Diagrams & Manuals
GTS 10 J (3601M30530) Table Saw View Diagrams & Manuals
GTS 10 J (3601M30541) Table Saw View Diagrams & Manuals
4000 (0601476260) Saw Table View Diagrams & Manuals
4100 (3601L13010) Table Saw View Diagrams & Manuals
4100 (3601L13011) Table Saw View Diagrams & Manuals
4100 (3601L13012) Table Saw View Diagrams & Manuals
4412 (0601665139) Table Saw View Diagrams & Manuals
4212 (060166F222) Miter Saw View Diagrams & Manuals
4410 (060166E222) Miter Saw View Diagrams & Manuals
GCM12SD (0601B23503) Slide Mitre Saw View Diagrams & Manuals
GCM12SD (0601B23508) Slide Mitre Saw View Diagrams & Manuals
GCM12SD (0601B23532) Slide Mitre Saw View Diagrams & Manuals
GCM12SD (0601B23537) Slide Mitre Saw View Diagrams & Manuals
GCM12SD (0601B23541) Slide Mitre Saw View Diagrams & Manuals
GCM12SD (0601B23542) Slide Mitre Saw View Diagrams & Manuals
4410L (060166E239) Circular Saw View Diagrams & Manuals
4100XC (3601L13014) Table Saw 4100xc View Diagrams & Manuals
4100XC (3601L13015) Table Saw, 10-Inch, Bare Tool Tw Ul62841 View Diagrams & Manuals
Show More Compatible Models
This item works with the following types of products:
- Saw Parts
- Table Saw Parts
- Miter Saw Parts
This part replaces obsolete part #: 2610996948, 2610911925
Customer Part Reviews ?
Average Rating (out of 5):
Click to filter by ratings:
5 stars
7
4 stars
2
3 stars
0
2 stars
0
1 stars
0
< PREV
- 1
Excellent, fits right in
Good quality product, fix my table saw myself . Thank much
Guest -
May 16, 2023
Verified Purchase
GOOD part
Critical part that keeps the armature stable. Great to have a place to find these important parts.
dave -
August 20, 2020
Verified Purchase
Successful repair
When the bearing seized it burned the rubber ring. I ordered it because I saw it on the schematic. I’m glad I did As it was an essential part.
Guest -
June 2, 2020
Verified Purchase
Got all parts ordered. Saw is back in service.
Parts fit correctly.
Guest -
May 31, 2020
Verified Purchase
Good fit
While the old rubber boot on the 20 year old motor was still ok, it’s a good part to replace because it dampens motor vibration. This one had a good tight fit. Hope it lasts as good as the original.
Jost -
April 20, 2020
Verified Purchase
Perfect fit, no hassles installing.
Easy and convenient to order parts. Parts are a perfect match.
iGlobal -
January 27, 2020
Verified Purchase
Old table saw parts
Prefect fit just as your web site described.
Guest -
October 14, 2019
Verified Purchase
Ended up not needing it
Ended up not needing it, but it was cheap so who cares
Guest -
January 3, 2022
Verified Purchase
fit very well
it fit really well but it took 10 days to get
iGlobal -
December 9, 2021
Verified Purchase
t
t
t -
t days ago
Verified Purchase
eReplacementParts Team
t
Questions & Answers ?
Our customer Service team is at the ready daily to answer your part and product questions.

Ask our Team
We have a dedicated staff with decades of collective experience in helping customers just like you purchase parts to repair their products.
Does this fit my product?Questions & Answers for Rubber Ring
No questions have been asked yet
Customer Repair Instructions ?
All our customer repair instructions are solicited directly from other customers just like you who have purchased and replaced this exact part.
Motor bearings worn out
Daniel - September 20, 2016
👍 4 of 4 people found this instruction helpful
Tool Type
Table Saw
Difficulty
Medium
Time
1-2 hours
Tools Used
Screwdriver, Socket set, Wrench Set, Nutdriver, Wire strippers/crimper
1.) Bosch 4000 Table Saw w gravity rise stand. Removed blade and then table saw from stand (4 bolts)
2.) Turned table saw upside down and removed plastic table support frame from cast table to access motor (4 allen-head cap screws & 2 small bolts).
3.) Removed brushes (2)
4.) Removed motor end cap (3 screws) to expose rear motor bearing and wiring to motor field
5.) Removed motor housing from cast gear box/blade support (4 screws). Armature remained in gear box.
6.) Removed armature by pulling out of gear box and front bearing
7.) Removed front bearing retainer (2 screws) and removed bearing with inside puller. Replaced with new bearing and re-attached retainer.
8.) Removed rear bearing by cutting off with dremel and cutting wheel. The outer bearing had fallen off with ball bearings so only inner race remained on armature shaft and nothing for puller to grab to...so had to cut off.
9.) Replaced new bearing on shaft and cleaned armature with damp rag and a little brake cleaner.
10.) Removed wire nut caps from field wiring and rear motor cap (which contains speed control board). Removed 2 bolts that held field in motor housing. Removed field from motor housing by tapping out from rear.
11.) Replace with new field. Reattached wire nuts and tightened 2 bolts.
12.) Added grease to armature shaft gear end and reinstalled cast gear housing/blade support.
13.) Reassembled saw in reverse order
14.) Replaced saw blade
15.) Plugged in and ran like new. Parts for $100 saved my $600 table saw. Tool retailers wanted $300 minimum to begin repair which would be used towards the final repair bill. Glad I did it myself, but you should have some mechanical and electric motor knowledge and able to keep parts in order during disassembly.
Did you find this story helpful?
Thanks for voting and helping fellow customers!
Rear motor bearing burned out
Bob - January 1, 2021
👍 1 of 1 people found this instruction helpful
Tool Type
Table Saw
Difficulty
Medium
Time
30-60 minutes
Tools Used
Screwdriver, Pliers, Socket set
Parts Used
First I searched the repairparts website for a manual and diagrams. Removed the motor housing which required enough force and prying with a screwdrive to worry me I might be doing damage. (Others' reports said this part was 'easy'. Hah!)
Once the rear housing containing the brushes and rear bearing support was free the field assembly came away easily. I did realize, late, it would have made things easier to have removed the brushes first, and then to separate the case.
The rear bearing, housed in the rear housing, had burned up the rubber ring. A mess. It was an awkward reach to dig out the hard, burned-on residue of rubber in the rear housing. I used a drill to grind part of it away.
I had ordered the rubber ring, and the new bearing, and new brushes. Had to keep digging to get enough of the old rubber ring out so the new one could seat. At that, it took a good deal of effort to get it and the new bearing seated. That part was only complete when I tightened down the bolts that hold the rear housing and field assembly to the front part of the motor housing.
The old brushes looked about 85% wear remaining after 6 years use on remodel projects.
I would like to have replaced the front motor bearing also but could not figure out how to tear down that end without a sense of risking further damage. Did not find complete or clear enough instructions on that part.
The how-I-fixed-it accounts of quite a few others really helped.
Did you find this story helpful?
Thanks for voting and helping fellow customers!
bad bearing
Timothy - November 4, 2020
👍 1 of 1 people found this instruction helpful
Tool Type
Table Saw
Difficulty
Medium
Time
15-30 minutes
Tools Used
, bearing puller
removed the armature cover, pulled off bearing with bearing puller, installed new bearing with a socket and hammer
Did you find this story helpful?
Thanks for voting and helping fellow customers!
rear motor bearing seized
ERIK - November 13, 2021
Tool Type
Table Saw
Difficulty
Hard
Time
30-60 minutes
Tools Used
Screwdriver, Pliers, Nutdriver, gear puller
1. Removed motor housing
2. Removed seized bearing, installed new.
3. Installed new rubber bearing carrier
4. Removed motor bushings to reassemble housing.
5. Installed housing
6. install bushings
2. Removed seized bearing, installed new.
3. Installed new rubber bearing carrier
4. Removed motor bushings to reassemble housing.
5. Installed housing
6. install bushings
Did you find this story helpful?
Thanks for voting and helping fellow customers!
Wasn’t running
CARLOS - September 11, 2021
Tool Type
Table Saw
Difficulty
Medium
Time
1-2 hours
Tools Used
Power Drill, Ball bearings puller
I removed the motor housing, and the ball bearing… replaced with the new ones, put it back together!..
That was it!
It is running again!
That was it!
It is running again!
Did you find this story helpful?
Thanks for voting and helping fellow customers!
Bosch 4000 Table Saw
David - August 23, 2020
Tool Type
Table Saw
Difficulty
Hard
Time
1-2 hours
Tools Used
Screwdriver, bearing puller
Parts Used
The motor was sparking. I replaced the armature field and bearings. The tear down is challenging. Mark the wires first as the schematic is hard to understand or not right. One wire is connected to a spade on one of the bushings.
Interesting enough my motor never had the rubber ring this is critical to keep the bearing stable and inline.
The most difficult part of the assembly was installation of the bearing bracket. The trick here is to get a M4 screw 2 inches long and use this to feed into the cast housing into the bearing bracket. Once these 2 long screws are seated, back one out slowly and dont move anything. Then instal the original screw and tighten. then do the other side. I dont know of any other way of doing this.
Did you find this story helpful?
Thanks for voting and helping fellow customers!
Bearing at back of motor had overheated and fused to the armature
Jost - April 20, 2020
Tool Type
Table Saw
Difficulty
Hard
Time
1-2 hours
Tools Used
Screwdriver, Pliers, Press, Allen Wrench and hammer
1. Removed plastic base and main switch
2. Removed saw blade arbor, Arber lock and Spur gear.
3. Removed motor brushes, housing and armature
4. Pressed new bearing on armature and slid rubber boot over bearing.
5. Assembled in reverse order of disassembly.
2. Removed saw blade arbor, Arber lock and Spur gear.
3. Removed motor brushes, housing and armature
4. Pressed new bearing on armature and slid rubber boot over bearing.
5. Assembled in reverse order of disassembly.
Did you find this story helpful?
Thanks for voting and helping fellow customers!
Bearing in drive motor was out
Jeff - March 27, 2020
Tool Type
Table Saw
Difficulty
Medium
Time
1-2 hours
Tools Used
Screwdriver, Pliers
Removed motor and disassemble it to get to the bearing on the end of the shaft. Replaced bearing and reassembled. Works good as new.
Did you find this story helpful?
Thanks for voting and helping fellow customers!
Motor bearing was worn and quite noisy
Kevin - October 25, 2019
Tool Type
Table Saw
Difficulty
Medium
Time
30-60 minutes
Tools Used
Screwdriver, Pliers, Wrench Set, Bearing pulller
Followed the advice of those who've done this. The only thing missing from those instructions was the fact that you have to remove the plastic body of the saw (while it's upside down) to be able to get enough clearance to remove the end cover of the motor. Once that's done, it was fairly straight forward to get to the bearing and remove it. A bearing puller is a must to get the old one off the shaft. It was easy enough tapping the new one on using a socket slightly larger than the shaft diameter. The saw is back in working order and seems to be operating as good as ever.
Did you find this story helpful?
Thanks for voting and helping fellow customers!
bearing was worn-out and spun in the rubber Ring destroying it
Edward - February 21, 2019
Tool Type
Table Saw
Difficulty
Medium
Time
1-2 hours
Tools Used
Screwdriver, Pliers, Socket set, puller to remove old bearing
Replaced the bearing and rubber Ring
Did you find this story helpful?
Thanks for voting and helping fellow customers!
Load More Install Stories
OEM stands for Original Equipment Manufacturer and means the part you’re buying is sourced directly from the manufacturer who made your product. At eReplacementParts, we sell only genuine OEM parts, guaranteeing the part you’re purchasing is of better design and of higher quality than aftermarket parts.
Our product descriptions are a combination of data sourced directly from the manufacturers who made your product as well as content researched and curated by our content & customer service teams. This content is edited and reviewed internally before being made public to customers.
Our customer service team are at the ready daily to answer your part and product questions. We have a dedicated staff with decades of collective experience in helping customers just like you purchase parts to repair their products.
All our part reviews are solicited directly from other customers who have purchased this exact part. While we moderate these reviews for profanity, offensive language or personally identifiable information, these reviews are posted exactly as submitted and no alterations are made by our team.
All our customer repair instructions are solicited directly from other customers just like you who have purchased and replaced this exact part. While we moderate these reviews for profanity, offensive language or personally identifiable information, these reviews are posted exactly as submitted and no alterations are made by our team.
Based on data from past customer purchasing behaviors, these parts are most commonly purchased together along with the part you are viewing. These parts may be necessary or helpful to replace to complete your current repair.
All our installation videos are created and produced in collaboration with our in-house repair technician, Mark Sodja, who has helped millions of eReplacementParts customers over the last 13 years repair their products. Mark has years of experience in selling and repairing both commercial and residential products with a specialty in gas-powered equipment.
This data is collected from customers who submitted a repair instruction after replacing this exact part. Customers can rate how easy the repair was to complete and how long it took. We aggregate this data to provide a repair rating that allows customers to quickly determine the difficulty and time needed to perform their own repair.