


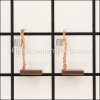
This item is a genuine Makita replacement part that has been OEM sourced to ensure quality. The rubber pin is intended to be used with impact drills/drivers, shears, and drywall screwdrivers. The rubber pin is used to provide spacing between the brush card and the housing assembly. This item is sold as a single part.
Rubber Pin 4 263032-0
OEM part for: Makita
Part Number: 263032-0
$4.99
In Stock
Jump To:
Frequently Purchased Together ?
Compatibility
This part will fit the following 310 machines
Makita
BDF452HW Drill / Driver View Diagrams & Manuals
BHP451 Drill / Driver View Diagrams & Manuals
BDF451 Drill / Driver View Diagrams & Manuals
BTD130FW Impact Driver View Diagrams & Manuals
BTP140 Hybrid Impact Hammer Driver Drill View Diagrams & Manuals
BTD140 Impact Driver View Diagrams & Manuals
BTD142 18V Compact Lithium-Ion Cordless Impact Driver View Diagrams & Manuals
BTW251 18V LXT Lithium-Ion Cordless 1/2" Impact Wrench View Diagrams & Manuals
BHP452 18V LXT Lithium-Ion Cordless 1/2" Hammer Drill-Driver View Diagrams & Manuals
BTD141 18V LXT Lithium-Ion Cordless Impact Driver View Diagrams & Manuals
BTW253 18V LXT Lithium-Ion Cordless 3/8" Impact Wrench View Diagrams & Manuals
BJS130 18V LXT Lithium-Ion Cordless 18 Gauge Straight Shear View Diagrams & Manuals
BFS450 18V LXT Lithium-Ion Cordless Drywall Screwdriver View Diagrams & Manuals
BFR750 18V LXT Lithium-Ion Cordless Autofeed Screwdriver View Diagrams & Manuals
BHP454 18V LXT Lithium-Ion Cordless 1/2" Hammer Driver-Drill View Diagrams & Manuals
BDF451Z Cordless 1/2" Driver-Drill View Diagrams & Manuals
BDF452 Cordless 1/2" Driver-Drill View Diagrams & Manuals
BFR750Z Cordless Autofeed Screwdriver View Diagrams & Manuals
BFS450Z Cordless Drywall Screwdriver View Diagrams & Manuals
BTD141Z 18V LXT Lithium-Ion Cordless Impact Driver View Diagrams & Manuals
LXFD01CW 18V Compact Lithium-Ion Cordless 1/2" Driver-Drill View Diagrams & Manuals
LXFD01 18V LXT Lithium-Ion Cordless 1/2" Driver-Drill View Diagrams & Manuals
LXFD01Z 18V LXT Lithium-Ion Cordless 1/2" Driver-Drill View Diagrams & Manuals
LXPH01 18V LXT Lithium-Ion Cordless 1/2 Hammer Driver-Drill Kit View Diagrams & Manuals
LXPH01Z 18V LXT Lithium-Ion Cordless 1/2 Hammer Driver-Drill View Diagrams & Manuals
LXPH01CW 18V LXT Lithium-Ion Cordless 1/2 Hammer Driver-Drill View Diagrams & Manuals
LXDT04 18V LXT Lithium-Ion Cordless Impact Driver Kit View Diagrams & Manuals
LXDT04CW Cordless Impact Driver View Diagrams & Manuals
LXPH03 18V Hamer Driver-Drill View Diagrams & Manuals
XFD01 18V LXT Lithium-Ion Cordless 1/2" Driver-Drill Kit View Diagrams & Manuals
XFD01RW 18V Compact Lithium-Ion Cordless 1/2" Driver-Drill Kit View Diagrams & Manuals
XPH01RW 18V Compact Lithium-Ion Cordless 1/2" Hammer Driver-Drill Kit View Diagrams & Manuals
XPH03M 18V LXT Lithium-Ion Cordless 1/2" Hammer Driver-Drill Kit View Diagrams & Manuals
XPH01 18V LXT Lithium-Ion Cordlesss 1/2" Hammer Driver-Drill View Diagrams & Manuals
XDT11R Cordless Impact Driver View Diagrams & Manuals
BDF440 Drill View Diagrams & Manuals
BDF450 Drill View Diagrams & Manuals
BDF451 (Type 1) Drill View Diagrams & Manuals
BDF451 (Type 2) Drill View Diagrams & Manuals
BDF451 (Type 3) Drill View Diagrams & Manuals
BDF451 (Type 4) Drill View Diagrams & Manuals
BDF451Z (Type 1) Drill View Diagrams & Manuals
BDF451Z (Type 2) Drill View Diagrams & Manuals
BDF451Z (Type 3) Drill View Diagrams & Manuals
BDF451Z (Type 4) Drill View Diagrams & Manuals
BDF452H (Type 1) Drill View Diagrams & Manuals
BDF452H (Type 2) Drill View Diagrams & Manuals
BDF452H (Type 3) Drill View Diagrams & Manuals
BDF452HW (Type 2) Drill View Diagrams & Manuals
BDF452HW (Type 3) Drill View Diagrams & Manuals
BDF452 (Type 2) Drill View Diagrams & Manuals
BDF452 (Type 3) Drill View Diagrams & Manuals
BDF454 Drill View Diagrams & Manuals
BDF454F (Type 1) Drill View Diagrams & Manuals
BDF454F (Type 2) Drill View Diagrams & Manuals
BDF454F (Type 3) Drill View Diagrams & Manuals
BDF454 (Type 2) Drill View Diagrams & Manuals
BDF454 (Type 3) Drill View Diagrams & Manuals
BDF454Z (Type 1) Drill View Diagrams & Manuals
BDF454Z (Type 2) Drill View Diagrams & Manuals
BDF454Z (Type 3) Drill View Diagrams & Manuals
BFR540L (Type 1) Screwdriver View Diagrams & Manuals
BFR540L (Type 2) Screwdriver View Diagrams & Manuals
BFR540L (Type 3) Screwdriver View Diagrams & Manuals
BFR540L (Type 4) Screwdriver View Diagrams & Manuals
BFR540Z (Type 1) Screwdriver View Diagrams & Manuals
BFR540Z (Type 2) Screwdriver View Diagrams & Manuals
BFR540Z (Type 3) Screwdriver View Diagrams & Manuals
BFR540Z (Type 4) Screwdriver View Diagrams & Manuals
BFR550F (Type 1) Screwdriver View Diagrams & Manuals
BFR550F (Type 2) Screwdriver View Diagrams & Manuals
BFR550F (Type 3) Screwdriver View Diagrams & Manuals
BFR550L (Type 1) Screwdriver View Diagrams & Manuals
BFR550L (Type 2) Screwdriver View Diagrams & Manuals
BFR550L (Type 3) Screwdriver View Diagrams & Manuals
BFR550 (Type 1) Screwdriver View Diagrams & Manuals
BFR550 (Type 2) Screwdriver View Diagrams & Manuals
BFR550 (Type 3) Screwdriver View Diagrams & Manuals
BFR550Z (Type 1) Screwdriver View Diagrams & Manuals
BFR550Z (Type 2) Screwdriver View Diagrams & Manuals
BFR550Z (Type 3) Screwdriver View Diagrams & Manuals
BFR750F (Type 1) Screwdriver View Diagrams & Manuals
BFR750F (Type 2) Screwdriver View Diagrams & Manuals
BFR750F (Type 3) Screwdriver View Diagrams & Manuals
BFR750L (Type 1) Screwdriver View Diagrams & Manuals
BFR750L (Type 2) Screwdriver View Diagrams & Manuals
BFR750L (Type 3) Screwdriver View Diagrams & Manuals
BFR750Z (Type 2) Screwdriver View Diagrams & Manuals
BFR750Z (Type 3) Screwdriver View Diagrams & Manuals
BFS450F (Type 1) Screwdriver View Diagrams & Manuals
BFS450F (Type 2) Screwdriver View Diagrams & Manuals
BFS450F (Type 3) Screwdriver View Diagrams & Manuals
BFS450H2 (Type 1) Screwdriver View Diagrams & Manuals
BFS450H2 (Type 2) Screwdriver View Diagrams & Manuals
BFS450H2 (Type 3) Screwdriver View Diagrams & Manuals
BFS450Z (Type 2) Screwdriver View Diagrams & Manuals
BFS450Z (Type 3) Screwdriver View Diagrams & Manuals
BHP450 Drill View Diagrams & Manuals
BHP451 (Type 2) Drill View Diagrams & Manuals
BHP451 (Type 3) Drill View Diagrams & Manuals
BHP452H2 (Type 1) Drill View Diagrams & Manuals
BHP452H2 (Type 2) Drill View Diagrams & Manuals
BHP452H2 (Type 3) Drill View Diagrams & Manuals
BHP452H (Type 1) Drill View Diagrams & Manuals
BHP452H (Type 2) Drill View Diagrams & Manuals
BHP452H (Type 3) Drill View Diagrams & Manuals
BHP452HW (Type 1) Drill View Diagrams & Manuals
BHP452HW (Type 2) Drill View Diagrams & Manuals
BHP452HW (Type 3) Drill View Diagrams & Manuals
BHP452 (Type 2) Drill View Diagrams & Manuals
BHP452 (Type 3) Drill View Diagrams & Manuals
BHP452Z Drill View Diagrams & Manuals
BHP454F (Type 1) Drill View Diagrams & Manuals
BHP454F (Type 2) Drill View Diagrams & Manuals
BHP454F (Type 3) Drill View Diagrams & Manuals
BHP454S (Type 1) Drill View Diagrams & Manuals
BHP454S (Type 2) Drill View Diagrams & Manuals
BHP454S (Type 3) Drill View Diagrams & Manuals
BHP454 (Type 2) Drill View Diagrams & Manuals
BHP454 (Type 3) Drill View Diagrams & Manuals
BHP454Z (Type 1) Drill View Diagrams & Manuals
BHP454Z (Type 2) Drill View Diagrams & Manuals
BHP454Z (Type 3) Drill View Diagrams & Manuals
BJS130F (Type 1) Misc View Diagrams & Manuals
BJS130F (Type 2) Misc View Diagrams & Manuals
BJS130F (Type 3) Misc View Diagrams & Manuals
BJS130 (Type 2) Misc View Diagrams & Manuals
BJS130 (Type 3) Misc View Diagrams & Manuals
BJS130Z Misc View Diagrams & Manuals
BJS130Z (Type 1) Misc View Diagrams & Manuals
BJS130Z (Type 2) Misc View Diagrams & Manuals
BJS130Z (Type 3) Misc View Diagrams & Manuals
BTD043 Drill / Driver View Diagrams & Manuals
BTD044Z (Type 1) Drill / Driver View Diagrams & Manuals
BTD044Z (Type 2) Drill / Driver View Diagrams & Manuals
BTD064Z (Type 2) Drill / Driver View Diagrams & Manuals
BTD103 Drill / Driver View Diagrams & Manuals
BTD103Z Drill / Driver View Diagrams & Manuals
BTD104 (Type 1) Drill / Driver View Diagrams & Manuals
BTD104 (Type 2) Drill / Driver View Diagrams & Manuals
BTD104Z (Type 1) Drill / Driver View Diagrams & Manuals
BTD104Z (Type 2) Drill / Driver View Diagrams & Manuals
BTD130FSFEW (Type 1) Drill / Driver View Diagrams & Manuals
BTD130FSFEW (Type 2) Drill / Driver View Diagrams & Manuals
BTD130FSFEW (Type 3) Drill / Driver View Diagrams & Manuals
BTD130F (Type 1) Drill / Driver View Diagrams & Manuals
BTD130F (Type 2) Drill / Driver View Diagrams & Manuals
BTD130F (Type 3) Drill / Driver View Diagrams & Manuals
BTD130FZ (Type 1) Drill / Driver View Diagrams & Manuals
BTD130FZ (Type 2) Drill / Driver View Diagrams & Manuals
BTD130FZ (Type 3) Drill / Driver View Diagrams & Manuals
BTD140 (Type 1) Drill / Driver View Diagrams & Manuals
BTD140 (Type 2) Drill / Driver View Diagrams & Manuals
BTD140 (Type 3) Drill / Driver View Diagrams & Manuals
BTD140Z (Type 1) Drill / Driver View Diagrams & Manuals
BTD140Z (Type 2) Drill / Driver View Diagrams & Manuals
BTD140Z (Type 3) Drill / Driver View Diagrams & Manuals
BTD141H2 (Type 1) Drill / Driver View Diagrams & Manuals
BTD141H2 (Type 2) Drill / Driver View Diagrams & Manuals
BTD141H2 (Type 3) Drill / Driver View Diagrams & Manuals
BTD141HW (Type 1) Drill / Driver View Diagrams & Manuals
BTD141HW (Type 2) Drill / Driver View Diagrams & Manuals
BTD141HW (Type 3) Drill / Driver View Diagrams & Manuals
BTD141 (Type 1) Drill / Driver View Diagrams & Manuals
BTD141 (Type 2) Drill / Driver View Diagrams & Manuals
BTD141 (Type 3) Drill / Driver View Diagrams & Manuals
BTD141Z (Type 1) Drill / Driver View Diagrams & Manuals
BTD141Z (Type 2) Drill / Driver View Diagrams & Manuals
BTD141Z (Type 3) Drill / Driver View Diagrams & Manuals
BTD142H (Type 1) Drill / Driver View Diagrams & Manuals
BTD142H (Type 2) Drill / Driver View Diagrams & Manuals
BTD142HW (Type 1) Drill / Driver View Diagrams & Manuals
BTD142HW (Type 2) Drill / Driver View Diagrams & Manuals
BTD146 Drill / Driver View Diagrams & Manuals
BTP140F (Type 1) Drill / Driver View Diagrams & Manuals
BTP140F (Type 2) Drill / Driver View Diagrams & Manuals
BTP140F (Type 3) Drill / Driver View Diagrams & Manuals
BTP140 (Type 1) Drill / Driver View Diagrams & Manuals
BTP140 (Type 2) Drill / Driver View Diagrams & Manuals
BTP140 (Type 3) Drill / Driver View Diagrams & Manuals
BTP140X2 (Type 1) Drill / Driver View Diagrams & Manuals
BTP140X2 (Type 2) Drill / Driver View Diagrams & Manuals
BTP140X2 (Type 3) Drill / Driver View Diagrams & Manuals
BTP140Z (Type 1) Drill / Driver View Diagrams & Manuals
BTP140Z (Type 2) Drill / Driver View Diagrams & Manuals
BTP140Z (Type 3) Drill / Driver View Diagrams & Manuals
BTS130 (Type 1) Drill / Driver View Diagrams & Manuals
BTS130 (Type 2) Drill / Driver View Diagrams & Manuals
BTW103Z Drill / Driver View Diagrams & Manuals
BTW104Z Drill / Driver View Diagrams & Manuals
BTW104Z (Type 1) Drill / Driver View Diagrams & Manuals
BTW104Z (Type 2) Drill / Driver View Diagrams & Manuals
BTW250 (Type 1) Drill / Driver View Diagrams & Manuals
BTW250 (Type 2) Drill / Driver View Diagrams & Manuals
BTW250 (Type 3) Drill / Driver View Diagrams & Manuals
BTW250 (Type 4) Drill / Driver View Diagrams & Manuals
BTW250Z (Type 1) Drill / Driver View Diagrams & Manuals
BTW250Z (Type 2) Drill / Driver View Diagrams & Manuals
BTW250Z (Type 3) Drill / Driver View Diagrams & Manuals
BTW250Z (Type 4) Drill / Driver View Diagrams & Manuals
BTW251F (Type 1) Drill / Driver View Diagrams & Manuals
BTW251F (Type 2) Drill / Driver View Diagrams & Manuals
BTW251F (Type 3) Drill / Driver View Diagrams & Manuals
BTW251F (Type 4) Drill / Driver View Diagrams & Manuals
BTW251FX1 (Type 1) Drill / Driver View Diagrams & Manuals
BTW251FX1 (Type 2) Drill / Driver View Diagrams & Manuals
BTW251FX1 (Type 3) Drill / Driver View Diagrams & Manuals
BTW251FX1 (Type 4) Drill / Driver View Diagrams & Manuals
BTW251 (Type 1) Drill / Driver View Diagrams & Manuals
BTW251 (Type 2) Drill / Driver View Diagrams & Manuals
BTW251 (Type 3) Drill / Driver View Diagrams & Manuals
BTW251 (Type 4) Drill / Driver View Diagrams & Manuals
BTW251X (Type 1) Drill / Driver View Diagrams & Manuals
BTW251X (Type 2) Drill / Driver View Diagrams & Manuals
BTW251X (Type 3) Drill / Driver View Diagrams & Manuals
BTW251X (Type 4) Drill / Driver View Diagrams & Manuals
BTW251Z (Type 1) Drill / Driver View Diagrams & Manuals
BTW251Z (Type 2) Drill / Driver View Diagrams & Manuals
BTW251Z (Type 3) Drill / Driver View Diagrams & Manuals
BTW251Z (Type 4) Drill / Driver View Diagrams & Manuals
BTW251ZX1 (Type 1) Drill / Driver View Diagrams & Manuals
BTW251ZX1 (Type 2) Drill / Driver View Diagrams & Manuals
BTW251ZX1 (Type 3) Drill / Driver View Diagrams & Manuals
BTW251ZX1 (Type 4) Drill / Driver View Diagrams & Manuals
BTW253F (Type 1) Drill / Driver View Diagrams & Manuals
BTW253F (Type 2) Drill / Driver View Diagrams & Manuals
BTW253F (Type 3) Drill / Driver View Diagrams & Manuals
BTW253 (Type 1) Drill / Driver View Diagrams & Manuals
BTW253 (Type 2) Drill / Driver View Diagrams & Manuals
BTW253 (Type 3) Drill / Driver View Diagrams & Manuals
BTW253Z (Type 1) Drill / Driver View Diagrams & Manuals
BTW253Z (Type 2) Drill / Driver View Diagrams & Manuals
BTW253Z (Type 3) Drill / Driver View Diagrams & Manuals
CA5000X Saw View Diagrams & Manuals
LXDT03 (Type 1) Drill / Driver View Diagrams & Manuals
LXDT03 (Type 2) Drill / Driver View Diagrams & Manuals
LXDT03 (Type 3) Drill / Driver View Diagrams & Manuals
LXDT03Z (Type 1) Drill / Driver View Diagrams & Manuals
LXDT03Z (Type 2) Drill / Driver View Diagrams & Manuals
LXDT03Z (Type 3) Drill / Driver View Diagrams & Manuals
LXDT04C1 (Type 1) Drill / Driver View Diagrams & Manuals
LXDT04C1 (Type 2) Drill / Driver View Diagrams & Manuals
LXDT04 (Type 1) Drill / Driver View Diagrams & Manuals
LXDT04 (Type 2) Drill / Driver View Diagrams & Manuals
LXDT04Z1 (Type 1) Drill / Driver View Diagrams & Manuals
LXDT04Z1 (Type 2) Drill / Driver View Diagrams & Manuals
LXDT04Z (Type 1) Drill / Driver View Diagrams & Manuals
LXDT04Z (Type 2) Drill / Driver View Diagrams & Manuals
LXFD03 (Type 1) Drill View Diagrams & Manuals
LXFD03 (Type 2) Drill View Diagrams & Manuals
LXFD03X (Type 1) Drill View Diagrams & Manuals
LXFD03X (Type 2) Drill View Diagrams & Manuals
LXFD03Z1 (Type 1) Drill View Diagrams & Manuals
LXFD03Z1 (Type 2) Drill View Diagrams & Manuals
LXFD03Z (Type 1) Drill View Diagrams & Manuals
LXFD03Z (Type 2) Drill View Diagrams & Manuals
LXFD03ZX1 (Type 1) Drill View Diagrams & Manuals
LXFD03ZX1 (Type 2) Drill View Diagrams & Manuals
LXFD03ZX (Type 1) Drill View Diagrams & Manuals
LXFD03ZX (Type 2) Drill View Diagrams & Manuals
LXPH01C1 (Type 1) Drill View Diagrams & Manuals
LXPH01C1 (Type 2) Drill View Diagrams & Manuals
LXPH01 (Type 1) Drill View Diagrams & Manuals
LXPH01 (Type 2) Drill View Diagrams & Manuals
LXPH01Z (Type 1) Drill View Diagrams & Manuals
LXPH01Z (Type 2) Drill View Diagrams & Manuals
LXPH031 (Type 1) Drill View Diagrams & Manuals
LXPH031 (Type 2) Drill View Diagrams & Manuals
LXPH03 (Type 2) Drill View Diagrams & Manuals
LXPH03X (Type 1) Drill View Diagrams & Manuals
LXPH03X (Type 2) Drill View Diagrams & Manuals
LXPH03Z Drill View Diagrams & Manuals
LXPH03Z1 (Type 1) Drill View Diagrams & Manuals
LXPH03Z1 (Type 2) Drill View Diagrams & Manuals
LXPH03ZX1 (Type 1) Drill View Diagrams & Manuals
LXPH03ZX1 (Type 2) Drill View Diagrams & Manuals
LXPH03ZX (Type 1) Drill View Diagrams & Manuals
LXPH03ZX (Type 2) Drill View Diagrams & Manuals
XCS01T1 Misc View Diagrams & Manuals
XCS01Z Saw View Diagrams & Manuals
XDT04 Drill View Diagrams & Manuals
XDT04A Drill / Driver View Diagrams & Manuals
XDT04RW Drill View Diagrams & Manuals
XDT04Z Drill View Diagrams & Manuals
XDT111 Drill / Driver View Diagrams & Manuals
XDT11Z Drill / Driver View Diagrams & Manuals
XFD01CW Drill View Diagrams & Manuals
XFD01Z Drill View Diagrams & Manuals
XFD03 Drill View Diagrams & Manuals
XFD03M Drill View Diagrams & Manuals
XFD03Z Drill View Diagrams & Manuals
XPH012 Drill View Diagrams & Manuals
XPH01A Drill View Diagrams & Manuals
XPH01CW Drill View Diagrams & Manuals
XPH01Z Drill View Diagrams & Manuals
XPH03MB Drill View Diagrams & Manuals
XPH03Z Drill View Diagrams & Manuals
XPT03 Drill / Driver View Diagrams & Manuals
XPT03Z Drill / Driver View Diagrams & Manuals
XRF01 Screwdriver View Diagrams & Manuals
XRF01Z Screwdriver View Diagrams & Manuals
XRF02 Screwdriver View Diagrams & Manuals
XRF02Z Screwdriver View Diagrams & Manuals
XSJ01 Misc View Diagrams & Manuals
XSJ01T Misc View Diagrams & Manuals
XSJ01Z Misc View Diagrams & Manuals
XWT05 Drill / Driver View Diagrams & Manuals
XWT05Z Drill / Driver View Diagrams & Manuals
XWT06 Drill / Driver View Diagrams & Manuals
XWT06Z Drill / Driver View Diagrams & Manuals
Show More Compatible Models
This item works with the following types of products:
- Drill Parts
- Impact Driver Parts
- Hammer Drill Parts
- Impact Wrench Parts
- Cordless Drill Parts
- Shear Parts
- Screwdriver Parts
Repair Videos ?
Watch the Repair Video for
Rubber Pin 4

Articles:
|
Brush clips won't stay attached? Step-by-step instructions show you how to remove and install the rubber pins on your Ma...
April 07, 2016
|

Questions & Answers ?
Our customer Service team is at the ready daily to answer your part and product questions.

Ask our Team
We have a dedicated staff with decades of collective experience in helping customers just like you purchase parts to repair their products.
Does this fit my product?Questions & Answers for Rubber Pin 4
No questions have been asked yet
Customer Repair Instructions ?
All our customer repair instructions are solicited directly from other customers just like you who have purchased and replaced this exact part.
Anvil was worn, the sleeve end moved a lot.
Ed - August 3, 2016
👍 1 of 1 people found this instruction helpful
Tool Type
Impact Driver
Difficulty
Easy
Time
15-30 minutes
Tools Used
Screwdriver
Unscrewed screws and took case apart.
Replaced anvil
Replaced brushes
Added rubber pin in case back end (i lost it)
Replaced case with new parts, added label
I now have a brand new impact driver
I also used a video available on ereplacementparts, was a great asset and explained and showed the repair.
Replaced anvil
Replaced brushes
Added rubber pin in case back end (i lost it)
Replaced case with new parts, added label
I now have a brand new impact driver
I also used a video available on ereplacementparts, was a great asset and explained and showed the repair.
Did you find this story helpful?
Thanks for voting and helping fellow customers!
over heated & burned fan blades on armature & melted those to brush holder
John - September 22, 2021
Tool Type
Hammer Drill
Difficulty
Easy
Time
30-60 minutes
Tools Used
Screwdriver, Pliers, needle nose pliers
removed damaged / ruined parts
installed new ones,
most difficulty was re-aligning all parts correctly,
installed new ones,
most difficulty was re-aligning all parts correctly,
Did you find this story helpful?
Thanks for voting and helping fellow customers!
Motor kept stopping and sparks shooting out
Neil - April 20, 2018
Tool Type
Cordless Drill
Difficulty
Medium
Time
15-30 minutes
Tools Used
Screwdriver
Removed all screws holding casing and power head, separated case removed motor replaced armature, removed brush holder and 2 screws from trigger, installed new brush holder wires on trigger make sure which ones are red and black, re assembled in reverse order total time was maybe 20 minutes, make sure notch on motor lines in with the notch in the case.
Did you find this story helpful?
Thanks for voting and helping fellow customers!
Driver was smoking and shooting sparks out of the motor
Justin - March 28, 2018
Tool Type
Impact Driver
Difficulty
Medium
Time
Less than 15 minutes
Tools Used
Screwdriver
Swapped out all visibly worn parts with replacement parts. Driver works great.
Did you find this story helpful?
Thanks for voting and helping fellow customers!
Brush-holder, and brushes damaged by impact with pointed object to back of impact driver.
Todd - March 1, 2017
Tool Type
Impact Wrench
Difficulty
Medium
Time
1-2 hours
Tools Used
Screwdriver, needle nose pliers, wire cutters
1. Disassembled impact driver. (remove screws from end cap, body halves)
2. Removed damaged brushes, springs, and electrical clips.
3. Disconnected brush-holder electrical feed wires from electrical source. (screws)
4. Removed damaged brush-holder.
5. Installed new brush-holder.
6. Connected brush-holder electrical feed wires to electrical source. (screws)
7. Installed new brushes, springs, and electrical clips.
8. Assembled impact driver. (installed screws in body halves, end cap)
Did you find this story helpful?
Thanks for voting and helping fellow customers!
Multiple parts worn
Lukasz - January 12, 2017
Tool Type
Impact Driver
Difficulty
Easy
Time
15-30 minutes
Tools Used
Screwdriver
Removed the rear cover, disconnected the brushes and replaced them,
Installed the new rear cover and rubber pin
Pressed on the new front bumper
Installed the new rear cover and rubber pin
Pressed on the new front bumper
Did you find this story helpful?
Thanks for voting and helping fellow customers!
Older makita drill overheated and melted the brush holder and armature
Gary - January 8, 2017
Tool Type
Cordless Drill
Difficulty
Medium
Time
15-30 minutes
Tools Used
Screwdriver
1. Remove two screws on rear of drill and remove cap taking care not to lose small plugs (smaller than pencil eraser).
2. Remove screw side half of drill housing observing damage and parts orientation. Note there is one screw inside the back cap to unscrew as well.
3. Remove damaged parts and add replacement parts in same orientation. I checked a newer drill for reference, but should have taken a photo before I started.
4. Reassembled taking care on the trigger lock and speed shifter since they try to get out of alignment. There is also a small "T" shaped piece of curved steel that aligns in a groove forward of the chuck. It fell out loose on mine.
5. Check drill operation.
Did you find this story helpful?
Thanks for voting and helping fellow customers!
Fan blades broke off and armature fused to brush holder
scott - October 15, 2016
Tool Type
Cordless Drill
Difficulty
Medium
Time
15-30 minutes
Tools Used
Screwdriver
1) Removed battery
2) Removed screws from case and set aside one half of the case
3) Removed old brush holder from case and disconnected wiring from the trigger
4) Moved magnet coil retention bracket out of the way
5) Removed armature screws from front of drill around chuck
6) Twisted plastic armature retainer and pulled armature assembly out of drill body, taking care not to damage the planetary gears
7) Transferred plastic armature retainer to new armature
8) Transferred magnet coil to new armature and installed the assembly
9) Installed new brushes in new brush holder
10) Installed new brush holder assembly in drill body and connected to the trigger
11) Transferred speed selector switch to new armature.
12) Installed new Rubber Pins into back of drill case
13) Reinstalled magnet coil retention bracket
14) Reassembled drill case and tested
Did you find this story helpful?
Thanks for voting and helping fellow customers!
Over heated and froze the motor
Robert - August 11, 2016
Tool Type
Hammer Drill
Difficulty
Medium
Time
30-60 minutes
Tools Used
Screwdriver, Wrench Set
1. Got online to your website
2. Looked at posted video
3. Ordered parts
4. Installed parts
5. Drill works great
2. Looked at posted video
3. Ordered parts
4. Installed parts
5. Drill works great
Did you find this story helpful?
Thanks for voting and helping fellow customers!
OEM stands for Original Equipment Manufacturer and means the part you’re buying is sourced directly from the manufacturer who made your product. At eReplacementParts, we sell only genuine OEM parts, guaranteeing the part you’re purchasing is of better design and of higher quality than aftermarket parts.
Our product descriptions are a combination of data sourced directly from the manufacturers who made your product as well as content researched and curated by our content & customer service teams. This content is edited and reviewed internally before being made public to customers.
Our customer service team are at the ready daily to answer your part and product questions. We have a dedicated staff with decades of collective experience in helping customers just like you purchase parts to repair their products.
All our part reviews are solicited directly from other customers who have purchased this exact part. While we moderate these reviews for profanity, offensive language or personally identifiable information, these reviews are posted exactly as submitted and no alterations are made by our team.
All our customer repair instructions are solicited directly from other customers just like you who have purchased and replaced this exact part. While we moderate these reviews for profanity, offensive language or personally identifiable information, these reviews are posted exactly as submitted and no alterations are made by our team.
Based on data from past customer purchasing behaviors, these parts are most commonly purchased together along with the part you are viewing. These parts may be necessary or helpful to replace to complete your current repair.
All our installation videos are created and produced in collaboration with our in-house repair technician, Mark Sodja, who has helped millions of eReplacementParts customers over the last 13 years repair their products. Mark has years of experience in selling and repairing both commercial and residential products with a specialty in gas-powered equipment.
This data is collected from customers who submitted a repair instruction after replacing this exact part. Customers can rate how easy the repair was to complete and how long it took. We aggregate this data to provide a repair rating that allows customers to quickly determine the difficulty and time needed to perform their own repair.