


This is a genuine Powermate replacement part, it is sold individually.
It is used on the Generators shown below.
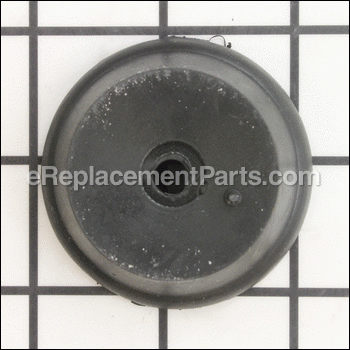
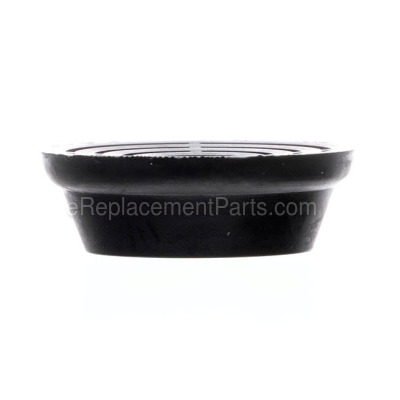
The purpose of the 0047774 Rubber Foot, is it to keep the unit stabilized when it is running.
And also to keep the frame off of the ground and damaging it.
Rubber Foot 0047774SRV
OEM part for: Powermate
Part Number: 0047774SRV
$4.99
In Stock
Jump To:
Product Description ?
- Size: 106-Wide
- Classification: Part
- Weight: 0.02 lbs.
- Shipping: Ships Worldwide
Frequently Purchased Together ?

Compatibility
This part will fit the following 25 machines
Powermate
PMC401853 Generator View Diagrams & Manuals
PMC401856 Generator View Diagrams & Manuals
PMC401857 Generator View Diagrams & Manuals
PMC431800.01 Generator View Diagrams & Manuals
PL0563505 Generator View Diagrams & Manuals
PM0401858 Generator View Diagrams & Manuals
PM0431800.01 Generator View Diagrams & Manuals
PM0431800 Generator View Diagrams & Manuals
PM0431802.01 Generator View Diagrams & Manuals
PM0431802 Generator View Diagrams & Manuals
PM0563505 Generator View Diagrams & Manuals
PM0401850 Generator View Diagrams & Manuals
PM0401851 Generator View Diagrams & Manuals
PM0401852 Generator View Diagrams & Manuals
PM0401853 Generator View Diagrams & Manuals
PM0401854 Generator View Diagrams & Manuals
PM0401855 Generator View Diagrams & Manuals
PM0401856 Generator View Diagrams & Manuals
PM0401857 Generator View Diagrams & Manuals
PC0401850 Generator View Diagrams & Manuals
PC0401851 Generator View Diagrams & Manuals
PC0401855 Generator View Diagrams & Manuals
PC0401856 Generator View Diagrams & Manuals
PE0401853 Generator View Diagrams & Manuals
PL0563503 Generator View Diagrams & Manuals
Show More Compatible Models
This item works with the following types of products:
- Generator Parts
This part replaces obsolete part #: 0047774
Customer Part Reviews ?
Average Rating (out of 5):
Click to filter by ratings:
5 stars
19
4 stars
1
3 stars
1
2 stars
0
1 stars
0
< PREV
- 1
- 2
- 3
work good
good product fast shipping very satisfied
Guest -
21 days ago
Verified Purchase
Easy replacement
Perfect replacement part and arrived a day early
Guest -
March 19, 2023
Verified Purchase
Perfect.
Quick service.
Guest -
October 12, 2022
Verified Purchase
Perfect replacement.
Exactly what I needed.
Guest -
July 26, 2022
Verified Purchase
Perfect fit.
My 1850 powermate generator is like new. Ordered extras.
Guest -
April 8, 2021
Verified Purchase
great service and parts
worked great just like original part. fast service.
Guest -
March 9, 2021
Verified Purchase
Reparación fácil
Excelente condiciones, llegó rápido buen servicio
Guest -
December 7, 2020
Verified Purchase
Easy repair!
Arrived quickly!
Samuel -
December 1, 2020
Verified Purchase
Parts looked just like oem fit great
The part came quickly and was a great price.
Guest -
October 19, 2020
Verified Purchase
Worked great 👍
Got here fast
Guest -
June 25, 2020
Verified Purchase
t
t
t -
t days ago
Verified Purchase
eReplacementParts Team
t
Questions & Answers ?
Our customer Service team is at the ready daily to answer your part and product questions.

Ask our Team
We have a dedicated staff with decades of collective experience in helping customers just like you purchase parts to repair their products.
Does this fit my product?Questions & Answers for Rubber Foot
No questions have been asked yet
Customer Repair Instructions ?
All our customer repair instructions are solicited directly from other customers just like you who have purchased and replaced this exact part.
Fuel leak causing gasoline to leak onto the rubber vibration reducing feet. Caused the rubber feet to deteriorate.
Richard - April 10, 2016
👍 8 of 10 people found this instruction helpful
Tool Type
Generator
Difficulty
Easy
Time
Less than 15 minutes
Tools Used
Wrench Set, 7/16\\
Parts Used
Simply remove the attaching screws and reinstall using the new rubber feet
Did you find this story helpful?
Thanks for voting and helping fellow customers!
Ethonol ruined the carburator
John - April 12, 2017
👍 5 of 6 people found this instruction helpful
Tool Type
Generator
Difficulty
Easy
Time
15-30 minutes
Tools Used
Screwdriver, Pliers, Socket set, Torq driver
Removed all the casing pieces
Removed all the fuel lines
Removed the air filter
Removed the carburetor choke cover
Removed the carburetor
Installed the new carb and gaskets
installed the fuel line from the carb to the new shut off valve
Installed the fuel line to the gas tank and new shut off valve
Replaced the choke cover
Replace the air filter
Replaced the side panel
Added gas and started the generator on first pull
Turned off the generator and washed up
Did you find this story helpful?
Thanks for voting and helping fellow customers!
Rubber feet dry rotting
Harry - May 19, 2016
👍 3 of 4 people found this instruction helpful
Tool Type
Generator
Difficulty
Easy
Time
Less than 15 minutes
Tools Used
Socket set
Parts Used
Remove the screws that hold the rubber feet to the frame and remove them. Then attach the new rubber feet with the same screws.
Did you find this story helpful?
Thanks for voting and helping fellow customers!
The rubber feet on the generator were old and decaying making the generator unstable
Daniel - February 27, 2019
👍 1 of 1 people found this instruction helpful
Tool Type
Generator
Difficulty
Easy
Time
15-30 minutes
Tools Used
Socket set, Wrench Set
Parts Used
The repair was quick and easy especially when you have the correct replacement parts. I tilted the generator and placed a wood block underneath. Removed the two supporting legs with rubber feet on one side, then the same on other side using the same method. Pretty simple.
Did you find this story helpful?
Thanks for voting and helping fellow customers!
Rotten rubber feet
Kevin - January 31, 2019
👍 1 of 1 people found this instruction helpful
Tool Type
Generator
Difficulty
Easy
Time
15-30 minutes
Tools Used
Socket set, Wrench Set
Parts Used
Remove bolts and nuts from generator feet, Installed new pads
Did you find this story helpful?
Thanks for voting and helping fellow customers!
The feet on my Colman Powermate where falling apart.
Ian - January 12, 2019
👍 1 of 1 people found this instruction helpful
Tool Type
Generator
Difficulty
Easy
Time
Less than 15 minutes
Tools Used
Wrench Set
Parts Used
I removed the old feet with a cresent wrench. Re used existing stanless bolts, washer, and locking nut. The old feet where falling apart and origional i think 20 something year old feet. Was suprised that Generac still makes these. With They would make the other crap for this thing still.
Did you find this story helpful?
Thanks for voting and helping fellow customers!
Original rubber feet dry rotted
Kurt - July 27, 2018
👍 1 of 1 people found this instruction helpful
Tool Type
Generator
Difficulty
Easy
Time
Less than 15 minutes
Tools Used
Wrench Set
Parts Used
Removed old feet and replaced with new
Did you find this story helpful?
Thanks for voting and helping fellow customers!
Needed to replace all four rubber feet
Thomas - June 3, 2018
👍 1 of 1 people found this instruction helpful
Tool Type
Generator
Difficulty
Medium
Time
15-30 minutes
Tools Used
Screwdriver, Wrench Set
Parts Used
Removed all four rubbers and replaced with new ones.
Did you find this story helpful?
Thanks for voting and helping fellow customers!
Rubber feet were totally gone-gas cap gasket shot
DAVE - May 31, 2018
👍 1 of 1 people found this instruction helpful
Tool Type
Generator
Difficulty
Easy
Time
Less than 15 minutes
Tools Used
Power Drill, Adjustable Wrench
Parts Used
Took old gas cap off-tossed away---removed screws holding old foot rubber, put new foot rubber on screw and replaced screw(x4)--done
Did you find this story helpful?
Thanks for voting and helping fellow customers!
Old rubber feet had worn out
kenneth - April 12, 2018
👍 1 of 1 people found this instruction helpful
Tool Type
Generator
Difficulty
Easy
Time
15-30 minutes
Tools Used
Adjustable Wrench, Allen wrench set
Parts Used
Unbolted the old rubber feet and bolted on the new ones
Did you find this story helpful?
Thanks for voting and helping fellow customers!
Load More Install Stories
OEM stands for Original Equipment Manufacturer and means the part you’re buying is sourced directly from the manufacturer who made your product. At eReplacementParts, we sell only genuine OEM parts, guaranteeing the part you’re purchasing is of better design and of higher quality than aftermarket parts.
Our product descriptions are a combination of data sourced directly from the manufacturers who made your product as well as content researched and curated by our content & customer service teams. This content is edited and reviewed internally before being made public to customers.
Our customer service team are at the ready daily to answer your part and product questions. We have a dedicated staff with decades of collective experience in helping customers just like you purchase parts to repair their products.
All our part reviews are solicited directly from other customers who have purchased this exact part. While we moderate these reviews for profanity, offensive language or personally identifiable information, these reviews are posted exactly as submitted and no alterations are made by our team.
All our customer repair instructions are solicited directly from other customers just like you who have purchased and replaced this exact part. While we moderate these reviews for profanity, offensive language or personally identifiable information, these reviews are posted exactly as submitted and no alterations are made by our team.
Based on data from past customer purchasing behaviors, these parts are most commonly purchased together along with the part you are viewing. These parts may be necessary or helpful to replace to complete your current repair.
All our installation videos are created and produced in collaboration with our in-house repair technician, Mark Sodja, who has helped millions of eReplacementParts customers over the last 13 years repair their products. Mark has years of experience in selling and repairing both commercial and residential products with a specialty in gas-powered equipment.
This data is collected from customers who submitted a repair instruction after replacing this exact part. Customers can rate how easy the repair was to complete and how long it took. We aggregate this data to provide a repair rating that allows customers to quickly determine the difficulty and time needed to perform their own repair.