


Why Read This Article?
Finish Nailer Repair - Replacing the Driver Guide (Ridgid Part # 79004001022)
Article Breakdown
Finish Nailer Repair - Replacing the Driver Guide (Ridgid Part # 79004001022)
Video
Tools & Materials

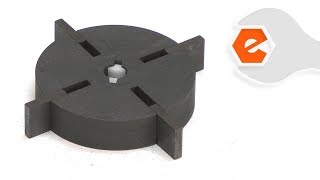
The Roto kit is installed to the front of the pump motor. The kit consists of a new rotor and the rotor vanes. The rotor is the fuel pump in your forced-air heater. Over time, the rotor vanes will wear until the rotor can no longer produce enough pressure to pump fuel.
Let's get started.
REMOVING THE ROTOR KIT 1. Safety first.
a. Disconnect the heater from its source of electricity.
b. Drain any excess fuel from the heater.
2. Remove the top cover.
a. Remove the screws securing the top cover to the lower housing.
b. Lift the top cover away from the unit.
3. Remove the fan guard.
a. Lift the fan guard away from the lower housing.
4. Remove the filter housing.
a. Remove the (4) screws securing the rotor filter housing to the pump cover.
b. Remove the filter housing from the pump.
5. Remove the rotor and vanes.
a. Remove the (6) screws securing the pump cover to the pump body.
b. Remove the pump cover.
c. Remove the rotor from the pump housing.
d. Remove any vanes that fall into the pump housing or the heater housing.
INSTALLING THE NEW ROTOR KIT
6. Install the rotor and vanes.
a. Orient the new rotor so that the white hub faces the pump.
b. Install the new rotor onto the pump spindle.
c. Install the new rotor vanes into the four slots on the new rotor. The blades should align flush with the outer surface of the rotor.
REASSEMBLING THE UNIT
7. Reinstall the pump cover.
a. Install the pump cover onto the pump body.
b. Secure the pump cover with the (6) screws.
8. Reinstall the filter housing.
a. Thread the (4) screws into the filter housing. (This will help retain the gasket during installation.)
b. Install the filter housing onto the pump cover.
c. Secure the filter housing with the screws.
9. Reinstall the fan guard.
a. Align the fan guard with the slots on the lower housing.
b. Press down firmly on the fan guard to seat it in the lower housing.
10. Reinstall the top cover.
a. Install the top cover onto the lower housing.
b. Secure the top cover with the screws.
