


Why Read This Article?
Finish Nailer Repair - Replacing the Driver Guide (Ridgid Part # 79004001022)
Article Breakdown
Finish Nailer Repair - Replacing the Driver Guide (Ridgid Part # 79004001022)
Video
Tools & Materials
- screwdriver
- utility knife
- wire strippers
- lineman's pliers
- multimeter or continuity tester
- replacement cord
- masking tape
Safety Guidelines
- Performing repairs in a clean workspace can minimize the potential for accidents and prevents dismantled tools from being exposed to dirt.
- Remember to unplug the tool prior to repair.
 For more information on Power Cords--Click here.
For power supply problems caused by bad, cut, or damaged power cords, this article explains steps to replace the cord and get that tool or machine back to work in no time.
For more information on Power Cords--Click here.
For power supply problems caused by bad, cut, or damaged power cords, this article explains steps to replace the cord and get that tool or machine back to work in no time.
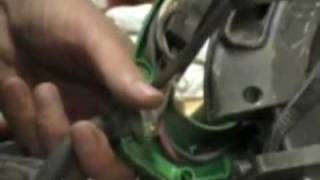
Removing the Old Cord
Uncovering the wire terminals is the first step to removing the old cord.
Most power tool cords are connected directly to the tool switch through a wire terminal. Most switches are located in the handle of the power tool.
First, the tool plate or safety cover must be removed to expose the inside of the tool and to allow access to the wire terminals. Sometimes more than one covering must be removed, and, for example, the handle of the tool must often be removed as well. Once the tool casing is removed, the cord wires can be disconnected from the wire terminals.
(Hint #1: Before disconnecting the cord wires from their terminals, it is important to note the route that the wires follow out of the terminals to connect to the plug. The wires of the new cord will need to be routed into the wire terminals in the same way. Making this quick check can help prevent the wires from being pinched after installation of the new cord. Marking each wire of the old cord with masking tape can also ensure correct replacement of the new power cord's wires.)
(Hint #2: If the power cord replacement is being done along with a new tool switch replacement, it may be a good idea to check the new switch's wiring pattern first, as it may require a different pattern. This can be found in the manufacturer's wiring diagrams.)
To disconnect the cord wires from the terminals, loosen the terminal screws with a small screwdriver and pull the wires out of the terminal. Cords with three-pronged plugs usually have three wires and cords with two-pronged plugs usually only have two wires.
Now that the terminal screws are loose and the wires are removed, the last step is removing the cord's retaining bracket. Most power tools have one, and most of them have to be unscrewed.
If the old power cord is marked for later reference, it can be set aside to help with the positioning of the new cord wires later on.
[Back to top]
Stripping the New Cord (when necessary)
If the wires of the new cord are already stripped of insulation, then it is ready to install and this step can be skipped. If not...
The new cord wires may need to be stripped before installation. Before stripping the wires, a portion of the cord jacket must be cut. This jacket is the flexible, protective covering that surrounds the inner wires inside the cord.
How long of a piece of the cord jacket should be removed? The best way to answer that question is to look at the old cord and to remove the same length of cord jacket on the new power cord as is missing on the old one.
Carefully cut the cord jacket length-wise (to match the length of the exposed inner wires of the old cord) without damaging the inner wires, and remove that length of the jacket. Compare the exposed inner wires of the new cord against those of the old cord to make sure that the length of the exposed wires is the same. If everything checks out, the inner wires are ready to be stripped.
Strip away ½ inch of the inner-wire insulation using a pair of wire strippers. Using wire strippers for this step is very important. If a knife or other make-shift tool is used, it can be very easy to damage the wires inside the insulation, reducing the amount of power that will go to the motor of the power tool.
Last, twist the wires carefully with lineman's pliers. This makes for a better connection between the wires and the wire terminals inside the power tool. The new cord is now stripped and ready to be installed.
[Back to top]
Installing the New Cord
Place the new cord wires correctly into their wire terminals. Checking the marked, old cord can be useful for this step. Routing the cord and wires in the right path can help avoid pinching when the tool case (plate) is put back into place.
Now all that is left is for the new power cord to be secured back in place by re-tightening the retaining bracket.
[Back to top]
Replacing the Safety Cover
Correctly and securely replace the tool's plates, handle, and safety covers. Again, making sure that the cord and wires are not pinched in this step will increase the life of the tool and help the tool run safely.
[Back to top]
Checking the Tool for Safety
The repaired power tool should be checked for electrical safety.
A bad electrical connection can pass electrical current through the metal housing of the tool; this is a serious danger for operation. A multitester is the best way to ensure that the tool is safe by testing for current in the tool housing.
With the multitester set to test continuity, put one end to the plug and the other end to the outside housing of the tool. If the multiester doesn't register any electrical current then the repaired tool is ready for safe operation and this power tool repair is complete. For a "Multitesters 101" article-Click here.

If you're looking to replace a power cord for your power tool or machine, see our Power Cords parts page to find the cord you need. Our easy searches and fast shipping options can get your new power cord to you in no time.
