Why Read This Article?
Finish Nailer Repair - Replacing the Driver Guide (Ridgid Part # 79004001022)
Article Breakdown
Finish Nailer Repair - Replacing the Driver Guide (Ridgid Part # 79004001022)
Tools & Materials

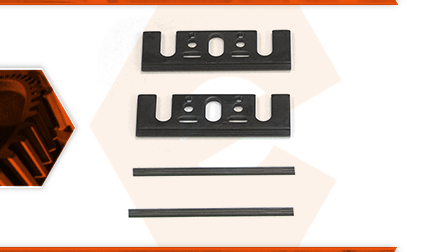
The blade set allows you to convert your planer from high-speed steel blades to double-sided carbide blades. The set includes two blade clamps and two carbide blades. The carbide blades stay sharp longer than steel blades and are sharpened on both sides for twice the life.
Let's get started.
REMOVING THE BLADES
1. Use the wrench that came with the planer to remove the bolts.
2. Rotate the cutter head around with the belt and then hold the belt to keep the cutter head in place.
3. Now you can remove the bolts.
4. Remember, the planer blades can be razor sharp, so be careful not to cut yourself. A small magnet is helpful when removing the blades. Remove the clamp and then the blade.
5. Repeat this for the second blade.
6. Remove the setting gauge from each of the old blades.
INSTALLING THE NEW BLADES
7. You will need the knife setup gauge that came with the planer. If you have misplaced it, you can order a new one separately.
8. To set the knives, first place the new carbide blade into the gauge with the groove on the blade facing up.
9. Slide this to the front of the gauge so it sits against the shoulder.
10. Place the clamping plate onto the blade.
11. On the back side of the plate, there is a ridge and that ridge fits into the groove on the blade.
12. Place the setting gauge onto the knife.
13. Loosely install the screws.
14. Push the knife tight to the front of the gauge and push the setting gauge so the shoulder is tight to the back of the gauge.
15. Once everything's in place, tighten up the screws.
16. Repeat this for the second knife.
17. Place the knife right up on the edge of the carbide cutter-head.
18. Install the clamp from the guide. The ridges on the front of the clamp need to fit into the slot on the knife.
19. The shoulder on the guide fits into the groove on the cutter-head.
20. Slide the knife side-t-side until it's centered on the clamp.
21. Secure everything in place with the top clamp and the bolts.
22. Rotate the cutter-head to make sure nothing is rubbing.
23. Tighten the bolts all the way down.
24. Repeat for the second blade.


