Why Read This Article?
Finish Nailer Repair - Replacing the Driver Guide (Ridgid Part # 79004001022)
Article Breakdown
Finish Nailer Repair - Replacing the Driver Guide (Ridgid Part # 79004001022)
Tools & Materials

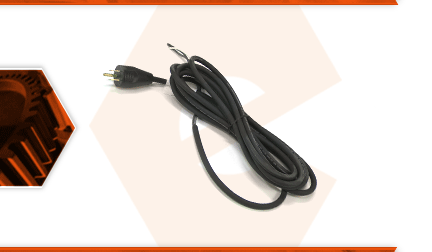
The cord for your scroll saw is a three-wire cord. Power cords tend to receive lots of abuse. The cord can be cut, nicked, internally damaged or have the prongs broken. A damaged cord should be immediately replaced to avoid electrical shock.
Let's get started.
REMOVING THE POWER CORD 1. Remove the table.
a. Remove the two screws securing the table to the trunnion. The screws are accessed from the underside of the table.
b. Slide the blade tension lever to the RIGHT to release tension on the blade.
c. Loosen the top blade clamp thumbscrew.
d. Disconnect the blade from the top blade clamp.
e. Lift the table away from the saw.
2. Remove the side cover.
a. Remove the screw securing the mount to the lower arm assembly.
b. Remove the mount from the saw.
c. Remove the screws securing the side cover. (Note the original position of each screw as you remove it from the arm; the screws are not interchangeable).
d. Remove the (2) screws securing the lower guard.
e. Remove the lower guard.
f. Remove the side cover from the saw.
3. Remove half of the rear housing.
a. Remove the screws securing the rear housing.
b. Carefully pry one half of the rear housing away from the saw. (This housing helps stabilize the main components of the saw, so be careful when removing it, because the saw may collapse or tip over).
4. Remove the power cord.
a. Cut the cable tie securing the bundle of (power cord) wires in the housing.
b. Disconnect the white cord wire from the circuit board.
c. Disconnect the black cord wire from the fuse assembly.
d. Remove the screw securing the ground wires.
e. Disconnect the ground wire (eyelets) from the screw.
f. Remove the power cord from the saw.
PREPARING THE NEW POWER CORD FOR INSTALLATION
5. Cut the wires to the proper length.
a. Align the new power cord with the old power cord (at the point where the insulation terminates and the internal wires appear).
b. Use wire cutters to cut the wires on the new power cord to the same length as the wires on the original power cord (allowing room for terminal connectors).
c. Strip approximately one-quarter of an inch of insulation from each of the new power cord wires.
d. Install and crimp new wire connectors onto the ends of the power cord wires. (Use an eyelet-style terminal for the ground wire).
6. Transfer the cord protector.
a. Remove the cord protector from the old power cord.
b. Install the cord protector onto the new power cord.
INSTALLING THE NEW POWER CORD
7. Install the power cord.
a. Thread the new cord wires through the loop in the wiring harness.
b. Reconnect the ground wires (eyelets) to the housing using the screw.
c. Connect the white wire to the terminal on the circuit board.
d. Connect the black wire to the fuse terminal.
e. Secure the wire bundle with a new cable tie.
REASSEMBLING THE UNIT
8. Reinstall the rear housing.
a. Install the rear housing onto the saw.
b. Align the cord protector (strain relief) with the opening in the rear housing.
c. Secure the rear housing with the screws.
9. Reinstall the side cover.
a. Install the side cover.
b. Install the mount.
c. Secure the mount with the screw.
d. Install the lower guard.
e. Secure the lower guard with the screws.
f. Secure the side cover with the remaining screws.
10. Reinstall the table.
a. Install the table onto the saw.
b. Install the blade and tighten the blade clamp thumbscrews.
c. Secure the table to the trunnion with the two screws.


