


This replacement rechargeable battery is designed for use with Braun clippers. It is an authentic item which is supplied by the original manufacturer. Over time batteries will become weaker and eventually will not provide enough power to operate the unit as it was designed. Several factors can cause this, such as improper charging or the way the tool is used along with normal deterioration of the battery. Make sure to refer to the owners manual of your model for the correct installation of the new battery. Keep in mind this high-quality component is sold as an individual item.
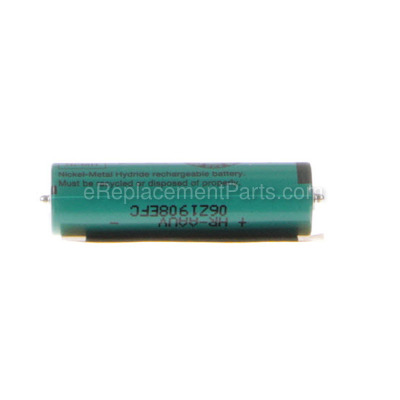
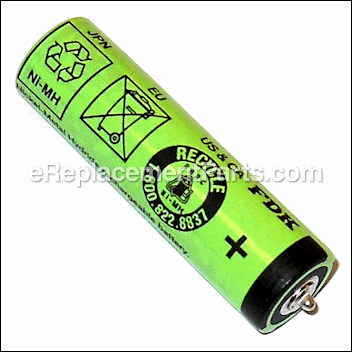
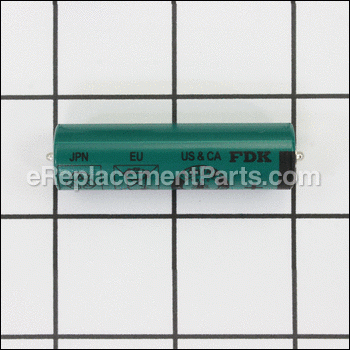
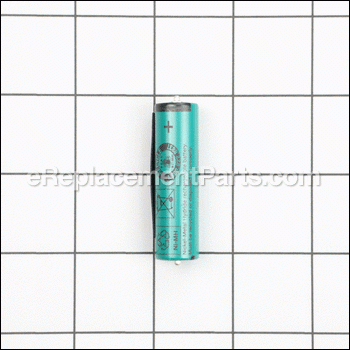
Braun Rechargeable Battery 67030923
OEM part for: Braun
Part Number: 67030923
$6.93
In Stock
Compatibility
This part will fit the following 30 machines
Braun
140 5685 Series 1 View Diagrams & Manuals
150 5685 Series 1 View Diagrams & Manuals
5614 5723 Flex XP View Diagrams & Manuals
390CC 5735 Series 3 View Diagrams & Manuals
5790 5735 Contour View Diagrams & Manuals
5895 5735 Contour View Diagrams & Manuals
5897 5735 Contour View Diagrams & Manuals
370 5737 Series 3 View Diagrams & Manuals
5878 5737 Contour View Diagrams & Manuals
5885 5737 Contour View Diagrams & Manuals
5886 5737 Contour View Diagrams & Manuals
370 5738 Series 3 View Diagrams & Manuals
380 5738 Series 3 View Diagrams & Manuals
5775 5738 Contour View Diagrams & Manuals
5875 5738 Contour View Diagrams & Manuals
5876 5738 Contour View Diagrams & Manuals
5884 5738 Contour View Diagrams & Manuals
340 5742 Series 3 View Diagrams & Manuals
4775 5742 SmartControl 3 View Diagrams & Manuals
4875 5742 SmartControl 3 View Diagrams & Manuals
4876 5742 SmartControl 3 View Diagrams & Manuals
390CC 5772 Series 3 View Diagrams & Manuals
380 5773 Series 3 View Diagrams & Manuals
370 5774 Series 3 View Diagrams & Manuals
350CC 5774 Series 3 View Diagrams & Manuals
370CC 5774 Series 3 View Diagrams & Manuals
340 5775 Series 3 View Diagrams & Manuals
330 5776 Series 3 View Diagrams & Manuals
320 5776 Series 3 View Diagrams & Manuals
360 5779 Series 3 View Diagrams & Manuals
Show More Compatible Models
This item works with the following types of products:
- Shaver Parts
Customer Part Reviews ?
Average Rating (out of 5):
Click to filter by ratings:
5 stars
7
4 stars
0
3 stars
1
2 stars
0
1 stars
0
< PREV
- 1
Great Price and quick delivery
Great price and quick delivery of new batteries. Installed, charged and works great.
Guest -
February 25, 2020
Verified Purchase
Excellent replacement
These batteries restore my razor to like new.
James D. -
November 25, 2019
Verified Purchase
Perfect fit
My electric shaver now works like new with the replacement batteries. I would like to recommend placing a note with the order stating batteries need to be charged before use. Satisfied customer.
Guest -
September 13, 2019
Verified Purchase
Razor is working like new again
These batteries were an exact replacement for the original Braun shaver batteries. Those batteries were worn out and these new ones showed a dramatic improvement in the amount of power and time between charges.
Guest -
September 11, 2019
Verified Purchase
Great replacement
Item as described, worked as expected, Satisfied Customer.
Guest -
August 28, 2019
Verified Purchase
Relatively easy repair, batteries work.
Setting aside the difficulty of disassembling a Bruan Series 3 370 Razor, once you get down to the batteries, swapping in the replacement batteries was a breeze. The batteries fit and once the razor was reassebled, charged up quickly. Now lets see how long they last.
Guest -
July 4, 2019
Verified Purchase
Nice having my electric razor back
Replaced the batteries and the foil, like a new razor! Batteries very easy to replace just make sure to observe polarity, Braun placed the correct polarity etched in the plastic so you should be ok. Be sure to fully charge you razor before your first use.
Guest -
June 23, 2019
Verified Purchase
Website information incomplete
The good news: The batteries I needed for my electric razor were shipped promptly and delivered quickly. They were exactly what I ordered and work great.
The bad news: The website does not list my shaver as one of the models that use that battery. The online representative had no information either. I was finally able to determine that it was the correct item by getting the part number from the original manufacturer.
Guest -
October 13, 2019
Verified Purchase
t
t
t -
t days ago
Verified Purchase
eReplacementParts Team
t
Questions & Answers ?
Our customer Service team is at the ready daily to answer your part and product questions.

Ask our Team
We have a dedicated staff with decades of collective experience in helping customers just like you purchase parts to repair their products.
Does this fit my product?Questions & Answers for Braun Rechargeable Battery
No questions have been asked yet
Customer Repair Instructions ?
All our customer repair instructions are solicited directly from other customers just like you who have purchased and replaced this exact part.
The batteries no longer charged.
Glen - October 21, 2016
👍 14 of 15 people found this instruction helpful
Tool Type
Shaver
Difficulty
Easy
Time
Less than 15 minutes
Tools Used
Screwdriver, Torx Driver
Parts Used
1. Removed the two screw covers on bottom of the shaver.
2. Removed the screws with a torx screwdriver, and slid out the motor / battery tray.
3. Removed the old batteries (they are held in with adhesive tape).
4. Inserted new batteries ensuring new adhesive tape was adhered to battery compartment.
5. Re-assembled the shaver.
6. Charged the shaver (batteries), and it worked like new!
Did you find this story helpful?
Thanks for voting and helping fellow customers!
Rechargeable battery no longer held charge.
Paul - January 23, 2018
👍 4 of 4 people found this instruction helpful
Tool Type
Shaver
Difficulty
Medium
Time
15-30 minutes
Tools Used
Screwdriver, Strip of plastic
Parts Used
1. Removed 2 rubber caps covering screws at the plug end of the razor.
2. Removed the 2 screws and slid head and motor out of body housing.
3. Pried out old batteries (..held in w/2 sided tape under battery...) noting +/- ends, although this is noted in the razor.
4. Applied the 2 sided tape supplied w/new batteries (one small piece bridged both) and snapped them in place assuring correct polarity. Nipples and the ends of the batteries just snap into their respective brackets.
5. The trickiest part of the whole job was sliding the assembly back into the housing - the on/off button in the housing (...couldn't see how to remove it...) has a protrusion that bends down as you reinsert motor and not lining up with the switch on the motor. I got by this by cutting a 1/2" strip out of a grocery store plastic clamshell food container, inserted it to cover the protrusion, slowly reinserted the motor than withdrawing the strip which realigned it with the switch on the motor.
6. Tested the razor to assure it worked, then screwed in the two retention screws and reinserted both caps.
Did you find this story helpful?
Thanks for voting and helping fellow customers!
Original batteries no longer kept a charge
Yannis - September 23, 2018
👍 2 of 2 people found this instruction helpful
Tool Type
Shaver
Difficulty
Easy
Time
15-30 minutes
Tools Used
Screwdriver, scissors to cut double sided tape
Parts Used
1. Found video on youtube to explain how to open the case (little rubber plugs on bottom hide the screws - have to pop those out using a small flat blade screwdriver).
2. Note battery orientation (+/-).
3. Carefully remove old batteries (they are held in place with double-sided tape)
4. Cut the new double-sided tape down to similar size as original; attached to new batteries
5. Insert new batteries into shaver with correct orientation - press firmly into place so the tape sticks.
6. Test with charger to confirm correct installation
7. Close up the case, reinstall screws and plugs.
Did you find this story helpful?
Thanks for voting and helping fellow customers!
The battery in my Braun, Series 1 150 shaver would no longer hold a charge long enough to complete a shave.
Milt - March 26, 2018
👍 2 of 2 people found this instruction helpful
Tool Type
Shaver
Difficulty
Easy
Time
15-30 minutes
Tools Used
Screwdriver, Socket set, smallest tork driver bit.
Parts Used
First, the outer shell of the bottom half of the shaver body must be removed. This is accomplished by holding the top half of the shaver body in one hand and pulling hard on the lower half. There is no need to remove any screws from the top part of the shaver. Once the lower shell is removed, the circuit board and the battery, with it's clear plastic cover are exposed.
Now the clear plastic cover must be removed to gain access to the battery. This is done by removing the small tork screw at the plug end of the power unit and lifting off the plastic cover.
Next, the spent, single NIMH battery must be removed. Since it has pins on the ends that are pushed into holding receptacles on both ends of the board, the battery can simply be lifted out of the receptacles and withdrawn from the board. However, since the battery is further held in pace by a sticky piece of tape between the battery side and the top of the circuit board, it may have to first be loosened from the board with a small, flat screwdriver before it can be be lifted out of it's receptacles.
Once the spent battery is removed, the replacement battery can snapped in place, making sure the correct polarity is maintained (positive end toward the plug end of the board).
Next, reinstall the plastic cover and it's small tork screw, making sure the tork screw is not overtightened.
Finally, push the bottom outer shell back on, making sure the white rubber gasket between the bottom outer shell and the top of the shaver body is sufficiently tucked in so that the bottom shell can fit snugly against the top part of the shaver.
Thats it! Charge the new battery, if needed, and you are ready to complete many, many nice close shaves for many months to come.
Did you find this story helpful?
Thanks for voting and helping fellow customers!
Old batteries no longer held a charge
Ron - January 16, 2018
👍 1 of 1 people found this instruction helpful
Tool Type
Shaver
Difficulty
Easy
Time
Less than 15 minutes
Tools Used
Screwdriver
Parts Used
These instructions are for a Braun Series 3 shaver, but probably apply to a number of different Braun models. Remove rubber plugs and screws on bottom of razor and pull off the case (be careful not to damage the circuit boards). Replace old batteries with new. Be sure to install new batteries correctly (positive and negative are marked inside bottom of case). Slide case back onto razor (make sure waterproof seal has not been disturbed if razor is washable). Reinstall screws and rubber plugs. Charge new batteries for four hours. NOTE: Screws can be removed with Torx #8 or a regular screwdriver as there is also a straight slot on the screws. Very inexpensive fix compared to purchasing a new shaver.
Did you find this story helpful?
Thanks for voting and helping fellow customers!
old batteries were death
ALEJANDRO - March 24, 2020
Tool Type
Shaver
Difficulty
Medium
Time
More than 2 hours
Tools Used
Nutdriver
Parts Used
old batteries were death
Did you find this story helpful?
Thanks for voting and helping fellow customers!
Battery got hot while charging. Batteries would fully charge but got hot. Replaced both batteries. Razor works like new. Easy for me to replace. Please observe the polarity when replacing batterie
James - November 26, 2019
Tool Type
Shaver
Difficulty
Easy
Time
Less than 15 minutes
Tools Used
, #8 hex bit
Parts Used
Carefully slide the razor base back into the shaver and observe and match up the side burns trimmer to the small shaft that sticks up. Then screw the two screws and replace the two black plugs the cover the two access screws. Then plug in an AC outlet and observe the green light on the razor base. When the light goes out razor is fully charged. Usually takes about two hours. Very easy on this Braun model 4775 to replace batteries.
Did you find this story helpful?
Thanks for voting and helping fellow customers!
Batteries needed to be replaced
DOUGLAS - September 15, 2019
Tool Type
Shaver
Difficulty
Easy
Time
Less than 15 minutes
Tools Used
Screwdriver, Patience
Parts Used
1: With the Braun 4775 shaver, unscrewed the two bottom screws, after removing the screw covers
2: Removed the bottom half or cover, exposing the inner workings of the shaver and the two batteries. This took a bit of effort, as the cover is has a fairly tight fit.
3: Removed the two batteries, noting the positive (+) and negative (-) battery positions (it is also marked on the shaver)
4: Replaced the two batteries, using the same positive (+) and negative (-) battery positions
5: Put the shaver cover back on, careful to ensure the three-prong plug was in the correct position and that the on/off switch was not obstructed.
6: Put back the two screws, tight but not "gorilla tight".
7: Put back the screw covers. All done.
Did you find this story helpful?
Thanks for voting and helping fellow customers!
shaver wouldn't hold a charge.
Melvin - August 28, 2019
Tool Type
Shaver
Difficulty
Easy
Time
Less than 15 minutes
Tools Used
Screwdriver
Parts Used
Removed two bottom screws
Did you find this story helpful?
Thanks for voting and helping fellow customers!
Shaver stopped taking a charge. Rather then spend $100.00 on new shaver I got new batteries.
william - August 16, 2019
Tool Type
Shaver
Difficulty
Easy
Time
Less than 15 minutes
Tools Used
Screwdriver
Parts Used
Braun shaver, removed bottom two screws & pulled housing off of chassis. Rechargeable batteries had a nipple on each end & were not soldered in place. Pop out batteries & replace making sure of polarity. Replace housing & charge. Quick repair.
Did you find this story helpful?
Thanks for voting and helping fellow customers!
Load More Install Stories
OEM stands for Original Equipment Manufacturer and means the part you’re buying is sourced directly from the manufacturer who made your product. At eReplacementParts, we sell only genuine OEM parts, guaranteeing the part you’re purchasing is of better design and of higher quality than aftermarket parts.
Our product descriptions are a combination of data sourced directly from the manufacturers who made your product as well as content researched and curated by our content & customer service teams. This content is edited and reviewed internally before being made public to customers.
Our customer service team are at the ready daily to answer your part and product questions. We have a dedicated staff with decades of collective experience in helping customers just like you purchase parts to repair their products.
All our part reviews are solicited directly from other customers who have purchased this exact part. While we moderate these reviews for profanity, offensive language or personally identifiable information, these reviews are posted exactly as submitted and no alterations are made by our team.
All our customer repair instructions are solicited directly from other customers just like you who have purchased and replaced this exact part. While we moderate these reviews for profanity, offensive language or personally identifiable information, these reviews are posted exactly as submitted and no alterations are made by our team.
Based on data from past customer purchasing behaviors, these parts are most commonly purchased together along with the part you are viewing. These parts may be necessary or helpful to replace to complete your current repair.
All our installation videos are created and produced in collaboration with our in-house repair technician, Mark Sodja, who has helped millions of eReplacementParts customers over the last 13 years repair their products. Mark has years of experience in selling and repairing both commercial and residential products with a specialty in gas-powered equipment.
This data is collected from customers who submitted a repair instruction after replacing this exact part. Customers can rate how easy the repair was to complete and how long it took. We aggregate this data to provide a repair rating that allows customers to quickly determine the difficulty and time needed to perform their own repair.