
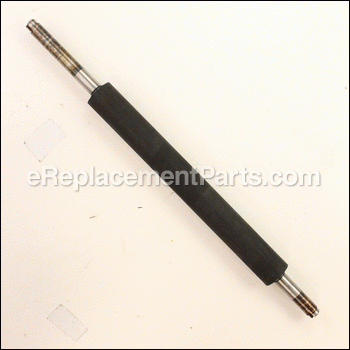
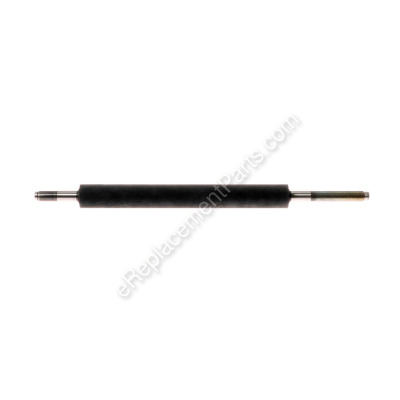


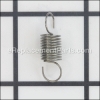
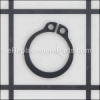
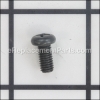
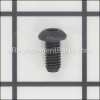
This is a genuine DeWalt part that is OEM sourced to ensure a high level of quality. The rear roller is intended to be used with 13" planers. This item attaches to the drive chain and sprocket and is used to guide material out of the back of the planer. This item is available as an individual replacement part.
Rear Roller 5140010-94
OEM part for: DeWALT
Part Number: 5140010-94
$89.22
In Stock
Jump To:
Frequently Purchased Together ?


Compatibility
This part will fit the following 2 machines
DeWALT
DW735 Type 1 13 inch Planer View Diagrams & Manuals
DW735X Type 1 13" Planer View Diagrams & Manuals
This item works with the following types of products:
- Planer Parts
Customer Part Reviews ?
Average Rating (out of 5):
Click to filter by ratings:
5 stars
5
4 stars
0
3 stars
0
2 stars
0
1 stars
0
< PREV
- 1
Good service
Correct part. Fast service.
Guest -
September 6, 2023
Verified Purchase
So far, so good
Just put this (and the front roller) in the planer. Haven't run wood through it but the fit looks perfect.
Guest -
April 28, 2023
Verified Purchase
Easy Repair
Great part/s ,they all came in a timely fashion, my planner is now up and running at a very responsible replacement parts price !!!
Guest -
March 5, 2022
Verified Purchase
Perfect replacement.
The new part when installed, worked perfectly.
Guest -
July 14, 2021
Verified Purchase
Planner Rollers
The part worked just fine
Guest -
November 5, 2019
Verified Purchase
t
t
t -
t days ago
Verified Purchase
eReplacementParts Team
t
Questions & Answers ?
Our customer Service team is at the ready daily to answer your part and product questions.

Ask our Team
We have a dedicated staff with decades of collective experience in helping customers just like you purchase parts to repair their products.
Does this fit my product?Questions & Answers for Rear Roller
No questions have been asked yet
Customer Repair Instructions ?
All our customer repair instructions are solicited directly from other customers just like you who have purchased and replaced this exact part.
Front roller was gouged
Robert - October 12, 2018
👍 2 of 2 people found this instruction helpful
Tool Type
Planer
Difficulty
Medium
Time
1-2 hours
Tools Used
Screwdriver
Parts Used
Followed the you tube video eReplacement had on this, though my planer is a 735 not the 734
Did you find this story helpful?
Thanks for voting and helping fellow customers!
Outfeed roller had worn and was not pulling wood through.
Steve - October 17, 2022
👍 1 of 1 people found this instruction helpful
Tool Type
Planer
Difficulty
Easy
Time
1-2 hours
Tools Used
Screwdriver, Pliers, Power Drill, torx and allen wrenches
Parts Used
Flipped the planer upside down. Took off all cover plates exposing the chain drives. Removed sprokers and chains. Removed the two side plates. Removed the four screws holding the bushing plate and bushings. Removed outfeed roller. Took out the springs to inspect. Pulled off the bushings on each end of the roller. Took off the washers on each end and inspected for wear. Put washers and new bushings on new roller. Installed springs and roller into cradle.
I replaced all the phillip head screws with button head allen screws to make it easier to replace if needed next time. Factory screws are phillip head and will strip the head if not careful. Replaced the side shields, sprockets and chains, covers, and fired her up. Ran like new. Turned planer right side up and tested with a piece of wood.. Worked like new.
I replaced all the phillip head screws with button head allen screws to make it easier to replace if needed next time. Factory screws are phillip head and will strip the head if not careful. Replaced the side shields, sprockets and chains, covers, and fired her up. Ran like new. Turned planer right side up and tested with a piece of wood.. Worked like new.
Did you find this story helpful?
Thanks for voting and helping fellow customers!
Rear roller shaft on planet broke
Brian - March 15, 2022
Tool Type
Planer
Difficulty
Medium
Time
30-60 minutes
Tools Used
Screwdriver, Pliers, Snap ring plyers
Parts Used
There were 2 retainer brackets that held the roller in place. I removed these brackets snd the the shaft was able to be removed. Very easy repair.
Did you find this story helpful?
Thanks for voting and helping fellow customers!
end of the roller snapped off
Randy - July 5, 2021
Tool Type
Planer
Difficulty
Medium
Time
30-60 minutes
Tools Used
Screwdriver, Pliers, Snap ring pliers
Parts Used
removed the broken roller an replaced it with the new one fit great was very smooth
Did you find this story helpful?
Thanks for voting and helping fellow customers!
Would not feed boards
craig - May 21, 2021
Tool Type
Planer
Difficulty
Medium
Time
1-2 hours
Tools Used
Screwdriver, Pliers, Power Drill, Wrench Set, Snap ring plyers
Parts Used
Remove side covers expose gears and shaft remove shaft and housing install new roller install gear from broken shaft to new shaft put housing back in place don’t forget spring on top of housing Put chain back on gears and lube chain and shaft reinstall covers
Did you find this story helpful?
Thanks for voting and helping fellow customers!
Broken shaft on rear roller
Michael - October 30, 2020
Tool Type
Planer
Difficulty
Easy
Time
30-60 minutes
Tools Used
Screwdriver, Split ring tool
Parts Used
I found a video on Youtube which showed detailed instructions for replacing the roller shaft. Replacing the shaft and roller was really easy. The planer, however, is heavy.
Did you find this story helpful?
Thanks for voting and helping fellow customers!
The lead roller lost it's rubber covering and wood not feed wood into the planer.
Ken - July 14, 2020
Tool Type
Planer
Difficulty
Medium
Time
1-2 hours
Tools Used
Screwdriver, Socket set, wood blocks
1- Disconnect the power
2- Remove both side covers and both side shields
3- Remove the roller gears and chains from both ends.
4- Slide blocks in and lower the planer down to just about to tough the blocks.
5- Remove the retainer clips at each end, then slowly raise the planer until you can remove the roller.
6- Keep the bus hinging in place on the original in order to see how to assemble the new assemblies.
7- Set the new roller and bushings in place on top of the wood blocks.
8- Start to lower the planer head and help guide the springs back into the pockets above the bushings. Continue to lower the head until just short of fully seated.
9- Tighten the screws to secure the retaining clips at each end. Once snug, slide the wood blocks out. Follow the reverse of steps 1-3 to complete the repair.
Did you find this story helpful?
Thanks for voting and helping fellow customers!
rollers wore out after 13 years. rubber hardened, and wouldn't feed correctly
Douglas - June 1, 2020
Tool Type
Planer
Difficulty
Medium
Time
30-60 minutes
Tools Used
Screwdriver, Socket set, Adjustable Wrench, snap ring pliers
Parts Used
Remove side casings.
Remove chain guards.
Remove both sprockets and chain all at once.
Remove tension clips.
Rollers now will drop out.
Take felt washers and bushings off of old and install on new rollers.
Install doing reverse of above.
(These are the main steps, by memory a week later. Common sense will tell you if I left anything out by accident)
Did you find this story helpful?
Thanks for voting and helping fellow customers!
Rear roller was bent causing the bushing to seize.
Burt - May 15, 2018
Tool Type
Planer
Difficulty
Medium
Time
30-60 minutes
Tools Used
Screwdriver, Pliers, Power Drill, Allen that comes attached to tool.
Parts Used
1) Raise tool to max height then turn unit upside down
2) Remove the gear covers from both sides of the tool
3) Remove the safety Shields from both sides of the tool
4) Carefully remove the roller mounts and lift out roller
5) Slide off old bushings, and discard
6) Slide off plastic spacers and slide onto new roller
7) Slide on new bushings to roller snugly against plastic spacers
8) Reassemble in reverse order
9) Take your time, be patient, and good luck!
Did you find this story helpful?
Thanks for voting and helping fellow customers!
Parts were worn out and had to be replaced.
Debra - May 2, 2018
Tool Type
Planer
Difficulty
Medium
Time
30-60 minutes
Tools Used
Screwdriver, Wrench Set
Replaced the parts. Now up and running.
Did you find this story helpful?
Thanks for voting and helping fellow customers!
Load More Install Stories
OEM stands for Original Equipment Manufacturer and means the part you’re buying is sourced directly from the manufacturer who made your product. At eReplacementParts, we sell only genuine OEM parts, guaranteeing the part you’re purchasing is of better design and of higher quality than aftermarket parts.
Our product descriptions are a combination of data sourced directly from the manufacturers who made your product as well as content researched and curated by our content & customer service teams. This content is edited and reviewed internally before being made public to customers.
Our customer service team are at the ready daily to answer your part and product questions. We have a dedicated staff with decades of collective experience in helping customers just like you purchase parts to repair their products.
All our part reviews are solicited directly from other customers who have purchased this exact part. While we moderate these reviews for profanity, offensive language or personally identifiable information, these reviews are posted exactly as submitted and no alterations are made by our team.
All our customer repair instructions are solicited directly from other customers just like you who have purchased and replaced this exact part. While we moderate these reviews for profanity, offensive language or personally identifiable information, these reviews are posted exactly as submitted and no alterations are made by our team.
Based on data from past customer purchasing behaviors, these parts are most commonly purchased together along with the part you are viewing. These parts may be necessary or helpful to replace to complete your current repair.
All our installation videos are created and produced in collaboration with our in-house repair technician, Mark Sodja, who has helped millions of eReplacementParts customers over the last 13 years repair their products. Mark has years of experience in selling and repairing both commercial and residential products with a specialty in gas-powered equipment.
This data is collected from customers who submitted a repair instruction after replacing this exact part. Customers can rate how easy the repair was to complete and how long it took. We aggregate this data to provide a repair rating that allows customers to quickly determine the difficulty and time needed to perform their own repair.