


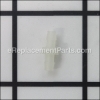
This is the Genuine Craftsman replacement part. It is made out of Flexible Rubber and is Sold Individually. The purpose of the 530069216 Tank Purge Line is to return the excess fuel that is in the carburetor after the primer bulb has been pushed. The excess fuel is forced through the purge line back into the fuel tank. Over time the Tank Purge Line will become brittle and crack and will need to be replaced.
Purge Line 530069216
OEM part for: Poulan, Paramount, Weed Eater, Husqvarna, Craftsman, Jonsered
Part Number: 530069216
$6.21
In Stock
Jump To:
Product Description ?
- OD 3/16
- Classification: Part
- Weight: 0.01 lbs.
- Also Known As: Fuel Line
- Shipping: Ships Worldwide
Frequently Purchased Together ?


Compatibility
This part will fit the following 1492 machines
Paramount
PHT19 Gas Hedgetrimmer View Diagrams & Manuals
Poulan
1800 Gas Chain Saw View Diagrams & Manuals
1900 Gas Chain Saw View Diagrams & Manuals
1950 Type 1 Gas Chain Saw View Diagrams & Manuals
1950 Type 2 Gas Chain Saw View Diagrams & Manuals
1950 Type 3 Gas Chain Saw View Diagrams & Manuals
1950 Type 4 Gas Chain Saw View Diagrams & Manuals
1950 Type 5 Gas Chain Saw View Diagrams & Manuals
1950 Type 6 Gas Chain Saw View Diagrams & Manuals
1950 Type 7 Gas Chain Saw View Diagrams & Manuals
1950LE Type 1 Gas Chain Saw View Diagrams & Manuals
1950LE Type 2 Gas Chain Saw View Diagrams & Manuals
1975 Type 1 Gas Chain Saw View Diagrams & Manuals
1975 Type 2 Gas Chain Saw View Diagrams & Manuals
1975 Type 3 Gas Chain Saw View Diagrams & Manuals
1975 Type 4 Gas Chain Saw View Diagrams & Manuals
1975 Type 5 Gas Chain Saw View Diagrams & Manuals
1975 Type 6 Gas Chain Saw View Diagrams & Manuals
1975 Type 7 Gas Chain Saw View Diagrams & Manuals
1975LE Type 1 Gas Chain Saw View Diagrams & Manuals
1975LE Type 2 Gas Chain Saw View Diagrams & Manuals
20 Gas Chain Saw View Diagrams & Manuals
2000 Gas Chain Saw View Diagrams & Manuals
2025 Gas Chain Saw View Diagrams & Manuals
2050 Type 1 Gas Chain Saw View Diagrams & Manuals
2050 Type 2 Gas Chain Saw View Diagrams & Manuals
2050 Type 3 Gas Chain Saw View Diagrams & Manuals
2050 Type 4 Gas Chain Saw View Diagrams & Manuals
2050 Type 5 Gas Chain Saw View Diagrams & Manuals
2050 Type 6 Gas Chain Saw View Diagrams & Manuals
2050 Type 7 Gas Chain Saw View Diagrams & Manuals
2055 Type 1 Gas Chain Saw View Diagrams & Manuals
2055 Type 2 Gas Chain Saw View Diagrams & Manuals
2055 Type 3 Gas Chain Saw View Diagrams & Manuals
2055 Type 4 Gas Chain Saw View Diagrams & Manuals
2055 Type 5 Gas Chain Saw View Diagrams & Manuals
2055 Type 6 Gas Chain Saw View Diagrams & Manuals
2055 Type 7 Gas Chain Saw View Diagrams & Manuals
2050LE Type 1 Gas Chain Saw View Diagrams & Manuals
2050LE Type 2 Gas Chain Saw View Diagrams & Manuals
2050WT Type 1 Gas Chain Saw View Diagrams & Manuals
2050WT Type 2 Gas Chain Saw View Diagrams & Manuals
2050WT Type 3 Gas Chain Saw View Diagrams & Manuals
2050WT Type 4 Gas Chain Saw View Diagrams & Manuals
2050WT Type 5 Gas Chain Saw View Diagrams & Manuals
2050WT Type 6 Gas Chain Saw View Diagrams & Manuals
2050WT Type 7 Gas Chain Saw View Diagrams & Manuals
2055LE Type 1 Gas Chain Saw View Diagrams & Manuals
2055LE Type 2 Gas Chain Saw View Diagrams & Manuals
2075 Type 1 Gas Chain Saw View Diagrams & Manuals
2075 Type 2 Gas Chain Saw View Diagrams & Manuals
2075 Type 3 Gas Chain Saw View Diagrams & Manuals
2075 Type 4 Gas Chain Saw View Diagrams & Manuals
2075 Type 5 Gas Chain Saw View Diagrams & Manuals
2075 LE Gas Chain Saw View Diagrams & Manuals
2075C Type 1 Gas Chain Saw View Diagrams & Manuals
2075C Type 2 Gas Chain Saw View Diagrams & Manuals
2075C Type 3 Gas Chain Saw View Diagrams & Manuals
2075C Type 4 Gas Chain Saw View Diagrams & Manuals
2075C Type 5 Gas Chain Saw View Diagrams & Manuals
2075OC Type 1 Gas Chain Saw View Diagrams & Manuals
2075OC Type 2 Gas Chain Saw View Diagrams & Manuals
2075OC Type 3 Gas Chain Saw View Diagrams & Manuals
2075OC Type 4 Gas Chain Saw View Diagrams & Manuals
2075OC Type 5 Gas Chain Saw View Diagrams & Manuals
20D Gas Chain Saw View Diagrams & Manuals
2100 Gas Chain Saw View Diagrams & Manuals
2150 Type 1 Gas Chain Saw View Diagrams & Manuals
2150 Type 2 Gas Chain Saw View Diagrams & Manuals
2150 Type 3 Gas Chain Saw View Diagrams & Manuals
2150 Type 4 Gas Chain Saw View Diagrams & Manuals
2150 Type 5 Gas Chain Saw View Diagrams & Manuals
2150 Type 6 Gas Chain Saw View Diagrams & Manuals
2150 Type 7 Gas Chain Saw View Diagrams & Manuals
2150 Predator Type 1 Gas Chain Saw View Diagrams & Manuals
2150 Predator Type 2 Gas Chain Saw View Diagrams & Manuals
2150 Predator Type 3 Gas Chain Saw View Diagrams & Manuals
2150 Predator Type 4 Gas Chain Saw View Diagrams & Manuals
2150 Predator Type 5 Gas Chain Saw View Diagrams & Manuals
2150 Predator Type 6 Gas Chain Saw View Diagrams & Manuals
2150LE Type 1 Gas Chain Saw View Diagrams & Manuals
2150LE Type 2 Gas Chain Saw View Diagrams & Manuals
2150LE Predator Type 1 Gas Chain Saw View Diagrams & Manuals
2150LE Predator Type 2 Gas Chain Saw View Diagrams & Manuals
2155 Type 1 Gas Chain Saw View Diagrams & Manuals
2155 Type 2 Gas Chain Saw View Diagrams & Manuals
2155 Type 3 Gas Chain Saw View Diagrams & Manuals
2155 Type 4 Gas Chain Saw View Diagrams & Manuals
2155 Type 5 Gas Chain Saw View Diagrams & Manuals
2175 Type 1 Gas Chain Saw View Diagrams & Manuals
2175 Type 2 Gas Chain Saw View Diagrams & Manuals
2175 Type 3 Gas Chain Saw View Diagrams & Manuals
2175 Type 4 Gas Chain Saw View Diagrams & Manuals
2175 Type 5 Gas Chain Saw View Diagrams & Manuals
2175 Type 6 Gas Chain Saw View Diagrams & Manuals
2175 Type 7 Gas Chain Saw View Diagrams & Manuals
2175 Gas Chain Saw View Diagrams & Manuals
2250 Type 1 Gas Chain Saw View Diagrams & Manuals
2250 Type 2 Gas Chain Saw View Diagrams & Manuals
2250 Type 3 Gas Chain Saw View Diagrams & Manuals
2250 Type 4 Gas Chain Saw View Diagrams & Manuals
2250 Type 5 Gas Chain Saw View Diagrams & Manuals
2250 Type 6 Gas Chain Saw View Diagrams & Manuals
2250 Type 7 Gas Chain Saw View Diagrams & Manuals
2250LE Type 1 Gas Chain Saw View Diagrams & Manuals
2250LE Type 2 Gas Chain Saw View Diagrams & Manuals
2300AV Gas Chain Saw View Diagrams & Manuals
2300CVA Gas Chain Saw View Diagrams & Manuals
2350 Gas Chain Saw View Diagrams & Manuals
2350CVA Gas Chain Saw View Diagrams & Manuals
2375 Type 1 Gas Chain Saw View Diagrams & Manuals
2375 Type 2 Gas Chain Saw View Diagrams & Manuals
2375 Type 3 Gas Chain Saw View Diagrams & Manuals
2375 Type 4 Gas Chain Saw View Diagrams & Manuals
2375 Type 5 Gas Chain Saw View Diagrams & Manuals
2375 Type 6 Gas Chain Saw View Diagrams & Manuals
2375 Type 7 Gas Chain Saw View Diagrams & Manuals
2375LE Type 1 Gas Chain Saw View Diagrams & Manuals
2375LE Type 2 Gas Chain Saw View Diagrams & Manuals
2400 Gas Chain Saw View Diagrams & Manuals
2700 Gas Chain Saw View Diagrams & Manuals
2800 Gas Chain Saw View Diagrams & Manuals
3000 Gas Chain Saw View Diagrams & Manuals
3000CB Gas Chain Saw View Diagrams & Manuals
3100 Gas Chain Saw View Diagrams & Manuals
3300 Gas Chain Saw View Diagrams & Manuals
3350 Gas Chain Saw View Diagrams & Manuals
3400 Gas Chain Saw View Diagrams & Manuals
3500 Gas Chain Saw View Diagrams & Manuals
3600 Gas Chain Saw View Diagrams & Manuals
3700 Gas Chain Saw View Diagrams & Manuals
3800 Gas Chain Saw View Diagrams & Manuals
4000 Gas Chain Saw View Diagrams & Manuals
BH2160 Gas Chain Saw View Diagrams & Manuals
BH2160LE Gas Chain Saw View Diagrams & Manuals
MICROXXV Gas Chain Saw View Diagrams & Manuals
P3314 Type 1 Gas Chain Saw View Diagrams & Manuals
P3314 Type 2 Gas Chain Saw View Diagrams & Manuals
P3314WS Type 1 Gas Chain Saw View Diagrams & Manuals
P3314WS Type 2 Gas Chain Saw View Diagrams & Manuals
P3314WSA Type 1 Gas Chain Saw View Diagrams & Manuals
P3314WSA Type 2 Gas Chain Saw View Diagrams & Manuals
P3416 Type 1 Gas Chain Saw View Diagrams & Manuals
P3416 Type 2 Gas Chain Saw View Diagrams & Manuals
P3516PR Type 1 Gas Chain Saw View Diagrams & Manuals
P3516PR Type 2 Gas Chain Saw View Diagrams & Manuals
P3818AV Type 1 Gas Chain Saw View Diagrams & Manuals
P3818AV Type 2 Gas Chain Saw View Diagrams & Manuals
P4018 Gas Chain Saw View Diagrams & Manuals
P4018AV Type 1 Gas Chain Saw View Diagrams & Manuals
P4018AV Type 2 Gas Chain Saw View Diagrams & Manuals
P4018AV-BH Type 1 Gas Chain Saw View Diagrams & Manuals
P4018AV-BH Type 2 Gas Chain Saw View Diagrams & Manuals
P4018WM Type 1 Gas Chain Saw View Diagrams & Manuals
P4018WM Type 2 Gas Chain Saw View Diagrams & Manuals
P4018WT Type 1 Gas Chain Saw View Diagrams & Manuals
P4018WT Type 2 Gas Chain Saw View Diagrams & Manuals
P4018WTL Gas Chain Saw View Diagrams & Manuals
PP3516 Type 2 Gas Chain Saw View Diagrams & Manuals
PP3816 Type 2 Gas Chain Saw View Diagrams & Manuals
PP3816AV Type 2 Gas Chain Saw View Diagrams & Manuals
PP4018 Type 2 Gas Chain Saw View Diagrams & Manuals
PP4218AV Type 2 Gas Chain Saw View Diagrams & Manuals
PP4218AVHD Type 2 Gas Chain Saw View Diagrams & Manuals
PP4218AVL Type 2 Gas Chain Saw View Diagrams & Manuals
PPB3416 Type 2 Gas Chain Saw View Diagrams & Manuals
PPB4018 Type 2 Gas Chain Saw View Diagrams & Manuals
S1970 Type 1 Gas Chain Saw View Diagrams & Manuals
S1970 Type 2 Gas Chain Saw View Diagrams & Manuals
S25AV Gas Chain Saw View Diagrams & Manuals
S25DA Gas Chain Saw View Diagrams & Manuals
SM4218AV Type 2 Gas Chain Saw View Diagrams & Manuals
2550T Gas Chain Saw View Diagrams & Manuals
P1500 Gas Trimmer View Diagrams & Manuals
P2500 Gas Trimmer View Diagrams & Manuals
P3500 Gas Trimmer View Diagrams & Manuals
P4500 Gas Trimmer View Diagrams & Manuals
PE3500 Gas Trimmer View Diagrams & Manuals
PL25 Type 1 Gas Trimmer View Diagrams & Manuals
PL25 Type 2 Gas Trimmer View Diagrams & Manuals
PL25 Type 3 Gas Trimmer View Diagrams & Manuals
PL25 Type 4 Gas Trimmer View Diagrams & Manuals
PP035 Gas Trimmer View Diagrams & Manuals
PT3000 Gas Trimmer View Diagrams & Manuals
PT7000 Gas Trimmer View Diagrams & Manuals
TE450 Gas Trimmer View Diagrams & Manuals
TE450CXL Type 1 Gas Trimmer View Diagrams & Manuals
TE450CXL Type 2 Gas Trimmer View Diagrams & Manuals
TE450CXL Type 3 Gas Trimmer View Diagrams & Manuals
TE450CXL Type 4 Gas Trimmer View Diagrams & Manuals
2450 Type 1 Gas Chain Saw View Diagrams & Manuals
2450 Type 2 Gas Chain Saw View Diagrams & Manuals
2450 Type 3 Gas Chain Saw View Diagrams & Manuals
2450 Type 4 Gas Chain Saw View Diagrams & Manuals
2450 Type 5 Gas Chain Saw View Diagrams & Manuals
2450 Type 6 Gas Chain Saw View Diagrams & Manuals
2450 Type 7 Gas Chain Saw View Diagrams & Manuals
2550 Type 1 Gas Chain Saw View Diagrams & Manuals
2550 Type 2 Gas Chain Saw View Diagrams & Manuals
2550 Type 3 Gas Chain Saw View Diagrams & Manuals
2550 Type 4 Gas Chain Saw View Diagrams & Manuals
2550 Type 5 Gas Chain Saw View Diagrams & Manuals
2550 Type 6 Gas Chain Saw View Diagrams & Manuals
2550 Type 7 Gas Chain Saw View Diagrams & Manuals
2550LE Type 1 Gas Chain Saw View Diagrams & Manuals
2550LE Type 2 Gas Chain Saw View Diagrams & Manuals
2550SE Type 1 Gas Chain Saw View Diagrams & Manuals
2550SE Type 2 Gas Chain Saw View Diagrams & Manuals
2555FLW Gas Chain Saw View Diagrams & Manuals
112 Gas Trimmer View Diagrams & Manuals
PP025 Gas Trimmer View Diagrams & Manuals
PP031 Gas Trimmer View Diagrams & Manuals
PP033 Gas Trimmer View Diagrams & Manuals
PP036 Gas Trimmer View Diagrams & Manuals
PP110 Gas Trimmer View Diagrams & Manuals
PP113 Gas Trimmer View Diagrams & Manuals
PP115 Gas Trimmer View Diagrams & Manuals
PP125 Gas Trimmer View Diagrams & Manuals
PP131 Gas Trimmer View Diagrams & Manuals
PP135 Gas Trimmer View Diagrams & Manuals
PP136 Gas Trimmer View Diagrams & Manuals
PP136E Type 1 Gas Trimmer View Diagrams & Manuals
PP136E Type 2 Gas Trimmer View Diagrams & Manuals
PP165 Gas Trimmer View Diagrams & Manuals
PP325 Gas Trimmer View Diagrams & Manuals
PP331 Gas Trimmer View Diagrams & Manuals
PP336 Gas Trimmer View Diagrams & Manuals
PPB100 Gas Trimmer View Diagrams & Manuals
PPB100E Type 1 Gas Trimmer View Diagrams & Manuals
PPB100E Type 2 Gas Trimmer View Diagrams & Manuals
PPB150E Type 1 Gas Trimmer View Diagrams & Manuals
PPB150E Type 2 Gas Trimmer View Diagrams & Manuals
PPB200 Gas Trimmer View Diagrams & Manuals
PPB200E Type 1 Gas Trimmer View Diagrams & Manuals
PPB200E Type 2 Gas Trimmer View Diagrams & Manuals
PPB250E Type 1 Gas Trimmer View Diagrams & Manuals
PPB250E Type 2 Gas Trimmer View Diagrams & Manuals
PPB300 Gas Trimmer View Diagrams & Manuals
PPB300E Type 1 Gas Trimmer View Diagrams & Manuals
PPB300E Type 2 Gas Trimmer View Diagrams & Manuals
PPB32SST Type 1 Gas Trimmer View Diagrams & Manuals
PPB32SST Type 2 Gas Trimmer View Diagrams & Manuals
PPB350 Gas Trimmer View Diagrams & Manuals
PT112 Gas Trimmer View Diagrams & Manuals
SM132 Type 1 Gas Trimmer View Diagrams & Manuals
SM132 Type 2 Gas Trimmer View Diagrams & Manuals
SM132LE Type 1 Gas Trimmer View Diagrams & Manuals
SM132LE Type 2 Gas Trimmer View Diagrams & Manuals
GHT220 (Type 4) Gas Hedge Trimmer View Diagrams & Manuals
GHT220 (Type 3) Gas Hedge Trimmer View Diagrams & Manuals
GHT220 (Type 5) Gas Hedge Trimmer View Diagrams & Manuals
GHT220LE (Type 1) Gas Hedge Trimmer View Diagrams & Manuals
GHT220LE (Type 2) Gas Hedge Trimmer View Diagrams & Manuals
SM4018 Gas Chainsaw View Diagrams & Manuals
PP210 Gas Chainsaw View Diagrams & Manuals
BVM200VS (Type 1) Gas Blower View Diagrams & Manuals
BVM200VS (Type 2) Gas Blower View Diagrams & Manuals
PP3516AVX Gas Chainsaw View Diagrams & Manuals
PP4218AVX Gas Chainsaw View Diagrams & Manuals
BVM210 (Type 1) Gas Blower View Diagrams & Manuals
BVM210 (Type 2) Gas Blower View Diagrams & Manuals
BVM210 (Type 3) Gas Blower View Diagrams & Manuals
PP258TP (Type 1) Pole Pruner View Diagrams & Manuals
PP258TP (Type 2) Pole Pruner View Diagrams & Manuals
PP446T Pro Trimmer View Diagrams & Manuals
BVM210VS (Type1) Pro Gas Blower View Diagrams & Manuals
BVM210VS (Type2) Pro Gas Blower View Diagrams & Manuals
HHT25 Pro Hedge Trimmer View Diagrams & Manuals
PP445 Gas Pole Pruner View Diagrams & Manuals
PVB20LE Type 1 Gas Blower View Diagrams & Manuals
PVB20LE Type 2 Gas Blower View Diagrams & Manuals
PVB20LE Type 3 Gas Blower View Diagrams & Manuals
PPB2000 (Type1) Pro Gas Blower View Diagrams & Manuals
PPB2000 (Type2) Pro Gas Blower View Diagrams & Manuals
BVM200C Gas Blower View Diagrams & Manuals
BVM200FE Gas Blower View Diagrams & Manuals
BVM200LE (Type1) Pro 25cc Gas Blower View Diagrams & Manuals
BVM200LE (Type2) Pro 25cc Gas Blower View Diagrams & Manuals
BVM200LE (Type3) Pro 25cc Gas Blower View Diagrams & Manuals
BVM200LE (Type4) Pro 25cc Gas Blower View Diagrams & Manuals
PBV200 Pro Leaf Blower View Diagrams & Manuals
PBV200LE (Type1) Pro Leaf Blower View Diagrams & Manuals
PBV200LE (Type2) Pro Leaf Blower View Diagrams & Manuals
PBV200LE (Type3) Pro Leaf Blower View Diagrams & Manuals
PPB430VS (Type1) Pro Leaf Blower View Diagrams & Manuals
PPB430VS (Type2) Pro Leaf Blower View Diagrams & Manuals
PPB2000LE (Type1) Pro Leaf Blower View Diagrams & Manuals
PPB2000LE (Type2) Pro Leaf Blower View Diagrams & Manuals
PPB2000LE (Type3) Pro Leaf Blower View Diagrams & Manuals
PPB2000LE (Type4) Pro Leaf Blower View Diagrams & Manuals
PPB2000LE (Type5) Pro Leaf Blower View Diagrams & Manuals
SM210VS (Type1) Pro Leaf Blower View Diagrams & Manuals
SM210VS (Type2) Pro Leaf Blower View Diagrams & Manuals
SM400 (Type1) Pro Gas Leaf Blower View Diagrams & Manuals
SM400 (Type2) Pro Gas Leaf Blower View Diagrams & Manuals
SM400 (Type3) Pro Gas Leaf Blower View Diagrams & Manuals
WT200 (Type1) Pro Gas Leaf Blower View Diagrams & Manuals
WT200 (Type2) Pro Gas Leaf Blower View Diagrams & Manuals
bv1850le (Type 1) Gas Blower View Diagrams & Manuals
bv1850le (Type 2) Gas Blower View Diagrams & Manuals
bv1850le (Type 3) Gas Blower View Diagrams & Manuals
bv1850le (Type 4) Gas Blower View Diagrams & Manuals
220le Gas Chainsaw View Diagrams & Manuals
260 Pro Chainsaw View Diagrams & Manuals
PP4218 (Type 1 ) Gas Saw View Diagrams & Manuals
PP4218 (Type 2) Gas Saw View Diagrams & Manuals
PP220 (Type 1) Gas Chain Saw View Diagrams & Manuals
PP220LE Pro Gas Saw View Diagrams & Manuals
PPB4218 Chain Saw View Diagrams & Manuals
S25 Chain Saw View Diagrams & Manuals
222 Gas Chainsaw View Diagrams & Manuals
PP446ET (Type 1) Pruner View Diagrams & Manuals
PP446ET (Type 2) Pruner View Diagrams & Manuals
PP446ET (Type 3) Pruner View Diagrams & Manuals
PP446ET Pruner View Diagrams & Manuals
PP446E (1) Pruner View Diagrams & Manuals
PP446E (2) Pruner View Diagrams & Manuals
SM446E Pole Pruner View Diagrams & Manuals
PP46ET Trimmer View Diagrams & Manuals
PP3416 (966063001) Gas Chainsaw View Diagrams & Manuals
285 Gas Chainsaw View Diagrams & Manuals
305 Gas Chainsaw View Diagrams & Manuals
335 Gas Chainsaw View Diagrams & Manuals
SM705 (Type 1) Gas Trimmer View Diagrams & Manuals
SM705 (Type 2) Gas Trimmer View Diagrams & Manuals
P3816 Gas Chain Saw Type 1 View Diagrams & Manuals
PP3816AV Gas Saw Type 1 View Diagrams & Manuals
P200C Gas Powered Blower View Diagrams & Manuals
PP4218AV (Type 1) Gas Saw 4218AV-POULAN Pro View Diagrams & Manuals
PPB1838LE Chain Saw View Diagrams & Manuals
235 Pro Chain Saw View Diagrams & Manuals
PP25E Gas Trimmer View Diagrams & Manuals
375 Chain Saw View Diagrams & Manuals
385 Chain Saw View Diagrams & Manuals
395 Chain Saw View Diagrams & Manuals
262 Gas Chainsaw View Diagrams & Manuals
BH2660 Gas Chainsaw View Diagrams & Manuals
PP180 Gas Chainsaw View Diagrams & Manuals
PP180C Gas Chainsaw View Diagrams & Manuals
PP220 (Type 2) Gas Chainsaw View Diagrams & Manuals
PP220 (Type 3) Gas Chainsaw View Diagrams & Manuals
PP220 (Type 4) Gas Chainsaw View Diagrams & Manuals
PP220 (Type 5) Gas Chainsaw View Diagrams & Manuals
PP221 (Type 1) Gas Chainsaw View Diagrams & Manuals
PP221 (Type 2) Gas Chainsaw View Diagrams & Manuals
PP221 (Type 3) Gas Chainsaw View Diagrams & Manuals
PP221 (Type 4) Gas Chainsaw View Diagrams & Manuals
PP221LE (Type 1) Gas Chainsaw View Diagrams & Manuals
PP221LE (Type 2) Gas Chainsaw View Diagrams & Manuals
PP230 Gas Chainsaw View Diagrams & Manuals
PP235 Gas Chainsaw View Diagrams & Manuals
PP236 Gas Chainsaw View Diagrams & Manuals
PP236C Gas Chainsaw View Diagrams & Manuals
PP260 (Type 1) Gas Chainsaw View Diagrams & Manuals
PP260 (Type 2) Gas Chainsaw View Diagrams & Manuals
PP260 (Type 3) Gas Chainsaw View Diagrams & Manuals
PP260 (Type 4) Gas Chainsaw View Diagrams & Manuals
PP260 (Type 5) Gas Chainsaw View Diagrams & Manuals
PP260 (Type 6) Gas Chainsaw View Diagrams & Manuals
PP260LE (Type 1) Gas Chainsaw View Diagrams & Manuals
PP260LE (Type 2) Gas Chainsaw View Diagrams & Manuals
PP26E Gas Trimmer View Diagrams & Manuals
PP285 Gas Chainsaw View Diagrams & Manuals
PP305 Gas Chainsaw View Diagrams & Manuals
PP336C Gas Chainsaw View Diagrams & Manuals
PP365 Gas Chainsaw View Diagrams & Manuals
PP365C Gas Chainsaw View Diagrams & Manuals
PP375 Gas Chainsaw View Diagrams & Manuals
PP385 Gas Chainsaw View Diagrams & Manuals
PP395 Gas Chainsaw View Diagrams & Manuals
PP446 Gas Pole Pruner View Diagrams & Manuals
PPB1634LE Gas Chainsaw View Diagrams & Manuals
PPB250E (Type 3) Gas Trimmer View Diagrams & Manuals
PPB4218 (Type 1) Gas Chainsaw View Diagrams & Manuals
PPB4218 (Type 2) Gas Chainsaw View Diagrams & Manuals
PPBVM200 (Type 1) Gas Blower View Diagrams & Manuals
PPBVM200 (Type 2) Gas Blower View Diagrams & Manuals
PPBVM200 (Type 3) Gas Blower View Diagrams & Manuals
S23 Arbor Pro Gas Chainsaw View Diagrams & Manuals
SM4218AVX Gas Chainsaw View Diagrams & Manuals
SM4518AVX Gas Chainsaw View Diagrams & Manuals
SM706 (Type 1) Gas Trimmer View Diagrams & Manuals
SM706 (Type 2) Gas Trimmer View Diagrams & Manuals
PP 258 TP (Type 1)(2008-12) Pole Saw View Diagrams & Manuals
PP 258 TP (Type 2)(2008-12) Pole Saw View Diagrams & Manuals
PP 258 TPC (579218001)(2011-10) Pole Saw View Diagrams & Manuals
P 3816 (966557801)(2012-08) Chain Saw View Diagrams & Manuals
P 3816 (Type 2) Chainsaw View Diagrams & Manuals
P 3818 (2012-01) Chainsaw View Diagrams & Manuals
P 4018 (952802151)(2012-01) Chainsaw View Diagrams & Manuals
P 4018 AV-BH Chainsaw View Diagrams & Manuals
PP 190 Chainsaw View Diagrams & Manuals
PP 222 Chainsaw View Diagrams & Manuals
PP 262 Chainsaw View Diagrams & Manuals
PP 3516 (Type 1)(2006-12) Chainsaw View Diagrams & Manuals
PP 3516 (Type 2)(2006-12) Chainsaw View Diagrams & Manuals
PP 3816 (Type 1)(2006-07) Chainsaw View Diagrams & Manuals
PP 3816 (Type 2)(2006-07) Chainsaw View Diagrams & Manuals
PP 4018 (Type 1) Chainsaw View Diagrams & Manuals
PP 4018 (Type 1)(2006-06) Chainsaw View Diagrams & Manuals
PP 4018 (Type 2)(2006-06) Chainsaw View Diagrams & Manuals
PP 4218 (2012-01) Chainsaw View Diagrams & Manuals
PP 4218 (Type 1)(2006-07) Chainsaw View Diagrams & Manuals
PP 4218 (Type 2)(2006-07) Chainsaw View Diagrams & Manuals
PP 4218 AVHD (Type 1) Chainsaw View Diagrams & Manuals
PP 4218 AVHD (Type 1)(2006-09) Chainsaw View Diagrams & Manuals
PP 4218 AVHD (Type 2)(2006-09) Chainsaw View Diagrams & Manuals
PPB 3416 (Type 1)(2008-07) Chainsaw View Diagrams & Manuals
PPB 3416 (Type 2)(2008-07) Chainsaw View Diagrams & Manuals
PPB 4018 (Type 1) Chainsaw View Diagrams & Manuals
PPB 4018 (Type 1)(2006-12) Chainsaw View Diagrams & Manuals
PPB 4018 (Type 2)(2006-12) Chainsaw View Diagrams & Manuals
PPB 4218 (Type 1)(2008-07) Chainsaw View Diagrams & Manuals
PPB 4218 (Type 2)(2008-07) Chainsaw View Diagrams & Manuals
BVM 200 (Type 1) Blower Vacuum View Diagrams & Manuals
BVM 200 (Type 2) Blower Vacuum View Diagrams & Manuals
BVM 200 (Type 3) Blower Vacuum View Diagrams & Manuals
PPB 2000 (Type 1)(2006-12) Blower View Diagrams & Manuals
PPB 2000 (Type 2)(2006-12) Blower View Diagrams & Manuals
P 1500 (952711930)(2010-04) String Trimmer View Diagrams & Manuals
P 2500 (952711931)(2010-08) String Trimmer View Diagrams & Manuals
PP 125 (Type 1) String Trimmer View Diagrams & Manuals
PP 125 (Type 1)(2009-03) String Trimmer View Diagrams & Manuals
PP 125 (Type 2) String Trimmer View Diagrams & Manuals
PP 125 (Type 2)(2009-03) String Trimmer View Diagrams & Manuals
PP 25 (Type 1) String Trimmer View Diagrams & Manuals
PP 25 (Type 2) String Trimmer View Diagrams & Manuals
PP 31 String Trimmer View Diagrams & Manuals
PP 325 (Type 1)(2008-12) String Trimmer View Diagrams & Manuals
PP 325 (Type 2)(2008-12) String Trimmer View Diagrams & Manuals
PP 33 String Trimmer View Diagrams & Manuals
PP 35 String Trimmer View Diagrams & Manuals
PP 36 String Trimmer View Diagrams & Manuals
PPB 150 E (Type 1)(2009-03) String Trimmer View Diagrams & Manuals
PPB 150 E (Type 2)(2009-03) String Trimmer View Diagrams & Manuals
PPB 150 E (Type 3)(2009-03) String Trimmer View Diagrams & Manuals
PPB 250 E (Type 1)(2009-01) String Trimmer View Diagrams & Manuals
PPB 250 E (Type 2)(2009-01) String Trimmer View Diagrams & Manuals
PPB 250 E (Type 3)(2009-01) String Trimmer View Diagrams & Manuals
PPB 32 SST (Type 1)(2009-05) String Trimmer View Diagrams & Manuals
PPB 32 SST (Type 2)(2009-05) String Trimmer View Diagrams & Manuals
XT 260 (Type 1)(2009-03) String Trimmer View Diagrams & Manuals
XT 260 (Type 1)(952711795)(2009-03) String Trimmer View Diagrams & Manuals
XT 260 (Type 2)(2009-03) String Trimmer View Diagrams & Manuals
XT 260 (Type 2)(952711795)(2009-03) String Trimmer View Diagrams & Manuals
1900 LE Chainsaws View Diagrams & Manuals
2150 PR Chainsaws View Diagrams & Manuals
2150LX Chainsaws View Diagrams & Manuals
2175LE Chainsaws View Diagrams & Manuals
S1634 (Type 1) Chainsaws View Diagrams & Manuals
S1634 (Type 2) Chainsaws View Diagrams & Manuals
S1634 (Type 3) Chainsaws View Diagrams & Manuals
S1634LE Chainsaws View Diagrams & Manuals
S1838 Chainsaws View Diagrams & Manuals
S1838LE Chainsaws View Diagrams & Manuals
BVM210FA (2012-10) Blowers View Diagrams & Manuals
25HHT Hedge Trimmers View Diagrams & Manuals
25HHT (2010-06) Hedge Trimmers View Diagrams & Manuals
FL26C (579178701)(2011-10) Trimmers And Edgers View Diagrams & Manuals
S31BC Trimmers And Edgers View Diagrams & Manuals
S31SNG Trimmers And Edgers View Diagrams & Manuals
S31SNGBC Trimmers And Edgers View Diagrams & Manuals
S31SST Trimmers And Edgers View Diagrams & Manuals
SB2000M Trimmers And Edgers View Diagrams & Manuals
SB2000MLE Trimmers And Edgers View Diagrams & Manuals
TE450CXL LE (Type 1) Trimmers And Edgers View Diagrams & Manuals
TE450CXL LE (Type 2) Trimmers And Edgers View Diagrams & Manuals
TE450CXL LE (Type 3) Trimmers And Edgers View Diagrams & Manuals
TE450CXL LE (Type 4) Trimmers And Edgers View Diagrams & Manuals
TF22G Hedge Trimmers View Diagrams & Manuals
Weed Eater
25HO Gas Trimmer View Diagrams & Manuals
BC2400 Type 5 Gas Trimmer View Diagrams & Manuals
BC2400 Type 6 Gas Trimmer View Diagrams & Manuals
BC24W Gas Trimmer View Diagrams & Manuals
BC2500LE Type 1 Gas Trimmer View Diagrams & Manuals
BC2500LE Type 2 Gas Trimmer View Diagrams & Manuals
BC2500LE Type 3 Gas Trimmer View Diagrams & Manuals
BC2500LE Type 4 Gas Trimmer View Diagrams & Manuals
BC3100 Gas Trimmer View Diagrams & Manuals
BC3150 Gas Trimmer View Diagrams & Manuals
FX25 Type 1 Gas Trimmer View Diagrams & Manuals
Featherlite Type 1 Gas Trimmer View Diagrams & Manuals
Featherlite Type 2 Gas Trimmer View Diagrams & Manuals
Featherlite Type 3 Gas Trimmer View Diagrams & Manuals
Featherlite Type 4 Gas Trimmer View Diagrams & Manuals
Featherlite Type 5 Gas Trimmer View Diagrams & Manuals
Featherlite SST 25 Gas Trimmer View Diagrams & Manuals
Featherlite SST 25 HO Type 1 Gas Trimmer View Diagrams & Manuals
Featherlite SST 25 HO Type 2 Gas Trimmer View Diagrams & Manuals
Featherlite SST 25 HO Type 3 Gas Trimmer View Diagrams & Manuals
Featherlite SST 25 HO Type 4 Gas Trimmer View Diagrams & Manuals
Featherlite SST LE Type 1 Gas Trimmer View Diagrams & Manuals
Featherlite SST LE Type 2 Gas Trimmer View Diagrams & Manuals
Featherlite SST LE Type 3 Gas Trimmer View Diagrams & Manuals
FL20 Type 1 Gas Trimmer View Diagrams & Manuals
FL21 Gas Trimmer View Diagrams & Manuals
FL21LE Gas Trimmer View Diagrams & Manuals
FL23 Gas Trimmer View Diagrams & Manuals
FL25 Type 1 Gas Trimmer View Diagrams & Manuals
FL25 Type 2 Gas Trimmer View Diagrams & Manuals
FL25LE Type 1 Gas Trimmer View Diagrams & Manuals
FL25LE Type 2 Gas Trimmer View Diagrams & Manuals
FL26 (Type 1) Gas Trimmer View Diagrams & Manuals
FX26 Type 1 Gas Trimmer View Diagrams & Manuals
FX26 Type 2 Gas Trimmer View Diagrams & Manuals
FX26S Type 1 Gas Trimmer View Diagrams & Manuals
LT17 Gas Trimmer View Diagrams & Manuals
LT7000 Gas Trimmer View Diagrams & Manuals
LT7500 Gas Trimmer View Diagrams & Manuals
MX550 Gas Trimmer View Diagrams & Manuals
MX557 Gas Trimmer View Diagrams & Manuals
PL200 (Type 1) Gas Trimmer View Diagrams & Manuals
PL500 Type 1 Gas Trimmer View Diagrams & Manuals
PL500 Type 2 Gas Trimmer View Diagrams & Manuals
PL500 Type 3 Gas Trimmer View Diagrams & Manuals
PL500 Type 4 Gas Trimmer View Diagrams & Manuals
PROLITE Gas Trimmer View Diagrams & Manuals
TE400 Gas Trimmer View Diagrams & Manuals
TE400CXL Type 1 Gas Trimmer View Diagrams & Manuals
TE400CXL Type 2 Gas Trimmer View Diagrams & Manuals
TE400CXL Type 3 Gas Trimmer View Diagrams & Manuals
TE400CXL Type 4 Gas Trimmer View Diagrams & Manuals
TE400CXL Type 5 Gas Trimmer View Diagrams & Manuals
TE400LE Type 1 Gas Trimmer View Diagrams & Manuals
TE400LE Type 2 Gas Trimmer View Diagrams & Manuals
TE400LE Type 3 Gas Trimmer View Diagrams & Manuals
TE400LE Type 4 Gas Trimmer View Diagrams & Manuals
TE475 Gas Trimmer View Diagrams & Manuals
TE475Y Gas Trimmer View Diagrams & Manuals
TE500CXL Type 1 Gas Trimmer View Diagrams & Manuals
TE500CXL Type 2 Gas Trimmer View Diagrams & Manuals
TE500CXL Type 3 Gas Trimmer View Diagrams & Manuals
TE500CXL Type 4 Gas Trimmer View Diagrams & Manuals
Twist n Edge Type 1 Gas Trimmer View Diagrams & Manuals
Twist n Edge Type 2 Gas Trimmer View Diagrams & Manuals
Twist n Edge Type 3 Gas Trimmer View Diagrams & Manuals
ULTRATRIM Gas Trimmer View Diagrams & Manuals
XR-20 Gas Trimmer View Diagrams & Manuals
XT200 Type 1 Gas Trimmer View Diagrams & Manuals
XT200 Type 2 Gas Trimmer View Diagrams & Manuals
XT200 Type 3 Gas Trimmer View Diagrams & Manuals
XT25 Gas Trimmer View Diagrams & Manuals
XT250 Type 1 Gas Trimmer View Diagrams & Manuals
XT250 Type 2 Gas Trimmer View Diagrams & Manuals
XT250LE Type 1 Gas Trimmer View Diagrams & Manuals
XT250LE Type 2 Gas Trimmer View Diagrams & Manuals
XT260 Type 1 Gas Trimmer View Diagrams & Manuals
XT260 Type 2 Gas Trimmer View Diagrams & Manuals
XT300 Type 1 Gas Trimmer View Diagrams & Manuals
XT300 Type 2 Gas Trimmer View Diagrams & Manuals
XT300 Type 3 Gas Trimmer View Diagrams & Manuals
XT300 Type 4 Gas Trimmer View Diagrams & Manuals
XT35 Gas Trimmer View Diagrams & Manuals
XT400 Type 2 Gas Trimmer View Diagrams & Manuals
XT400 Type 3 Gas Trimmer View Diagrams & Manuals
XT400 Type 4 Gas Trimmer View Diagrams & Manuals
XT45 Gas Trimmer View Diagrams & Manuals
XT55 Gas Trimmer View Diagrams & Manuals
XT600 Type 2 Gas Trimmer View Diagrams & Manuals
XT600 Type 3 Gas Trimmer View Diagrams & Manuals
XT600 Type 4 Gas Trimmer View Diagrams & Manuals
XT600 Type 5 Gas Trimmer View Diagrams & Manuals
XT600 Type 6 Gas Trimmer View Diagrams & Manuals
XT700 Gas Trimmer View Diagrams & Manuals
YP120 Gas Trimmer View Diagrams & Manuals
DAHT22 Gas Hedge Trimmer View Diagrams & Manuals
Featherlite Extreme FX25 (Type 1) Gas Timmer View Diagrams & Manuals
Featherlite Extreme FX25 (Type 2) Gas Timmer View Diagrams & Manuals
Featherlite Extreme FX25LE (Type 1) Gas Trimmer View Diagrams & Manuals
Featherlite Extreme FX25LE (Type 2) Gas Trimmer View Diagrams & Manuals
Featherlite Extreme FX25LE (Type 3) Gas Trimmer View Diagrams & Manuals
Featherlite LE (Type 1) Gas Timmer View Diagrams & Manuals
Featherlite LE (Type 2) Gas Timmer View Diagrams & Manuals
Featherlite LE (Type 3) Gas Timmer View Diagrams & Manuals
Featherlite Plus LE (Type 1) Gas Timmer View Diagrams & Manuals
Featherlite Plus LE (Type 2) Gas Timmer View Diagrams & Manuals
Featherlite SST Gas Timmer View Diagrams & Manuals
PL200 (Type 2) Gas Trimmer View Diagrams & Manuals
BV1650 (Type 1) Gas Blower View Diagrams & Manuals
BV1650 (Type 2) Gas Blower View Diagrams & Manuals
BV1650 (Type 3) Gas Blower View Diagrams & Manuals
BV1650LE (Type 1) Gas Blower View Diagrams & Manuals
BV1650LE (Type 2) Gas Blower View Diagrams & Manuals
BV1650 Handheld Blower View Diagrams & Manuals
BV1800 Handheld Blower View Diagrams & Manuals
BV1850 (2000-2004) Handheld Blower View Diagrams & Manuals
BV2000 (2000-2004) Handheld Blower View Diagrams & Manuals
BV1850 (2005-2009) Handheld Blower View Diagrams & Manuals
BV2000 (2005-2009) Handheld Blower View Diagrams & Manuals
VS2000BV Handheld Blower View Diagrams & Manuals
GHT195LE Gas Hedge Trimmer View Diagrams & Manuals
GHT225LE Gas Hedge Trimmer View Diagrams & Manuals
XT260 (Type 2) String Trimmer View Diagrams & Manuals
31WG Gas Trimmer View Diagrams & Manuals
FL25C Gas Trimmer View Diagrams & Manuals
FL20C Gas Trimmer View Diagrams & Manuals
FX26SC Gas Trimmer View Diagrams & Manuals
FX26SCE Gas Trimmer View Diagrams & Manuals
SST25CE Gas Trimmer View Diagrams & Manuals
GHT225LE (Type 1) Gas Hedge Trimmer View Diagrams & Manuals
GHT225LE (Type 2) Gas Hedge Trimmer View Diagrams & Manuals
GHT225LE (Type 3) Gas Hedge Trimmer View Diagrams & Manuals
GHT225LE (Type 4) Gas Hedge Trimmer View Diagrams & Manuals
SST25C (Type 1) Gas Trimmer View Diagrams & Manuals
SST25C (Type 2) Gas Trimmer View Diagrams & Manuals
SST25C (Type 3) Gas Trimmer View Diagrams & Manuals
SST25C (Type 4) Gas Trimmer View Diagrams & Manuals
FX26S Type 2 Gas Trimmer View Diagrams & Manuals
FL26 (Type 2) Gas Trimmer View Diagrams & Manuals
FX265 Featherlite Xtreme 16" 5cc Gas Trimmer View Diagrams & Manuals
Featherlite Plus Gas Trimmer View Diagrams & Manuals
B1750LE (1) Gas Blower View Diagrams & Manuals
B1750LE (2) Gas Blower View Diagrams & Manuals
B1750LE (3) Gas Blower View Diagrams & Manuals
FL20 Type 2 Gas Trimmer View Diagrams & Manuals
B1750 Gas Blower View Diagrams & Manuals
BV2000LE (Type 1) Barracuda Gas Blower View Diagrams & Manuals
BV2000LE (Type 2) Barracuda Gas Blower View Diagrams & Manuals
BV2000LE (Type 3) Gas Blower View Diagrams & Manuals
BV2000LE (Type 4) Gas Blower View Diagrams & Manuals
GHT180LE (Type 1) Gas Hedge Trimmer View Diagrams & Manuals
GHT180LE (Type 2) Gas Hedge Trimmer View Diagrams & Manuals
GHT180LE (Type 3) Gas Hedge Trimmer View Diagrams & Manuals
GHT180LE (Type 4) Gas Hedge Trimmer View Diagrams & Manuals
PPBVM200LE (Type 1) Gas Blower View Diagrams & Manuals
PPBVM200LE (Type 2) Gas Blower View Diagrams & Manuals
PPBVM200LE (Type 3) Gas Blower View Diagrams & Manuals
PPBVM200LE (Type 4) Gas Blower View Diagrams & Manuals
WT200LE (Type 1) Wildthing Gas Blower View Diagrams & Manuals
WT200LE (Type 2) Wildthing Gas Blower View Diagrams & Manuals
WT200LE (Type 3) Wildthing Gas Blower View Diagrams & Manuals
WT200LE (Type 4) Wildthing Gas Blower View Diagrams & Manuals
BV 200 (Type 1) Blower Vacuum View Diagrams & Manuals
BV 200 (Type 2) Blower Vacuum View Diagrams & Manuals
SST25FEATHERLITE Gas Trimmer View Diagrams & Manuals
2555 Chainsaw View Diagrams & Manuals
MICROXXV Gas Saw View Diagrams & Manuals
PP258TPC (579218001)(2011-10) Pole Saw View Diagrams & Manuals
PP3516AVX (2012-06) Chainsaw View Diagrams & Manuals
Husqvarna
240 (2008-01) Chainsaw View Diagrams & Manuals
240 E (2008-01) Chainsaw View Diagrams & Manuals
23 C (530083963) (1997-07) Chainsaw View Diagrams & Manuals
23 (1993-01) Chainsaw View Diagrams & Manuals
235 (2008-01) Chainsaw View Diagrams & Manuals
235 E (2008-01) Chainsaw View Diagrams & Manuals
Mondo (1997-04) Trimmer View Diagrams & Manuals
Mondo (1997-06) Trimmer View Diagrams & Manuals
Mondo Max (1997-04) Trimmer View Diagrams & Manuals
Mondo Max (1997-06) Trimmer View Diagrams & Manuals
Mondo Mega (1997-04) Trimmer View Diagrams & Manuals
21 LCN (1995-12) Line Trimmer View Diagrams & Manuals
18 H (1992-03) Hedge Trimmer View Diagrams & Manuals
18 H (1994-04) Hedge Trimmer View Diagrams & Manuals
B1750 (2006-12) Blower View Diagrams & Manuals
B1750LE (Type 1) (2006-12) Blower View Diagrams & Manuals
B1750LE (Type 2) (2006-12) Blower View Diagrams & Manuals
B1750LE (Type 3) (2006-12) Blower View Diagrams & Manuals
BV1850LE (Type 2) (2006-12) Blower View Diagrams & Manuals
BV1850LE (Type 3) (2006-12) Blower View Diagrams & Manuals
BV1850LE (Type 4) (2006-12) Blower View Diagrams & Manuals
BV2000 (Type 1) (2006-12) Le Blower View Diagrams & Manuals
BV2000 (Type 2) (2006-12) Le Blower View Diagrams & Manuals
BV2000 (Type 3) (2006-12) Le Blower View Diagrams & Manuals
BV2000 (Type 4) (2006-12) Le Blower View Diagrams & Manuals
BVM200VS (2009-03) Blower View Diagrams & Manuals
BVM200VS (545103471) (2009-03) Blower View Diagrams & Manuals
BVM210VS (2009-03) Blower View Diagrams & Manuals
GBV325 (2010-07) 952715704 Blower View Diagrams & Manuals
GBV345 (2010-05) Blower View Diagrams & Manuals
P325 (2010-04) Blower View Diagrams & Manuals
PBV200 (2006-12) Blower View Diagrams & Manuals
PBV200LE (Type 1) (2006-12) Blower View Diagrams & Manuals
PBV200LE (Type 2) (2006-12) Blower View Diagrams & Manuals
PBV200LE (Type 3) (2006-12) Blower View Diagrams & Manuals
PPB2000 (Type 1) (2006-12) Blower View Diagrams & Manuals
PPB2000 (Type 2) (2006-12) Blower View Diagrams & Manuals
PPB2000LE (Type 1) (2006-12) Blower View Diagrams & Manuals
PPB2000LE (Type 2) (2006-12) Blower View Diagrams & Manuals
PPB2000LE (Type 3) (2006-12) Blower View Diagrams & Manuals
PPB2000LE (Type 4) (2006-12) Blower View Diagrams & Manuals
PPB2000LE (Type 5) (2006-12) Blower View Diagrams & Manuals
PPB430VS (2009-03) Blower View Diagrams & Manuals
SM210VS (2009-03) Blower View Diagrams & Manuals
SM400 (Type 1) (2006-12) Blower View Diagrams & Manuals
SM400 (Type 2) (2006-12) Blower View Diagrams & Manuals
SM400 (Type 3) (2006-12) Blower View Diagrams & Manuals
WT200 (Type 1) (2006-12) Le Blower View Diagrams & Manuals
WT200 (Type 2) (2006-12) Le Blower View Diagrams & Manuals
WT200 (Type 3) (2006-12) Le Blower View Diagrams & Manuals
WT200 (Type 4) (2006-12) Le Blower View Diagrams & Manuals
1950 (Type 1) (2007-08) Chain Saw View Diagrams & Manuals
1950 (Type 2) (2007-08) Chain Saw View Diagrams & Manuals
1950 (Type 3) (2007-08) Chain Saw View Diagrams & Manuals
1950 (Type 4) (2007-08) Chain Saw View Diagrams & Manuals
1950 (Type 5) (2007-08) Chain Saw View Diagrams & Manuals
1950 (Type 6) (2007-08) Chain Saw View Diagrams & Manuals
1950 (Type 7) (2007-08) Chain Saw View Diagrams & Manuals
1975 (Type 1) (2008-03) Le, Woodshark View Diagrams & Manuals
1975 (Type 2) (2008-03) Le, Woodshark View Diagrams & Manuals
2050 (Type 1) (2006-11) Le Chain Saw View Diagrams & Manuals
2050 (Type 2) (2006-11) Le Chain Saw View Diagrams & Manuals
2050 (Type 1) (2008-06) 2150, 2175, 2375 Chain Saw View Diagrams & Manuals
2050 (Type 2) (2008-06) 2150, 2175, 2375 Chain Saw View Diagrams & Manuals
2050 (Type 3) (2008-06) 2150, 2175, 2375 Chain Saw View Diagrams & Manuals
2050 (Type 4) (2008-06) 2150, 2175, 2375 Chain Saw View Diagrams & Manuals
2050 (Type 5) (2008-06) 2150, 2175, 2375 Chain Saw View Diagrams & Manuals
2050 (Type 6) (2008-06) 2150, 2175, 2375 Chain Saw View Diagrams & Manuals
2050 (Type 7) (2008-06) 2150, 2175, 2375 Chain Saw View Diagrams & Manuals
2055 (Type 1) (2008-03) Le Chain Saw View Diagrams & Manuals
2055 (Type 2) (2008-03) Le Chain Saw View Diagrams & Manuals
2055 (Type 1) (2008-03) Chain Saw View Diagrams & Manuals
2055 (Type 2) (2008-03) Chain Saw View Diagrams & Manuals
2055 (Type 3) (2008-03) Chain Saw View Diagrams & Manuals
2055 (Type 4) (2008-03) Chain Saw View Diagrams & Manuals
2055 (Type 5) (2008-03) Chain Saw View Diagrams & Manuals
2055 (Type 6) (2008-03) Chain Saw View Diagrams & Manuals
2055 (Type 7) (2008-03) Chain Saw View Diagrams & Manuals
2075 (Type 1) (2075C, 20750C) (2007-07) Chain Saw View Diagrams & Manuals
2075 (Type 2) (2075C, 20750C) (2007-07) Chain Saw View Diagrams & Manuals
2075 (Type 3) (2075C, 20750C) (2007-07) Chain Saw View Diagrams & Manuals
2075 (Type 4) (2075C, 20750C) (2007-07) Chain Saw View Diagrams & Manuals
2075 (Type 5) (2075C, 20750C) (2007-07) Chain Saw View Diagrams & Manuals
2150 (Type 1) (2008-03) Le, Predator Le View Diagrams & Manuals
2150 (Type 2) (2008-03) Le, Predator Le View Diagrams & Manuals
2150 (Type 1) (2006-11) Pr Chain Saw View Diagrams & Manuals
2150 (Type 2) (2006-11) Pr Chain Saw View Diagrams & Manuals
2150 (Type 3) (2006-11) Pr Chain Saw View Diagrams & Manuals
2150 (Type 4) (2006-11) Pr Chain Saw View Diagrams & Manuals
2150 (Type 5) (2006-11) Pr Chain Saw View Diagrams & Manuals
2150 (Type 6) (2006-11) Pr Chain Saw View Diagrams & Manuals
220 (Type 1) (2006-09) Chain Saw View Diagrams & Manuals
220 (Type 2) (2006-09) Chain Saw View Diagrams & Manuals
220 (Type 3) (2006-09) Chain Saw View Diagrams & Manuals
220 (Type 4) (2006-09) Chain Saw View Diagrams & Manuals
220 (Type 5) (2006-09) Chain Saw View Diagrams & Manuals
220LE (2006-11) Chain Saw View Diagrams & Manuals
221 (Type 1) (2006-11) Le Chain Saw View Diagrams & Manuals
221 (Type 2) (2006-11) Le Chain Saw View Diagrams & Manuals
222 (2008-03) Chain Saw View Diagrams & Manuals
2250 (Type 1) (2006-09) Le Chain Saw View Diagrams & Manuals
2250 (Type 2) (2006-09) Le Chain Saw View Diagrams & Manuals
2250 (Type 1) (2008-03) 2450, 2550 Chain Saw View Diagrams & Manuals
2250 (Type 2) (2008-03) 2450, 2550 Chain Saw View Diagrams & Manuals
2250 (Type 3) (2008-03) 2450, 2550 Chain Saw View Diagrams & Manuals
2250 (Type 4) (2008-03) 2450, 2550 Chain Saw View Diagrams & Manuals
2250 (Type 5) (2008-03) 2450, 2550 Chain Saw View Diagrams & Manuals
2250 (Type 6) (2008-03) 2450, 2550 Chain Saw View Diagrams & Manuals
2250 (Type 7) (2008-03) 2450, 2550 Chain Saw View Diagrams & Manuals
2375 (Type 1) (2008-03) Le Chain Saw View Diagrams & Manuals
2375 (Type 2) (2008-03) Le Chain Saw View Diagrams & Manuals
2550 (Type 1) (2008-03) Le Chain Saw View Diagrams & Manuals
2550 (Type 2) (2008-03) Le Chain Saw View Diagrams & Manuals
2550SE (Type 1) (2008-03) Silver Edition View Diagrams & Manuals
2550SE (Type 2) (2008-03) Silver Edition View Diagrams & Manuals
2550T (2006-09) Titanium View Diagrams & Manuals
260 (Type 1) (2007-03) Le Chain Saw View Diagrams & Manuals
260 (Type 2) (2007-03) Le Chain Saw View Diagrams & Manuals
260 (Type 1) (2008-03) Chain Saw View Diagrams & Manuals
260 (Type 2) (2008-03) Chain Saw View Diagrams & Manuals
260 (Type 3) (2008-03) Chain Saw View Diagrams & Manuals
260 (Type 4) (2008-03) Chain Saw View Diagrams & Manuals
260 (Type 5) (2008-03) Chain Saw View Diagrams & Manuals
260 (Type 6) (2008-03) Chain Saw View Diagrams & Manuals
2160 (2006-11) Bh Chain Saw View Diagrams & Manuals
2160 (2006-11) Bh Le View Diagrams & Manuals
BH2660 (2006-11) Chain Saw View Diagrams & Manuals
P3314 (Type 1) (2008-07) Chain Saw View Diagrams & Manuals
P3314 (Type 2) (2008-07) Chain Saw View Diagrams & Manuals
P3314 (Type 1) (2008-07) Ws Chain Saw View Diagrams & Manuals
P3314 (Type 2) (2008-07) Ws Chain Saw View Diagrams & Manuals
P3314 (Type 1) (2008-07) Wsa Chain Saw View Diagrams & Manuals
P3314 (Type 2) (2008-07) Wsa Chain Saw View Diagrams & Manuals
P3416 (Type 1) (2008-07) Chain Saw View Diagrams & Manuals
P3416 (Type 2) (2008-07) Chain Saw View Diagrams & Manuals
P3516PR (Type 1) (2008-07) Chain Saw View Diagrams & Manuals
P3516PR (Type 2) (2008-07) Chain Saw View Diagrams & Manuals
P3818AV (Type 1) (2008-07) Chain Saw View Diagrams & Manuals
P3818AV (Type 2) (2008-07) Chain Saw View Diagrams & Manuals
P4018 (Type 1) (2008-07) Wt Chain Saw View Diagrams & Manuals
P4018 (Type 2) (2008-07) Wt Chain Saw View Diagrams & Manuals
P4018AV (Type 1) (2008-07) Chain Saw View Diagrams & Manuals
P4018AV (Type 2) (2008-07) Chain Saw View Diagrams & Manuals
P4018AVBH (Type 1) (2008-07) Chain Saw View Diagrams & Manuals
P4018AVBH (Type 2) (2008-07) Chain Saw View Diagrams & Manuals
P4018WM (Type 1) (2008-07) Chain Saw View Diagrams & Manuals
P4018WM (Type 2) (2008-07) Chain Saw View Diagrams & Manuals
PP3516 (Type 1) (2006-12) Chain Saw View Diagrams & Manuals
PP3516 (Type 2) (2006-12) Chain Saw View Diagrams & Manuals
PP3816 (Type 1) (2006-07) Chain Saw View Diagrams & Manuals
PP3816 (Type 2) (2006-07) Chain Saw View Diagrams & Manuals
PP3816AV (Type 1) (2008-07) Chain Saw View Diagrams & Manuals
PP3816AV (Type 2) (2008-07) Chain Saw View Diagrams & Manuals
PP4018 (Type 1) (2006-06) Chain Saw View Diagrams & Manuals
PP4018 (Type 2) (2006-06) Chain Saw View Diagrams & Manuals
PP4218 (Type 1) (2006-07) Chain Saw View Diagrams & Manuals
PP4218 (Type 2) (2006-07) Chain Saw View Diagrams & Manuals
PP4218AV (Type 1) (2006-12) Chain Saw View Diagrams & Manuals
PP4218AV (Type 1) (2008-07) Chain Saw View Diagrams & Manuals
PP4218AV (Type 2) (2006-12) Chain Saw View Diagrams & Manuals
PP4218AV (Type 2) (2008-07) Chain Saw View Diagrams & Manuals
PP4218AV (Type 1) (952802031) (2008-07) Chain Saw View Diagrams & Manuals
PP4218AV (Type 2) (952802031) (2008-07) Chain Saw View Diagrams & Manuals
PP4218AVHD (Type 1) (2006-09) Chain Saw View Diagrams & Manuals
PP4218AVHD (Type 2) (2006-09) Chain Saw View Diagrams & Manuals
PPB1838LE (2008-03) Chain Saw View Diagrams & Manuals
PPB3416 (Type 1) (2008-07) Chain Saw View Diagrams & Manuals
PPB3416 (Type 2) (2008-07) Chain Saw View Diagrams & Manuals
PPB4018 (Type 1) (2006-12) Chain Saw View Diagrams & Manuals
PPB4018 (Type 2) (2006-12) Chain Saw View Diagrams & Manuals
PPB4218 (Type 1) (2008-07) Chain Saw View Diagrams & Manuals
PPB4218 (Type 2) (2008-07) Chain Saw View Diagrams & Manuals
S1970 (Type 1) (2006-06) Woodshark View Diagrams & Manuals
S1970 (Type 2) (2006-06) Woodshark View Diagrams & Manuals
SM4018 (2008-03) Chain Saw View Diagrams & Manuals
SM4218AV (Type 1) (2008-07) Chain Saw View Diagrams & Manuals
SM4218AV (Type 2) (2008-07) Chain Saw View Diagrams & Manuals
SM4218AVX (2008-09) Chain Saw View Diagrams & Manuals
112 (2006-05) Handheld Trimmer View Diagrams & Manuals
31 (2006-06) Wg Handheld Trimmer View Diagrams & Manuals
BC3150 (2007-02) Handheld Trimmer View Diagrams & Manuals
FL20 (Type 1) (2009-03) Handheld Trimmer View Diagrams & Manuals
FL20 (Type 2) (2009-03) Handheld Trimmer View Diagrams & Manuals
FL20 (Type 1) (952711794) (2009-03) Handheld Trimmer View Diagrams & Manuals
FL20 (Type 2) (952711794) (2009-03) Handheld Trimmer View Diagrams & Manuals
FL23 (2008-03) Handheld Trimmer View Diagrams & Manuals
FL26 (Type 1) (2009-03) Handheld Trimmer View Diagrams & Manuals
FL26 (Type 2) (2009-03) Handheld Trimmer View Diagrams & Manuals
FX26 (Type 1) (2008-06) Handheld Trimmer View Diagrams & Manuals
FX26 (Type 2) (2008-06) Handheld Trimmer View Diagrams & Manuals
FX26S (Type 1) (2009-03) Handheld Trimmer View Diagrams & Manuals
FX26S (Type 2) (2009-03) Handheld Trimmer View Diagrams & Manuals
GHT195LE (Type 1) (2008-06) Handheld Trimmer View Diagrams & Manuals
GHT195LE (Type 2) (2008-06) Handheld Trimmer View Diagrams & Manuals
GHT195LE (Type 3) (2008-06) Handheld Trimmer View Diagrams & Manuals
GHT195LE (Type 4) (2008-06) Handheld Trimmer View Diagrams & Manuals
GHT225LE (Type 1) (2008-06) Handheld Trimmer View Diagrams & Manuals
GHT225LE (Type 3) (2008-06) Handheld Trimmer View Diagrams & Manuals
GHT225LE (Type 4) (2008-06) Handheld Trimmer View Diagrams & Manuals
MX550 (2009-03) Handheld Trimmer View Diagrams & Manuals
P1500 (2007-10) Handheld Trimmer View Diagrams & Manuals
P2500 (2007-10) Handheld Trimmer View Diagrams & Manuals
P3500 (2007-10) Handheld Trimmer View Diagrams & Manuals
P4500 (2009-04) Handheld Trimmer View Diagrams & Manuals
P4500F (2009-01) Handheld Trimmer View Diagrams & Manuals
PP025 (Type 1) (2008-12) Handheld Trimmer View Diagrams & Manuals
PP025 (Type 2) (2008-12) Handheld Trimmer View Diagrams & Manuals
PP036 (2007-09) Handheld Trimmer View Diagrams & Manuals
PP125 (Type 1) (2009-03) Handheld Trimmer View Diagrams & Manuals
PP125 (Type 2) (2009-03) Handheld Trimmer View Diagrams & Manuals
PP136 (2006-12) Handheld Trimmer View Diagrams & Manuals
PP25E (2009-01) Handheld Trimmer View Diagrams & Manuals
PP325 (Type 1) (2008-12) Handheld Trimmer View Diagrams & Manuals
PP325 (Type 2) (2008-12) Handheld Trimmer View Diagrams & Manuals
PP336 (2009-02) Handheld Trimmer View Diagrams & Manuals
PPB100 (2007-12) Handheld Trimmer View Diagrams & Manuals
PPB100E (Type 1) (2007-09) Handheld Trimmer View Diagrams & Manuals
PPB100E (Type 2) (2007-09) Handheld Trimmer View Diagrams & Manuals
PPB150E (Type 1) (2009-03) Handheld Trimmer View Diagrams & Manuals
PPB150E (Type 2) (2009-03) Handheld Trimmer View Diagrams & Manuals
PPB150E (Type 3) (2009-03) Handheld Trimmer View Diagrams & Manuals
PPB200 (2006-12) Handheld Trimmer View Diagrams & Manuals
PPB200E (Type 1) (2009-02) Handheld Trimmer View Diagrams & Manuals
PPB200E (Type 2) (2009-02) Handheld Trimmer View Diagrams & Manuals
PPB250E (Type 1) (2009-01) Handheld Trimmer View Diagrams & Manuals
PPB250E (Type 2) (2009-01) Handheld Trimmer View Diagrams & Manuals
PPB250E (Type 3) (2009-01) Handheld Trimmer View Diagrams & Manuals
PPB300 (2009-02) Handheld Trimmer View Diagrams & Manuals
PPB300E (Type 1) (2009-02) Handheld Trimmer View Diagrams & Manuals
PPB300E (Type 2) (2009-02) Handheld Trimmer View Diagrams & Manuals
PPB32SST (Type 1) (2009-05) Handheld Trimmer View Diagrams & Manuals
PPB32SST (Type 2) (2009-05) Handheld Trimmer View Diagrams & Manuals
SM132 (Type 1) (SM132) (2006-12) Le Handheld Trimmer View Diagrams & Manuals
SM132 (Type 2) (SM132) (2006-12) Le Handheld Trimmer View Diagrams & Manuals
SM706 (Type 1) (2008-12) Handheld Trimmer View Diagrams & Manuals
SM706 (Type 2) (2008-12) Handheld Trimmer View Diagrams & Manuals
SST25 (952711796) (2009-03) Handheld Trimmer View Diagrams & Manuals
SST25 (2009-03) Featherlite View Diagrams & Manuals
475 (2009-03) Te Handheld Trimmer View Diagrams & Manuals
475Y (2009-03) Te Handheld Trimmer View Diagrams & Manuals
TE400CXL (Type 1) (2007-07) Handheld Trimmer View Diagrams & Manuals
TE400CXL (Type 2) (2007-07) Handheld Trimmer View Diagrams & Manuals
TE400CXL (Type 3) (2007-07) Handheld Trimmer View Diagrams & Manuals
TE400CXL (Type 4) (2007-07) Handheld Trimmer View Diagrams & Manuals
TE400CXL (Type 5) (2007-07) Handheld Trimmer View Diagrams & Manuals
TE475 (952711797) (2009-03) Handheld Trimmer View Diagrams & Manuals
VS2000BV (952711922) (2009-04) Handheld Trimmer View Diagrams & Manuals
XT260 (Type 1) (2009-03) Handheld Trimmer View Diagrams & Manuals
XT260 (Type 2) (2009-03) Handheld Trimmer View Diagrams & Manuals
XT260 (Type 1) (952711795) (2009-03) Handheld Trimmer View Diagrams & Manuals
XT260 (Type 2) (952711795) (2009-03) Handheld Trimmer View Diagrams & Manuals
XT700 (952711798) (2009-03) Handheld Trimmer View Diagrams & Manuals
HHT25 (2008-06) Hedge Trimmer View Diagrams & Manuals
PP258TP (Type 1) (2008-12) Pole Pruner View Diagrams & Manuals
PP258TP (Type 2) (2008-12) Pole Pruner View Diagrams & Manuals
PP446 (2009-01) Pole Pruner View Diagrams & Manuals
PP446E (Type 1) (2009-01) Pole Pruner View Diagrams & Manuals
PP446E (Type 2) (2009-01) Pole Pruner View Diagrams & Manuals
PP446ET (Type 1) (2009-02) Pole Pruner View Diagrams & Manuals
PP446ET (Type 2) (2009-02) Pole Pruner View Diagrams & Manuals
PP446ET (Type 3) (2009-02) Pole Pruner View Diagrams & Manuals
PP446T (2009-01) Pole Pruner View Diagrams & Manuals
SM446E (Type 1) (2009-01) Pole Pruner View Diagrams & Manuals
SM446E (Type 2) (2009-01) Pole Pruner View Diagrams & Manuals
23 COMPACT (1993-01) Chain Saw View Diagrams & Manuals
230 (2009-04) Chain Saw View Diagrams & Manuals
236 E (2010-04) Chain Saw View Diagrams & Manuals
240 E TRIOBRAKE (2010-06) Chain Saw View Diagrams & Manuals
240 E TRIOBRAKE (2010-01) Chain Saw View Diagrams & Manuals
24 C (2005-02) Trimmer View Diagrams & Manuals
24 C (2004-01) Trimmer View Diagrams & Manuals
24 C (2003-01) Trimmer View Diagrams & Manuals
Craftsman
358351710 Chainsaw View Diagrams & Manuals
358355160 Chainsaw View Diagrams & Manuals
358351700 Chainsaw View Diagrams & Manuals
358350990 Chainsaw View Diagrams & Manuals
358351900 Chainsaw View Diagrams & Manuals
358355140 Chainsaw View Diagrams & Manuals
358355062 Chainsaw View Diagrams & Manuals
358355070 Chainsaw View Diagrams & Manuals
358355162 Chainsaw View Diagrams & Manuals
358355060 Gas Chainsaw View Diagrams & Manuals
358352360 Chainsaw View Diagrams & Manuals
358351181 Chainsaw View Diagrams & Manuals
358351162 Chainsaw View Diagrams & Manuals
358357230 Chainsaw View Diagrams & Manuals
358351143 Chainsaw View Diagrams & Manuals
358351063 Chainsaw View Diagrams & Manuals
358357361 Chainsaw View Diagrams & Manuals
358355141 Chainsaw View Diagrams & Manuals
358356090 Gas Chainsaw View Diagrams & Manuals
358356080 Gas Chainsaw View Diagrams & Manuals
358351820 Chainsaw View Diagrams & Manuals
358351082 Chainsaw View Diagrams & Manuals
358352350 Chainsaw View Diagrams & Manuals
358352320 Chainsaw View Diagrams & Manuals
358353662 Gas Chainsaw View Diagrams & Manuals
358356070 3.0/18 In. Gas Chainsaw View Diagrams & Manuals
358351182 Chainsaw View Diagrams & Manuals
358353631 Gas Chainsaw View Diagrams & Manuals
358353692 Gas Chainsaw View Diagrams & Manuals
358353672 Gas Chainsaw View Diagrams & Manuals
358353670 Gas Chainsaw View Diagrams & Manuals
358353690 Gas Chainsaw View Diagrams & Manuals
358353660 Gas Chainsaw View Diagrams & Manuals
358356332 Gas Chainsaw View Diagrams & Manuals
358356091 Gas Chainsaw View Diagrams & Manuals
358355161 Chainsaw View Diagrams & Manuals
358351161 Chainsaw View Diagrams & Manuals
358355061 Gas Chainsaw View Diagrams & Manuals
358355071 Gas Chainsaw View Diagrams & Manuals
358354811 Chainsaw View Diagrams & Manuals
358354870 Chainsaw View Diagrams & Manuals
358354810 Chainsaw View Diagrams & Manuals
358354871 Chainsaw View Diagrams & Manuals
358.354831 Chainsaw View Diagrams & Manuals
358352181 Chainsaw View Diagrams & Manuals
358356230 Chainsaw View Diagrams & Manuals
358356180 Chainsaw View Diagrams & Manuals
358352160 Chainsaw View Diagrams & Manuals
358354830 Chainsaw View Diagrams & Manuals
358352020 Chainsaw View Diagrams & Manuals
358352070 Chainsaw View Diagrams & Manuals
358352010 Chainsaw View Diagrams & Manuals
358352060 Chainsaw View Diagrams & Manuals
358352380 Chainsaw View Diagrams & Manuals
358356330 Chainsaw View Diagrams & Manuals
358352030 Chainsaw View Diagrams & Manuals
358352090 Chainsaw View Diagrams & Manuals
358352162 Chainsaw View Diagrams & Manuals
358352050 Chainsaw View Diagrams & Manuals
358352161 Gas Chainsaw View Diagrams & Manuals
35834021 Electric Chainsaw View Diagrams & Manuals
35834020 Electric Chainsaw View Diagrams & Manuals
358352180 Chainsaw View Diagrams & Manuals
35494 Chainsaw View Diagrams & Manuals
35834760 Electric Chainsaw View Diagrams & Manuals
35834810 Electric Chainsaw View Diagrams & Manuals
35834031 Electric Chainsaw View Diagrams & Manuals
35834030 Electric Chainsaw View Diagrams & Manuals
35834050 Electric Chainsaw View Diagrams & Manuals
35498 Chainsaw View Diagrams & Manuals
358351600 Chainsaw View Diagrams & Manuals
358348221 Chainsaw View Diagrams & Manuals
358351810 Chainsaw View Diagrams & Manuals
358351800 Chainsaw View Diagrams & Manuals
358350820 Chainsaw View Diagrams & Manuals
358350822 Chainsaw View Diagrams & Manuals
358350821 Chainsaw View Diagrams & Manuals
358351141 Chainsaw View Diagrams & Manuals
358351142 Chainsaw View Diagrams & Manuals
358351042 Chainsaw View Diagrams & Manuals
358351480 Chainsaw View Diagrams & Manuals
358348211 Chainsaw View Diagrams & Manuals
358351202 Chainsaw View Diagrams & Manuals
358351240 Chainsaw View Diagrams & Manuals
358351242 Chainsaw View Diagrams & Manuals
358351241 Chainsaw View Diagrams & Manuals
358351041 Gas Chainsaw View Diagrams & Manuals
358351080 Chainsaw View Diagrams & Manuals
358351060 Chainsaw View Diagrams & Manuals
358351061 Chainsaw View Diagrams & Manuals
358351062 Chainsaw View Diagrams & Manuals
358351081 Chainsaw View Diagrams & Manuals
358356101 Gas Chainsaw View Diagrams & Manuals
358356100 Gas Chainsaw View Diagrams & Manuals
358356280 Chainsaw View Diagrams & Manuals
358352730 Chainsaw View Diagrams & Manuals
358352800 Chainsaw View Diagrams & Manuals
358352830 Chainsaw View Diagrams & Manuals
358360100 Chainsaw View Diagrams & Manuals
358360150 Chainsaw View Diagrams & Manuals
358350570 Gas Chainsaw View Diagrams & Manuals
358350560 Gas Chainsaw View Diagrams & Manuals
358350870 Chainsaw View Diagrams & Manuals
358350960 Chainsaw View Diagrams & Manuals
358350930 Chainsaw View Diagrams & Manuals
358350911 Chainsaw View Diagrams & Manuals
358350881 Chainsaw View Diagrams & Manuals
358350860 Chainsaw View Diagrams & Manuals
358350831 Chainsaw View Diagrams & Manuals
358350880 Chainsaw View Diagrams & Manuals
358350940 Chainsaw View Diagrams & Manuals
358350851 Chainsaw View Diagrams & Manuals
358350830 Chainsaw View Diagrams & Manuals
358350850 Chainsaw View Diagrams & Manuals
358350861 Chainsaw View Diagrams & Manuals
358350941 Chainsaw View Diagrams & Manuals
358350834 Chainsaw View Diagrams & Manuals
358350862 Chainsaw View Diagrams & Manuals
358350931 Chainsaw View Diagrams & Manuals
358350961 Chainsaw View Diagrams & Manuals
358350833 Chainsaw View Diagrams & Manuals
358350842 Chainsaw View Diagrams & Manuals
358350871 Chainsaw View Diagrams & Manuals
358350852 Chainsaw View Diagrams & Manuals
358350853 Chainsaw View Diagrams & Manuals
358350950 Chainsaw View Diagrams & Manuals
358351610 Chainsaw View Diagrams & Manuals
358351140 Chainsaw View Diagrams & Manuals
35835108 Chainsaw View Diagrams & Manuals
358350863 Chainsaw View Diagrams & Manuals
358350951 Chainsaw View Diagrams & Manuals
358350841 Chainsaw View Diagrams & Manuals
358350840 Chainsaw View Diagrams & Manuals
358350832 Chainsaw View Diagrams & Manuals
358353630 Chainsaw View Diagrams & Manuals
358353661 Chainsaw View Diagrams & Manuals
358353671 Chainsaw View Diagrams & Manuals
358350942 Chainsaw View Diagrams & Manuals
358353691 Chainsaw View Diagrams & Manuals
358350962 Chainsaw View Diagrams & Manuals
358350910 Chainsaw View Diagrams & Manuals
358356333 Gas Chainsaw View Diagrams & Manuals
358350160 Gas Chainsaw View Diagrams & Manuals
358350270 Chainsaw View Diagrams & Manuals
358350280 Chainsaw View Diagrams & Manuals
358350260 Chainsaw View Diagrams & Manuals
358351380 Chainsaw View Diagrams & Manuals
358350952 Chainsaw View Diagrams & Manuals
358351580 Gas Chainsaw View Diagrams & Manuals
358350180 Gas Chainsaw View Diagrams & Manuals
358350080 Gas Chainsaw View Diagrams & Manuals
358350060 Gas Chainsaw View Diagrams & Manuals
358351560 Gas Chainsaw View Diagrams & Manuals
35831440 Gas Chainsaw View Diagrams & Manuals
358351910 Chainsaw View Diagrams & Manuals
358350991 Chainsaw View Diagrams & Manuals
358351901 Chainsaw View Diagrams & Manuals
358351701 Chainsaw View Diagrams & Manuals
358360690 Chainsaw View Diagrams & Manuals
358360681 Chainsaw View Diagrams & Manuals
944415371 Chainsaw View Diagrams & Manuals
358350811 Chainsaw View Diagrams & Manuals
358350671 Chainsaw View Diagrams & Manuals
944415431 Chainsaw View Diagrams & Manuals
358360381 Chainsaw View Diagrams & Manuals
358360361 Chainsaw View Diagrams & Manuals
944415361 Chainsaw View Diagrams & Manuals
358360680 Chainsaw View Diagrams & Manuals
944415430 Chainsaw View Diagrams & Manuals
944415370 Chainsaw View Diagrams & Manuals
944415360 Chainsaw View Diagrams & Manuals
358352680 Chainsaw View Diagrams & Manuals
358350670 Chainsaw View Diagrams & Manuals
358360360 Chainsaw View Diagrams & Manuals
358350810 Chainsaw View Diagrams & Manuals
358360380 Chainsaw View Diagrams & Manuals
944414430 Chainsaw View Diagrams & Manuals
944414370 Chainsaw View Diagrams & Manuals
944414420 Chainsaw View Diagrams & Manuals
358350660 Chainsaw View Diagrams & Manuals
358360280 Chainsaw View Diagrams & Manuals
358360260 Chainsaw View Diagrams & Manuals
358360131 Chainsaw View Diagrams & Manuals
944411364 Chainsaw View Diagrams & Manuals
358350562 Chainsaw View Diagrams & Manuals
358350802 Chainsaw View Diagrams & Manuals
358360881 Chainsaw View Diagrams & Manuals
358360831 Chainsaw View Diagrams & Manuals
358360180 Chainsaw View Diagrams & Manuals
358360830 Chainsaw View Diagrams & Manuals
358360130 Chainsaw View Diagrams & Manuals
358360880 Chainsaw View Diagrams & Manuals
358351040 Chainsaw View Diagrams & Manuals
350360171 Chainsaw View Diagrams & Manuals
358360171 Chainsaw View Diagrams & Manuals
358350601 Chainsaw View Diagrams & Manuals
358350561 Chainsaw View Diagrams & Manuals
358360871 Chainsaw View Diagrams & Manuals
358350801 Chainsaw View Diagrams & Manuals
358350462 Chainsaw View Diagrams & Manuals
358360121 Chainsaw View Diagrams & Manuals
358360821 Chainsaw View Diagrams & Manuals
944411362 Chainsaw View Diagrams & Manuals
944411372 Chainsaw View Diagrams & Manuals
944411422 Chainsaw View Diagrams & Manuals
358360170 Chainsaw View Diagrams & Manuals
358360820 Chainsaw View Diagrams & Manuals
358360120 Chainsaw View Diagrams & Manuals
358360870 Chainsaw View Diagrams & Manuals
358350800 Chainsaw View Diagrams & Manuals
358350600 Chainsaw View Diagrams & Manuals
358360151 Chainsaw View Diagrams & Manuals
358350441 Chainsaw View Diagrams & Manuals
358350461 Chainsaw View Diagrams & Manuals
944411371 Chainsaw View Diagrams & Manuals
358360101 Chainsaw View Diagrams & Manuals
358350481 Chainsaw View Diagrams & Manuals
358348210 Chainsaw View Diagrams & Manuals
358348220 Chainsaw View Diagrams & Manuals
944411421 Chainsaw View Diagrams & Manuals
358352681 Chainsaw View Diagrams & Manuals
358360850 Chainsaw View Diagrams & Manuals
358360800 Chainsaw View Diagrams & Manuals
358350580 Gas Chainsaw View Diagrams & Manuals
358350590 Gas Chainsaw View Diagrams & Manuals
358350540 Gas Chainsaw View Diagrams & Manuals
944411360 Gas Chainsaw View Diagrams & Manuals
944411420 Gas Chainsaw View Diagrams & Manuals
944411370 Gas Chainsaw View Diagrams & Manuals
358350380 Gas Chainsaw View Diagrams & Manuals
358350370 Gas Chainsaw View Diagrams & Manuals
358350460 Gas Chainsaw View Diagrams & Manuals
358350480 Gas Chainsaw View Diagrams & Manuals
358350440 Gas Chainsaw View Diagrams & Manuals
358351450 Chainsaw View Diagrams & Manuals
358350360 Chainsaw View Diagrams & Manuals
358351460 Chainsaw View Diagrams & Manuals
358794770 Gas Blower View Diagrams & Manuals
358794780 Blower View Diagrams & Manuals
358351440 Chainsaw View Diagrams & Manuals
358794963 Blower View Diagrams & Manuals
358794765 Blower View Diagrams & Manuals
358352150 Chain Saw View Diagrams & Manuals
358794774 Blower View Diagrams & Manuals
358794741 Blower View Diagrams & Manuals
358795580 26.2Cc Gas Brushwacker View Diagrams & Manuals
358795541 Trimmer View Diagrams & Manuals
358791520 Trimmer View Diagrams & Manuals
358791070 Trimmer View Diagrams & Manuals
358795800 Wheeled Trimmer View Diagrams & Manuals
358795200 String Trimmer View Diagrams & Manuals
358796353 Trimmer View Diagrams & Manuals
358791580 Trimmer View Diagrams & Manuals
358795792 Brushcutter View Diagrams & Manuals
358791010 Weedwacker View Diagrams & Manuals
358794773 Blower View Diagrams & Manuals
358797290 Gas Blower View Diagrams & Manuals
358797342 Blower View Diagrams & Manuals
358.795592 Trimmer View Diagrams & Manuals
358794944 Blower View Diagrams & Manuals
358794170 Blower View Diagrams & Manuals
358798212 24cc/1.3 cu.in. 2-Cycle Gasoline Weedwacker View Diagrams & Manuals
358798520 Gasoline Weedwacker View Diagrams & Manuals
358358850 Chainsaw View Diagrams & Manuals
358797200 Blower View Diagrams & Manuals
358356081 18" Gas Chainsaw View Diagrams & Manuals
358742420 Trimmer View Diagrams & Manuals
358742430 Trimmer View Diagrams & Manuals
358742440 Trimmer View Diagrams & Manuals
358742450 Trimmer View Diagrams & Manuals
358742460 Trimmer View Diagrams & Manuals
358742470 Trimmer View Diagrams & Manuals
358745190 Trimmer View Diagrams & Manuals
358745510 Trimmer View Diagrams & Manuals
358794220 Trimmer View Diagrams & Manuals
358794221 Trimmer View Diagrams & Manuals
358794240 Trimmer View Diagrams & Manuals
358794250 Trimmer View Diagrams & Manuals
358794251 Trimmer View Diagrams & Manuals
358795100 Trimmer View Diagrams & Manuals
358795120 Trimmer View Diagrams & Manuals
358795121 Trimmer View Diagrams & Manuals
358795140 Trimmer View Diagrams & Manuals
358795150 Trimmer View Diagrams & Manuals
358795151 Trimmer View Diagrams & Manuals
358795160 Trimmer View Diagrams & Manuals
358795161 Trimmer View Diagrams & Manuals
358795180 Trimmer View Diagrams & Manuals
358796270 Trimmer View Diagrams & Manuals
358796280 Trimmer View Diagrams & Manuals
358796281 Trimmer View Diagrams & Manuals
358796290 Trimmer View Diagrams & Manuals
944511460 Trimmer View Diagrams & Manuals
944511470 Trimmer View Diagrams & Manuals
944511560 Trimmer View Diagrams & Manuals
944512550 Trimmer View Diagrams & Manuals
944512560 Trimmer View Diagrams & Manuals
944517360 Trimmer View Diagrams & Manuals
358348320 Trimmer View Diagrams & Manuals
358348321 Trimmer View Diagrams & Manuals
358348340 Trimmer View Diagrams & Manuals
358348360 Trimmer View Diagrams & Manuals
358744380 Trimmer View Diagrams & Manuals
358745191 Trimmer View Diagrams & Manuals
358745500 Trimmer View Diagrams & Manuals
358745501 Trimmer View Diagrams & Manuals
358745511 Trimmer View Diagrams & Manuals
358745520 Trimmer View Diagrams & Manuals
358745521 Trimmer View Diagrams & Manuals
358745530 Trimmer View Diagrams & Manuals
358745531 Trimmer View Diagrams & Manuals
358745540 Trimmer View Diagrams & Manuals
358745541 Trimmer View Diagrams & Manuals
358745550 Trimmer View Diagrams & Manuals
358745551 Trimmer View Diagrams & Manuals
358745570 Trimmer View Diagrams & Manuals
358745571 Trimmer View Diagrams & Manuals
358745650 Trimmer View Diagrams & Manuals
358745651 Trimmer View Diagrams & Manuals
358791030 Trimmer View Diagrams & Manuals
358791031 Trimmer View Diagrams & Manuals
358791032 Trimmer View Diagrams & Manuals
358791040 Trimmer View Diagrams & Manuals
358791041 Trimmer View Diagrams & Manuals
358791042 Trimmer View Diagrams & Manuals
358791050 Trimmer View Diagrams & Manuals
358791051 Trimmer View Diagrams & Manuals
358791060 Trimmer View Diagrams & Manuals
358791061 Trimmer View Diagrams & Manuals
358791071 Trimmer View Diagrams & Manuals
358791072 Trimmer View Diagrams & Manuals
358791370 Trimmer View Diagrams & Manuals
35879142 Trimmer View Diagrams & Manuals
358791510 Trimmer View Diagrams & Manuals
358791530 Trimmer View Diagrams & Manuals
358791540 Trimmer View Diagrams & Manuals
358791560 Trimmer View Diagrams & Manuals
358791570 Trimmer View Diagrams & Manuals
358791590 Trimmer View Diagrams & Manuals
358791620 Trimmer View Diagrams & Manuals
358791800 Trimmer View Diagrams & Manuals
358791801 Trimmer View Diagrams & Manuals
358791820 Trimmer View Diagrams & Manuals
358795101 Trimmer View Diagrams & Manuals
358795122 Trimmer View Diagrams & Manuals
358795123 Trimmer View Diagrams & Manuals
358795310 Trimmer View Diagrams & Manuals
358795500 Trimmer View Diagrams & Manuals
358795501 Trimmer View Diagrams & Manuals
358795510 Trimmer View Diagrams & Manuals
358795511 Trimmer View Diagrams & Manuals
358795520 Trimmer View Diagrams & Manuals
358795521 Trimmer View Diagrams & Manuals
358795530 Trimmer View Diagrams & Manuals
358795531 Trimmer View Diagrams & Manuals
358795540 Trimmer View Diagrams & Manuals
358795542 Trimmer View Diagrams & Manuals
358795543 Trimmer View Diagrams & Manuals
358795550 Trimmer View Diagrams & Manuals
358795551 Trimmer View Diagrams & Manuals
358795560 Trimmer View Diagrams & Manuals
358795570 Trimmer View Diagrams & Manuals
358795571 Trimmer View Diagrams & Manuals
358795592 Trimmer View Diagrams & Manuals
358795810 Trimmer View Diagrams & Manuals
358795811 Trimmer View Diagrams & Manuals
358795820 Trimmer View Diagrams & Manuals
358795821 Trimmer View Diagrams & Manuals
358795822 Trimmer View Diagrams & Manuals
358796050 Trimmer View Diagrams & Manuals
358796090 Trimmer View Diagrams & Manuals
358796100 Trimmer View Diagrams & Manuals
358796190 Trimmer View Diagrams & Manuals
358796200 Trimmer View Diagrams & Manuals
358796260 Trimmer View Diagrams & Manuals
358796600 Trimmer View Diagrams & Manuals
358798210 Trimmer View Diagrams & Manuals
358798230 Trimmer View Diagrams & Manuals
358798420 Trimmer View Diagrams & Manuals
358798430 Trimmer View Diagrams & Manuals
358798441 Trimmer View Diagrams & Manuals
358798442 Trimmer View Diagrams & Manuals
358798451 Trimmer View Diagrams & Manuals
358798452 Trimmer View Diagrams & Manuals
358798490 Trimmer View Diagrams & Manuals
358798530 Trimmer View Diagrams & Manuals
358798560 Trimmer View Diagrams & Manuals
358798561 Trimmer View Diagrams & Manuals
944511461 Trimmer View Diagrams & Manuals
944511462 Trimmer View Diagrams & Manuals
944511464 Trimmer View Diagrams & Manuals
944511474 Trimmer View Diagrams & Manuals
944511561 Trimmer View Diagrams & Manuals
944512551 Trimmer View Diagrams & Manuals
944512552 Trimmer View Diagrams & Manuals
944512561 Trimmer View Diagrams & Manuals
944514360 Trimmer View Diagrams & Manuals
944514361 Trimmer View Diagrams & Manuals
944514460 Trimmer View Diagrams & Manuals
944514550 Trimmer View Diagrams & Manuals
944514560 Trimmer View Diagrams & Manuals
944515460 Trimmer View Diagrams & Manuals
944515560 Trimmer View Diagrams & Manuals
944515570 Trimmer View Diagrams & Manuals
944516360 Trimmer View Diagrams & Manuals
944516550 Trimmer View Diagrams & Manuals
944516560 Trimmer View Diagrams & Manuals
944516561 Trimmer View Diagrams & Manuals
944516570 Trimmer View Diagrams & Manuals
944516571 Trimmer View Diagrams & Manuals
944516660 Trimmer View Diagrams & Manuals
944516661 Trimmer View Diagrams & Manuals
944516662 Trimmer View Diagrams & Manuals
944517361 Trimmer View Diagrams & Manuals
944517362 Trimmer View Diagrams & Manuals
358356281 Chainsaw View Diagrams & Manuals
358381600 Chainsaw View Diagrams & Manuals
944411363 Chainsaw View Diagrams & Manuals
358795620 Hedge Trimmer View Diagrams & Manuals
358795700 Hedge Trimmer View Diagrams & Manuals
358795720 Hedge Trimmer View Diagrams & Manuals
358795721 Hedge Trimmer View Diagrams & Manuals
358795722 Hedge Trimmer View Diagrams & Manuals
358795740 Hedge Trimmer View Diagrams & Manuals
358795741 Hedge Trimmer View Diagrams & Manuals
358795750 Hedge Trimmer View Diagrams & Manuals
358795751 Hedge Trimmer View Diagrams & Manuals
358795780 Hedge Trimmer View Diagrams & Manuals
358795781 Hedge Trimmer View Diagrams & Manuals
358795790 Hedge Trimmer View Diagrams & Manuals
358795791 Hedge Trimmer View Diagrams & Manuals
358796330 Hedge Trimmer View Diagrams & Manuals
358796340 Hedge Trimmer View Diagrams & Manuals
358796341 Hedge Trimmer View Diagrams & Manuals
358796350 Hedge Trimmer View Diagrams & Manuals
358796351 Hedge Trimmer View Diagrams & Manuals
358796352 Hedge Trimmer View Diagrams & Manuals
358796354 Hedge Trimmer View Diagrams & Manuals
358796355 Hedge Trimmer View Diagrams & Manuals
358796356 Hedge Trimmer View Diagrams & Manuals
358796360 Hedge Trimmer View Diagrams & Manuals
358796370 Hedge Trimmer View Diagrams & Manuals
944512321 Hedge Trimmer View Diagrams & Manuals
944514320 Hedge Trimmer View Diagrams & Manuals
944514321 Hedge Trimmer View Diagrams & Manuals
944514322 Hedge Trimmer View Diagrams & Manuals
944514323 Hedge Trimmer View Diagrams & Manuals
944518321 Hedge Trimmer View Diagrams & Manuals
944518322 Hedge Trimmer View Diagrams & Manuals
944518323 Hedge Trimmer View Diagrams & Manuals
358797320 Blower View Diagrams & Manuals
358797341 Blower View Diagrams & Manuals
358797560 Blower View Diagrams & Manuals
358797770 Blower View Diagrams & Manuals
358797931 Blower View Diagrams & Manuals
358798960 Blower View Diagrams & Manuals
944515740 Blower View Diagrams & Manuals
944515741 Blower View Diagrams & Manuals
944515742 Blower View Diagrams & Manuals
944515743 Blower View Diagrams & Manuals
944517741 Blower View Diagrams & Manuals
944517742 Blower View Diagrams & Manuals
944518250 Blower View Diagrams & Manuals
944518252 Blower View Diagrams & Manuals
358794120 Blower View Diagrams & Manuals
358794130 Blower View Diagrams & Manuals
358794300 Blower View Diagrams & Manuals
358794310 Blower View Diagrams & Manuals
358794311 Blower View Diagrams & Manuals
358794340 Blower View Diagrams & Manuals
358794341 Blower View Diagrams & Manuals
358794342 Blower View Diagrams & Manuals
358794550 Blower View Diagrams & Manuals
358794560 Blower View Diagrams & Manuals
358794700 Blower View Diagrams & Manuals
358794701 Blower View Diagrams & Manuals
358794702 Blower View Diagrams & Manuals
358794730 Blower View Diagrams & Manuals
358794731 Blower View Diagrams & Manuals
358794732 Blower View Diagrams & Manuals
358794733 Blower View Diagrams & Manuals
358794740 Blower View Diagrams & Manuals
358794742 Blower View Diagrams & Manuals
358794743 Blower View Diagrams & Manuals
358794744 Blower View Diagrams & Manuals
358794750 Blower View Diagrams & Manuals
358794760 Blower View Diagrams & Manuals
358794761 Blower View Diagrams & Manuals
358794762 Blower View Diagrams & Manuals
358794763 Blower View Diagrams & Manuals
358794764 Blower View Diagrams & Manuals
358794771 Blower View Diagrams & Manuals
358794772 Blower View Diagrams & Manuals
358794880 Blower View Diagrams & Manuals
358794900 Blower View Diagrams & Manuals
358794901 Blower View Diagrams & Manuals
358794920 Blower View Diagrams & Manuals
358794940 Blower View Diagrams & Manuals
358794941 Blower View Diagrams & Manuals
358794942 Blower View Diagrams & Manuals
358794943 Blower View Diagrams & Manuals
358794945 Blower View Diagrams & Manuals
358794960 Blower View Diagrams & Manuals
358794961 Blower View Diagrams & Manuals
358794962 Blower View Diagrams & Manuals
358794964 Blower View Diagrams & Manuals
358795341 Blower View Diagrams & Manuals
358797010 Blower View Diagrams & Manuals
358797020 Blower View Diagrams & Manuals
358797030 Blower View Diagrams & Manuals
358797040 Blower View Diagrams & Manuals
358797120 Blower View Diagrams & Manuals
358797170 Blower View Diagrams & Manuals
358797201 Blower View Diagrams & Manuals
358797202 Blower View Diagrams & Manuals
358797203 Blower View Diagrams & Manuals
358797251 Blower View Diagrams & Manuals
358797300 Blower View Diagrams & Manuals
358797301 Blower View Diagrams & Manuals
358797310 Blower View Diagrams & Manuals
358.791032 2-Cycle Gasoline Weedwacker View Diagrams & Manuals
358355051 Chainsaw View Diagrams & Manuals
35835116 Chain Saw View Diagrams & Manuals
35835118 Chain Saw View Diagrams & Manuals
358351340 Gas Chainsaw View Diagrams & Manuals
358354940 Chain Saw View Diagrams & Manuals
358354980 Chain Saw View Diagrams & Manuals
358355120 Gasoline Chain Saw View Diagrams & Manuals
358355241 Chain Saw View Diagrams & Manuals
358356331 Chain Saw View Diagrams & Manuals
358357180 Sears Chain Saw View Diagrams & Manuals
358357181 Chain Saw View Diagrams & Manuals
358357362 Chain Saw View Diagrams & Manuals
358794380 Weedwacker View Diagrams & Manuals
358795050 Gasoline Brushwacker View Diagrams & Manuals
Jonsered
BV2125 (2003-01) Blower View Diagrams & Manuals
BV2125 (2004-01) Blower View Diagrams & Manuals
BV2125 (2005-02) Blower View Diagrams & Manuals
2035 (1998-09) Chain Saw View Diagrams & Manuals
2035 (2001-09) Chain Saw View Diagrams & Manuals
CS2137 (2003-01) Chain Saw View Diagrams & Manuals
CS2137 (2004-01) Chain Saw View Diagrams & Manuals
CS2137 (2004-05) Chain Saw View Diagrams & Manuals
CS2137 (2005-01) Chain Saw View Diagrams & Manuals
CS2137 (2009-02) Chain Saw View Diagrams & Manuals
CS2138 (2005-01) Chain Saw View Diagrams & Manuals
CS2138 (2009-02) Chain Saw View Diagrams & Manuals
CS2138 C (2006-01) Chain Saw View Diagrams & Manuals
CS2234 (2009-04) Chain Saw View Diagrams & Manuals
CS2234 (2010-04) Chain Saw View Diagrams & Manuals
CS2234 S (2009-01) Chain Saw View Diagrams & Manuals
CS2234 S (2009-04) Chain Saw View Diagrams & Manuals
CS2234 S (2010-04) Chain Saw View Diagrams & Manuals
CS2238 (2009-01) Chain Saw View Diagrams & Manuals
CS2238 (2009-04) Chain Saw View Diagrams & Manuals
CS2238 (2010-04) Chain Saw View Diagrams & Manuals
CS2238 S (2009-01) Chain Saw View Diagrams & Manuals
CS2238 S (2009-04) Chain Saw View Diagrams & Manuals
CS2238 S (2010-04) Chain Saw View Diagrams & Manuals
HT21 (2002-08) Hedge Trimmer View Diagrams & Manuals
HT21 (2003-01) Hedge Trimmer View Diagrams & Manuals
HT2121 (2003-01) Hedge Trimmer View Diagrams & Manuals
HT2121 (2004-01) Hedge Trimmer View Diagrams & Manuals
HT25 (2003-11) Hedge Trimmer View Diagrams & Manuals
HT25 (2004-01) Hedge Trimmer View Diagrams & Manuals
HT25 (2008-01) Hedge Trimmer View Diagrams & Manuals
GT21 (1997-05) Trimmer View Diagrams & Manuals
GT21 L (1995-05) Trimmer View Diagrams & Manuals
GT21 L (1996-02) Trimmer View Diagrams & Manuals
GT2124 (2003-01) Trimmer View Diagrams & Manuals
GT2124 (2004-01) Trimmer View Diagrams & Manuals
GT2124 (2005-02) Trimmer View Diagrams & Manuals
GT2124 (2007-04) Trimmer View Diagrams & Manuals
GT22 L (1995-05) Trimmer View Diagrams & Manuals
GT22 L (1996-03) Trimmer View Diagrams & Manuals
GT24 L (1995-05) Trimmer View Diagrams & Manuals
GT24 L (1996-03) Trimmer View Diagrams & Manuals
GT25 (1997-05) Trimmer View Diagrams & Manuals
GT26 (1997-05) Trimmer View Diagrams & Manuals
GT26 D (1999-05) Trimmer View Diagrams & Manuals
GT26 D (2002-08) Trimmer View Diagrams & Manuals
Show More Compatible Models
This item works with the following types of products:
- Hedge Trimmer Parts
- Trimmer Parts
- Chain Saw Parts
- Saw Parts
- Edger Parts
- Blower Parts
- Pruner Parts
This part replaces obsolete part #: 5300210-26, 5300211-32, 5300210-25, 530021132, , 530021014, 530021026, 530021035, 530021025, 530021028
Repair Videos ?
Watch the Repair Video for
Purge Line

Articles:
|
Fuel lines leaking? Learn to quickly remove and install the fuel tank purge line on your Poulan chainsaw. Step-by-step i...
November 01, 2016
|

Customer Part Reviews ?
Average Rating (out of 5):
Click to filter by ratings:
5 stars
32
4 stars
2
3 stars
0
2 stars
0
1 stars
0
< PREV
- 1
- 2
- 3
Arrived quickly.
Guest -
May 5, 2023
Verified Purchase
parts were perfect
The parts were perfect; thanks to the woman on phone who helped us locate what we needed.
Guest -
March 8, 2023
Verified Purchase
Chainsaw fuel line replacement.
The fuel line was an exact fit and quickly restored my saw to like new condition.
Guest -
September 30, 2022
Verified Purchase
easy to shop they deliver
you got everything that I wanted at reasonable time thank you
Gary -
October 5, 2021
Verified Purchase
the part was exactly what I need it thank you very much
it was what I expect it thank you
Guest -
August 2, 2021
Verified Purchase
Repair line
The new fuel line fit perfect.I had enough left over to replace the air line.The weed cutter works great now.
Guest -
June 15, 2021
Verified Purchase
Fuel line
Fuel line
Guest -
June 7, 2021
Verified Purchase
great to get products from
products worked great
Guest -
May 15, 2021
Verified Purchase
photos were a great help in ordering precisely what I needed.
Parts fit exactly with one exception. Three out of four holes were perfect matches, but the fourth hole needed to be drilled a bit larger. With that, the chainsaw is back in perfect running order thanks to new lines and primer bulb.
philip -
May 11, 2021
Verified Purchase
worked perfect
was what i needed
Guest -
April 3, 2021
Verified Purchase
t
t
t -
t days ago
Verified Purchase
eReplacementParts Team
t
Questions & Answers ?
Our customer Service team is at the ready daily to answer your part and product questions.

Ask our Team
We have a dedicated staff with decades of collective experience in helping customers just like you purchase parts to repair their products.
Does this fit my product?Questions & Answers for Purge Line
Looking for a fuel line pick up part#21014
Walter
for model number 358352350
asked on 2022-08-02
Hi Walter,
Thank you for your question. There are 2 fuel lines used to carry fuel from the tank to the carburetor.
The part number listed under your model number for the fuel line without filter is 791873. The part number listed for the fuel line with filter is 791891. If you need help placing an order for one of these parts, customer service is open 7 days a week and anyone will be happy to assist you. Please feel free to give us a call. We look forward to hearing from you!
eReplacementParts Team August 02, 2022
Customer Repair Instructions ?
All our customer repair instructions are solicited directly from other customers just like you who have purchased and replaced this exact part.
Old Primer Bulb was cracked and would not pump fuel into the carb
Rich - November 19, 2015
👍 62 of 75 people found this instruction helpful
Tool Type
Chain Saw
Difficulty
Easy
Time
15-30 minutes
Tools Used
Screwdriver, Pliers
- Removed top cover (to access carb area and allow side panel removal)
- Removed side cover where primer bulb is located
- Remove old snap in primer bulb (without disconnecting fuel lines)
- Cut and replace the 2 fuel lines one at a time (mine were hard and brittle from old fuel)
- The new bulb has 2 fuel ports, one is longer than the other which matched the old bulb.
- Installation instructions said to double check the direction of the fuel flow (the bulb sucks fuel through the carb, so the inlet side is connected to the carb and the outlet side goes back to the fuel tank).
- Snap the new bulb into place on the side panel
- Attach the side panel
- Attach the top panel
Did you find this story helpful?
Thanks for voting and helping fellow customers!
SST25 Line Trimmer: Would not start. Prior owner left old fuel in the entire fuel system for several years. Entire fuel system was gummed and would not start.
Aaron - June 8, 2016
👍 36 of 38 people found this instruction helpful
Tool Type
Trimmer
Difficulty
Easy
Time
15-30 minutes
Tools Used
Pliers, Allen Key Set, Needle Nose Pliers, Star Screwdriver Set
This process looks long but I assure you it is super easy and takes no time at all. If this is your first time taking a fuel system apart take pictures or use a IPB so you do not have to rely on memory for reassembly.
1. First I drained and disposed of all the old fuel.
2. Then I removed the fuel filter from the intake hose in the fuel tank with needle nose pliers. Once the fuel filter was removed then I remove the return line fuel assembly pickup (fancy name for little plastic insert) with needle nose pliers.
3. After both the fuel filter and fuel assembly pickup was remove then I removed the gas tank carefully, thus not to tear the fuel lines. The fuel tank is held on with two star screws so you would need the proper star screw driver or ratchet attachment.
4. Next I removed the hoses from the carburetor also careful not to tear the fuel lines. The reason for such care is because I used the old hoses to determine the size of the new hoses. Now for the carburetor.
5. I removed the air filter and air filter cover there are two Allen screws that hold on the carburetor. Using a the proper Allen key I remove both screws. Be careful not to tear any gaskets when removing. Also the throttle cable to attached to the carburetor it is easy to remove just angle the L properly and it slides right out.
Now that the carburetor is removed assess the situation. In my case I took the carburetor apart to see if I could clean it before I ordered a new carburetor but this was beyond cleaning. If you have never taken a carburetor apart proceed with caution and read a different repair guide.
Most of the parts where rusted and gummed and for 25 bucks I simple decided to order a new one. Also since I had the fuel take off I cleaned it and ordered new hoses, fuel filter, and a new fuel tank cap. I only ordered a new cap because the other one was cracked.
6. Once the parts arrived I began by cutting the new fuel hoses. I used the old hoses to determine the size. NOTE: Cut the new pieces a little longer than the old ones because the hardest part of the project is putting the new hoses into the fuel tank. And unless you are really good you will tare up the ends a bit and will need to be cut off. Plus you will need to cut the new ones at an angle so you will need to cut that flat as well.
7. After the cut is made, cut the end of the hoses at a sharp angle thus to be able to put the tip of the hose through the holes int he fuel tank. I recommend using a little lube on the outside of the hoses as well just so they slide easier. In my case I used a little 2-cycle oil because I knew it would not contaminate the line or the gas in the fuel tank. Once the hoses where just barely through the hole I grabbed the end of the hoses with needle nose pliers and pulled the desired length. On the intake hose I cut the end flush and attached the new fuel filter then put it back into the fuel tank. Also cut and attached the return line fuel assembly pickup to the return line then pulled it up to the top of the fuel tank.
8. Before I attached the tank I put the new carburetor on the same way I took it off making sure to attach the throttle cable as I went. When the screws where in line I tightened them down snug. Do not over tighten.
9. Now I attached fuel tank in same manner not to over tighten the screws.
10. Finally I attached the fuel lines to the carburetor filled the fuel tank with good 2 cycle and closes the fuel tank with my new fuel cap. Attached the air filter and air filter cover and we where good to go.
Primed the carburetor, put it full choke, cranked a could of times went into half choke. It fired right up, went to no choke and gave it full throttle and she purred like a kitten. Okay it is a line trimmer she roared like a lion but either way it is working great.
Did you find this story helpful?
Thanks for voting and helping fellow customers!
fuel lines inside gas tank corroded
howard - January 24, 2016
👍 30 of 35 people found this instruction helpful
Tool Type
Trimmer
Difficulty
Easy
Time
Less than 15 minutes
Tools Used
Screwdriver, Pliers
Parts Used
Two lines going into tank.
Take pictures before you start on which lines go where.
Unscrewed tank and was putting back on in 15 minutes.
Hardest part was getting new line back into tank.
Easy thing was line was already pre cut at angle.
Take pictures before you start on which lines go where.
Unscrewed tank and was putting back on in 15 minutes.
Hardest part was getting new line back into tank.
Easy thing was line was already pre cut at angle.
Did you find this story helpful?
Thanks for voting and helping fellow customers!
Fuel line became brittle.
Mark - April 7, 2017
👍 7 of 8 people found this instruction helpful
Tool Type
Chain Saw
Difficulty
Medium
Time
30-60 minutes
Tools Used
Screwdriver, Pliers, Socket set
Parts Used
I disassembled the exterior of the saw.
I removed the existing fuel line.
I reran the fuel line from the tank to the carburetor.
I reassembled the saw.
The most difficult part was removing the old filter from the gas tank.
To remove the filter I made a hook out of some wire, and fished the line and filter out
I purposely took my time since I am not a mechanic
Did you find this story helpful?
Thanks for voting and helping fellow customers!
Unit started extremely hard and would not run full-throttle.
Darwin - May 9, 2016
👍 6 of 6 people found this instruction helpful
Tool Type
Trimmer
Difficulty
Easy
Time
15-30 minutes
Tools Used
Screwdriver, Pliers, Allen wrenches
Remove the carburetor and replaced all gaskets, fuel pump diaphragm and regulator diaphragm. Reseated bulb and replaced the gaskets which mate the carburetor to the engine's intake manifold. Once completed, I tightened all the bolts on the crankcase and engine head, replaced and gapped the spark plug. The unit started on the second pull and is running great.
A quick note about the Walbro rebuild kit and the original parts in the carburetor. The fuel pump, for these carbs, in the original was a piece of blue plastic/mylar(?) that was solid. The replacement fuel pump looked like a mesh screen. That had me confused, for a bit. I did not realize that the replacement parts would look so different from the originals. That said, I should laugh at myself because this unit was made in 1996 and this is the first time it's been rebuilt. Things have changed, a bit, since them, obviously. LOL.
This was a quick, and easy job. If you can use a screwdriver you can do this work.
Did you find this story helpful?
Thanks for voting and helping fellow customers!
Fuel line from gas tank to carb. On chainsaw separated into several pieces
Bruce - November 30, 2015
👍 18 of 30 people found this instruction helpful
Tool Type
Chain Saw
Difficulty
Easy
Time
15-30 minutes
Tools Used
Screwdriver
Removed gas tank from chainsaw to remove filter and all pieces of broken gas line, installed new fuel line to filter, then feed filter into tank , reinstalled tank , then routed fuel line thru boot and into carb.
Did you find this story helpful?
Thanks for voting and helping fellow customers!
Two Poulan Pro power heads not running
Neal - May 8, 2016
👍 4 of 4 people found this instruction helpful
Tool Type
Pruner
Difficulty
Medium
Time
1-2 hours
Tools Used
Screwdriver, Sharp knife, Allen wrench
The fuel system disintegrates from the ethanol in gasoline, so I ordered the necessary parts; fuel filter and fuel line, purge line (different size), and a primer bulb, if one is needed.. If the primer bulb is tore, cracked, or makes a whistling sound, replace it first. Get a diagram online if your fuel lines are in pieces, but if they are intact, remove the fuel line from the back of the primer assembly, slowly pull the fuel filter and fuel line out through the fuel fill port. Cut your new fuel line's end at a diagonal, so that you can insert it through the hole in the gas tank. Slowly push enough through until you can grab it from the fuel fill port. Cut off this diagonal piece so that the end is once again square, and install your new fuel filter. Pull the fuel line back enough so the fuel filter is at an appropriate pickup point, I.e., close to the bottom of the tank while running. Cut the fuel line so that it just connects with the primer assembly. Remove the purge line from the primer assembly and use it to cut a new purge line slightly longer, with a diagonal cut on one end. Feed the diagonal end through the tank wall, and connect the other end to the primer assembly. I was able to do my 2 machines from one fuel line and purge line kit.
Did you find this story helpful?
Thanks for voting and helping fellow customers!
Fuel lines deteriorated
Bill - October 2, 2017
👍 3 of 3 people found this instruction helpful
Tool Type
Blower
Difficulty
Medium
Time
1-2 hours
Tools Used
Wrench Set
1 Remove fuel tank and carburetor
2 Insert lines into tank and attach filter
3 Reattach tank
4 Insert lines onto carburetor
5 Reattach carburetor.( not an easy task)
The smaller intake line has an undersized I.D. which required heated stretching in order to slip over the carburetor inlet pipe.
2 Insert lines into tank and attach filter
3 Reattach tank
4 Insert lines onto carburetor
5 Reattach carburetor.( not an easy task)
The smaller intake line has an undersized I.D. which required heated stretching in order to slip over the carburetor inlet pipe.
Did you find this story helpful?
Thanks for voting and helping fellow customers!
Fuel line and purge line deteriorated also bar chain oil leaking
James - March 28, 2016
👍 3 of 3 people found this instruction helpful
Tool Type
Chain Saw
Difficulty
Medium
Time
30-60 minutes
Tools Used
Screwdriver, Pliers, Wrench Set, Nutdriver, Adjustable Wrench
Hardest part getting the fuel line and the purge line through the tiny hole, in gas tank? I used a piece of wire I attached to the end of the fuel line and fed it through.
Did you find this story helpful?
Thanks for voting and helping fellow customers!
My chain saw was in storage for over 8 years. The fuel line was destroyed everywhere I would touch it it would fall apart.
Edward - April 13, 2018
👍 4 of 6 people found this instruction helpful
Tool Type
Chain Saw
Difficulty
Medium
Time
30-60 minutes
Tools Used
Screwdriver, Socket set
Parts Used
1. Removed cover from right side along with chain and bar.
2. Removed handle and carburetor cover.
3. Disconnection what little line was left noting routing of the fuel line.
4. Connect new line to carburetor and route line along handle to the fuel tank. Make sure you leave enough fuel line to reach the bottom of the tank.
5. Install the tapered end of the line into the tank until you have enough line installed to reach the bottom.
6. Fill the tank with gas and oil mixture.
7. Prime the carburetor by pouring a small amount of gas into the carburetor. With the switch in run pull the rope until it fires. You may need to prom the saw several times to get the air out and enough gas into the line to keep it running.
8. Reinstall the bar chain and covers. Replace the air cleaner and clean or replace the spark plug if needed.
Did you find this story helpful?
Thanks for voting and helping fellow customers!
Load More Install Stories
OEM stands for Original Equipment Manufacturer and means the part you’re buying is sourced directly from the manufacturer who made your product. At eReplacementParts, we sell only genuine OEM parts, guaranteeing the part you’re purchasing is of better design and of higher quality than aftermarket parts.
Our product descriptions are a combination of data sourced directly from the manufacturers who made your product as well as content researched and curated by our content & customer service teams. This content is edited and reviewed internally before being made public to customers.
Our customer service team are at the ready daily to answer your part and product questions. We have a dedicated staff with decades of collective experience in helping customers just like you purchase parts to repair their products.
All our part reviews are solicited directly from other customers who have purchased this exact part. While we moderate these reviews for profanity, offensive language or personally identifiable information, these reviews are posted exactly as submitted and no alterations are made by our team.
All our customer repair instructions are solicited directly from other customers just like you who have purchased and replaced this exact part. While we moderate these reviews for profanity, offensive language or personally identifiable information, these reviews are posted exactly as submitted and no alterations are made by our team.
Based on data from past customer purchasing behaviors, these parts are most commonly purchased together along with the part you are viewing. These parts may be necessary or helpful to replace to complete your current repair.
All our installation videos are created and produced in collaboration with our in-house repair technician, Mark Sodja, who has helped millions of eReplacementParts customers over the last 13 years repair their products. Mark has years of experience in selling and repairing both commercial and residential products with a specialty in gas-powered equipment.
This data is collected from customers who submitted a repair instruction after replacing this exact part. Customers can rate how easy the repair was to complete and how long it took. We aggregate this data to provide a repair rating that allows customers to quickly determine the difficulty and time needed to perform their own repair.