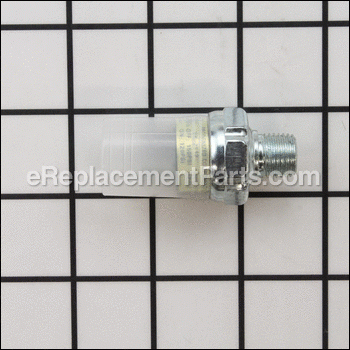

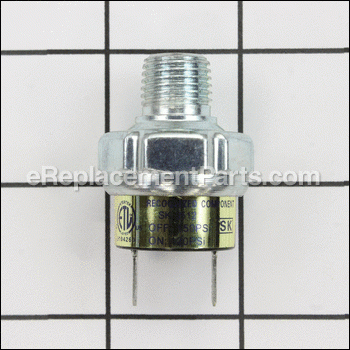
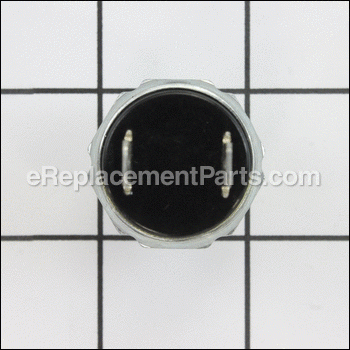
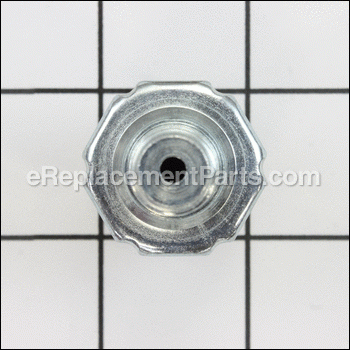

This item has been sourced from the original manufacturer and is intended to be used with Bostitch air compressors. The pressure switch is a vital component of the compressor that signals the motor to turn on or off based on the pressure in the tank. A faulty switch can either not turn on the motor and not allow enough pressure to build, or not turn the motor off and potentially overload the motor. This item is available as an individual replacement part.
Pressure Switch AB-9063227
OEM part for: Bostitch
Part Number: AB-9063227
$35.66
In Stock
Jump To:
Frequently Purchased Together ?


Compatibility
This part will fit the following 2 machines
Bostitch
CAP1512-OF (Type 0) Air Compressor View Diagrams & Manuals
CAP2000P-OF (Type 1) Air Compressor Power Tool View Diagrams & Manuals
This item works with the following types of products:
- Compressor Parts
Customer Part Reviews ?
Average Rating (out of 5):
Click to filter by ratings:
5 stars
7
4 stars
0
3 stars
0
2 stars
0
1 stars
0
< PREV
- 1
Pressure swirch
This was exact replace and work like new.
Guest -
March 19, 2021
Verified Purchase
So far working fine
A little challenge to get at, but easy fix on my compressor. Saved me from buying a new unit as I am a Carpenter and use that unit a lot.
Guest -
December 28, 2020
Verified Purchase
Pressure switch
Just what I need.
Guest -
November 24, 2020
Verified Purchase
The first & only place you need to look
Easy to find OEM parts and even how to install them. I've compared prices and haven't found any better deals. Very fast shipping.
D K -
April 14, 2020
Verified Purchase
Back up and running
The part was exactly what the repairman needed and my favorite compressor is back on the job.
Guest -
January 27, 2020
Verified Purchase
Pressure switch replacement
The part was exactly what I needed. Came quick,perfect condition.
Guest -
November 15, 2019
Verified Purchase
Resolved the issue with reasonable cost
My BOSTITCH CAP1512 air compressor would not shutoff, causing the pressure relief valve to open when the tank hit 155 psi. The valve would stay open until the tank pressure lowered to 70 psi and then would close, where the cycle would start over. The old pressure switch had a lot of rust in the air opening, which I'm sure is a result of me not emptying the condensate each time I used the compressor. The replacement of the pressure switch consisted of removing the 8 or so screws holding the black plastic cover on the front and back together and removing one push to connect/quick release tube, allowing access to the switch. Once reachable the switch replacement is very straight forward, with no issues in re-assembly. It took me 30 minutes to replace the switch start to finish. The compressor is now shutting down at the correct tank pressure. Ordering from eReplacementParts was easy and the part was shipped and delivered in 7 days, with a total cost that is 15% of a new compressor.
William -
June 18, 2019
Verified Purchase
t
t
t -
t days ago
Verified Purchase
eReplacementParts Team
t
Questions & Answers ?
Our customer Service team is at the ready daily to answer your part and product questions.

Ask our Team
We have a dedicated staff with decades of collective experience in helping customers just like you purchase parts to repair their products.
Does this fit my product?Questions & Answers for Pressure Switch
No questions have been asked yet
Customer Repair Instructions ?
All our customer repair instructions are solicited directly from other customers just like you who have purchased and replaced this exact part.
Pressure switch wasn't working, so had to be replaced.
Keith - July 1, 2016
👍 16 of 16 people found this instruction helpful
Tool Type
Compressor
Difficulty
Medium
Time
30-60 minutes
Tools Used
Screwdriver, Pliers, Power Drill, Socket set, Wrench Set, Nutdriver
Parts Used
The worst part was removing the old switch. Both covers and 2 of the rubber feet had to be removed to get at the old switch. Then there was no room to get a wrench on the switch, so I had to use a vice grip pliers to clamp unto the switch, Reinstalling the new switch was very easy and then putting everything back together.
Did you find this story helpful?
Thanks for voting and helping fellow customers!
Unit would overpressure and cause relief valve to blow.
Joe - July 8, 2018
👍 6 of 7 people found this instruction helpful
Tool Type
Compressor
Difficulty
Easy
Time
15-30 minutes
Tools Used
Screwdriver, Socket set
Parts Used
1. Since relief valve pressure should be higher than compressor shutoff switch, when relief valve popped at it's correct pressure and compressor was still running, I realized the compressor shutoff switch was sticking.
2. I removed miscellaneous screws to take off plastic covers and also removed two of the rubber feet which were in the way of cover removal.
3. I pulled off the two wire connectors on the pressure switch and used a deep socket to remove the switch.
4. I installed a new switch using Teflon tape to seal the threads and reinstalled the miscellaneous wires etc in reverse order. Tested compressor and all is well.
Did you find this story helpful?
Thanks for voting and helping fellow customers!
Compressor would not shut down after reaching maximum pressure
David - September 27, 2018
👍 3 of 3 people found this instruction helpful
Tool Type
Compressor
Difficulty
Easy
Time
30-60 minutes
Tools Used
Screwdriver, Adjustable Wrench, Heat Gun
Parts Used
Gaining access to the pressure sending switch was fairly easy, You will need an extra long phillips screwdriver to be able to reach the screws holding the covers together on the Bostitch Trim Air compressor. 2 of the screws were hidden behind a decal. The original pressure switch is epoxy or thread locked in, so I took a heat gun to it in order to soften up the glue. After that it came out easily. A little dab of blue thread lock on the new part, reconnect the 2 sending wires to the pressure switch reassemble the covers and test.
Did you find this story helpful?
Thanks for voting and helping fellow customers!
Before approaching maximum pressure safety switch would blow.
Michaelq - July 8, 2018
👍 1 of 1 people found this instruction helpful
Tool Type
Compressor
Difficulty
Medium
Time
1-2 hours
Tools Used
Screwdriver, Pliers, Adjustable Wrench
Parts Used
I had to remove all the plastic covers to get to the pressure switch. Once the covers were removed it was pretty easy to replace the pressure switch. The space around the switch is a little tight so it took a while to unscrew the old switch 1/4 turn at a time. To install the new switch all I did was use a little blue Loctite on the threads of the new switch. Originally I thought the problem was the safety switch. Every time I started the compressor as it approached 150 psi, the safety switch blew. First I replaced the safety switch which did not fix the problem. Bostitch technical support told me to replace the pressure switch which did fix the problem.
Did you find this story helpful?
Thanks for voting and helping fellow customers!
Electro portion of the electro-pnumatic switch failed
paul - January 12, 2018
👍 1 of 1 people found this instruction helpful
Tool Type
Compressor
Difficulty
Easy
Time
30-60 minutes
Tools Used
Screwdriver, Wrench Set, Adjustable Wrench
Parts Used
Removed shroud to access switch plug, disconnected, hot wired/bypassed switch to isolate/determine problem, ordered switch, received and re-assembled
Did you find this story helpful?
Thanks for voting and helping fellow customers!
The compressor would build pressure and then the safety valve would release and and the pressure would drop immediately and the compressor would start over again.
Chuck - December 12, 2020
Tool Type
Compressor
Difficulty
Medium
Time
15-30 minutes
Tools Used
Screwdriver, Adjustable Wrench, Solvent since the original was very difficult to remove
Parts Used
Removed housing.
Marked which lead went to which prong on the old and new valves.
Had to use solvent and allow to penetrate over night before trying again to remove original.
Vacuumed the opening to remove any residual rust particles.
Used Teflon tape on the new threads.
I was impressed with the quality of the Bostich
Compressor.
Did you find this story helpful?
Thanks for voting and helping fellow customers!
My compressor won’t turn off
Francisco - September 22, 2020
Tool Type
Compressor
Difficulty
Medium
Time
15-30 minutes
Tools Used
Screwdriver
Parts Used
I removed the screws of the cover of the compressor.
After that I change my compressor switch , taking the old off and removing the wires . And putted back the wires and the cover . That is it .
After that I change my compressor switch , taking the old off and removing the wires . And putted back the wires and the cover . That is it .
Did you find this story helpful?
Thanks for voting and helping fellow customers!
moisture sets in pressure switch and it fails to work
David - June 13, 2020
Tool Type
Compressor
Difficulty
Easy
Time
15-30 minutes
Tools Used
Screwdriver, pipe wrench
Parts Used
Remove 4 rubber feet remove 5 screws that hold plastic case together and 4 screws that hold case to metal legs. Separate case and expose switch remove two wires then unscrew switch. I drilled the new switch out about 1/8" deep and siliconed in a brass tube 3" long to help moisture from setting in switch after use I turn the compressor upside down. Screw switch in and reassemable.
Did you find this story helpful?
Thanks for voting and helping fellow customers!
Air compressor would not shut off after reaching target tank pressure.
William - June 19, 2019
Tool Type
Compressor
Difficulty
Easy
Time
15-30 minutes
Tools Used
Screwdriver, Adjustable Wrench
Parts Used
1. Removed 10 screws holding front and back plastic shroud together.
8 of the 10 are obvious, 2 are hidden under a decal on the plastic handle
you wrap the power cord around.
2. Separate the from and back plastic shrouds to get access to the pressure switch.
3. For more access to the switch I released the plastic air hose from the tank to the
manifold by pressing down on the quick release coupler near the tank This allowed
more room to work.
4. I used channel locks to un-screw the switch from the tank.
5. Applied thread sealant tape to the threads of the switch.
6. Screwed switch into tank until tight.
7. Push plastic air tube from manifold firmly back into quick release coupler near
the tank.
8. Put front & back plastic shrouds together and positioned that assembly in place.
9. Screwed shroud assembly to the metal frame.
10. Ran compressor and verified it shut off automatically after tank reached 155 PSI.
Did you find this story helpful?
Thanks for voting and helping fellow customers!
Kept running till pop off
Marvin - December 19, 2018
Tool Type
Compressor
Difficulty
Easy
Time
15-30 minutes
Tools Used
Screwdriver, Pliers, Wrench Set
Parts Used
Unplug, bleed off air in tank by opening valve on the end of the tank, slowly. Turn upside down, Remove plastic cover, 8 Philip head screws. To gain access to pressure switch. Removed spade connectors at the switch. Used correct size wrench to remove pressure switch. Replaced with new one, after putting small amount of pipe compound on threads, reinstalled spade connections, put the case back together. Closed drain valve, Plugged in and turned compressor on.. Shut off as new. At correct pressure.
Did you find this story helpful?
Thanks for voting and helping fellow customers!
OEM stands for Original Equipment Manufacturer and means the part you’re buying is sourced directly from the manufacturer who made your product. At eReplacementParts, we sell only genuine OEM parts, guaranteeing the part you’re purchasing is of better design and of higher quality than aftermarket parts.
Our product descriptions are a combination of data sourced directly from the manufacturers who made your product as well as content researched and curated by our content & customer service teams. This content is edited and reviewed internally before being made public to customers.
Our customer service team are at the ready daily to answer your part and product questions. We have a dedicated staff with decades of collective experience in helping customers just like you purchase parts to repair their products.
All our part reviews are solicited directly from other customers who have purchased this exact part. While we moderate these reviews for profanity, offensive language or personally identifiable information, these reviews are posted exactly as submitted and no alterations are made by our team.
All our customer repair instructions are solicited directly from other customers just like you who have purchased and replaced this exact part. While we moderate these reviews for profanity, offensive language or personally identifiable information, these reviews are posted exactly as submitted and no alterations are made by our team.
Based on data from past customer purchasing behaviors, these parts are most commonly purchased together along with the part you are viewing. These parts may be necessary or helpful to replace to complete your current repair.
All our installation videos are created and produced in collaboration with our in-house repair technician, Mark Sodja, who has helped millions of eReplacementParts customers over the last 13 years repair their products. Mark has years of experience in selling and repairing both commercial and residential products with a specialty in gas-powered equipment.
This data is collected from customers who submitted a repair instruction after replacing this exact part. Customers can rate how easy the repair was to complete and how long it took. We aggregate this data to provide a repair rating that allows customers to quickly determine the difficulty and time needed to perform their own repair.