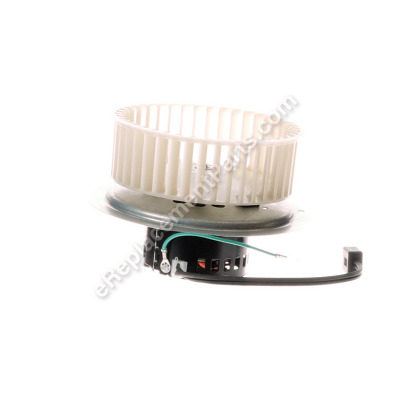
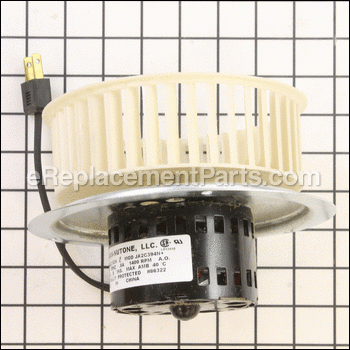
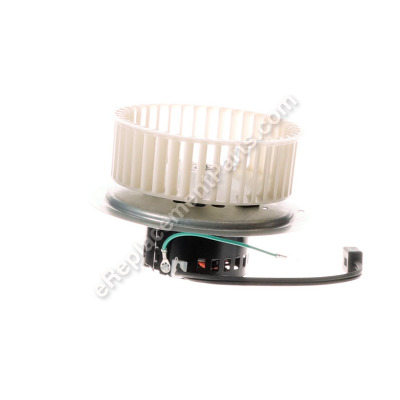
This replacement power unit is an authentic Nutone exhaust fans and ceiling heaters. It is sourced directly from original equipment manufacturer. This assembly includes a motor, plastic impeller wheel and a metal bracket. Please note, one power unit is included per order. Replacing this item will only require a screwdriver.
Srv Nt Power Unit Asy Pkgd Qt1 S0696B000
OEM part for: Broan, Nutone
Part Number: S0696B000
Product Description ?
- Dimensions
- Fan OD: 6-3/16
- Classification: Part
- Weight: 2.95 lbs.
- Shipping: Ships Worldwide
Compatibility
This part will fit the following 23 machines
Nutone
Broan
This item works with the following types of products:
- Heater Parts
This part replaces obsolete part #: 0696B000
Customer Part Reviews ?
- 1
- 2
Questions & Answers ?
Our customer Service team is at the ready daily to answer your part and product questions.

Ask our Team
We have a dedicated staff with decades of collective experience in helping customers just like you purchase parts to repair their products.
Does this fit my product?Questions & Answers for Srv Nt Power Unit Asy Pkgd Qt1
Customer Repair Instructions ?
All our customer repair instructions are solicited directly from other customers just like you who have purchased and replaced this exact part.
Old fan unit was very loud
Tool Type
Ventilation
Difficulty
Easy
Time
15-30 minutes
Tools Used
Screwdriver
Parts Used
Remove light assembly first with four screws and unplug.
Unscrew old housing holding motor and fan and unplug.
Remove old fan and power unit from housing with three screws.
Clean old housing unit free of dust and debris.
Clean end of exhaust tube and remove old foam insulation at end.
Add new foam trim purchased at local hardware store/self adhesive/cut to size.
Install new fan and power unit into housing with same three screws.
Plug housing in.
You may want to plug in light assembly electrical first at this time as hand space is tight once fan housing is in place. Light assembly is lightweight and should hang fine with just plugging in until fan housing is secure.
Plug in housing electrical connection and reinstall with same screws.
Attach light assemble with same four screws.
Test and done!
Motor in bathroom exhaust fan wore out
Tool Type
Ventilation
Difficulty
Easy
Time
15-30 minutes
Tools Used
Screwdriver, None
Parts Used
Bathroom fan motor had died
Tool Type
Ventilation
Difficulty
Medium
Time
15-30 minutes
Tools Used
Screwdriver, Pliers
Parts Used
2. Plugged in the new one and secured it with screws
3. Replaced the existing cover
fan was worn out
Tool Type
Ventilation
Difficulty
Medium
Time
15-30 minutes
Tools Used
Screwdriver, Pliers
Parts Used
noise and rattle
Tool Type
Ventilation
Difficulty
Easy
Time
Less than 15 minutes
Tools Used
Screwdriver
Parts Used
Ventilation motor stopped working.
Tool Type
Ventilation
Difficulty
Easy
Time
15-30 minutes
Tools Used
Screwdriver
Parts Used
- Removed the old power unit ( 4 self-tapping screws and disconnect electrical plug ) Install new power unit ( same 4 screws and plug-in. ) This is the 3rd time I've replaced this unit in the last 10 years,
Loud nois when fan was turned on
Tool Type
Ventilation
Difficulty
Easy
Time
Less than 15 minutes
Tools Used
Screwdriver
Parts Used
2. Remove 1 screw loosened 2 screws
3 Slid fan and light fixture off of two loosened screws
4 Unplugged fan and light fixture
5. Removed old fan / motor assembly from light fixture
6. Assembled new fan / motor onto light fixture
7. Plugged fan and light fixture in
8. Slid fan and light fixture onto the two screw left in housing
9 Tightened screws replaced light and fan
Fan in bathroom did not work.
Tool Type
Ventilation
Difficulty
Medium
Time
15-30 minutes
Tools Used
Nutdriver, Vacuum cleaner
Parts Used
2. Removed cover and housing for fan
3. Installed new power unit (motor and fan) in housing
4. Replaced housing in old outer housing of unit.
It was hard to get the unit back together, as I needed to work over my head and reinstall the screws, while making sure the replacement unit did not fall and I did not drop the screws. Having the right nut driver helped.
Bad bearing on motor
Tool Type
Ventilation
Difficulty
Easy
Time
Less than 15 minutes
Tools Used
Screwdriver
Parts Used
Very old motor died
Tool Type
Ventilation
Difficulty
Easy
Time
15-30 minutes
Tools Used
Screwdriver
Parts Used
Loosened 3 screws
Pulled out motor/fan assy
Unplugged unit
Plugged in new motor/ fan assy
Pushed in new assy on screws
Tightened screws
Replaced grill
OEM stands for Original Equipment Manufacturer and means the part you’re buying is sourced directly from the manufacturer who made your product. At eReplacementParts, we sell only genuine OEM parts, guaranteeing the part you’re purchasing is of better design and of higher quality than aftermarket parts.
Our product descriptions are a combination of data sourced directly from the manufacturers who made your product as well as content researched and curated by our content & customer service teams. This content is edited and reviewed internally before being made public to customers.
Our customer service team are at the ready daily to answer your part and product questions. We have a dedicated staff with decades of collective experience in helping customers just like you purchase parts to repair their products.
All our part reviews are solicited directly from other customers who have purchased this exact part. While we moderate these reviews for profanity, offensive language or personally identifiable information, these reviews are posted exactly as submitted and no alterations are made by our team.
All our customer repair instructions are solicited directly from other customers just like you who have purchased and replaced this exact part. While we moderate these reviews for profanity, offensive language or personally identifiable information, these reviews are posted exactly as submitted and no alterations are made by our team.
Based on data from past customer purchasing behaviors, these parts are most commonly purchased together along with the part you are viewing. These parts may be necessary or helpful to replace to complete your current repair.
All our installation videos are created and produced in collaboration with our in-house repair technician, Mark Sodja, who has helped millions of eReplacementParts customers over the last 13 years repair their products. Mark has years of experience in selling and repairing both commercial and residential products with a specialty in gas-powered equipment.
This data is collected from customers who submitted a repair instruction after replacing this exact part. Customers can rate how easy the repair was to complete and how long it took. We aggregate this data to provide a repair rating that allows customers to quickly determine the difficulty and time needed to perform their own repair.


