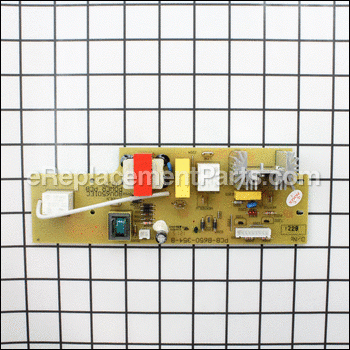

It is a genuine item that is supplied directly from the original equipment manufacturer for use with Breville ovens. This is an identical replacement for a faulty or a missing power PCB that was installed on a new unit, please make sure to refer to the appropriate diagrams of your model for the correct location and application of this component. Keep in mind this high-quality item is sold individually.
Power Pcb SP0010491
OEM part for: Breville
Part Number: SP0010491
$41.45
Usually ships in 7 - 12 business days
7 - 12 business days
Compatibility
This part will fit the following 1 machine
Breville
BOV650XL The Compact Smart Oven View Diagrams & Manuals
This item works with the following types of products:
- Oven Parts
This part replaces obsolete part #: BOV650XL/32A
Questions & Answers ?
Our customer Service team is at the ready daily to answer your part and product questions.

Ask our Team
We have a dedicated staff with decades of collective experience in helping customers just like you purchase parts to repair their products.
Does this fit my product?Questions & Answers for Power Pcb
No questions have been asked yet
Customer Repair Instructions ?
All our customer repair instructions are solicited directly from other customers just like you who have purchased and replaced this exact part.
Top Heating Element Won't Turn On: Connection to PCB board burnt out
IVAN - August 4, 2016
👍 4 of 4 people found this instruction helpful
Tool Type
Convection Oven
Difficulty
Medium
Time
30-60 minutes
Tools Used
Screwdriver, Pliers
Parts Used
No wire cutting involved
Tools: Needle nose pliers [without teeth preferred]. Standard sized screw driver. [+ extra long screw driver if you have medium to large hands] [Thin electronics flat screw driver]
Before purchasing your PCB board, remove your casing to identify that part of the board connecting the top burner has burnt or disconnected.
CHECK THE NUMBER OF WIRES in the wire ribbon!
When ordering your PCB board, check the number of wire-ribbon that connect the board to the controls. This will determine which board you need exactly. "The way to tell which Power PCB you have, is to count the pins (or terminals) on it. The part number BOV650XL/32A Power PCB has 9. The part number BOV650XL/32 has 7.
REMOVE CASING
1. remove all screws from rear face of oven. The rear face is a single plate that will slide off later.
2. remove screws only on side sections of the bottom, where the outer most case meets the bottom casing. [About two screws total]
3. remove screws connecting the feet to the bottom of the oven
4. The rear plate should now be able to slide off, remove the rear plate by apply a little bit of force to pull free. The metal is thin and will flex easily, some flexing to slide on and off is necessary.
5. Once the rear plate is removed, there are about five or so screws that connect the outer casing to the oven, on the side that has the oven controls. An extra long screw driver will come in handing with reaching these screws as the clearance is thin. Start with screws furthest from the corner, as this will allow the outer casing to flex more and easier to reach screws. [When re-installing, start with the inner screws and end with the outer screws to allow more flex]
6. The outer casing should be able to slide off by pulling it from the rear.
INSTALLING NEW PCB BOARD.
It would be a good idea to take a photo or label the location of wires before removing them from the board.
1. Remove the female wire connectors from the male connections fixed on the board by gently pulling back and fourth with pliers.
2.. Gently pry the wire ribbons by pulling on the plastic connector. some force needed.
3. Remove the pcb board by removing the four screws that attach it to the oven.
4. Screw new pcb board back into position.
5. Reconnect all wires in the proper positions.
[NOTE] two of the female connections for the top and bottom heating elements had to be widened to accommodate larger male connectors on the new PCB board. I did this buy using wiggling a thin screw driver back and fourth to bend the female connector wider, and connector in place with a pliers.
Did you find this story helpful?
Thanks for voting and helping fellow customers!
Bad motherboard
Richard - September 24, 2016
👍 1 of 1 people found this instruction helpful
Tool Type
Toaster
Difficulty
Medium
Time
30-60 minutes
Tools Used
Screwdriver
Parts Used
Removed outer casing from Breville oven with really long philips screw driver.
Unplugged motherboard and replaced. I had to change one of the wire
connectors because the pin was a different size on the new board.
Luckily I had a supply of different connectors handy. You might include a note
with the replacement board giving people a heads up. New board fixed the problem!
Unplugged motherboard and replaced. I had to change one of the wire
connectors because the pin was a different size on the new board.
Luckily I had a supply of different connectors handy. You might include a note
with the replacement board giving people a heads up. New board fixed the problem!
Did you find this story helpful?
Thanks for voting and helping fellow customers!
OEM stands for Original Equipment Manufacturer and means the part you’re buying is sourced directly from the manufacturer who made your product. At eReplacementParts, we sell only genuine OEM parts, guaranteeing the part you’re purchasing is of better design and of higher quality than aftermarket parts.
Our product descriptions are a combination of data sourced directly from the manufacturers who made your product as well as content researched and curated by our content & customer service teams. This content is edited and reviewed internally before being made public to customers.
Our customer service team are at the ready daily to answer your part and product questions. We have a dedicated staff with decades of collective experience in helping customers just like you purchase parts to repair their products.
All our part reviews are solicited directly from other customers who have purchased this exact part. While we moderate these reviews for profanity, offensive language or personally identifiable information, these reviews are posted exactly as submitted and no alterations are made by our team.
All our customer repair instructions are solicited directly from other customers just like you who have purchased and replaced this exact part. While we moderate these reviews for profanity, offensive language or personally identifiable information, these reviews are posted exactly as submitted and no alterations are made by our team.
Based on data from past customer purchasing behaviors, these parts are most commonly purchased together along with the part you are viewing. These parts may be necessary or helpful to replace to complete your current repair.
All our installation videos are created and produced in collaboration with our in-house repair technician, Mark Sodja, who has helped millions of eReplacementParts customers over the last 13 years repair their products. Mark has years of experience in selling and repairing both commercial and residential products with a specialty in gas-powered equipment.
This data is collected from customers who submitted a repair instruction after replacing this exact part. Customers can rate how easy the repair was to complete and how long it took. We aggregate this data to provide a repair rating that allows customers to quickly determine the difficulty and time needed to perform their own repair.