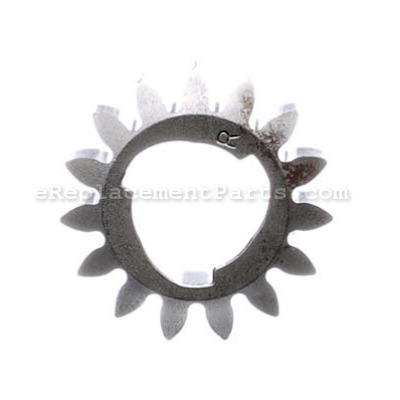
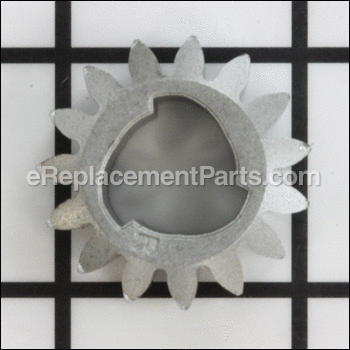
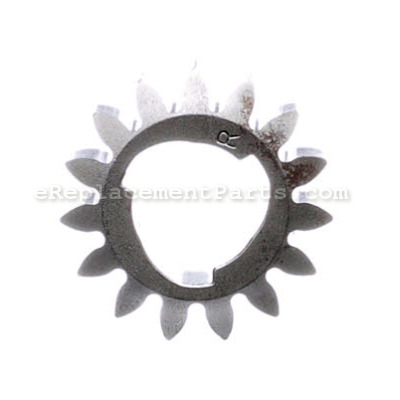
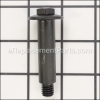
This is a Genuine OEM Toro Pinion Gear, with 15 teeth, which drives the gear on the wheel. This part is sold individually. There are two of these gears used on the Mowers for the left and right sides. If the gear is showing signs of damage or wear it needs to be replaced.
Pinion Gear 105-3040
OEM part for: Toro, Lawn Boy
Part Number: 105-3040
Jump To:
Frequently Purchased Together ?
Compatibility
This part will fit the following 105 machines
Toro
Lawn Boy
This item works with the following types of products:
- Lawn Mower Parts
Customer Part Reviews ?
- 1
Questions & Answers ?
Our customer Service team is at the ready daily to answer your part and product questions.

Ask our Team
We have a dedicated staff with decades of collective experience in helping customers just like you purchase parts to repair their products.
Does this fit my product?Questions & Answers for Pinion Gear
Customer Repair Instructions ?
All our customer repair instructions are solicited directly from other customers just like you who have purchased and replaced this exact part.
Mower not self propelling.
Tool Type
Lawn Mower
Difficulty
Easy
Time
30-60 minutes
Tools Used
Screwdriver, Pliers, Socket set
Parts Used
Use 13mm socket to remove wheel. Determine it the gear on the mower is worn. Check both wheels to determine if you need to replace the gear on both sides! If you don't you'll end up ordering twice and paying for shipping twice. Also the same gear works on both sides and is marked with an R and L so you will know how to put it on.
Remove c clamp with screwdriver and pliers. Don't bend it. Just press down on the clamp until you can get a grip on it with the pliers and then pull it off.
Remove the washer
Remove the worn out gear. Don't let the little free moving metal tab that engages the gear slip out of its slot or the wheel will not engage when you finish.
Put the new gear on. It has an R on one side and an L on the other. The R goes on the right side as you stand behind the mower, L on the left side.
Reverse the process for the washer and c clamp.
Replace the wheel.
Self propelled was not working due to worn down pinion gears.
Tool Type
Lawn Mower
Difficulty
Easy
Time
15-30 minutes
Tools Used
Screwdriver, Pliers, Socket set, Gloves
2. Removed left wheel with a socket set.
3. Removed ring clip with screw driver and needle nose pliers.
4. Removed pinion gear and thrust washer while holding down key on shaft. Quickly examined condition of key and didn't replace.
5. Replaced with new pinion gear, new thrust washer and new ring clip. Slid pinion gear on with L on outside (facing direction you would be standing to use mower), thrust washer and put on gloves to push ring clip onto shaft. The pinion gears have L and R engraved on them and are interchangeable.
6. Replaced old wheel with new wheel. Gears on old wheel were worn too. Used socket set to reinstall wheel.
7. Repeated for the right side.
8. Tested and self propelled worked. Although the left wheel would not move when I backed up. I had the tension too tight on the self propelled cable. Loosen nut near handle and eased back on the tension in the cable. Mower backs up and self propelled works like new. Mower is about 12-14 years old and is a Toro Personal Pace.
Right side drive wheel was not engaging.
Tool Type
Lawn Mower
Difficulty
Medium
Time
15-30 minutes
Tools Used
Screwdriver, Pliers, Socket set
2. Key and spring were damaged also.
3. Cleaned key way and spring retaining hole and installed new parts.
4. Installed new pinion gear with thrust washers and spring clips.
5. Installed existing wheel, started mower
Self propel not working
Tool Type
Lawn Mower
Difficulty
Medium
Time
1-2 hours
Tools Used
Screwdriver, Pliers, Socket set
Grinding noise in left wheel, loss of self propel function
Tool Type
Lawn Mower
Difficulty
Medium
Time
More than 2 hours
Tools Used
Screwdriver, Pliers, Socket set, Nutdriver, Adjustable Wrench
Removed mower blade and belt.
Rebuilt transmission and repackaged with grease.
Reassembled and found an extra spacer. Eventually found it went in between the main engine shaft and the blade's shaft-bracket. If you leave this off then the engine won't turn due to clamping friction of the bracket against the engine's bottom.
After reassembling with all new parts and testing, the left wheel gears still sounded bad (grinding). Read different website forums from 2010-now where some people fixed this design/tolerance issue by adding spacers between the left wheel mount and the mower body. I added those and the grinding went away.
I'm not sure exactly what happened. My wife called me and said that the tire exploded. The plastic hub had twisted up like a straw.
Tool Type
Lawn Mower
Difficulty
Easy
Time
Less than 15 minutes
Tools Used
Pliers, Socket set
Wheel mount brackets mis-aligned causing gears to mis-align and slip.
Tool Type
Lawn Mower
Difficulty
Easy
Time
1-2 hours
Tools Used
Socket set, Snap ring pliers, file, pry bar
2. Remove snap rings and pinion gears.
3. Removed and cleaned woodruff keys and springs.
4. Cleaned axle and keyway.
5. Used file to remove burrs on axle shaft keyway.
6. Used pry bar to straighten wheel mount brackets.
7. Cleaned, lubricated and reinstalled keys and springs.
8. Installed new pinion gears, washers and snap rings.
9. Lubricated gears and installed wheel and cover assembly.
Gears were worn
Tool Type
Lawn Mower
Difficulty
Easy
Time
15-30 minutes
Tools Used
Pliers, Socket set
Parts Used
lawn mower drive wheels would not drive mower forward
Tool Type
Lawn Mower
Difficulty
Easy
Time
15-30 minutes
Tools Used
Socket set
Parts Used
removed clip ring and slid worn wheel pinion gear off.
installed new pinion gear and clip ring.
reinstalled wheel bolt,wheel and washers.
repeated for the other drive also.
drive wheels propel mower forward now..
Grinding noise in self propell mode
Tool Type
Lawn Mower
Difficulty
Easy
Time
1-2 hours
Tools Used
Socket set, Wrench Set, Snap ring pliers
Parts Used
OEM stands for Original Equipment Manufacturer and means the part you’re buying is sourced directly from the manufacturer who made your product. At eReplacementParts, we sell only genuine OEM parts, guaranteeing the part you’re purchasing is of better design and of higher quality than aftermarket parts.
Our product descriptions are a combination of data sourced directly from the manufacturers who made your product as well as content researched and curated by our content & customer service teams. This content is edited and reviewed internally before being made public to customers.
Our customer service team are at the ready daily to answer your part and product questions. We have a dedicated staff with decades of collective experience in helping customers just like you purchase parts to repair their products.
All our part reviews are solicited directly from other customers who have purchased this exact part. While we moderate these reviews for profanity, offensive language or personally identifiable information, these reviews are posted exactly as submitted and no alterations are made by our team.
All our customer repair instructions are solicited directly from other customers just like you who have purchased and replaced this exact part. While we moderate these reviews for profanity, offensive language or personally identifiable information, these reviews are posted exactly as submitted and no alterations are made by our team.
Based on data from past customer purchasing behaviors, these parts are most commonly purchased together along with the part you are viewing. These parts may be necessary or helpful to replace to complete your current repair.
All our installation videos are created and produced in collaboration with our in-house repair technician, Mark Sodja, who has helped millions of eReplacementParts customers over the last 13 years repair their products. Mark has years of experience in selling and repairing both commercial and residential products with a specialty in gas-powered equipment.
This data is collected from customers who submitted a repair instruction after replacing this exact part. Customers can rate how easy the repair was to complete and how long it took. We aggregate this data to provide a repair rating that allows customers to quickly determine the difficulty and time needed to perform their own repair.

