
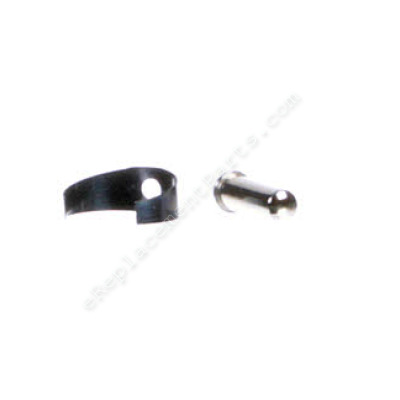


This is the lock pin assembly for various dremel and multi-tool models. The lock pin is a crucial component within power tools, responsible for securing the bits in place during use to prevent any movement. Over time, lock pins can wear down or become damaged, leading to improper engagement or hindering the rotation and functionality of the tool. Replacing a lock pin involves turning off the dremel or multi-tool and removing its motor brushes and housing screws that hold it together. Separate the housing into two halves, take out the motor, and locate the lock pin. Remove the lock pin and its spring, then install the new lock pin and spring. Reinstall the motor, the other half of the housing, along with its screws and bushings.
Lock Pin Assembly 2615297356
OEM part for: Dremel, Bosch
Part Number: 2615297356
Jump To:
Product Description ?
- Includes: Locking Pin and a Metal Spring
- Classification: Part
- Weight: 0.01 lbs.
- Shipping: Ships Worldwide
Frequently Purchased Together ?

Compatibility
This part will fit the following 16 machines
Dremel
This item works with the following types of products:
- Multi-Tool Parts
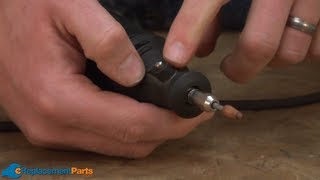
Repair Videos ?
|
This article will walk you through the steps needed to replace the lock pin and spring on your Dremel 395 Moto-Tool. ...
March 27, 2013
|

Customer Part Reviews ?
- 1
Questions & Answers ?
Our customer Service team is at the ready daily to answer your part and product questions.

Ask our Team
We have a dedicated staff with decades of collective experience in helping customers just like you purchase parts to repair their products.
Does this fit my product?Questions & Answers for Lock Pin Assembly
Customer Repair Instructions ?
All our customer repair instructions are solicited directly from other customers just like you who have purchased and replaced this exact part.
Brushes burnt & lock mechanism wore out
Tool Type
MultiTool
Difficulty
Easy
Time
15-30 minutes
Tools Used
Screwdriver
Spring & lock pin. Reinstalled
locking mechanism stripped - could not remove tool
Tool Type
MultiTool
Difficulty
Medium
Time
Less than 15 minutes
Tools Used
Screwdriver
The spindle lock was wore off
Tool Type
MultiTool
Difficulty
Easy
Time
Less than 15 minutes
Tools Used
Screwdriver
Parts Used
2. Replaced spindle lock and retainer "part set I purchased".
3. Carefully assembled making sure the retainer spring was properly in place.
and lined up with spindle lock.
4. Ready to go.
The locking pins on two of our Dremel tools were worn out
Tool Type
MultiTool
Difficulty
Easy
Time
15-30 minutes
Tools Used
Screwdriver, Adjustable Wrench
Parts Used
Remove the brush caps, brushes and springs
Remove the screws from the housings
Take out the old spring and the pin
Replace them with the new parts
Put the housings back together
Replace the front on the tool
Replace the brush caps, brushes and springs
Shaft locking assembly not working
Tool Type
MultiTool
Difficulty
Easy
Time
Less than 15 minutes
Tools Used
Screwdriver
Parts Used
Remove the top housing far enough to remove the old stop and spring
Install the new stop and spring
Install the front nose piece
It is a Dremel, the shaft lock was worn out. I replaced it in about 30 minutes.
Tool Type
MultiTool
Difficulty
Medium
Time
15-30 minutes
Tools Used
Screwdriver
Parts Used
OEM stands for Original Equipment Manufacturer and means the part you’re buying is sourced directly from the manufacturer who made your product. At eReplacementParts, we sell only genuine OEM parts, guaranteeing the part you’re purchasing is of better design and of higher quality than aftermarket parts.
Our product descriptions are a combination of data sourced directly from the manufacturers who made your product as well as content researched and curated by our content & customer service teams. This content is edited and reviewed internally before being made public to customers.
Our customer service team are at the ready daily to answer your part and product questions. We have a dedicated staff with decades of collective experience in helping customers just like you purchase parts to repair their products.
All our part reviews are solicited directly from other customers who have purchased this exact part. While we moderate these reviews for profanity, offensive language or personally identifiable information, these reviews are posted exactly as submitted and no alterations are made by our team.
All our customer repair instructions are solicited directly from other customers just like you who have purchased and replaced this exact part. While we moderate these reviews for profanity, offensive language or personally identifiable information, these reviews are posted exactly as submitted and no alterations are made by our team.
Based on data from past customer purchasing behaviors, these parts are most commonly purchased together along with the part you are viewing. These parts may be necessary or helpful to replace to complete your current repair.
All our installation videos are created and produced in collaboration with our in-house repair technician, Mark Sodja, who has helped millions of eReplacementParts customers over the last 13 years repair their products. Mark has years of experience in selling and repairing both commercial and residential products with a specialty in gas-powered equipment.
This data is collected from customers who submitted a repair instruction after replacing this exact part. Customers can rate how easy the repair was to complete and how long it took. We aggregate this data to provide a repair rating that allows customers to quickly determine the difficulty and time needed to perform their own repair.