
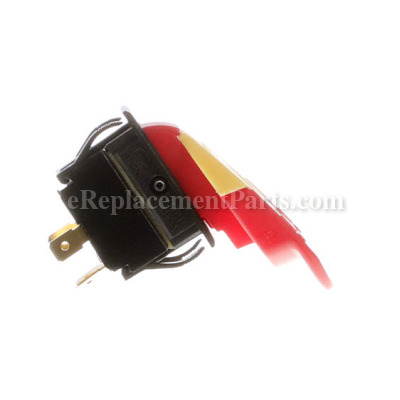


This is a genuine manufacturer approved replacement switch used on a variety of power equipment. It is the part of the tool handling on/off operations. Since switches have moving mechanical parts, they will eventually wear out and will require a replacement. Switch has a plastic body and it is sold individually.
To replace this switch you would need a screwdriver.
• Remove screws used to hold switch cover
• Disconnect wires from the old switch and remove it from the housing
• Place the new switch in the housing and connect wires to it
• Reassemble the housing
On-off Switch 994534
OEM part for: Jet, Powermatic
Part Number: 994534
$44.27
In Stock
Jump To:
Product Description ?
- Classification: Part
- Weight: 0.03 lbs.
- Shipping: Ships Worldwide
Frequently Purchased Together ?

Compatibility
This part will fit the following 29 machines
Powermatic
4224 24 in. 3HP 220V Wood Lathe View Diagrams & Manuals
4224B Woodturning Lathe View Diagrams & Manuals
Jet
JDS-12B Benchtop 12 in. Disc Sander View Diagrams & Manuals
JBOS-5 (708404) JBOS-5 Benchtop Oscillating Spindle Sander View Diagrams & Manuals
JBTS-10BT-3 (708315BTA) 10 in. Table Saw View Diagrams & Manuals
JBTS-10BT-3 (708315BTB) 10 in. Table Saw View Diagrams & Manuals
JBTS-10BT-3 (708315BTC) 10 in. Table Saw View Diagrams & Manuals
JBTS-10BT-3 (708315LSA) 10 in. Table Saw View Diagrams & Manuals
JBTS-10BT-3 (708315LSB) 10 in. Table Saw View Diagrams & Manuals
DC-650A (708640) Dust Collection View Diagrams & Manuals
DC-650C (708640C) Dust Collection View Diagrams & Manuals
DC-650ARC (708640RC) Dust Collection View Diagrams & Manuals
DC-650CRC (708641RC) Dust Collection View Diagrams & Manuals
DC-650TS (708630) Dust Collector View Diagrams & Manuals
EHVS-80CS (708448) Edge Horizontal / Vertical Sander View Diagrams & Manuals
10-20 Plus (628900) Drum Sander View Diagrams & Manuals
16-32 Plus (629004K) Sander View Diagrams & Manuals
22-44 Plus Sander View Diagrams & Manuals
JWTS-10 (708100) Super Saw View Diagrams & Manuals
JML-1014I (708375) Mini Lathe View Diagrams & Manuals
JWL-1220 (708376) Mini Lathe View Diagrams & Manuals
DC-650BK (708642) Dust Collector View Diagrams & Manuals
DC-650CK (708642) Dust Collector View Diagrams & Manuals
DC-650MK (708642) Dust Collector View Diagrams & Manuals
22-44OSC Oscillating Drum Sander View Diagrams & Manuals
JSG-96 Disc / Belt Sander View Diagrams & Manuals
JWBS-14OS (708113A) 14-inch Woodworking Band Saw View Diagrams & Manuals
JWL-1442VS (2007) Wood Lathe View Diagrams & Manuals
JWL-1442VS (2010) Wood Lathe View Diagrams & Manuals
Show More Compatible Models
This item works with the following types of products:
- Lathe Parts
- Sander Parts
- Saw Parts
- Table Saw Parts
- Band Saw Parts
This part replaces obsolete part #: JWL1442-118, JBOS5-03, 994532, 72-2004, JBOS503, 708315-153, 708315-5, 6295760, JSG96-135, JML-65
Customer Part Reviews ?
Average Rating (out of 5):
Click to filter by ratings:
5 stars
14
4 stars
3
3 stars
0
2 stars
0
1 stars
1
< PREV
- 1
- 2
Easy Install
The new switch was very easy to install and has a more positive contact than the original switch.
Ward -
October 9, 2023
Verified Purchase
Perfect Fit
The part shipped very quickly and arrived in perfect condition. The switch for my dust collector fit PERFECTLY, no need to have to "rube" it into place.
Guest -
August 27, 2023
Verified Purchase
Part
I received it quick with no hassles.
Guest -
January 2, 2023
Verified Purchase
new switch for my jet sander
it was very easy to get the Wright switch and install it thanks for your support and prompt shipping
Guest -
July 20, 2021
Verified Purchase
It was great and the part arrived so quickly.
The part was great and very impressed with the speed of the delivery.
Guest -
May 13, 2021
Verified Purchase
Easy Repair Part worked well
The people were super helpful when the Post Office held up the package for two weeks for some unknown reason. They even offered to send another part at their own expense. Great
Guest -
February 27, 2021
Verified Purchase
Right part-came very quickly.
Absolutely correct part-Came fast. Works great.
Only complaint was the price--that was GIH--BUT-- I did not have to wait for a month either so it balanced out!
Ralph -
January 21, 2021
Verified Purchase
great company!! Not many businesses like this anymore
always get the part soon with no mistakes
Guest -
November 17, 2020
Verified Purchase
Worked as expected
Fit perfectly
Jeff -
October 23, 2020
Verified Purchase
Worked great!
The part arrived on time and worked as expected. Would definitely recommend.
Guest -
September 1, 2020
Verified Purchase
t
t
t -
t days ago
Verified Purchase
eReplacementParts Team
t
Questions & Answers ?
Our customer Service team is at the ready daily to answer your part and product questions.

Ask our Team
We have a dedicated staff with decades of collective experience in helping customers just like you purchase parts to repair their products.
Does this fit my product?Questions & Answers for On-off Switch
Do you carry a on/off switch for this model. The current one is labeled J9301A or J4031W. It has 4 wires going into machine.
James
for model number JSG-96
asked on 2022-05-06
Hello James, Thank you for contacting us. We have researched the model you have provided and have found the part you are looking for is Part Number: 994534. If you need help placing an order, customer service is open 7 days a week. Please feel free to give us a call. We look forward to hearing from you!
eReplacementParts Team May 06, 2022
Customer Repair Instructions ?
All our customer repair instructions are solicited directly from other customers just like you who have purchased and replaced this exact part.
one side of the old switch died
donald - December 5, 2023
Tool Type
Lathe
Difficulty
Easy
Time
Less than 15 minutes
Tools Used
Screwdriver
Parts Used
took switch off of the lathe and tested it. One side was dead
order switch and put it on the lathe.
Because I took the old switch off it only took a few minutes to put the new one on.
Used a drill gun to make it easier.
total time 15 minutes
order switch and put it on the lathe.
Because I took the old switch off it only took a few minutes to put the new one on.
Used a drill gun to make it easier.
total time 15 minutes
Did you find this story helpful?
Thanks for voting and helping fellow customers!
Locking tab broken off
David - December 4, 2023
Tool Type
Sander
Difficulty
Medium
Time
15-30 minutes
Tools Used
Screwdriver, Alan key
Parts Used
Disconnect
Remove access cover
Disconnect belt drive motor using Alan key
Remove motor switch assembly
Disconnect switch and remove
Install new switch
Reverse process to reassemble
Remove access cover
Disconnect belt drive motor using Alan key
Remove motor switch assembly
Disconnect switch and remove
Install new switch
Reverse process to reassemble
Did you find this story helpful?
Thanks for voting and helping fellow customers!
Table saw off/on switch contacts were welded closed.
DeLane - October 21, 2023
Tool Type
Table Saw
Difficulty
Easy
Time
30-60 minutes
Tools Used
Screwdriver
Parts Used
I removed one side panel which allowed me to access the switch case. Once all the wires were disconnected, I was able to pop the switch out of the frame. The new switch popped right back in. Reconnected the wires and back in business. To replace the switch, it took about 15 minutes. The rest of the time was spent cleaning the inside of the table saw.
Side note: The original switch contacts were welded closed, not allowing the saw to stop. I was able to redress the contacts and put the switch back together. I swapped out the new for the old and have been using it ever since. The new switch is saved as a spare.
Side note: The original switch contacts were welded closed, not allowing the saw to stop. I was able to redress the contacts and put the switch back together. I swapped out the new for the old and have been using it ever since. The new switch is saved as a spare.
Did you find this story helpful?
Thanks for voting and helping fellow customers!
Broken on/off switch
Timothy - January 21, 2023
Tool Type
Sander
Difficulty
Medium
Time
15-30 minutes
Tools Used
Screwdriver, Wrench Set
Parts Used
Jet 1632 Drum Sander
Removed the cover of the switch box
Removed set screw to conveyor drive
Removed the box from the machine
Made sure to rewire correctly by finding a diagram on YouTube
Plugged in to make sure wired correctly before reinstalling the box on the machine
Put cover on box
Installed box back on machine
Put set screw back in the conveyor drive shaft
All worked great!
Did you find this story helpful?
Thanks for voting and helping fellow customers!
Power Switch was destroyed when a student snagged her back on the switch on her way out the door.
Christopher - May 6, 2022
Tool Type
Sander
Difficulty
Hard
Time
15-30 minutes
Tools Used
Screwdriver, Pliers, Socket set, Spudger. A universal jointed screwdriver might have helped.
Parts Used
Executive summary: Disconnect the power cord. Remove the cover plate on the bottom of the control housing by removing four phillips head machine screws. Let the circuit board drop. Depress the spring tabs on the ends of the old switch and push it out through the upper face of the control panel. Disconnect the spade connectors from the old switch and connect the wires to the new one; one at a time so you don't screw up the pin order. Push the new switch into the control panel. Push the control board back itn the control housing, resecure the cover plates.
Epic Version:
This was a technically simple but physically awkward repair to a part that should not normally need replacement.The poor kid who broke the switch was tearfully honest and apologetic and if she hadn't told me what happened I would never have discovered who was responsible, so, yeah, there are still great kids out there.
First, disconnect the power before working on any machine.
To replace the broken switch it is necessary to remove the cover plate on the bottom of the control housing. Unfortunately, the legs and mounting surface of the stamped sheetmetal stand on the model JWDS 1632 drum sander are angled for stability. Without removing the stand I could not get a straight shot at two of the screws that secured the cover plate. So I angled the screwdriver. The screws came out easily enough, but I chowdered the heads in the process.
Once the cover plate is off, the circuit board can be pulled out of the way so you can reach up underneath the control panel with your favorite spudger to release the spring tabs that secure the switch. I have a couple of old butter knives ground and bent into various shapes for this purpose.
I found that the best approach was to wiggle the switch housing back and forth, pushing alternately on each end of the housing as I released the spring tabs a bit at a time on each end. Eventually the switch comes free and you can pull it up out of the housing. Allow the circuit board to come up with it and there is just enough slack in the wires to remove them from the old switch and replace them on the new one, one at a time.
Push the new switch back into the face of the control panel. It will sort of click-click-click, and then snap into place. Push the circuit board back into the housing and then reinstall the coverplate, securing it with the screws. Take care to NOT cross thread the screws, which I did because of the way the stand interfered with the shaft of the screwdriver and because I was working over my head while crawling around under the machine, and because I was too lazy to just take the machine off of it's stand in the first place.
Test the machine to make sure the new switch works. Then, sulk for a few days because you cross threaded the screws and chowdered their heads up and made a carefully maintained machine look like it was chewed on by a dull beaver. Go to the local hardware store and pick up four (M6 I think, but you better check) socket head screws and washers. Remove the chowdered up old screws, chase the threads with a tap, and replace them with the socket heads because you can remove and install them with a BALL DRIVER next time. Hopefully there will not be a next time.
Did you find this story helpful?
Thanks for voting and helping fellow customers!
Switch shorted out
DAVID - April 12, 2022
Tool Type
Sander
Difficulty
Easy
Time
30-60 minutes
Tools Used
Screwdriver, Socket set
Parts Used
Opened up control box . Disconnected it from driveshaft and relocated box on workbenches. Removed damaged parts and burned wires replaced with new and reinstalled.
Did you find this story helpful?
Thanks for voting and helping fellow customers!
Broke it with hammer loop in my jeans!
Dale - July 3, 2021
Tool Type
Lathe
Difficulty
Easy
Time
15-30 minutes
Tools Used
Screwdriver, Pliers
Parts Used
Removed broken switch.
Installed replacement.
Easy.. didn't even need to stay at a Holiday Inn!
Installed replacement.
Easy.. didn't even need to stay at a Holiday Inn!
Did you find this story helpful?
Thanks for voting and helping fellow customers!
Plastic On/Off switch was broken and had to be replaced
David - February 19, 2021
Tool Type
Sander
Difficulty
Hard
Time
1-2 hours
Tools Used
Screwdriver, Pliers, Wrench Set, Nutdriver
Parts Used
I had to disassemble the housing for the switch. That included decoupling the motor
Did you find this story helpful?
Thanks for voting and helping fellow customers!
Swich failed
Ralph - January 22, 2021
Tool Type
Sander
Difficulty
Easy
Time
Less than 15 minutes
Tools Used
Screwdriver
Parts Used
It took two screws, and then just on & off with 4 wire clips then put the new switch back in. I did have to move a collar from the old switch to the new one. This was the most difficult part of the job.
Exactly correct part-- very easy!
Exactly correct part-- very easy!
Did you find this story helpful?
Thanks for voting and helping fellow customers!
1995 central machine on/off switch broke.
Thomas - December 10, 2020
Tool Type
Band Saw
Difficulty
Medium
Time
1-2 hours
Tools Used
Screwdriver, Pliers, Power Drill, Utility knife
Parts Used
Lots of work, old switch not available! Used a Jet replacement, four leads, hole in switch plate had to make larger
Did you find this story helpful?
Thanks for voting and helping fellow customers!
Load More Install Stories
OEM stands for Original Equipment Manufacturer and means the part you’re buying is sourced directly from the manufacturer who made your product. At eReplacementParts, we sell only genuine OEM parts, guaranteeing the part you’re purchasing is of better design and of higher quality than aftermarket parts.
Our product descriptions are a combination of data sourced directly from the manufacturers who made your product as well as content researched and curated by our content & customer service teams. This content is edited and reviewed internally before being made public to customers.
Our customer service team are at the ready daily to answer your part and product questions. We have a dedicated staff with decades of collective experience in helping customers just like you purchase parts to repair their products.
All our part reviews are solicited directly from other customers who have purchased this exact part. While we moderate these reviews for profanity, offensive language or personally identifiable information, these reviews are posted exactly as submitted and no alterations are made by our team.
All our customer repair instructions are solicited directly from other customers just like you who have purchased and replaced this exact part. While we moderate these reviews for profanity, offensive language or personally identifiable information, these reviews are posted exactly as submitted and no alterations are made by our team.
Based on data from past customer purchasing behaviors, these parts are most commonly purchased together along with the part you are viewing. These parts may be necessary or helpful to replace to complete your current repair.
All our installation videos are created and produced in collaboration with our in-house repair technician, Mark Sodja, who has helped millions of eReplacementParts customers over the last 13 years repair their products. Mark has years of experience in selling and repairing both commercial and residential products with a specialty in gas-powered equipment.
This data is collected from customers who submitted a repair instruction after replacing this exact part. Customers can rate how easy the repair was to complete and how long it took. We aggregate this data to provide a repair rating that allows customers to quickly determine the difficulty and time needed to perform their own repair.