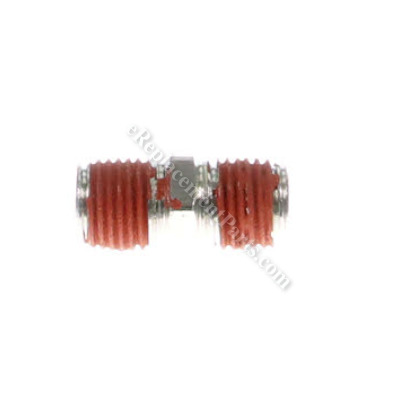


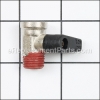
This genuine OEM nipple serves as a connector in your air compressor, connecting the pressure switch to both the tank and the regulator. A damaged or corroded nipple can result in air leaks and inconsistent pressure. To check for leaks, you can apply soapy water on all the fittings of your pressure switch and observe if any bubbles form. If you need to replace the nipple, the typical process involves disassembling the pressure switch to access it. Consult your user manual for instructions on how to proceed with the replacement. Generally, you will first need to drain the tank by opening the valve located at the bottom. Next, remove the coupler from the regulator and then unthread the nipple to detach the regulator from the pressure switch. Detach the pressure switch shroud to gain access to the wire connections inside. When disconnecting the connections, make sure to note the location of each wire. Start with the wire going from the motor to the switch, followed by the cord wires, and then both ground wires. Remove the strain relief, the pressure gauge, and the airline that connects the check valve to the pressure switch. You can now unthread the pressure switch from the nipple on the tank before removing the nipple itself. It is recommended to use thread tape to seal all the connections when you are reassembling the pressure switch. Please keep in mind that this replacement part is sold individually.
Nipple HF002401AV-S
OEM part for: Campbell Hausfeld, Husky
Part Number: HF002401AV-S
Jump To:
Frequently Purchased Together ?


Compatibility
This part will fit the following 665 machines
Campbell Hausfeld
Husky
This item works with the following types of products:
- Compressor Parts
- Paint Sprayer Parts
- Pump Parts
This part replaces obsolete part #: HF002401AV, HF007301AV, HF007300AV, HF002401AJ, HF002400AV
Customer Part Reviews ?
- 1
Questions & Answers ?
Our customer Service team is at the ready daily to answer your part and product questions.

Ask our Team
We have a dedicated staff with decades of collective experience in helping customers just like you purchase parts to repair their products.
Does this fit my product?Questions & Answers for Nipple
Customer Repair Instructions ?
All our customer repair instructions are solicited directly from other customers just like you who have purchased and replaced this exact part.
Leaky air compressor.
Tool Type
Compressor
Difficulty
Easy
Time
1-2 hours
Tools Used
Screwdriver, Socket set, Adjustable Wrench, MEGALOC thread sealant; MEGATAPE (3.5 mil)
2. Applied soapy water (with small artists brush) on all fittings to determine where leaks existed.
3. Bubbles appeared in three locations: Pressure gauge fitting (the one attached to the regulator), check valve thread and nipple (that feeds the hose line fitting).
4. Oiled compressor motor bearings using a cotton cue tip with oil to get rid of squeaking that I noticed when moving the motor by hand. Squeaking is gone.
5. Removed air gauges, nipple, regulator, compressor head, check valve (and this requires removing the copper pipe that connects the air compressor to the check valve). When removing the copper pipe and head, they must be removed at the same time, in order to remove the pipe from the check valve.
6. Installed the new nipple (which was rusted). I used MEGALOC sealant when reinstalling. The sealant is rated at 2600 PIS for gas.
7. Installed the new regulator.
8. Reinstalled both pressure gauges using MEAGATAPE (3.5 MIL thick) as a sealant. The tape is rated at 300 psi max. I could have used the MAGALOC sealant but just wanted to try the tape, which worked great.
9. Reinstalled the copper tube, check valve and compressor head. It was not necessary to replace the head gaskets. Care must be taken to make note of the position of the gaskets when reinstalling. I used MEGALOC seal on the check valve. I also removed and reinstalled the nipple on the head that mates to the copper pipe using the MEGALOC sealant. I used the original ferrules on the copper pipe. Although I purchased new ferrule, I decided not to use them. The original ferrules worked.
10. Removed and reinstalled the fitting that connects to the hose. I used MAGTAPE for this.
11. All the fixes worked well. The compressor holds pressure (it's been two weeks since the fix and there is no loss of pressure).
The pressure gauge broke off
Tool Type
Compressor
Difficulty
Easy
Time
15-30 minutes
Tools Used
Wrench Set
Parts Used
The regulator, nipple, & the drain were all broken.
Tool Type
Compressor
Difficulty
Easy
Time
30-60 minutes
Tools Used
Wrench Set, Nylon tape
Slow air leak
Tool Type
Compressor
Difficulty
Easy
Time
Less than 15 minutes
Tools Used
Wrench Set, none
Parts Used
OEM stands for Original Equipment Manufacturer and means the part you’re buying is sourced directly from the manufacturer who made your product. At eReplacementParts, we sell only genuine OEM parts, guaranteeing the part you’re purchasing is of better design and of higher quality than aftermarket parts.
Our product descriptions are a combination of data sourced directly from the manufacturers who made your product as well as content researched and curated by our content & customer service teams. This content is edited and reviewed internally before being made public to customers.
Our customer service team are at the ready daily to answer your part and product questions. We have a dedicated staff with decades of collective experience in helping customers just like you purchase parts to repair their products.
All our part reviews are solicited directly from other customers who have purchased this exact part. While we moderate these reviews for profanity, offensive language or personally identifiable information, these reviews are posted exactly as submitted and no alterations are made by our team.
All our customer repair instructions are solicited directly from other customers just like you who have purchased and replaced this exact part. While we moderate these reviews for profanity, offensive language or personally identifiable information, these reviews are posted exactly as submitted and no alterations are made by our team.
Based on data from past customer purchasing behaviors, these parts are most commonly purchased together along with the part you are viewing. These parts may be necessary or helpful to replace to complete your current repair.
All our installation videos are created and produced in collaboration with our in-house repair technician, Mark Sodja, who has helped millions of eReplacementParts customers over the last 13 years repair their products. Mark has years of experience in selling and repairing both commercial and residential products with a specialty in gas-powered equipment.
This data is collected from customers who submitted a repair instruction after replacing this exact part. Customers can rate how easy the repair was to complete and how long it took. We aggregate this data to provide a repair rating that allows customers to quickly determine the difficulty and time needed to perform their own repair.