676-A, B, C, 676F-A, B, C
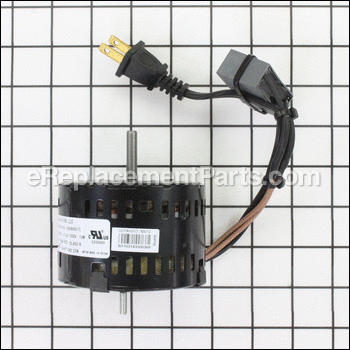
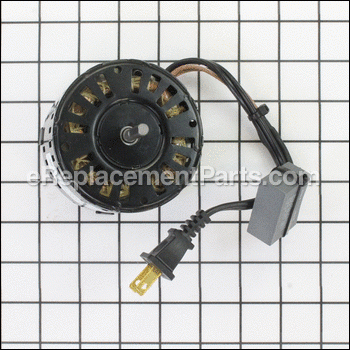
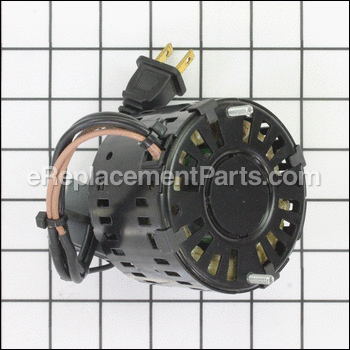
Srv Motor F/676, 680, Designer S99080517
OEM part for: Broan, Nutone
Part Number: S99080517
Compatibility
This part will fit the following 26 machines
Broan
Nutone
This item works with the following types of products:
- Ventilation Parts
This part replaces obsolete part #: S99080517H, S99080517I, S97009752G, S99080517C, S99080517A, S99080517F, S99080517D, S97009752 (676-A, B, C, 676F-A, B, C), 99080517I, 99080517C, 97009752G, 99080517D, 99080517H, 99080517A, 99080517F, 99080517G, 99080517E, 99080517B, 99080517, 97009752F, 97009752D, 97009752C, S97009752, 97009752B, 97009752A, 97009752E
Customer Part Reviews ?
- 1
Questions & Answers ?
Our customer Service team is at the ready daily to answer your part and product questions.

Ask our Team
We have a dedicated staff with decades of collective experience in helping customers just like you purchase parts to repair their products.
Does this fit my product?Questions & Answers for Srv Motor F/676, 680, Designer
Customer Repair Instructions ?
All our customer repair instructions are solicited directly from other customers just like you who have purchased and replaced this exact part.
Had to replace the blower motor in my bathroom blower.
Tool Type
Ventilation
Difficulty
Easy
Time
Less than 15 minutes
Tools Used
Screwdriver
Motor bearings were worn and noisy. Lots of axial play in motor shaft noted upon disassembly. Wheel was ok, just dirty.
Tool Type
Ventilation
Difficulty
Easy
Time
1-2 hours
Tools Used
Screwdriver, Socket set, Adjustable Wrench, utility knife
Remove light lens.
Remove light bulb.
Use utility knife to cut thru caulk I used a year ago to secure cover to ceiling. (I cleaned and oiled the motor and wheel about 15 months ago when the bathroom fan became too noisy.)
Unplug light and motor.
Use Crescent wrench to loosen and remove nut and washers securing light housing.
Use old straight bladed screwdriver or putty knife to pop loose the single tab on one side of the sheet metal plate that the motor is mounted to. It is hard to tell which side has the single tab vs the two tabs, so it took a while to do this step.
Mark the fan housing to indicate for future repairs which side the single tab is located on.
R&R motor from bracket using socket/ratchet, or crescent wrench.
Reverse order to re-assemble.
Use a bit of caulk or glue to attach cover to ceiling. Secure with blue tape until dry.
New installation sounds and works great!
Motor going bad
Tool Type
Ventilation
Difficulty
Easy
Time
15-30 minutes
Tools Used
Nutdriver
Parts Used
Bad vibration/loud noise when fan was running
Tool Type
Ventilation
Difficulty
Easy
Time
15-30 minutes
Tools Used
Screwdriver
2. Removed vent cover
3. Unplugged power cord from fan motor to housing
4. Removed screw securing motor bracket to housing
5. Removed motor bracket and fan motor
6. Assembled new motor bracket, fan motor and fan blade
7. Inserted new assembly in housing
8. Secured motor bracket to housing with screw
9. Plugged power cord from motor into housing socket
10. Replaced vent cover
11. Restored power
Fan was extremely noisy
Tool Type
Ventilation
Difficulty
Easy
Time
15-30 minutes
Tools Used
Pliers, Thin blade to pry with and a ladder
Parts Used
Remove the light bulb to access the nut holding the light reflector
Unplug the light housing electrical connector
There are three tabs in slots holding the fan and fan mount.
Gently work a screwdriver between the fan mount and the outer shell of the unit on the side of the single tab
Unplug the fan and pry the tab out of the slot, the fan can be pulled down in a hinging movement releasing the other two tabs.
Gently pry the fan blade off the fan shaft
Remove the two nuts holding the fan motor and remove the motor
Reassemble in the reverse order, but when inserting the fan mount into the outer shell put the two tabs in first and gently hinge the fan assembly up and push up till the third tab snaps into place.
Bathroom exhaust fan replacement
Tool Type
Ventilation
Difficulty
Easy
Time
15-30 minutes
Tools Used
Screwdriver, Nutdriver
Existing motor bearing was worn and fan was noisy
Tool Type
Ventilation
Difficulty
Medium
Time
15-30 minutes
Tools Used
Screwdriver, Vacuum Cleaner
Parts Used
Hard part was getting grill screws lined up with holes in frame at the end.
Bathroom fan. It was old we bought it in May of 1991. It started making a terrible noise
Tool Type
Ventilation
Difficulty
Easy
Time
30-60 minutes
Tools Used
Screwdriver
Parts Used
Motor stopped working.
Tool Type
Ventilation
Difficulty
Easy
Time
15-30 minutes
Tools Used
Screwdriver, Pliers
Parts Used
Ventilator worn out.
Tool Type
Ventilation
Difficulty
Easy
Time
30-60 minutes
Tools Used
Screwdriver, Socket set, Nutdriver
2. Removed ventilator cover
3. Removed light bulb
4. Unplugged light from the main unit
5. Removed nut attaching light housing to the main unit and removed light housing
6. Unplugged fan from the main unit
7. Used screwdriver to gently removed fan housing from the main unit.
8. Replaced fan and blower wheel and reassembled in reverse order.
OEM stands for Original Equipment Manufacturer and means the part you’re buying is sourced directly from the manufacturer who made your product. At eReplacementParts, we sell only genuine OEM parts, guaranteeing the part you’re purchasing is of better design and of higher quality than aftermarket parts.
Our product descriptions are a combination of data sourced directly from the manufacturers who made your product as well as content researched and curated by our content & customer service teams. This content is edited and reviewed internally before being made public to customers.
Our customer service team are at the ready daily to answer your part and product questions. We have a dedicated staff with decades of collective experience in helping customers just like you purchase parts to repair their products.
All our part reviews are solicited directly from other customers who have purchased this exact part. While we moderate these reviews for profanity, offensive language or personally identifiable information, these reviews are posted exactly as submitted and no alterations are made by our team.
All our customer repair instructions are solicited directly from other customers just like you who have purchased and replaced this exact part. While we moderate these reviews for profanity, offensive language or personally identifiable information, these reviews are posted exactly as submitted and no alterations are made by our team.
Based on data from past customer purchasing behaviors, these parts are most commonly purchased together along with the part you are viewing. These parts may be necessary or helpful to replace to complete your current repair.
All our installation videos are created and produced in collaboration with our in-house repair technician, Mark Sodja, who has helped millions of eReplacementParts customers over the last 13 years repair their products. Mark has years of experience in selling and repairing both commercial and residential products with a specialty in gas-powered equipment.
This data is collected from customers who submitted a repair instruction after replacing this exact part. Customers can rate how easy the repair was to complete and how long it took. We aggregate this data to provide a repair rating that allows customers to quickly determine the difficulty and time needed to perform their own repair.


