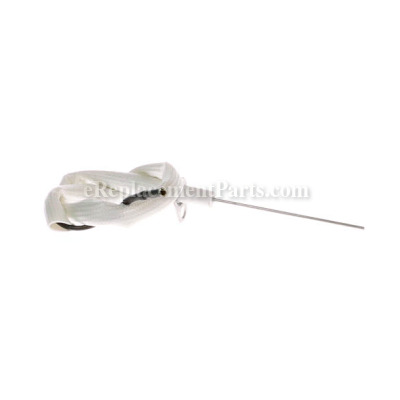
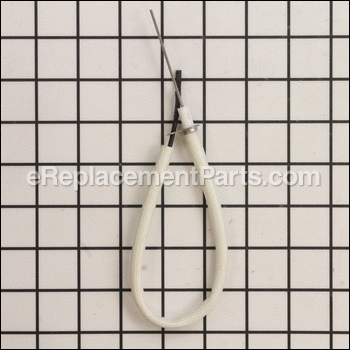
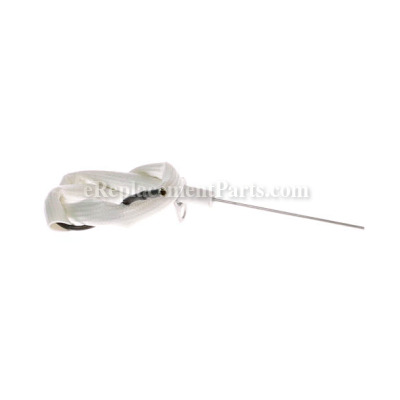
This item is sourced from the original manufacturer to be used with outdoor gas grills from Napoleon. The electrode wire connects to the ignitor wire and is mounted near the burner tube. The electrode uses the electric charge from the ignitor to create an electric arc against the burner that lights the fuel that is emitted by the burner. This item is available as an individual replacement part, please note the ignitor is a separate item.
Main Burner Electrode N240-0016
OEM part for: Napoleon
Part Number: N240-0016
Jump To:
Frequently Purchased Together ?
Compatibility
This part will fit the following 11 machines
Napoleon
This item works with the following types of products:
This part replaces obsolete part #: N240-0016-RP
Repair Videos ?
|
Having trouble getting your grill to light up? A common cause of this issue is a defective ignition switch. We'll sho...
November 08, 2012
|
Customer Part Reviews ?
- 1
Questions & Answers ?
Our customer Service team is at the ready daily to answer your part and product questions.

Ask our Team
We have a dedicated staff with decades of collective experience in helping customers just like you purchase parts to repair their products.
Does this fit my product?Questions & Answers for Main Burner Electrode
Customer Repair Instructions ?
All our customer repair instructions are solicited directly from other customers just like you who have purchased and replaced this exact part.
Ignitor did not work
Tool Type
Outdoor Grill
Difficulty
Easy
Time
15-30 minutes
Tools Used
Pliers, Nutdriver
Bent old collector box out of the way to gain access to mounting screw
Removed sheet metal screw using 1/4" nutdriver
Removed old wire from spark producer - used needle nose pliers to remove broken wire socket
Removed old wire and collector from grill by pulling through grill base
threaded new wire through collector box and hole in grill base
connected wire to spark producer
fastened collector box and wire to grill base with sheet metal screw using 1/4" nut driver, ensuring collector box remained parallel (lined up appropriately) to the grill burner
bent collector box over end of electrode
turned on gas and tested - fired first time, and every time since
This was a very simple repair to perform, and inexpensive. Under $15 to restore functionality.
Spark igniter replaced
Tool Type
Outdoor Grill
Difficulty
Easy
Time
15-30 minutes
Tools Used
Nutdriver, None
Parts Used
Main burner rusted and electrodes were shot
Tool Type
Outdoor Grill
Difficulty
Medium
Time
1-2 hours
Tools Used
Screwdriver, Socket set, Nutdriver
Removed all knobs and removed the control dashboard.
Loosened gas manifold and removed burner and replaced with new
Reset manifold and adjusted burner vent
Then just reassemble.
Hardest part of job was getting at fasteners to remove
igniter not working - irregular flame
Tool Type
Outdoor Grill
Difficulty
Easy
Time
30-60 minutes
Tools Used
Nutdriver
2) remove sear plates
3) using 1/4" socket or nut driver remove 2 screws at rear of burner midway between right and left burners
4) lift up old burner at rear and slide out
5) reverse process to reinstall
If installing a new igniter:
1) remove old igniter gripping the outside and turning counter clockwise, remove hex nut and slide out from under the grill. pull wires from old to install on new, reverse process to install.
If installing new main burner electrode:
1) with igniter out bend back electrode shield and remove 1/4 inch screw, unplug wire from igniter, remove old electrode and reverse process to reinstall.
***I recommend doing all together and it is wise to inspect the drip pan prior to ordering!! It slides out from under the grill with the doors open and is very likely to be rusted. Get all your parts at once and do the whole job in under an hour! Like a new grill!!
Total overhaul, main burner replacement, steam clean and related unit.
Tool Type
Outdoor Grill
Difficulty
Easy
Time
15-30 minutes
Tools Used
Socket set, Nutdriver, N/A
Grill would not light with starter
Tool Type
Outdoor Grill
Difficulty
Easy
Time
Less than 15 minutes
Tools Used
Screwdriver
You need to keep the screw from the old one as the replacement does not come with a new one.
Burner tube was failing, ignitor was inoperative
Tool Type
Outdoor Grill
Difficulty
Medium
Time
15-30 minutes
Tools Used
Pliers, Wrench Set, rat-tail file
2. Removed old burner, ignitor and electrode.
3. Enlarged hole for ignitor button.
4. Bent electrode cover to allow for longer electrode.
5. Opened air intakes to match original burner tube.
6. Installed new burner.
7. Re-installed drip pans and grates.
8. Tested.
Replaced all worn out parts.
Tool Type
Outdoor Grill
Difficulty
Medium
Time
1-2 hours
Tools Used
Screwdriver, Pliers, Socket set, Pressure washer
OEM stands for Original Equipment Manufacturer and means the part you’re buying is sourced directly from the manufacturer who made your product. At eReplacementParts, we sell only genuine OEM parts, guaranteeing the part you’re purchasing is of better design and of higher quality than aftermarket parts.
Our product descriptions are a combination of data sourced directly from the manufacturers who made your product as well as content researched and curated by our content & customer service teams. This content is edited and reviewed internally before being made public to customers.
Our customer service team are at the ready daily to answer your part and product questions. We have a dedicated staff with decades of collective experience in helping customers just like you purchase parts to repair their products.
All our part reviews are solicited directly from other customers who have purchased this exact part. While we moderate these reviews for profanity, offensive language or personally identifiable information, these reviews are posted exactly as submitted and no alterations are made by our team.
All our customer repair instructions are solicited directly from other customers just like you who have purchased and replaced this exact part. While we moderate these reviews for profanity, offensive language or personally identifiable information, these reviews are posted exactly as submitted and no alterations are made by our team.
Based on data from past customer purchasing behaviors, these parts are most commonly purchased together along with the part you are viewing. These parts may be necessary or helpful to replace to complete your current repair.
All our installation videos are created and produced in collaboration with our in-house repair technician, Mark Sodja, who has helped millions of eReplacementParts customers over the last 13 years repair their products. Mark has years of experience in selling and repairing both commercial and residential products with a specialty in gas-powered equipment.
This data is collected from customers who submitted a repair instruction after replacing this exact part. Customers can rate how easy the repair was to complete and how long it took. We aggregate this data to provide a repair rating that allows customers to quickly determine the difficulty and time needed to perform their own repair.


