eReplacementParts.com
877-346-4814
Bissell Parts
Repair Parts Home
  
Vacuum Parts
  
Bissell Parts
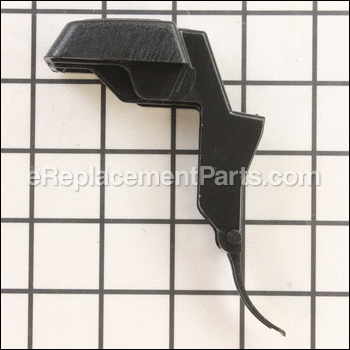
  B-203-8075 Lever Release

Lever Release B-203-8075

OEM part for: Bissell

Part Number: B-203-8075


Install
Videos!
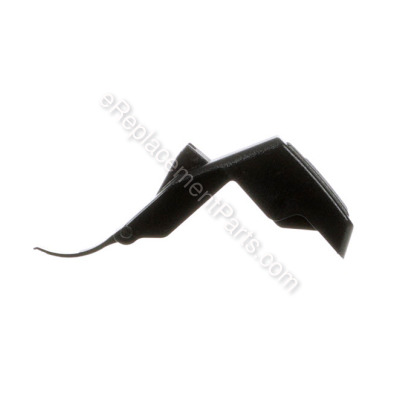
Lever Release - B-203-8075:Bissell 360 View
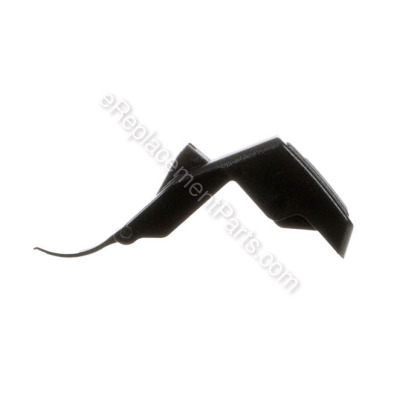
Lever Release - B-203-8075:BissellLever Release - B-203-8075:BissellLever Release - B-203-8075:Bissell 360 View
Usually ships in 7 - 12 business days
Leaves our warehouse within
7 - 12 business days
Easy Less than 15 minutes (13 rated repairs)?
OEM: Original Equipment Manufacturer ?
Bissell
Does this d-block d-md-none fit my product?

Product Description ?

This release lever is priced as an individual replacement part. It is made of plastic and will need replacing if it becomes broken. The lever attaches to the top cover and is used to put the vacuum in different cleaning positions. When replacing this part a screwdriver may be needed. This is an original Bissell replacement part that is sourced from the manufacturer for use with bagless vacuum cleaners.

  • Classification: Part
  • Weight: 0.06 lbs.
  • Shipping: Ships Worldwide

Compatibility

This part will fit the following 2 machines

Bissell

68C7 Upright Bagless Vacuum View Diagrams & Manuals
12B1 (1240) Powerforce Helix Bagless Upright View Diagrams & Manuals
Don't see yours? Try searching our site for :

This item works with the following types of products:

  • Vacuum Parts

Customer Part Reviews ?

4.8
Average Rating (out of 5):
5 Reviews
Click to filter by ratings:
5 stars
4
4 stars
1
3 stars
0
2 stars
0
1 stars
0
  • Highest Rating
  • Most Recent
< PREV
  • 1
NEXT >
  • Easy repair
    Just what I needed and shipping was fast
    Guest - April 7, 2022 Verified Purchase
    vacuum part
    The vacuum part fit perfectly. Selection of the part on site was also easy. I found a youtube video showing the installation procedure.
    Guest - January 20, 2022 Verified Purchase
    Lever release
    eReplacementParts had the lever release for my Bissell vacuum in stock and was shipped promptly.
    Guest - November 23, 2020 Verified Purchase
    Release lever
    Part received was was an exact replacement. No problems installing. Would purchase from seller again.
    Ronald - January 13, 2020 Verified Purchase
    Easy repair
    Fit was great
    Guest - January 20, 2022 Verified Purchase
    t
    t
    t - t days ago Verified Purchase
    eReplacementParts Team
    t

    Questions & Answers ?

    Our customer Service team is at the ready daily to answer your part and product questions.

    photo of team member
    Ask our Team

    We have a dedicated staff with decades of collective experience in helping customers just like you purchase parts to repair their products.

    Does this fit my product?

    Questions & Answers for Lever Release


    y as till une vido qui montre comment poser cette pice si oui prouver vous me l'envoyer merci Denis
    Denis for model number bissell 358 power force asked on 2022-09-30
    Hello Denis, Thank you for the question. Very sorry, we do not have a video at this time for the lever. Here are some instructions from a previous customer that has installed the Lever. 1. Remove two screws holding case surrounding the lever release. 2. Remove the lever release by prying out with small screwdriver, a little pressure is required and another set of hands to help. One set of hands with small screwdriver to slightly spread the case holding the lever and the other set of hands to pop the lever out. A little pressure is necessary. 3. Snap new lever in place. 4. Replace the cover and the screws. We hope this helps!
    eReplacementParts Team September 30, 2022

    Customer Repair Instructions ?

    All our customer repair instructions are solicited directly from other customers just like you who have purchased and replaced this exact part.

    Easy Less than 15 minutes (13 rated repairs)?

    The vacuum would not stay upright.

    Bryan - March 23, 2016
    👍 10 of 10 people found this instruction helpful
    Tool Type

    Vacuum

    Difficulty

    Easy

    Time

    Less than 15 minutes

    Tools Used

    Screwdriver, Two small flathead screwdrivers were used.

    I popped off the wheel to give me a little extra working space. Turn the unit upside down. Insert a small screwdriver on each side of the plastic tabs that allows the release lever to pivot and hold it in place. Pry on the plastic tabs just enough to clear and have a second person pull the lever out from the top side. After removing the old broken lever, the new one can be pushed in from the top. You will hear a clicking sound when it snaps into place. No tools required to install the new lever.
    Did you find this story helpful?
    Thanks for voting and helping fellow customers!

    The brush roller was worn down and the lever release was broken, the handle would not stay upright.

    Wayne - March 1, 2018
    👍 2 of 2 people found this instruction helpful
    Tool Type

    Vacuum

    Difficulty

    Easy

    Time

    Less than 15 minutes

    Tools Used

    Screwdriver

    1. Remove the screws from the bracket of the vacuum surrounding the brush roller.
    2. Remove the belt from around old roller and the roller comes right out.
    3. Replace the belt around the new roller and it snaps right into place.
    4. Replace the screws back in the bracket holding the roller unit.

    1. Remove two screws holding case surrounding the lever release.
    2. Remove the lever release by prying out with small screwdriver, a little pressure is required and another set of hands to help. One set of hands with small screwdriver to slightly spread the case holding the lever and the other set of hands to pop the lever out. A little pressure is necessary.
    3. Snap new lever in place.
    4. Replace the cover and the screws.
    Did you find this story helpful?
    Thanks for voting and helping fellow customers!

    Lever that holds vacuum upright broke

    Jerry - September 15, 2017
    👍 2 of 2 people found this instruction helpful
    Tool Type

    Vacuum

    Difficulty

    Medium

    Time

    15-30 minutes

    Tools Used

    Screwdriver, Pliers, Ice pick(s)

    The difficult part is getting the old one out. Turn the vacuum over and observe the bottom of the lever mechanism. There are two tabs that must be pried away from the latch mechanism. Careful study will reveal the process. You might also use two long finishing nails to both pry and hold each tab away from the latch do one side and then carefully the other the mechanism will now pull free at the top. The new one simply inserts and pops into place.
    Did you find this story helpful?
    Thanks for voting and helping fellow customers!

    lever release was broke

    stanley - December 31, 2018
    👍 1 of 1 people found this instruction helpful
    Tool Type

    Vacuum

    Difficulty

    Easy

    Time

    Less than 15 minutes

    Tools Used

    , 2 zip ties

    slide 2 zip ties in each side of the lever to release it. then slide the new lever in until it clicked
    Did you find this story helpful?
    Thanks for voting and helping fellow customers!

    Release lever broke

    George - January 14, 2022
    Tool Type

    Vacuum

    Difficulty

    Easy

    Time

    Less than 15 minutes

    Tools Used

    Screwdriver

    Quick and easy.
    Did you find this story helpful?
    Thanks for voting and helping fellow customers!

    Just replace the footpedal for the vacuum !!!

    Christopher - August 7, 2020
    Tool Type

    Vacuum

    Difficulty

    Easy

    Time

    30-60 minutes

    Tools Used

    Screwdriver, Just screwdriver !

    Followed the video on YouTube and then took the two screwdrivers pools that close together then pull the step part polish straight out then replace the part and it clicked right In !!!
    Did you find this story helpful?
    Thanks for voting and helping fellow customers!

    Handle release broke

    Barbara - February 13, 2019
    Tool Type

    Vacuum

    Difficulty

    Easy

    Time

    Less than 15 minutes

    Tools Used

    , Phillips screwdriver

    Disassembled and removed broken release lever, installed new release and reassembled.
    Did you find this story helpful?
    Thanks for voting and helping fellow customers!

    The lever for the vacuum upper release tab broke off

    Todd - September 1, 2017
    Tool Type

    Vacuum

    Difficulty

    Easy

    Time

    Less than 15 minutes

    Tools Used

    Screwdriver

    Removed the bottom cover,roller and belt. Released tabs and removed lever. Then reinstalled new part and reassembled.
    Did you find this story helpful?
    Thanks for voting and helping fellow customers!

    broken plastic

    John - July 24, 2017
    Tool Type

    Vacuum

    Difficulty

    Easy

    Time

    Less than 15 minutes

    Tools Used

    Screwdriver

    Open the brushroll housing and remove the broken lever. Install the new lever and reassemble the housing.
    Did you find this story helpful?
    Thanks for voting and helping fellow customers!

    Old foot lever was broken, vacuum wouldn't stay standing. Old filter was turn.

    Adam - June 24, 2017
    Tool Type

    Vacuum

    Difficulty

    Easy

    Time

    Less than 15 minutes

    Tools Used

    Screwdriver, Hands

    Replacing old filter is pretty much self explanatory.

    Used flat blade screwdriver to pry out old lever by turning vacuum upside down and depressing tabs that hold foot pedal in place. Slide out old pedal. Install new pedal by sliding it down gently into place until it clicks in place.
    Did you find this story helpful?
    Thanks for voting and helping fellow customers!

    OEM stands for Original Equipment Manufacturer and means the part you’re buying is sourced directly from the manufacturer who made your product. At eReplacementParts, we sell only genuine OEM parts, guaranteeing the part you’re purchasing is of better design and of higher quality than aftermarket parts.

    Our product descriptions are a combination of data sourced directly from the manufacturers who made your product as well as content researched and curated by our content & customer service teams. This content is edited and reviewed internally before being made public to customers.

    Our customer service team are at the ready daily to answer your part and product questions. We have a dedicated staff with decades of collective experience in helping customers just like you purchase parts to repair their products.

    All our part reviews are solicited directly from other customers who have purchased this exact part. While we moderate these reviews for profanity, offensive language or personally identifiable information, these reviews are posted exactly as submitted and no alterations are made by our team.

    All our customer repair instructions are solicited directly from other customers just like you who have purchased and replaced this exact part. While we moderate these reviews for profanity, offensive language or personally identifiable information, these reviews are posted exactly as submitted and no alterations are made by our team.

    Based on data from past customer purchasing behaviors, these parts are most commonly purchased together along with the part you are viewing. These parts may be necessary or helpful to replace to complete your current repair.

    All our installation videos are created and produced in collaboration with our in-house repair technician, Mark Sodja, who has helped millions of eReplacementParts customers over the last 13 years repair their products. Mark has years of experience in selling and repairing both commercial and residential products with a specialty in gas-powered equipment.

    This data is collected from customers who submitted a repair instruction after replacing this exact part. Customers can rate how easy the repair was to complete and how long it took. We aggregate this data to provide a repair rating that allows customers to quickly determine the difficulty and time needed to perform their own repair.

    eReplacementParts.com
    7174 South 400 West
    Suite 5
    Midvale, UT 84047
    visa mastercard discover american express PayPal