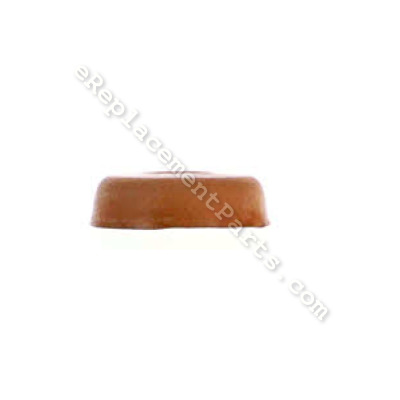


This is a Genuine Coleman replacement part designed for use with some of their Lanterns and Stoves. This item sits on the end of the Pump Plunger and provides an air tight seal. This part is made out of Leather and it is Sold Individually. Please note Leather Cup can have cracks and also can become completely hardened. In either of these cases, the cup will require replacement.
Leather Pump Cup 2165091
OEM part for: Coleman
Part Number: 2165091
$4.99
Usually ships in 7 - 12 business days
7 - 12 business days
Compatibility
This part will fit the following 31 machines
Coleman
200A195 1-Mantle Gas Lantern View Diagrams & Manuals
200A700 1-Mantle Gas Lantern View Diagrams & Manuals
220F195 2 Mantle Gas Lantern View Diagrams & Manuals
220H195 2 Mantle Gas Lantern View Diagrams & Manuals
220J195 2 Mantle Gas Lantern View Diagrams & Manuals
220K195 2 Mantle Gas Lantern View Diagrams & Manuals
228D 2 Mantle Gas Lantern View Diagrams & Manuals
228E 2 Mantle Gas Lantern View Diagrams & Manuals
228F195 2 Mantle Gas Lantern View Diagrams & Manuals
228H195 2 Mantle Gas Lantern View Diagrams & Manuals
228J195 2 Mantle Gas Lantern View Diagrams & Manuals
275-710 2 Mantle Gas Lantern View Diagrams & Manuals
243 Instant Lite Lantern View Diagrams & Manuals
243A Instant Lite Lantern View Diagrams & Manuals
242C Single Mantle Propane Lantern View Diagrams & Manuals
206-703 Kerosene Lantern View Diagrams & Manuals
237-195 Kerosene Single-Mantle Lantern View Diagrams & Manuals
237A195 Kerosene Single-Mantle Lantern View Diagrams & Manuals
237B195 Kerosene Single-Mantle Lantern View Diagrams & Manuals
201-700 Kerosene Lantern View Diagrams & Manuals
201-7009 Kerosene Lantern View Diagrams & Manuals
234 Single Mantle Kerosene Lantern View Diagrams & Manuals
202 Single Mantle Lantern View Diagrams & Manuals
413G499 2-Burner Gas Camp Stove View Diagrams & Manuals
413H499 2 Burner Gas Camp Stove View Diagrams & Manuals
425E499 2 Burner Gas Camp Stove View Diagrams & Manuals
426D499 3 Burner Gas Camp Stove View Diagrams & Manuals
22E197 2 Mantle Gas Lantern View Diagrams & Manuals
413E Fuel Stove View Diagrams & Manuals
413F Fuel Stove View Diagrams & Manuals
505A Easi-lite Single Burner Stove View Diagrams & Manuals
Show More Compatible Models
This item works with the following types of products:
- Lighting Parts
- Range Parts
Customer Part Reviews ?
Average Rating (out of 5):
Click to filter by ratings:
5 stars
2
4 stars
0
3 stars
0
2 stars
0
1 stars
0
< PREV
- 1
Correct part
Easy ordering, timely arrival. Outstanding
Guest -
September 20, 2019
Verified Purchase
Everything fit and working great, took $ 5.00 garage sale stove and made a new one.!!!!
Come in a timely manner, everything works
Guest -
July 8, 2019
Verified Purchase
t
t
t -
t days ago
Verified Purchase
eReplacementParts Team
t
Questions & Answers ?
Our customer Service team is at the ready daily to answer your part and product questions.

Ask our Team
We have a dedicated staff with decades of collective experience in helping customers just like you purchase parts to repair their products.
Does this fit my product?Questions & Answers for Leather Pump Cup
No questions have been asked yet
Customer Repair Instructions ?
All our customer repair instructions are solicited directly from other customers just like you who have purchased and replaced this exact part.
Leather gasket was worn out in Coleman stove fuel pump.
Jeanie - January 31, 2017
👍 6 of 7 people found this instruction helpful
Tool Type
Lighting
Difficulty
Easy
Time
Less than 15 minutes
Tools Used
Screwdriver
Parts Used
Used a small flat blade screwdriver to take wire clip out of the hole, pulled the plunger out of the sleeve. Then, used a screwdriver to bend back ears of the washer. Removed the old leather seal, replaced with the new seal, put the washer back in place on the plunger. added drop of motor oil to new leather. Installed the plunger in the sleeve and fastened the wire clip back in the hole. Less than 10 minutes.
Did you find this story helpful?
Thanks for voting and helping fellow customers!
The original leather pump cup was bad in a Coleman fuel lantern I paid $12 for.
warren - April 1, 2017
👍 2 of 2 people found this instruction helpful
Tool Type
Lighting
Difficulty
Easy
Time
Less than 15 minutes
Tools Used
Parts Used
I simply replaced the leather gasket.
Did you find this story helpful?
Thanks for voting and helping fellow customers!
Coleman model 413E gas camp cook stove was acting up with high yellow flames instead of small blue flames
J - April 29, 2016
👍 4 of 6 people found this instruction helpful
Tool Type
Heater
Difficulty
Easy
Time
15-30 minutes
Tools Used
Screwdriver, Pliers, Wrench Set, Adjustable Wrench
Pulled clip from fuel tank at the plunger and installed new parts with some oil on the new leather cup. Unscrewed valve and Generator assy. and applied sealer to threads on new assembly, and tightened then screwed on the new cap. Pumped it up and it works like it did new in 1956.
Did you find this story helpful?
Thanks for voting and helping fellow customers!
Coleman 425C stove would not light
Robert - March 7, 2019
👍 1 of 1 people found this instruction helpful
Tool Type
Lighting
Difficulty
Medium
Time
1-2 hours
Tools Used
Pliers, Wrench Set
Parts Used
Followed simple instructions on package. Had trouble threading the new generator rod into the valve fitting, even though the old rod would thread back in place just fine. The threads finally engaged. Dickered with the valve wheel adjusting nut a good while. At first the flame would not burn high enough. Later it burned high, but the valve wheel was adjusted to where it would not turn off. The flame would not tun off. I figured out that the position of the valve wheel nut regulates how far the valve will open. When I had that figured out, I set it to where the flame burned the highest, and would also shut off. If adjusted too far the other way, the flame will not burn high enough. When wheel bottoms out, adjust the nut to give the wheel more lack. Be sure to have the auxilarry burner turned off, as this will bleed off fuel pressure from the main burner while trying to adjust main burner flame height. To be honest, I don't know if the old generator needed replacing, even though it was probably the original generator. It may have been that the valve wheel simply needed adjusting. Whatever the case, the old 425C operates like a new one. The needle on the old generator was bent where it protruded out of the end of the tube. I straightened it up, but replaced the generator anyway. I am a novice at this. The select model type with the option of lighting, or range, makes no sense. I selected one because it was the only way to be allowed to submit this. Also had to select leather pump cup to submit, which is a bad glitch in your program.
Did you find this story helpful?
Thanks for voting and helping fellow customers!
trouble lighting
Larry - January 8, 2019
👍 1 of 1 people found this instruction helpful
Tool Type
Lighting
Difficulty
Easy
Time
Less than 15 minutes
Tools Used
Screwdriver, Air pressure
removed air pump, replaced leather pump cap, replaced check valve and air stem. I cleaned all other parts with air hose. Replaced the mantles, filled with fuel, pumped air stem, and it lit right away, works great.
Did you find this story helpful?
Thanks for voting and helping fellow customers!
Primer was wore out
Tim - August 21, 2018
👍 1 of 1 people found this instruction helpful
Tool Type
Lighting
Difficulty
Easy
Time
Less than 15 minutes
Tools Used
Pliers
Parts Used
Took old leather primer out and replaced it with new old one was loose new one was nice and tight
Did you find this story helpful?
Thanks for voting and helping fellow customers!
Leather seal on Coleman camp stove air pump dried and cracked.
Ronald - August 1, 2018
👍 1 of 1 people found this instruction helpful
Tool Type
Range
Difficulty
Easy
Time
Less than 15 minutes
Tools Used
Pliers, Adjustable Wrench, Motor oil
Parts Used
Remove air pump from fuel tank.
Remove old seal from pump stem.
Note fastener orientation.
Soak new plunger in oil overnight
Reassemble pump stem.
Reinstall pump stem into fuel tank.
Careful, it is easy to damage the new, swollen seal.
Test the new pump.
Remove old seal from pump stem.
Note fastener orientation.
Soak new plunger in oil overnight
Reassemble pump stem.
Reinstall pump stem into fuel tank.
Careful, it is easy to damage the new, swollen seal.
Test the new pump.
Did you find this story helpful?
Thanks for voting and helping fellow customers!
Coleman lantern would not stay lit
Patrick - July 11, 2018
👍 1 of 1 people found this instruction helpful
Tool Type
Lighting
Difficulty
Easy
Time
Less than 15 minutes
Tools Used
Adjustable Wrench
Watched repair on U-TUBE of vintage Coleman lanterns. Followed instructions on package of new generator. Replaced leather pump cup.
Did you find this story helpful?
Thanks for voting and helping fellow customers!
Filler cap gasket leaking
Don - July 1, 2018
👍 1 of 1 people found this instruction helpful
Tool Type
Range
Difficulty
Easy
Time
Less than 15 minutes
Tools Used
Screwdriver
Replaced filler cap on old Coleman stove
Did you find this story helpful?
Thanks for voting and helping fellow customers!
Pump on lantern needed a new leather cup.
Charles - June 27, 2018
👍 1 of 1 people found this instruction helpful
Tool Type
Lighting
Difficulty
Easy
Time
Less than 15 minutes
Tools Used
Screwdriver
Parts Used
Removed the pump clip with a screw driver removed the pump, removed the retaining clip for the cup removed old cup reversed the procedure and reinstalled, very easy
Did you find this story helpful?
Thanks for voting and helping fellow customers!
Load More Install Stories
OEM stands for Original Equipment Manufacturer and means the part you’re buying is sourced directly from the manufacturer who made your product. At eReplacementParts, we sell only genuine OEM parts, guaranteeing the part you’re purchasing is of better design and of higher quality than aftermarket parts.
Our product descriptions are a combination of data sourced directly from the manufacturers who made your product as well as content researched and curated by our content & customer service teams. This content is edited and reviewed internally before being made public to customers.
Our customer service team are at the ready daily to answer your part and product questions. We have a dedicated staff with decades of collective experience in helping customers just like you purchase parts to repair their products.
All our part reviews are solicited directly from other customers who have purchased this exact part. While we moderate these reviews for profanity, offensive language or personally identifiable information, these reviews are posted exactly as submitted and no alterations are made by our team.
All our customer repair instructions are solicited directly from other customers just like you who have purchased and replaced this exact part. While we moderate these reviews for profanity, offensive language or personally identifiable information, these reviews are posted exactly as submitted and no alterations are made by our team.
Based on data from past customer purchasing behaviors, these parts are most commonly purchased together along with the part you are viewing. These parts may be necessary or helpful to replace to complete your current repair.
All our installation videos are created and produced in collaboration with our in-house repair technician, Mark Sodja, who has helped millions of eReplacementParts customers over the last 13 years repair their products. Mark has years of experience in selling and repairing both commercial and residential products with a specialty in gas-powered equipment.
This data is collected from customers who submitted a repair instruction after replacing this exact part. Customers can rate how easy the repair was to complete and how long it took. We aggregate this data to provide a repair rating that allows customers to quickly determine the difficulty and time needed to perform their own repair.