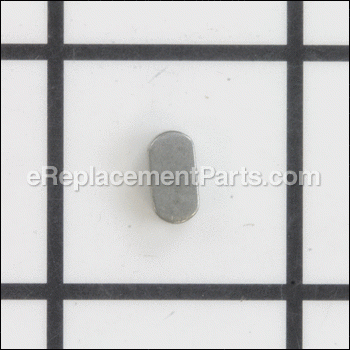
This is a genuine replacement part which is sourced directly from original equipment manufacturer. It is generally used on Delta planers. The key helps to secure cutter head shaft. This is a metal half moon key which is sold individually. You may need pliers to replace this item.
Key 1349860
OEM part for: Delta
Part Number: 1349860
7 - 12 business days
Compatibility
This part will fit the following 4 machines
Delta
This item works with the following types of products:
- Planer Parts
Customer Part Reviews ?
- 1
Questions & Answers ?
Our customer Service team is at the ready daily to answer your part and product questions.

Ask our Team
We have a dedicated staff with decades of collective experience in helping customers just like you purchase parts to repair their products.
Does this fit my product?Questions & Answers for Key
Customer Repair Instructions ?
All our customer repair instructions are solicited directly from other customers just like you who have purchased and replaced this exact part.
Pulley on cutter head had come loose and worn the inside so was loose on shaft.
Tool Type
Planer
Difficulty
Easy
Time
15-30 minutes
Tools Used
Wrench Set, Gear puller
Parts Used
Removed nut on end of shaft
Used gear puller to remove old pulley
Put in new key and placed new pulley on shaft
Put nut on end of shaft and tightened
Remplace drive belt and shields.
Making noise and found that nut on pulley was lose and pulley was wobbly
Tool Type
Planer
Difficulty
Medium
Time
15-30 minutes
Tools Used
Screwdriver
Parts Used
The cutter head shaft nut backed off and allowed the pulley to be hammered out of round so that the planer wouldn't make smooth cuts.
Tool Type
Planer
Difficulty
Medium
Time
30-60 minutes
Tools Used
Screwdriver, Socket set
Nut loosened on cutter head drive and destroyed belt and pulley
Tool Type
Planer
Difficulty
Easy
Time
15-30 minutes
Tools Used
Socket set
Install the new belt and replace the cover.
The drive pulley worn out causing the belt to go out of alignment, melting the belt and belt guard.
Tool Type
Planer
Difficulty
Medium
Time
15-30 minutes
Tools Used
Screwdriver, Wrench Set, Epoxy (plastic weld)
The existing cutterhead pulley whore out
Tool Type
Planer
Difficulty
Easy
Time
Less than 15 minutes
Tools Used
Screwdriver, Socket set
2. Removed the existing belt.
3. Removed the existing cutterhead pulley and key.
4. Installed the new cutterhead pulley and key.
5. Installed a new belt by gradually slipping it over the pulleys as I slowly turned the pulleys.
6. Installed the new belt guard.
Nut on cutter head drive pulley came loose during normal operation and belt, pulley and key were destroyed. Also, belt cover was badly damaged.
Tool Type
Planer
Difficulty
Easy
Time
30-60 minutes
Tools Used
Screwdriver, fine file. heat gun, duct tape, Loctite, wrench, allen wr
Parts Used
2. Remove two more Phillips head screws holding the damaged belt cover in place and remove the damaged belt and cover.
3. Use the heat gun to remold the cover and then apply duct tape to the inside and outside of the cover where the belt had worn a track thru the cover. (Replacement cover is no longer available).
4. Next I wiggled the pulley until it finally pulled off the shaft of the cutter head and also removed the damaged key sitting in the key-way. Used the file and 400 grit emery paper to smooth out the shaft, especially the area around the lip of the key-way.
5. Dropped in the new key and inserted the new pulley on the shaft. Put Removable Loctite on the threads of the nut and shaft, then tightened the nut holding the pulley onto the cutter head shaft.
6. Worked the new 6-rib drive belt onto the motor pulley and cutter head pulley. This is a very tight fit, so you need to start it on the smaller motor pulley and then force it in and forward on the larger new cutter head pulley. It will fit, but requires some brute force.
7. Before reassembly of the reshaped belt cover and planer side cover, I plugged the planer into power and tested it without any load (wood being planed). It ran well and there was no wobble in the new pulley which had fit smoothly on the cutter head shaft.
8. Disconnected from power and reinstalled the belt cover with two Phillips head screws, the main side cover using two Phillips head screws and reassembled the cutter head locking handle.
9. Reconnected to power and tested without planing wood and then under load. Works super!
Pulley came loose
Tool Type
Planer
Difficulty
Easy
Time
15-30 minutes
Tools Used
Screwdriver, Socket set, Soft mallet
Remove the pulley and belt cover
Remove the hex nut from the cutterhead shaft
Remove the pullet and the key
Square up the shaft keyway with a file if necessary
Place the new key in the key way
Place the new pulley on the shaft with a soft mallet
Tighten the hex nut on the shaft
Replace the belt , belt cover and side cover
Cutterhead nut loosened over time which cracked the pulley and broke the belt
Tool Type
Planer
Difficulty
Easy
Time
15-30 minutes
Tools Used
, Sandpaper, wood block, mini sledge hammer
Parts Used
2 Removed head lock assembly
3 Removed belt cover
4 Removed damaged belt and cutterhead wheel
5 Reinstalled in reverse order. Cutterhead shaft had a bit on one side of the keyway which needed sanding down to fit the new wheel
6 Used the wood block and mallet to drift the wheel back over the shaft and compress the new key
6 Applied loctite to cutterhead nut before reinstalling the belt cover
Sheared key on motor pulley
Tool Type
Planer
Difficulty
Easy
Time
15-30 minutes
Tools Used
Screwdriver, Adjustable Wrench, Allen wrench
Parts Used
2. Remove plastic housing with a phillips screw driver.
3. Lower cutting head down onto a scrap piece of wood to lock pulley shaft.
4. Remove drive belt from pulley.
5.Loosen nut from pulley.
6.Remove bad key from shaft and install new key.
7.Install pulley by aligning keyway of pulley with key on shaft and slide it onto shaft.
8.Apply blue lock tight onto threads and install nut onto shaft and tighten.
9.Install drive belt.
10.Install plastic housing with phillips screws.
11. Install locking handle with special screw.
12. Raise cutting head and remove scrap wood.
13. Plug in power cord.
14. Turn on planer to test.
OEM stands for Original Equipment Manufacturer and means the part you’re buying is sourced directly from the manufacturer who made your product. At eReplacementParts, we sell only genuine OEM parts, guaranteeing the part you’re purchasing is of better design and of higher quality than aftermarket parts.
Our product descriptions are a combination of data sourced directly from the manufacturers who made your product as well as content researched and curated by our content & customer service teams. This content is edited and reviewed internally before being made public to customers.
Our customer service team are at the ready daily to answer your part and product questions. We have a dedicated staff with decades of collective experience in helping customers just like you purchase parts to repair their products.
All our part reviews are solicited directly from other customers who have purchased this exact part. While we moderate these reviews for profanity, offensive language or personally identifiable information, these reviews are posted exactly as submitted and no alterations are made by our team.
All our customer repair instructions are solicited directly from other customers just like you who have purchased and replaced this exact part. While we moderate these reviews for profanity, offensive language or personally identifiable information, these reviews are posted exactly as submitted and no alterations are made by our team.
Based on data from past customer purchasing behaviors, these parts are most commonly purchased together along with the part you are viewing. These parts may be necessary or helpful to replace to complete your current repair.
All our installation videos are created and produced in collaboration with our in-house repair technician, Mark Sodja, who has helped millions of eReplacementParts customers over the last 13 years repair their products. Mark has years of experience in selling and repairing both commercial and residential products with a specialty in gas-powered equipment.
This data is collected from customers who submitted a repair instruction after replacing this exact part. Customers can rate how easy the repair was to complete and how long it took. We aggregate this data to provide a repair rating that allows customers to quickly determine the difficulty and time needed to perform their own repair.


