eReplacementParts.com
877-346-4814
Ryobi Parts

Insulator 791-181851

OEM part for: Ryobi, Troy-Bilt, MTD, Cub Cadet

Part Number: 791-181851


Install
Videos!
Insulator - 791-181851:Ryobi 360 View
Insulator - 791-181851:RyobiInsulator - 791-181851:RyobiInsulator - 791-181851:Ryobi 360 View
In Stock
Order within the next 7 hours and your part ships today!
Easy 15-30 minutes (7 rated repairs)?
OEM: Original Equipment Manufacturer ?
RyobiTroy-BiltMTDCub Cadet
Does this d-block d-md-none fit my product?

Product Description ?

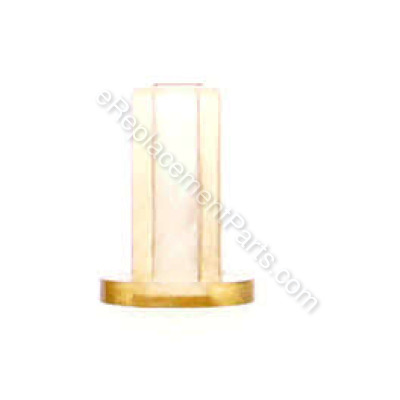
This authentic OEM insulator is located in the pinion gear of your handheld lawn and garden equipment in the blade housing. It acts as a protective barrier, preventing heat transfer and electrical conductivity between various components. To determine if the insulator requires replacement, keep an eye out for significant wear or any signs of abnormal heat buildup while operating your machine. To remove the insulator, consult your user manual for specific instructions on locating and accessing the insulator. Typically, the process involves unthreading the screws on the blade housing to disassemble it and carefully prying the insulator from the pinion gear. Once the new insulator is installed, reassemble your machine by following the steps in reverse order.

  • Classification: Part
  • Weight: 0.01 lbs.
  • Shipping: Ships Worldwide

Compatibility

This part will fit the following 30 machines

Ryobi

HS720r (41AJHS-A034) Handheld Tool View Diagrams & Manuals
HS720r (41AJHS-B034) Handheld Hedge Trimmer View Diagrams & Manuals
TP720r (41AJTP-A034) Handheld Tree Pruner View Diagrams & Manuals
TP720r (41AJTP-B034) Handheld Tree Pruner View Diagrams & Manuals
HS720R (41AJHS-A054) Hedge Trimmer View Diagrams & Manuals
HS720R (41AJHS-B054) Hedge Trimmer View Diagrams & Manuals
HS720R (706000001) Hedge Trimmer View Diagrams & Manuals
TP720R (41AJTPA054) Tree Pruner View Diagrams & Manuals
TP720R (41AJTPB054) Tree Pruner View Diagrams & Manuals
TP720R (611000001) Pruner View Diagrams & Manuals

Troy-Bilt

TBHS (41AJHS-C063) Attachment View Diagrams & Manuals
TBTP (41AJTP-C063) Attachment View Diagrams & Manuals
HS720r (41AJHS-A054) Hedge Trimmer Attachment View Diagrams & Manuals
HS720r (41AJHS-B054) Hedge Trimmer Attachment View Diagrams & Manuals
HS720r (41AJHS-C954) Hedge Trimmer Attachment View Diagrams & Manuals
TP720r (41AJTP-A054) Pole Saw Attachment View Diagrams & Manuals
TP720r (41AJTP-B054) Pole Saw Attachment View Diagrams & Manuals
TP720r (41AJTP-C954) Pole Saw Attachment View Diagrams & Manuals
41AJTP-C063 (TBTP) Tree Pruner Attachment View Diagrams & Manuals
41AJTP-A054 (TP720R) Pruner Attachment View Diagrams & Manuals
41AJTP-B054 (TP720R) Pruner Attachment View Diagrams & Manuals
41AJHS-A054 (HS720R) Trimmer View Diagrams & Manuals
41AJHS-B054 (HS720R) Trimmer View Diagrams & Manuals
41AJHS-C063 (TBHS) Hedge Trimmer Add-On View Diagrams & Manuals

MTD

HS720R (41AJHS-A034) Hedge Trimmer View Diagrams & Manuals
HS720R (41AJHS-B034) Hedge Trimmer View Diagrams & Manuals
TP720R (41AJTP-A034) Tree Pruner Attachment View Diagrams & Manuals
TP720R (41AJTP-B034) Tree Pruner Attachment View Diagrams & Manuals

Cub Cadet

HS720R (41AJHS-C954) Attachment View Diagrams & Manuals
TP720R (41AJTP-C954) Attachment View Diagrams & Manuals
Show More Compatible Models
Don't see yours? Try searching our site for :

This item works with the following types of products:

  • Hedge Trimmer Parts
  • Trimmer Parts
  • Pruner Parts

Customer Part Reviews ?

5
Average Rating (out of 5):
4 Reviews
Click to filter by ratings:
5 stars
4
4 stars
0
3 stars
0
2 stars
0
1 stars
0
  • Highest Rating
  • Most Recent
< PREV
  • 1
NEXT >
  • The part arrived on time and is a perfect fit
    This insulator/breakaway peace fit like a glove. I understand why Ryobitools built in break points in their tools, I wish I wasn’t always finding them. I still trust that replacement parts are and will still be available.
    Guest - August 6, 2022 Verified Purchase
    Ryobi repair
    The parts arrived quickly and in very good condition. Price and quality was good. I will continue to buy from you when I need parts.
    Guest - September 29, 2021 Verified Purchase
    Was right part right on time
    Awesome work great
    Guest - July 23, 2021 Verified Purchase
    Worked as expected, and received in good condition.
    My Ryobi pole saw is now back to working mode. Great prompt delivery.
    Guest - July 9, 2020 Verified Purchase
    t
    t
    t - t days ago Verified Purchase
    eReplacementParts Team
    t

    Questions & Answers ?

    Our customer Service team is at the ready daily to answer your part and product questions.

    photo of team member
    Ask our Team

    We have a dedicated staff with decades of collective experience in helping customers just like you purchase parts to repair their products.

    Does this fit my product?

    Questions & Answers for Insulator


    No questions have been asked yet

    Customer Repair Instructions ?

    All our customer repair instructions are solicited directly from other customers just like you who have purchased and replaced this exact part.

    Easy 15-30 minutes (7 rated repairs)?

    Insulator was broken

    Roy - June 26, 2020
    Tool Type

    Hedge Trimmer

    Difficulty

    Easy

    Time

    15-30 minutes

    Tools Used

    , 2\\

    Used 2" length Torque Bit size T-20: remove 2 T-20 screws from bottom identification plate, remove 10 T-20 screws from outside housing & 1 T-20 screw form assemble that holds Handle in unit, Remove 4 T-20 screws from inside plate & separate housing from the inside assemble. Remove cable & spider gear from unit & separate, remove insulator from spider gear with Putty Knife. Greased bearings, gears, blade assemble, cable & installed insulator in spider gear. Reassemble in reverse order, note - when installing handle in assemble to be sure to have the hole for set screw center on bottom of unit.
    Did you find this story helpful?
    Thanks for voting and helping fellow customers!

    The insulater rounded out on the inside causing the square cable shaft to slip.

    Jerry - May 31, 2020
    Tool Type

    Hedge Trimmer

    Difficulty

    Easy

    Time

    15-30 minutes

    Tools Used

    Screwdriver, Star tip screw driver is needed.

    1. I removed the screws holding the housing of the hedge trimmer attachment together.
    2. I separated the two plastic housing pieces, removing the side with the screws in it.
    3. I pulled the shaft out of the insulator, pulled the insulator out of the gear and replaced it with the new one.
    4. I put the shaft into the new insulator and placed it back into the gear.
    5. I put the housing back together and installed the screws.
    6. I attached the unit to my weed eater shaft and tested it.
    Did you find this story helpful?
    Thanks for voting and helping fellow customers!

    Set screw came loose. Which made the pruner head come off and insulator fell into brush and was lost.

    Anthony - December 13, 2018
    Tool Type

    Pruner

    Difficulty

    Easy

    Time

    Less than 15 minutes

    Tools Used

    Screwdriver

    Reattached insulator to cable. Then put head on and tighten set screw.
    Did you find this story helpful?
    Thanks for voting and helping fellow customers!

    Screw came out & cutting head fell off resulting in loss insulator.

    Charles - September 29, 2018
    Tool Type

    Pruner

    Difficulty

    Easy

    Time

    Less than 15 minutes

    Tools Used

    Screwdriver

    Ordered new insulator & installed. Reassembled cutting head to pole with new screw & I`m back in business.
    Did you find this story helpful?
    Thanks for voting and helping fellow customers!

    Ryobi gas engine drive head did not move hedge trimmer attachment blades

    Douglas - July 9, 2018
    Tool Type

    Hedge Trimmer

    Difficulty

    Easy

    Time

    15-30 minutes

    Tools Used

    , Torx screwdriver

    Dis-assembled case of hedge trimmer and replaced insulator between drive cable and driven gear.
    Did you find this story helpful?
    Thanks for voting and helping fellow customers!

    The insulator "rounded-out"

    Steve - October 8, 2017
    Tool Type

    Hedge Trimmer

    Difficulty

    Easy

    Time

    15-30 minutes

    Tools Used

    Power Drill, T-20 bit

    Removed most of the screws to "split" the hedge trimmer, removed the gear and insulator, cleaned and re-greased, installed new insulator, and re-assembled trimmer. Ops check good.
    Did you find this story helpful?
    Thanks for voting and helping fellow customers!

    Pole came apart from the head and insulator was lost

    Cliff - April 20, 2017
    Tool Type

    Pruner

    Difficulty

    Easy

    Time

    30-60 minutes

    Tools Used

    Screwdriver

    Disassemble the head, clean & re-grease, replace insulator, assemble head & pole. Attached to power head, started and continued my pruning project. Perfect as this pruner attachment is no longer available.
    Did you find this story helpful?
    Thanks for voting and helping fellow customers!

    OEM stands for Original Equipment Manufacturer and means the part you’re buying is sourced directly from the manufacturer who made your product. At eReplacementParts, we sell only genuine OEM parts, guaranteeing the part you’re purchasing is of better design and of higher quality than aftermarket parts.

    Our product descriptions are a combination of data sourced directly from the manufacturers who made your product as well as content researched and curated by our content & customer service teams. This content is edited and reviewed internally before being made public to customers.

    Our customer service team are at the ready daily to answer your part and product questions. We have a dedicated staff with decades of collective experience in helping customers just like you purchase parts to repair their products.

    All our part reviews are solicited directly from other customers who have purchased this exact part. While we moderate these reviews for profanity, offensive language or personally identifiable information, these reviews are posted exactly as submitted and no alterations are made by our team.

    All our customer repair instructions are solicited directly from other customers just like you who have purchased and replaced this exact part. While we moderate these reviews for profanity, offensive language or personally identifiable information, these reviews are posted exactly as submitted and no alterations are made by our team.

    Based on data from past customer purchasing behaviors, these parts are most commonly purchased together along with the part you are viewing. These parts may be necessary or helpful to replace to complete your current repair.

    All our installation videos are created and produced in collaboration with our in-house repair technician, Mark Sodja, who has helped millions of eReplacementParts customers over the last 13 years repair their products. Mark has years of experience in selling and repairing both commercial and residential products with a specialty in gas-powered equipment.

    This data is collected from customers who submitted a repair instruction after replacing this exact part. Customers can rate how easy the repair was to complete and how long it took. We aggregate this data to provide a repair rating that allows customers to quickly determine the difficulty and time needed to perform their own repair.

    eReplacementParts.com
    7174 South 400 West
    Suite 5
    Midvale, UT 84047
    visa mastercard discover american express PayPal