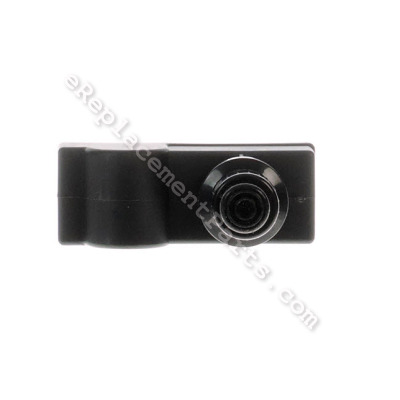


This replacement ignitor assembly is a genuine Broil-Mate part. It is specially sourced from original equipment manufacturer for use with gas grills. Igniter makes ignition process simple and safe by producing the spark to ignite the burner with only a push of a button. It has a plastic body and it is sold individually. Please note, it does require a "AAA" battery which is sold separately.
Replacing this ignitor is an easy task that does not require any tools.
• Unplug the wires from the old ignition module
• Unscrew the button that holds it to the unit
• Place a new module in place
• Install a "AAA" battery and secure the module with the button
• Re-connect the wires
Ignitor 10342-245
OEM part for: Broil-Mate, Broil King, Sterling
Part Number: 10342-245
$12.08
In Stock
Jump To:
Product Description ?
- Classification: Part
- Weight: 0.19 lbs.
- Shipping: Ships Worldwide
Frequently Purchased Together ?
Compatibility
This part will fit the following 68 machines
Broil-Mate
1551-64 Gas Grill View Diagrams & Manuals
1964-54 Gas Grill View Diagrams & Manuals
1964-57 Gas Grill View Diagrams & Manuals
1411-54 Gas Grill View Diagrams & Manuals
1411-57 Gas Grill View Diagrams & Manuals
1161-54 Gas Grill View Diagrams & Manuals
1161-57 Gas Grill View Diagrams & Manuals
1961-54 Gas Grill View Diagrams & Manuals
1961-57 Gas Grill View Diagrams & Manuals
1553-64 Gas Grill View Diagrams & Manuals
1553-67 Gas Grill View Diagrams & Manuals
Broil King
9761-54 Regal 420 Gas Grill View Diagrams & Manuals
9761-57 Regal 420 Gas Grill View Diagrams & Manuals
9887-14 (XLS 20) Sovereign XLS Gas Grill View Diagrams & Manuals
9887-17 (XLS 20) Sovereign XLS Gas Grill View Diagrams & Manuals
9877-34 (Sovereign 70) Gas Grill View Diagrams & Manuals
9877-37 (Sovereign 70) Gas Grill View Diagrams & Manuals
9877-54 (Sovereign 20) Gas Grill View Diagrams & Manuals
9877-57 (Sovereign 20) Gas Grill View Diagrams & Manuals
9877-74 (Sovereign 70) Gas Grill View Diagrams & Manuals
9877-77 (Sovereign 70) Gas Grill View Diagrams & Manuals
9159-64 Crown Series Gas Grill View Diagrams & Manuals
9159-67 Crown Series Gas Grill View Diagrams & Manuals
9455-84 (Crown Series 90) Gas Grill View Diagrams & Manuals
9455-87 (Crown Series 90) Gas Grill View Diagrams & Manuals
949-44 (Crown Series 40) Gas Grill View Diagrams & Manuals
949-47 (Crown Series 40) Gas Grill View Diagrams & Manuals
949-94 (Crown Series 90) Gas Grill View Diagrams & Manuals
949-97 (Crown Series 90) Gas Grill View Diagrams & Manuals
9959-64 Crown Series Gas Grill View Diagrams & Manuals
9959-67 Crown Series Gas Grill View Diagrams & Manuals
9956-64 Crown Series Gas Grill View Diagrams & Manuals
9956-67 Crown Series Gas Grill View Diagrams & Manuals
946-44 (Crown Series 40) Gas Grill View Diagrams & Manuals
946-47 (Crown Series 40) Gas Grill View Diagrams & Manuals
9346-64 (Monarch 40) Gas Grill View Diagrams & Manuals
9346-67 (Monarch 40) Gas Grill View Diagrams & Manuals
9865-54 (Signet 20) Gas Grill View Diagrams & Manuals
9865-57 (Signet 20) Gas Grill View Diagrams & Manuals
9865-74 (Signet 70) Gas Grill View Diagrams & Manuals
9865-77 (Signet 70) Gas Grill View Diagrams & Manuals
9869-54 (Signet 20B) Gas Grill View Diagrams & Manuals
9869-57 (Signet 20B) Gas Grill View Diagrams & Manuals
9869-74C (Signet 70B) Gas Grill View Diagrams & Manuals
9869-77C (Signet 70B) Gas Grill View Diagrams & Manuals
9215-54 BBQ Grill View Diagrams & Manuals
9215-57 BBQ Grill View Diagrams & Manuals
9561-54 BBQ Grill View Diagrams & Manuals
9561-57 BBQ Grill View Diagrams & Manuals
9565-14 BBQ Grill View Diagrams & Manuals
9565-17 BBQ Grill View Diagrams & Manuals
9888-14 BBQ Grill View Diagrams & Manuals
9888-17 BBQ Grill View Diagrams & Manuals
9878-14 BBQ Grill View Diagrams & Manuals
9878-17 BBQ Grill View Diagrams & Manuals
9453-64 BBQ Grill View Diagrams & Manuals
9453-67 BBQ Grill View Diagrams & Manuals
9453-64C BBQ Grill View Diagrams & Manuals
9453-67C BBQ Grill View Diagrams & Manuals
9312-54 BBQ Grill View Diagrams & Manuals
9312-57 BBQ Grill View Diagrams & Manuals
Sterling
4451-64 E-Z Grill View Diagrams & Manuals
4965-54 Grill View Diagrams & Manuals
4965-57 Grill View Diagrams & Manuals
4964-54 Gas Grill View Diagrams & Manuals
4964-57 Gas Grill View Diagrams & Manuals
4411-54 Gas Grill View Diagrams & Manuals
4411-57 Gas Grill View Diagrams & Manuals
Show More Compatible Models
This item works with the following types of products:
This part replaces obsolete part #: 10342-242
Repair Videos ?

Articles:
|
Having trouble getting your grill to light up? A common cause of this issue is a defective ignition switch. We'll sho...
November 08, 2012
|

Customer Part Reviews ?
Average Rating (out of 5):
Click to filter by ratings:
5 stars
17
4 stars
0
3 stars
0
2 stars
0
1 stars
0
< PREV
- 1
- 2
Easy to install
Arrived quickly and was easy to install. Worked on the first click.
Guest -
October 25, 2023
Verified Purchase
Spark igniter fit just like the original, installation was simple! Beats lighting the grill with a lighter!
Just like the original, arrived securely packaged and ready for installation.
Lawrence -
March 22, 2022
Verified Purchase
Awesome
The igniter arrived very quickly, fit perfectly, there are no problems igniting the grill any more.
Irina -
August 11, 2021
Verified Purchase
Fit perfectly
Very easy to install and worked as it shoukd
Guest -
August 9, 2021
Verified Purchase
30 second fix
Needed a new igniter, ordered it, had it in a few days, and in 30 seconds it was installed and working.
Guest -
May 31, 2021
Verified Purchase
Easy repair group part worked as expected
Easy repair group part worked as expected
Guest -
March 16, 2021
Verified Purchase
Exact replacement.
Part arrived within a few days. Perfect replacement for my Broil King grill.
Very pleased with eReplacementParts.
Guest -
October 28, 2020
Verified Purchase
Perfect
Easily installed, exactly the right part.
Guest -
May 8, 2020
Verified Purchase
Easy Repair. Worked Great
It was just like the original Part. Same number. Went back together smoothly. Thanks
Guest -
October 28, 2019
Verified Purchase
Easy repair
Simple to replace. Woorks great .
Douglas -
September 9, 2019
Verified Purchase
t
t
t -
t days ago
Verified Purchase
eReplacementParts Team
t
Questions & Answers ?
Our customer Service team is at the ready daily to answer your part and product questions.

Ask our Team
We have a dedicated staff with decades of collective experience in helping customers just like you purchase parts to repair their products.
Does this fit my product?Questions & Answers for Ignitor
can I convert this propane Barbeque to a natural gas BB?
John
for model number 7653_64
asked on 2023-05-02
Hello John, thank you for your question. Yes. We find a Hose Natural Gas 10111-K45. The durable hose is designed to be flexible, and connect the natural gas source to the control assembly of the grill. The hose will have one male connection, and one female connection, also included is a brass adapter.
eReplacementParts Team May 02, 2023
Customer Repair Instructions ?
All our customer repair instructions are solicited directly from other customers just like you who have purchased and replaced this exact part.
Ignitor would not spark when pushed
Mark - March 28, 2016
👍 4 of 6 people found this instruction helpful
Tool Type
Outdoor Grill
Difficulty
Easy
Time
Less than 15 minutes
Tools Used
Pliers
Parts Used
Disconnected two wires.
Unscrewed the hex nut that holds the ignitor electronics
Put on the new one, screwed on the nut, connected the wires and done.
Unscrewed the hex nut that holds the ignitor electronics
Put on the new one, screwed on the nut, connected the wires and done.
Did you find this story helpful?
Thanks for voting and helping fellow customers!
Randy - July 18, 2018
👍 1 of 1 people found this instruction helpful
Tool Type
Outdoor Grill
Difficulty
Easy
Time
Less than 15 minutes
Tools Used
Adjustable Wrench
Parts Used
Removed old igniter & electrodes. Replaced electrodes, plugged them into the new igniter Installed AAA battery. Grille started on first try
Did you find this story helpful?
Thanks for voting and helping fellow customers!
Grill ignitor needed to be replaced.
Donald - April 13, 2018
👍 1 of 1 people found this instruction helpful
Tool Type
Outdoor Grill
Difficulty
Easy
Time
Less than 15 minutes
Tools Used
Pliers
Parts Used
1. Removed old ignitor.
2. Ordered a new one (not available locally and a generic one did not work)
3. Installed a new battery in the new ignitor
3. Installed new ignitor in grill, tested and cooked!
2. Ordered a new one (not available locally and a generic one did not work)
3. Installed a new battery in the new ignitor
3. Installed new ignitor in grill, tested and cooked!
Did you find this story helpful?
Thanks for voting and helping fellow customers!
Grill ignitor not working.
Michael - January 20, 2022
Tool Type
Outdoor Grill
Difficulty
Easy
Time
Less than 15 minutes
Tools Used
Pliers
Parts Used
1: ignitor not working.
2: Checked battery for ignitor, battery was good.
3: removed ignitor cap holding battery.
4: remove nut holding ignitor to grill frame and remove ignitor body.
5: disconnect 2 small black wires connected to ignitor.
6: install new ignitor in reverse order, install new battery, check operation.
2: Checked battery for ignitor, battery was good.
3: removed ignitor cap holding battery.
4: remove nut holding ignitor to grill frame and remove ignitor body.
5: disconnect 2 small black wires connected to ignitor.
6: install new ignitor in reverse order, install new battery, check operation.
Did you find this story helpful?
Thanks for voting and helping fellow customers!
No spark
MICHAEL - August 4, 2021
Tool Type
Outdoor Grill
Difficulty
Easy
Time
Less than 15 minutes
Tools Used
, None
Parts Used
Replaced igniter
Did you find this story helpful?
Thanks for voting and helping fellow customers!
Mothing
Michael - May 13, 2021
Tool Type
Outdoor Grill
Difficulty
Easy
Time
Less than 15 minutes
Tools Used
, None to remove nut on igniter and replace it .
Parts Used
1. Removed to igniter button setting aside the AAA battery.
2. Loosen the nut holding the igniter in the mounting hole.
3. Moved the igniter to fit through the slot under the front of the grill.
4. Labeled each wire top, 2nd, then 3rd connector.
5. Removed igniter then connected the wires back to the new igniter connections. Reinstalled igniter into the hole, then installed the locking nut securing the igniter.
6. Removed the igniter button to install the AAA battery back in the igniter positive side facing out.
7. Screwed the igniter button onto the igniter.
8. Pushed the igniter button to light the grill after turning on the gas.
Did you find this story helpful?
Thanks for voting and helping fellow customers!
The igniter only lasts about a year or two
Eric - August 28, 2020
Tool Type
Outdoor Grill
Difficulty
Easy
Time
Less than 15 minutes
Tools Used
, none
Parts Used
removed locking ring, igniter, moved wires to new igniter, re installed
Did you find this story helpful?
Thanks for voting and helping fellow customers!
No spark to light gas grill.
Michele - October 30, 2019
Tool Type
Outdoor Grill
Difficulty
Easy
Time
Less than 15 minutes
Tools Used
, No tools required.
Parts Used
Unscrewed front of ignitor, removed 2 connector wires and replaced in the reverse with new ignitor.
Did you find this story helpful?
Thanks for voting and helping fellow customers!
Ignitor did not work
Frank - May 2, 2019
👍 1 of 2 people found this instruction helpful
Tool Type
Outdoor Grill
Difficulty
Easy
Time
Less than 15 minutes
Tools Used
Screwdriver, Hands
Parts Used
Took old one out put new one in
Did you find this story helpful?
Thanks for voting and helping fellow customers!
The grill would not light
jeffrey - April 25, 2019
Tool Type
Outdoor Grill
Difficulty
Easy
Time
Less than 15 minutes
Tools Used
Pliers
Parts Used
I removed the knob and retaining nut. Pulled out ignitor and removed the wires. Put back together with the new ignitor and checked operation. Works perfect.
Did you find this story helpful?
Thanks for voting and helping fellow customers!
Load More Install Stories
OEM stands for Original Equipment Manufacturer and means the part you’re buying is sourced directly from the manufacturer who made your product. At eReplacementParts, we sell only genuine OEM parts, guaranteeing the part you’re purchasing is of better design and of higher quality than aftermarket parts.
Our product descriptions are a combination of data sourced directly from the manufacturers who made your product as well as content researched and curated by our content & customer service teams. This content is edited and reviewed internally before being made public to customers.
Our customer service team are at the ready daily to answer your part and product questions. We have a dedicated staff with decades of collective experience in helping customers just like you purchase parts to repair their products.
All our part reviews are solicited directly from other customers who have purchased this exact part. While we moderate these reviews for profanity, offensive language or personally identifiable information, these reviews are posted exactly as submitted and no alterations are made by our team.
All our customer repair instructions are solicited directly from other customers just like you who have purchased and replaced this exact part. While we moderate these reviews for profanity, offensive language or personally identifiable information, these reviews are posted exactly as submitted and no alterations are made by our team.
Based on data from past customer purchasing behaviors, these parts are most commonly purchased together along with the part you are viewing. These parts may be necessary or helpful to replace to complete your current repair.
All our installation videos are created and produced in collaboration with our in-house repair technician, Mark Sodja, who has helped millions of eReplacementParts customers over the last 13 years repair their products. Mark has years of experience in selling and repairing both commercial and residential products with a specialty in gas-powered equipment.
This data is collected from customers who submitted a repair instruction after replacing this exact part. Customers can rate how easy the repair was to complete and how long it took. We aggregate this data to provide a repair rating that allows customers to quickly determine the difficulty and time needed to perform their own repair.