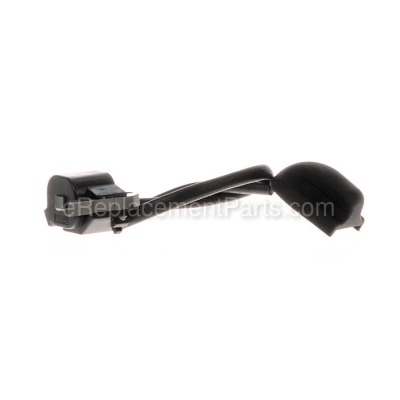


This is an original manufacturer approved replacement ignition module assembly, it is not an aftermarket imitation. It is a genuine item specially made for Ryobi backpack blowers and vacuums. The ignition module also known as an armature-magneto supplies high voltage pulses to the spark plug. If the ignition coil is defective, the engine may not start. Please note, this item is sold individually. You will need a screwdriver set to complete this repair.
Ignition Module Assembly 291424001
OEM part for: Ryobi
Part Number: 291424001
$21.48
In Stock
Jump To:
Frequently Purchased Together ?


Compatibility
This part will fit the following 2 machines
Ryobi
RY08420 Blower/Vacuum View Diagrams & Manuals
RY08420A Backpack Blower View Diagrams & Manuals
This item works with the following types of products:
- Blower Parts
- Vacuum Parts
Customer Part Reviews ?
Average Rating (out of 5):
Click to filter by ratings:
5 stars
1
4 stars
0
3 stars
0
2 stars
0
1 stars
0
< PREV
- 1
Easy Repair
My leaf blower would not start, found out there was no spark so I replaced the ignition module. Quick fix, works great.
Guest -
April 20, 2020
Verified Purchase
t
t
t -
t days ago
Verified Purchase
eReplacementParts Team
t
Questions & Answers ?
Our customer Service team is at the ready daily to answer your part and product questions.

Ask our Team
We have a dedicated staff with decades of collective experience in helping customers just like you purchase parts to repair their products.
Does this fit my product?Questions & Answers for Ignition Module Assembly
No questions have been asked yet
Customer Repair Instructions ?
All our customer repair instructions are solicited directly from other customers just like you who have purchased and replaced this exact part.
No spark
Rob - January 20, 2016
👍 10 of 12 people found this instruction helpful
Tool Type
Blower
Difficulty
Medium
Time
30-60 minutes
Tools Used
Screwdriver, Wrench Set, Nutdriver, Torx driver
Parts Used
Remove pull start cover. Remove ignition coil. Replace coil and set gap between coil and flywheel magnets using a business card as a gauge. Replace cover and check for spark. In this repair the blower now runs fine
Did you find this story helpful?
Thanks for voting and helping fellow customers!
Stopped running suddenly and woudl not start again
John - September 9, 2017
👍 5 of 6 people found this instruction helpful
Tool Type
Blower
Difficulty
Medium
Time
15-30 minutes
Tools Used
Screwdriver, Pliers, Socket set, Wrench Set, Nutdriver
Squirted some starter fluid in the air cleaner and still did not fire. Pulled plug wire and out and put a bolt into the rubber cap to wedge in the spark plug contacts and held near engine ground and pulled- no spark was seen. Accidentally found it would still give a shock, but no spark so it was a weak ignition. A bit of a pain to take apart to access the ignition module since you must remove it from the backpack carrier, and take off the fuel tank. But the pull cord housing comes off with 4 screws. Replaced it and used a business card to gap between the ignition module and the magnets while tightening the new module. Re-assembled and it starts right up and runs well. Note that there was very little difference in the Ohmmeter reading on the bad and new module so you cannot trust that. Check for a hot spark. I replaced the plug anyway but that was not the cause.
Did you find this story helpful?
Thanks for voting and helping fellow customers!
Gobi bp42 would not start
W - May 19, 2018
👍 1 of 1 people found this instruction helpful
Tool Type
Blower
Difficulty
Easy
Time
30-60 minutes
Tools Used
Nutdriver, T25 torx
No spark. Replaced coil,air filter and fuel filter.
.I used a piece of cardboard to set the coil gap but it clearly was too wide. Used a business card the second time and it was perfect.
.I used a piece of cardboard to set the coil gap but it clearly was too wide. Used a business card the second time and it was perfect.
Did you find this story helpful?
Thanks for voting and helping fellow customers!
Wouldn't start
Joshua - August 17, 2017
👍 1 of 1 people found this instruction helpful
Tool Type
Blower
Difficulty
Medium
Time
15-30 minutes
Tools Used
, Torx screwdrivers
Parts Used
1. Remove cover
2. Remove carb assembly
3. Now you can access the old ignition module and it will need to be removed.
4. Install new ignition module assembly and use an ATM card to ensure the spacing is correct between it it and the flywheel magnets(?). You'll see it.
5. Put it all back together.
* Most difficult part-and it's. It that difficult is making sure you get the spacing right. You can't just bolt it up; you have to hold the card while you tighten it down.
Did you find this story helpful?
Thanks for voting and helping fellow customers!
Blower would not start.
DARRELL - September 23, 2020
Tool Type
Blower
Difficulty
Medium
Time
30-60 minutes
Tools Used
Screwdriver, Pliers, Socket set, feeler gauge
Determined it had no fire to the plug. Replaced the ignition module and the plug while I was there.
Blower started first time pulled. Changing this was not hard but, does require knowledge of engines and good mechanical ability. Once the problem was found, identifying the proper parts and ordering was outstanding.
Blower started first time pulled. Changing this was not hard but, does require knowledge of engines and good mechanical ability. Once the problem was found, identifying the proper parts and ordering was outstanding.
Did you find this story helpful?
Thanks for voting and helping fellow customers!
No spark
Jeff - June 23, 2020
Tool Type
Blower
Difficulty
Medium
Time
30-60 minutes
Tools Used
Screwdriver, Wrench Set
Parts Used
Replaced ignition coil with new spark plug.
Did you find this story helpful?
Thanks for voting and helping fellow customers!
Would not start.
Sidney - April 18, 2018
Tool Type
Blower
Difficulty
Medium
Time
1-2 hours
Tools Used
Screwdriver, Socket set, Wrench Set
Parts Used
Took apart, replaced the old ignition module with the new one and reassembled.
Did you find this story helpful?
Thanks for voting and helping fellow customers!
do not known
Jacalyn - November 3, 2016
Tool Type
Blower
Difficulty
Medium
Time
30-60 minutes
Tools Used
Screwdriver, Pliers, Socket set, Wrench Set
Took the tool apart. Removed the old components and replaced the with the new one. Reassembled. Tested. Works great!
Did you find this story helpful?
Thanks for voting and helping fellow customers!
Loss of power after engine getting hot, ignition suspected
Barbara - June 15, 2016
Tool Type
Blower
Difficulty
Medium
Time
15-30 minutes
Tools Used
Power Drill, Star bits
Parts Used
1) Remove cowling and backpack frame
2) Remove old ignition coil with plug wire noticing route for re-instillation of wire
3) Install new module placing cardboard business between coil and flywheel for spacer
4) Replace cowling and backpack frame
2) Remove old ignition coil with plug wire noticing route for re-instillation of wire
3) Install new module placing cardboard business between coil and flywheel for spacer
4) Replace cowling and backpack frame
Did you find this story helpful?
Thanks for voting and helping fellow customers!
OEM stands for Original Equipment Manufacturer and means the part you’re buying is sourced directly from the manufacturer who made your product. At eReplacementParts, we sell only genuine OEM parts, guaranteeing the part you’re purchasing is of better design and of higher quality than aftermarket parts.
Our product descriptions are a combination of data sourced directly from the manufacturers who made your product as well as content researched and curated by our content & customer service teams. This content is edited and reviewed internally before being made public to customers.
Our customer service team are at the ready daily to answer your part and product questions. We have a dedicated staff with decades of collective experience in helping customers just like you purchase parts to repair their products.
All our part reviews are solicited directly from other customers who have purchased this exact part. While we moderate these reviews for profanity, offensive language or personally identifiable information, these reviews are posted exactly as submitted and no alterations are made by our team.
All our customer repair instructions are solicited directly from other customers just like you who have purchased and replaced this exact part. While we moderate these reviews for profanity, offensive language or personally identifiable information, these reviews are posted exactly as submitted and no alterations are made by our team.
Based on data from past customer purchasing behaviors, these parts are most commonly purchased together along with the part you are viewing. These parts may be necessary or helpful to replace to complete your current repair.
All our installation videos are created and produced in collaboration with our in-house repair technician, Mark Sodja, who has helped millions of eReplacementParts customers over the last 13 years repair their products. Mark has years of experience in selling and repairing both commercial and residential products with a specialty in gas-powered equipment.
This data is collected from customers who submitted a repair instruction after replacing this exact part. Customers can rate how easy the repair was to complete and how long it took. We aggregate this data to provide a repair rating that allows customers to quickly determine the difficulty and time needed to perform their own repair.