eReplacementParts.com
877-346-4814
Makita Parts
Repair Parts Home
  
Power Tool Parts
  
Makita Parts
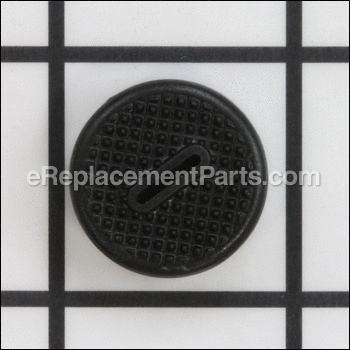
  643829-7 Holder Cap, Bjr182z

Holder Cap,​ Bjr182z 643829-7

OEM part for: Makita

Part Number: 643829-7


Install
Videos!
Holder Cap, Bjr182z - 643829-7:Makita 360 View
Holder Cap, Bjr182z - 643829-7:MakitaHolder Cap, Bjr182z - 643829-7:MakitaHolder Cap, Bjr182z - 643829-7:Makita 360 View
In Stock
Order within the next 12 hours and your part ships today!
Easy 30-60 minutes (5 rated repairs)?
OEM: Original Equipment Manufacturer ?
Makita
Does this d-block d-md-none fit my product?

Product Description ?

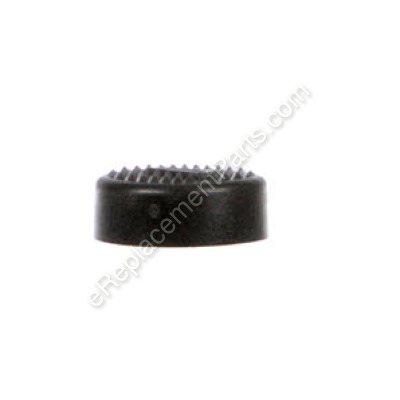
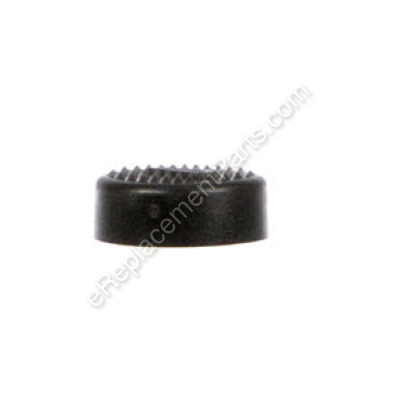
This is an original Makita part. The holder cap is made of plastic and is used in saws and hammers. It attaches to the carbon brush and holds it in place. This cap is sold individually, however a screwdriver may be needed to replace this item if it becomes cracked or broken.

  • Classification: Part
  • Weight: 0.01 lbs.
  • Shipping: Ships Worldwide

Frequently Purchased Together ?

Compatibility

This part will fit the following 75 machines

Makita

BSS611 18V LXT Lithium-Ion 6-1/2" Circular Saw View Diagrams & Manuals
BJR182 18V LXT Lithium-Ion Reciprocating Saw View Diagrams & Manuals
BHR202 18V LXT Lithium-Ion Cordless 7/8" SDS-Plus Rotary Hammer View Diagrams & Manuals
BHR202Z 18V LXT Lithium-Ion Cordless 7/8" Rotary Hammer View Diagrams & Manuals
BSS611Z 18V LXT Lithium-Ion Cordless 6-1/2" Circular Saw View Diagrams & Manuals
BHR241 Lithium-Ion Cordless Rotary Hammer View Diagrams & Manuals
BHR241Z Lithium-Ion Cordless Rotary Hammer View Diagrams & Manuals
BHR261 Lithium-Ion Cordless Rotary Hammer View Diagrams & Manuals
HRH01 36V LXT Lithium-Ion Cordless 1" SDS-PLUS View Diagrams & Manuals
XRJ03Z 18V LXT Lithium-Ion Cordless Recipro Saw View Diagrams & Manuals
XSH01X 18V X2 LXT Lithium-Ion 36V Cordless 7-1/4 Circular Saw Kit View Diagrams & Manuals
XSH01Z 18V X2 LXT Lithium-Ion 36V Cordless 7-1/4 Circular Saw View Diagrams & Manuals
BHR202F (Type 1) Rotary Hammer View Diagrams & Manuals
BHR202F (Type 3) Rotary Hammer View Diagrams & Manuals
BHR202F (Type 4) Rotary Hammer View Diagrams & Manuals
BHR241F (Type 1) Rotary Hammer View Diagrams & Manuals
BHR241F (Type 2) Rotary Hammer View Diagrams & Manuals
BHR241F (Type 3) Rotary Hammer View Diagrams & Manuals
BHR241F (Type 4) Rotary Hammer View Diagrams & Manuals
BHR241 (Type 2) Rotary Hammer View Diagrams & Manuals
BHR241 (Type 3) Rotary Hammer View Diagrams & Manuals
BHR241 (Type 4) Rotary Hammer View Diagrams & Manuals
BHR241Z (Type 1) Rotary Hammer View Diagrams & Manuals
BHR241Z (Type 2) Rotary Hammer View Diagrams & Manuals
BHR241Z (Type 3) Rotary Hammer View Diagrams & Manuals
BHR241Z (Type 4) Rotary Hammer View Diagrams & Manuals
BHR261 (Type 2) Rotary Hammer View Diagrams & Manuals
BJR182F (Type 1) Saw View Diagrams & Manuals
BJR182F (Type 2) Saw View Diagrams & Manuals
BJR182F (Type 3) Saw View Diagrams & Manuals
BJR182F (Type 4) Saw View Diagrams & Manuals
BJR182 (Type 2) Saw View Diagrams & Manuals
BJR182 (Type 3) Saw View Diagrams & Manuals
BJR182 (Type 4) Saw View Diagrams & Manuals
BJR182X (Type 1) Saw View Diagrams & Manuals
BJR182X (Type 2) Saw View Diagrams & Manuals
BJR182X (Type 3) Saw View Diagrams & Manuals
BJR182X (Type 4) Saw View Diagrams & Manuals
BJR182Z (Type 1) Saw View Diagrams & Manuals
BJR182Z (Type 2) Saw View Diagrams & Manuals
BJR182Z (Type 3) Saw View Diagrams & Manuals
BJR182Z (Type 4) Saw View Diagrams & Manuals
BSS611F (Type 1) Saw View Diagrams & Manuals
BSS611F (Type 2) Saw View Diagrams & Manuals
BSS611F (Type 3) Saw View Diagrams & Manuals
BSS611F (Type 4) Saw View Diagrams & Manuals
BSS611 (Type 2) Saw View Diagrams & Manuals
BSS611 (Type 3) Saw View Diagrams & Manuals
BSS611 (Type 4) Saw View Diagrams & Manuals
BSS611X (Type 1) Saw View Diagrams & Manuals
BSS611X (Type 2) Saw View Diagrams & Manuals
BSS611X (Type 3) Saw View Diagrams & Manuals
BSS611X (Type 4) Saw View Diagrams & Manuals
HRH02ZX2 (Type 1) Rotary Hammer View Diagrams & Manuals
HRH02ZX2 (Type 2) Rotary Hammer View Diagrams & Manuals
LXPK01 Planer View Diagrams & Manuals
LXPK01Z1 (Type 1) Planer View Diagrams & Manuals
LXPK01Z1 (Type 2) Planer View Diagrams & Manuals
LXPK01Z (Type 1) Planer View Diagrams & Manuals
LXPK01Z (Type 2) Planer View Diagrams & Manuals
XPK01Z Planer View Diagrams & Manuals
XRH03 Rotary Hammer View Diagrams & Manuals
XRH03T Rotary Hammer View Diagrams & Manuals
XRH03Z Rotary Hammer View Diagrams & Manuals
XRH04 Rotary Hammer View Diagrams & Manuals
XRH04T Rotary Hammer View Diagrams & Manuals
XRH04Z Rotary Hammer View Diagrams & Manuals
XRH05PT Rotary Hammer View Diagrams & Manuals
XRH05Z Rotary Hammer View Diagrams & Manuals
Show More Compatible Models
Don't see yours? Try searching our site for :

This item works with the following types of products:

  • Circular Saw Parts
  • Saw Parts
  • Reciprocating Saw Parts
  • Rotary Hammer Parts

This part replaces obsolete part #: 43829-7H

Repair Videos ?

Watch the Repair Video for Holder Cap,​ Bjr182z

Customer Part Reviews ?

5
Average Rating (out of 5):
1 Review
Click to filter by ratings:
5 stars
1
4 stars
0
3 stars
0
2 stars
0
1 stars
0
  • Highest Rating
  • Most Recent
< PREV
  • 1
NEXT >
  • Repaired my sawsaw
    The parts for my saw saw worked just great thanks
    Guest - April 26, 2019 Verified Purchase
    t
    t
    t - t days ago Verified Purchase
    eReplacementParts Team
    t

    Questions & Answers ?

    Our customer Service team is at the ready daily to answer your part and product questions.

    photo of team member
    Ask our Team

    We have a dedicated staff with decades of collective experience in helping customers just like you purchase parts to repair their products.

    Does this fit my product?

    Questions & Answers for Holder Cap,​ Bjr182z


    No questions have been asked yet

    Customer Repair Instructions ?

    All our customer repair instructions are solicited directly from other customers just like you who have purchased and replaced this exact part.

    Easy 30-60 minutes (5 rated repairs)?

    Loss of power not due to battery

    Paul - September 13, 2016
    👍 2 of 2 people found this instruction helpful
    Tool Type

    Circular Saw

    Difficulty

    Easy

    Time

    15-30 minutes

    Tools Used

    Screwdriver, Pliers, Paper clip and knife

    The repair would normally take a few minutes. It was made more difficult because the old brushes and brush caps were melted to the brush holders. It took some time and care to get the caps pried off because the caps are threaded on to the brush holders. Once the brush holders were removed the metal end of the brushes was also melted to the brush holders. I was able to pry them out as well. I cleaned up the holders slightly with a knife and the new brushes drop in fine. The caps went on fine as well with the aid of a bent paper clip to hold the brush spring in the holder while pushing down on to it.
    Did you find this story helpful?
    Thanks for voting and helping fellow customers!

    Was using saw and it just quit.

    Kevin - May 23, 2017
    👍 1 of 1 people found this instruction helpful
    Tool Type

    Circular Saw

    Difficulty

    Easy

    Time

    15-30 minutes

    Tools Used

    Screwdriver

    The repair involved removing several Phillips screws to open the case. Two are longer so note where they go. The only minor difficulty involved removing the brush caps as they were really fried on so plan on replacing them. The old brushes were in pieces, the switch tested good but since I had it apart decided to swap it out as well. Put it back together and wow runs like new! The possible diagnosis on the website made the repairs simple and inexpensive.
    Did you find this story helpful?
    Thanks for voting and helping fellow customers!

    The reciprocating saw was totally dead. worked fine after replacing the parts.

    Daniel - January 9, 2022
    Tool Type

    Circular Saw

    Difficulty

    Easy

    Time

    30-60 minutes

    Tools Used

    Screwdriver, Pliers

    1. disassembled saw going to the transformer; unscrewed Phillip screws from the cover.
    2. Remove old parts going to the coil/transformer positive lead side, including the mounting hardware.
    3. installed and remounted new parts to coil/transformer going to the positive lead side.
    4. reattached the saw cover with Phillip screws.
    Did you find this story helpful?
    Thanks for voting and helping fellow customers!

    Brushes deteriorated and froze -- saw lost power

    Christopher - October 4, 2018
    Tool Type

    Circular Saw

    Difficulty

    Hard

    Time

    More than 2 hours

    Tools Used

    Screwdriver, Pliers, Multi tool remove brush caps, other small tools.

    1. Opened the back of the saw with brushes. Brushes were frozen and melted.
    2. Using multi tool and small blade carefully cut open the brush caps and removed them. They were melted into the brush holder.
    3. Realized that I would need to destroy the brush holders to get the remains of the brushes out of the unit. So I set the unit aside and ordered a set of brush holders.
    4. Opened the saw unit as described in a video. Removed the armature. The armature maybe is ok. Replaced it anyway.
    5. Carefully removed the two brush holders making sure I knew the black(negative) side and the red(positive) side. Take a picture if needed so you get the correct brush holder in the correct side of the unit.
    6. Insert the new brush holders. Wire them back to where the old ones were attached.
    7. Insert the new armature unit.
    8. Close up the unit and put the cap back on the brush side of the unit.
    9. Insert the new brushes. Pay attention to the curvature to align it with armature correctly. Should only got into holder one way(rectangular in shape).
    10. Screw on the brushes cap. Rotate the blade by hand (no battery in unit) and make sure blade turns freely. If not, check your brushes to make sure they are correctly inserted.
    11. Put a battery in the unit and try it out.
    Did you find this story helpful?
    Thanks for voting and helping fellow customers!

    Jig saw quit working, worn out brushes

    Louie - August 13, 2017
    Tool Type

    Jig saw

    Difficulty

    Easy

    Time

    Less than 15 minutes

    Tools Used

    Screwdriver

    Removed the brush caps and the worn brushes. Installed the new brushes and then installed the new brush caps.
    Did you find this story helpful?
    Thanks for voting and helping fellow customers!

    OEM stands for Original Equipment Manufacturer and means the part you’re buying is sourced directly from the manufacturer who made your product. At eReplacementParts, we sell only genuine OEM parts, guaranteeing the part you’re purchasing is of better design and of higher quality than aftermarket parts.

    Our product descriptions are a combination of data sourced directly from the manufacturers who made your product as well as content researched and curated by our content & customer service teams. This content is edited and reviewed internally before being made public to customers.

    Our customer service team are at the ready daily to answer your part and product questions. We have a dedicated staff with decades of collective experience in helping customers just like you purchase parts to repair their products.

    All our part reviews are solicited directly from other customers who have purchased this exact part. While we moderate these reviews for profanity, offensive language or personally identifiable information, these reviews are posted exactly as submitted and no alterations are made by our team.

    All our customer repair instructions are solicited directly from other customers just like you who have purchased and replaced this exact part. While we moderate these reviews for profanity, offensive language or personally identifiable information, these reviews are posted exactly as submitted and no alterations are made by our team.

    Based on data from past customer purchasing behaviors, these parts are most commonly purchased together along with the part you are viewing. These parts may be necessary or helpful to replace to complete your current repair.

    All our installation videos are created and produced in collaboration with our in-house repair technician, Mark Sodja, who has helped millions of eReplacementParts customers over the last 13 years repair their products. Mark has years of experience in selling and repairing both commercial and residential products with a specialty in gas-powered equipment.

    This data is collected from customers who submitted a repair instruction after replacing this exact part. Customers can rate how easy the repair was to complete and how long it took. We aggregate this data to provide a repair rating that allows customers to quickly determine the difficulty and time needed to perform their own repair.

    eReplacementParts.com
    7174 South 400 West
    Suite 5
    Midvale, UT 84047
    visa mastercard discover american express PayPal