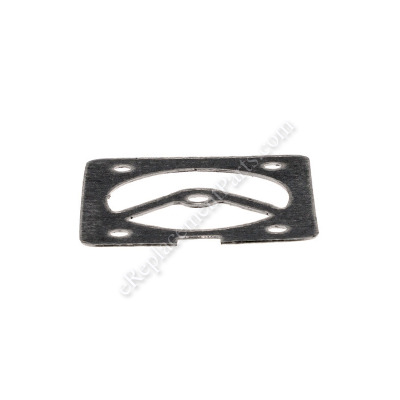


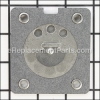
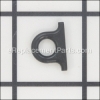
Head Gasket Z-D24819
Part Number: Z-D24819
Order within the next 8 hours
and your part ships today!
and your part ships today!
Product Information
Description:
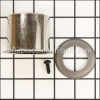
| This is a genuine manufacturer-sourced replacement gasket, it is specially designed for use with Craftsman air compressors. It is utilized to provide an air-tight seal for the cylinder head, over time it may begin to wear out and crack eventually requiring a replacement to maintain peak performance. Please refer to the appropriate diagrams of your model for the correct location and use of this hardware. This high-quality component is made of durable composite material and it is sold individually. |
Frequently Purchased With
Compatibility
the 150+ compatible machines
This part is compatible with the following machines:
Porter Cable
CF1400 Pancake Air Compressor
CF2600 Type 0 Pancake Air Compressor
CF2600 Type 1 Pancake Air Compressor
CF2600 Type 2 Pancake Air Compressor
CPFAC2040P Type 0 Pancake Compressor
CPFAC2040P Type 1 Pancake Compressor
CPFAC2040P Type 2 Pancake Compressor
CPFAC2040P Type 3 Pancake Compressor
CPFAC2600P Type 0 2 HP 6-Gallon Pancake Compressor
CPFAC2600P Type 1 2 HP 6-Gallon Pancake Compressor
CPFAC2600P Type 2 2 HP 6-Gallon Pancake Compressor
CFFN250B Type 1 A 2HP 6G PC UM 1STG 120 Compressor
CFFN250T Type 0 Nailer/Compressor
E2002 Type 1 A 2HP 4G PC UM 1STG 120 Compressor
CFBN200A Type 0 A 2HP 6G PC UM 1STG 120 Compressor
CFBN200A Type 2 A 2HP 6G PC UM 1STG 120 Compressor
CFBN217A Type 1 A 2HP 6G PC UM 1STG 120 Compressor
C2000 Type 0 A 2.5HP 6G PC UM 1STG 120 Compressor
C2000 Type 1 A 2.5HP 6G PC UM 1STG 120 Compressor
C2002-WK Type 0 1HP 6G Compressor
C3001 Type 0 A 3HP 4G SS UM 1STG 120 Compressor
C3001 Type 01 A 3HP 4G SS UM 1STG 120 Compressor
C3001 Type 1 A 3HP 4G SS UM 1STG 120 Compressor
C3001 Type 2 A 3HP 4G SS UM 1STG 120 Compressor
CPFAC2600P-W Type 0 A 2HP 6G PC UM 1STG 120 Compressor
CPFAC2600P-W Type 1 A 2HP 6G PC UM 1STG 120 Compressor
C6001 150 PSI 17 Gallon Oil-Free Vertical Portable Compressor
C2002 Type 2 1HP 6 Gallon Compressor
C2002 Type 3 1HP 6 Gallon Compressor
C2000-WK Type 0 2.5 Hp Compressor
C2000-WK Type 1 2.5 Hp Compressor
C2002 Type 0 1 HP 6 Gallon Compressor
C2002 Type 4 1 HP 6 Gallon Compressor
C2002 Type 5 1 HP 6 Gallon Compressor
C2002 Type 7 1 HP 6 Gallon Compressor
C2004-WK Type 1 4 GAL Air Compressor
C2004-WK Type 3 4 GAL Air Compressor
CF6131-P Compressor
CFFN250S Air Compressor
C2005 Type 5 Compressor
C2005 Type 4 Compressor
PCFP02003 Compressor
C2002 Type 8 1 HP 6 Gallon Compressor
Delta
DeWALT
DeVilbiss
EXFA2080SV Type 0 Workshop/Auto Compressor
FA750 Type 0 Workshop/Auto Compressor
FA750 Type 1 Workshop/Auto Compressor
FA750 Type 2 Workshop/Auto Compressor
HFAC100 Type 0 Workshop/Auto Compressor
HFAC100 Type 1 Workshop/Auto Compressor
IRSFAC28 Type 0 Workshop/Auto Compressor
IRSFAC28 Type 2 Workshop/Auto Compressor
Y6010-WK Type 0 Compressor
HFAC153 Type 0 1.5 HP 3G HD Air Compressor
HFAC153 Type 1 1.5 HP 3G HD Air Compressor
HFAC153 Type 2 1.5 HP 3G HD Air Compressor
HFAC153 Type 3 1.5 HP 3G HD Air Compressor
HFAC153 Type 4 1.5 HP 3G HD Air Compressor
EXFAC200 Type 0 125 PSI Air Compressor
EXFAC200 Type 1 125 PSI Air Compressor
Y6020 Type 0 Air Compressor
PAFAC153 Type 0 1.5 HP 3G Compressor
PAFAC153 Type 1 1.5HP 3G Compressor
PAFAC153 Type 2 1.5HP 3G Compressor
PAFAC153 Type 3 1.5HP 3G Compressor
PAFAC153 Type 4 1.5HP 3G Compressor
EXFAC125 (Type 2) 1 HP 2.5 Gallon Compressor
EXFAC125 (Type 3) 1 HP 2.5 Gallon Compressor
Black and Decker
919-16537 Type 0 1 Horse Power Compressor
919-16538 Type 0 1 Horse Power Compressor
919-16538 Type 1 1 Horse Power Compressor
919-16644 Type 0 3.0 Horse Power 15 Gallon Compressor
919-16644 Type 1 3.0 Horse Power 15 Gallon Compressor
919-16644 Type 2 3.0 Horse Power 15 Gallon Compressor
919-16726 Type 0 1.5 Horse Power Compressor
919-16727 Type 0 1.5 Horse Power Compressor
919-16737 Type 0 Compressor
919-16738 Type 0 Compressor
919-72412 Type 0 3.0 Horse Power 15 Gallon Compressor
919-72412 Type 1 3.0 Horse Power 15 Gallon Compressor
919-72412 Type 2 3.0 Horse Power 15 Gallon Compressor
919-72412 Type 3 3.0 Horse Power 15 Gallon Compressor
919-72413 Type 0 3.0 Horse Power 15 Gallon Compressor
919-72413 Type 1 3.0 Horse Power 15 Gallon Compressor
919-72413 Type 2 3.0 Horse Power 15 Gallon Compressor
Craftsman
919152160 Air Compressor
919167370 Air Compressor
919167380 Air Compressor
919167260 Air Compressor
919167270 Air Compressor
919167244 Air Compressor
919166442 Air Compressor
919152145 Air Compressor
919166441 Air Compressor
919167243 Air Compressor
919166440 Air Compressor
919152144 Air Compressor
919152143 Air Compressor
919167242 Air Compressor
919165381 Air Compressor
919165361 Air Compressor
919152340 Air Compressor
919165370 Air Compressor
919165281 Air Compressor
919165282 Air Compressor
919152142 Air Compressor
919165360 Air Compressor
919165380 Air Compressor
919152141 Air Compressor
919165240 Air Compressor
919165280 Air Compressor
919152350 Air Compressor
919152120 Air Compressor
919165040 Air Compressor
919150340 Air Compressor
919152040 Air Compressor
919162080 Air Compressor
919150200 Air Compressor
919150390 Air Compressor
919162120 Air Compressor
919150360 Air Compressor
919150260 Compact Air Compressor
919150330 Compressor
919150210 Compressor
919150331 Air Compressor
919150311 Air Compressor
919150310 Compressor
919152042 Permanently Lubricated Compressor
919152020 Air Compressor
919162121 Air Compressor
919152041 Air Compressor
91915216 Compressor
919167241 Air Compressor
919165041 Air Compressor
919167240 Air Compressor
919167160 Air Compressor
919152140 Air Compressor
919167141 Air Compressor
919151360 Air Compressor
919154210 Compressor
919154310 Compressor
Bostitch
Products Compatibility
This item works with the following types of products:
- • Compressor
Repair Guides
![]()

Watch the Repair Video for
Head Gasket

Articles:
|
This article will show you how to quickly replace the head gasket on an air compressor....
November 19, 2014
|

Questions & Answers for Head Gasket
No questions have been asked yet
Repair Instructions: Submitted by Customers Like You
3 of 3 people found this instruction helpful
Tool Type:
Compressor
Parts Used:
Repair Difficulty:
Easy
Time Spent Repairing:
30-60 minutes
Tools Used:
Screwdriver, Pliers, Wrench Set, Adjustable Wrench
Compressor ran but would not reach the pressure shut off as air was leaking by. Discovered worn gasket and the check valve was not seating.
Disassembled the compressor including the compressor cylinder. Word to the wise: the case has some Torx screws way, down deep. Standard extensions wouldn't work as they were to large in diameter. The depth of one of the screws is in excess of 6" Replaced the head gasket and the tube gasket. Lubed the tube gasket with some dish soap to ease the installation. Use a torque wrench to set the head bolts.
Replaced the check valve and reconnected all hoses and wiring.
Plugged in and ran a test. All went well.
Replaced the check valve and reconnected all hoses and wiring.
Plugged in and ran a test. All went well.
Did you find this story helpful?
Thanks for voting and helping fellow customers!
1 of 1 people found this instruction helpful
Tool Type:
Compressor
Parts Used:
Repair Difficulty:
Easy
Time Spent Repairing:
30-60 minutes
Tools Used:
Screwdriver, Socket set, Torx Drivers
Air Leak above 60 psi
Disassembled compressor cylinder, replaced tube seal, gaskets and valve plate, reassembled. There was a YouTube video from eReplacementParts available if necessary. Some of the screws in the housing were in deep pockets and required torx driver with long shafts, but otherwise simple and straightforward. The location of the air leak at the tube seal was easy to diagnose once the housing was disassembled, by pressurizing and listening for the leak. Over time, heat will degrade the seal, fairly common problem for this compressor.
Did you find this story helpful?
Thanks for voting and helping fellow customers!
Tool Type:
Compressor
Parts Used:
Repair Difficulty:
Medium
Time Spent Repairing:
30-60 minutes
Tools Used:
Screwdriver, Wrench Set, Allen wrenches
Not reaching pressure
Replaced valve plate and gaskets.
Both gaskets should be ordered with the plate. Valve plate comes with lower gasket. Upper gadket5 is separate purchase but cannot reuse original gasket.
Both gaskets should be ordered with the plate. Valve plate comes with lower gasket. Upper gadket5 is separate purchase but cannot reuse original gasket.
Did you find this story helpful?
Thanks for voting and helping fellow customers!
Tool Type:
Compressor
Parts Used:
Repair Difficulty:
Easy
Time Spent Repairing:
15-30 minutes
Tools Used:
Screwdriver, Wrench Set, Torx head screwdriver (unsure of size)
O-Ring around the pressure tube to the tank blew out at the pump head.
Compressor is probably 12 years old...and I use it all the time...so, no surprise really that it went south. Replacing the special o-ring requires the 4-bolt head to be removed. Removing the head will very likely damage the very delicate head gasket. So I replaced that too. The most difficult part of the repair was determining the proper orientation of the pressure tube when reassembling, but, a person can figure that out by spatially rotating in your noggin. The other part that required some "figuring" was locating the 5 Torx head screws that hold the two halves of the air pump case assembly and the 2 large philips head screws that prevent the air pump assembly from "sliding out" of the brackets on the top of the tank.
Did you find this story helpful?
Thanks for voting and helping fellow customers!
Tool Type:
Compressor
Repair Difficulty:
Easy
Time Spent Repairing:
30-60 minutes
Tools Used:
Screwdriver, Socket set, Torque wrench
Air leak.
Removed the plastic, the cylinder head and reassembled.
Did you find this story helpful?
Thanks for voting and helping fellow customers!
Tool Type:
Compressor
Repair Difficulty:
Medium
Time Spent Repairing:
30-60 minutes
Tools Used:
Screwdriver, Nutdriver
Compressor leaked air slowly.
1. Disassembled the outer cover.
2. Removed the head and the outlet tube.
3. Cleaned the gasket from the head.
4. Replaced the tube seal.
5. Reassembled the head and the outlet tube.
6. Reassembled the compressor.
2. Removed the head and the outlet tube.
3. Cleaned the gasket from the head.
4. Replaced the tube seal.
5. Reassembled the head and the outlet tube.
6. Reassembled the compressor.
Did you find this story helpful?
Thanks for voting and helping fellow customers!
Tool Type:
Compressor
Repair Difficulty:
Easy
Time Spent Repairing:
15-30 minutes
Tools Used:
Socket set
Low air pressure
Removed the head and found damaged valve plate and gasket
Ordered the replacement and was surprised to find the gasket cost more than the plate.
Put the parts in and installed the head
Ordered the replacement and was surprised to find the gasket cost more than the plate.
Put the parts in and installed the head
Did you find this story helpful?
Thanks for voting and helping fellow customers!
Tool Type:
Compressor
Repair Difficulty:
Medium
Time Spent Repairing:
1-2 hours
Tools Used:
Screwdriver, Socket set, Wrench Set, Nutdriver
Leaking air
Removed the housing to uncover the pump and motor
Removed the cylinder head, gasket, valve plate and another gasket
Installed the first new gasket on the nearest the cylinder , then the valve plate followed by the second gasket. Then installed the new cylinder head. Tested, no air leaks.
Removed the cylinder head, gasket, valve plate and another gasket
Installed the first new gasket on the nearest the cylinder , then the valve plate followed by the second gasket. Then installed the new cylinder head. Tested, no air leaks.
Did you find this story helpful?
Thanks for voting and helping fellow customers!
Tool Type:
Compressor
Repair Difficulty:
Easy
Time Spent Repairing:
Less than 15 minutes
Tools Used:
Screwdriver, Pliers
Needed new head and gaskets.
Removed motor cover
Removed wire ring
Removed head and gaskets
Replaced with new parts.
Completed repair with ease.
Removed wire ring
Removed head and gaskets
Replaced with new parts.
Completed repair with ease.
Did you find this story helpful?
Thanks for voting and helping fellow customers!
Tool Type:
Compressor
Repair Difficulty:
Easy
Time Spent Repairing:
30-60 minutes
Tools Used:
Screwdriver, Nutdriver, Torx screwdriver
Porter-Cable C2002 Type 3 leaking air
1. Disconnect and drain compressor
2. Remove compressor handle and cover (Torx screws)
3. Remove compressor motor assembly and wire connections
4. Remove 4 screws holding compressor head
5. Remove valve plate and clean all surfaces
6. Remove tube seal from tube
7. Install new tube seal, lower gasket and valve plate, upper gasket and compressor head
8. Install and tighten 4 compressor head screws in a diagonal pattern to 50 inch lbs.
9. Install compressor motor assemble and reattach wires
10. Install cover and handle
11. Test
12. Compressor still leaks, not as bad
13. Removed and cleaned check valve
14. Install check valve
15.Test
16. No leaks
Did you find this story helpful?
Thanks for voting and helping fellow customers!
show more
Reviews
7 Reviews
Average Rating (out of 5):
Click to filter by ratings:
5 stars
6
4 stars
1
3 stars
0
2 stars
0
1 stars
0
< PREV
- 1
Seal
Part worked great, air compressor now gets up to operating pressure as before!
Guest -
March 23, 2023
Verified Purchase
Worked great
Old compressor and new parts. Worked out great. Parts were delivered in a timely manner too.
Anonymous -
September 5, 2022
Verified Purchase
Great parts
The compressor working like New thanks
Guest -
December 3, 2019
Verified Purchase
Compressor head gasket and valve
Perfect fit fast service will by from them again anytime
Guest -
November 22, 2019
Verified Purchase
pancake air compressor repair
Head gasket and valve plate fir perfectly. Compressor works good! Great place to buy replacement parts for any equipment!
Mason -
October 18, 2019
Verified Purchase
The right part and easy to install
Head Gasket and o-ring arrived quickly and I had the compressor back up and running like new in minutes. Other web sites said these parts were no longer available. This saved my 300 dollar compressor.
Guest -
October 8, 2019
Verified Purchase
Great parts
Came in a timly mater. Package was in good shape. Parts were of hi quality
Guest -
September 9, 2019
Verified Purchase
Verified Purchase
eReplacementParts Team
< PREV
- 1
Product Information
Repair Guides
![]()
Watch the Repair Video for
Head Gasket
Articles:
|
This article will show you how to quickly replace the head gasket on an air compressor....
November 19, 2014
|