
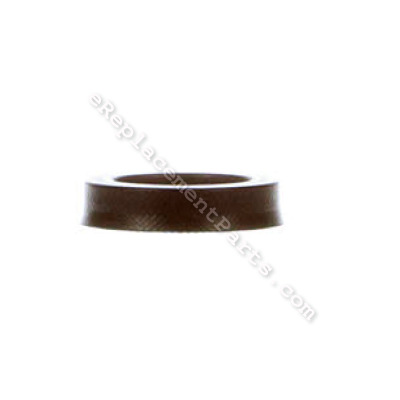


This item is sourced from the original equipment manufacturer. It is specially designed for use with Karcher pressure washers. This is one of the special components that are utilized to provide a tight seal for the pump components. Over time it may wear out or get damaged causing water leaks and eventually requiring a replacement. Note, this high-quality grooved ring is made of a durable material and is sold individually. Make sure to check the diagrams of your specific model for the exact location and the correct application. You will need a wrench set to take the pump apart in order to perform this repair.
Grooved Ring 16x24x5.3 6.365-408.0
OEM part for: Karcher
Part Number: 6.365-408.0
$8.10
In Stock
Jump To:
Frequently Purchased Together ?


Compatibility
This part will fit the following 12 machines
Karcher
K 1200 G (1.810-983.0) Pressure Washer View Diagrams & Manuals
K 1200 G-Plus (1.810-984.0) Pressure Washer View Diagrams & Manuals
K 12000 GX (1.810-982.0) Pressure Washer View Diagrams & Manuals
HD 3500 G (1.810-994.0) Pressure Washer View Diagrams & Manuals
HD 3500 DH-QC (1.810-996.0) Pressure Washer View Diagrams & Manuals
HD 3500 DH (1.810-997.0) Pressure Washer View Diagrams & Manuals
HD 3500 DB (1.810-998.0) Pressure Washer View Diagrams & Manuals
HD 3501 (1.810-999.0) Pressure Washer View Diagrams & Manuals
K 14000 G (1.810-989.0) Pressure Washer View Diagrams & Manuals
HD 3600 DH (1.810-934.0) Pressure Washer View Diagrams & Manuals
G 4000 SH (18104000) Pressure Washer View Diagrams & Manuals
G 4000 RH (18104010) Pressure Washer View Diagrams & Manuals
Show More Compatible Models
This item works with the following types of products:
- Pressure Washer Parts
Customer Part Reviews ?
Average Rating (out of 5):
Click to filter by ratings:
5 stars
1
4 stars
0
3 stars
0
2 stars
0
1 stars
0
< PREV
- 1
Perfect parts and quick delivery
Our pressure washer was in need of repair and after contacting eReplacementParts, we received the parts quickly. My husband is a happy man again! Thank you
Joan -
September 9, 2023
Verified Purchase
t
t
t -
t days ago
Verified Purchase
eReplacementParts Team
t
Questions & Answers ?
Our customer Service team is at the ready daily to answer your part and product questions.

Ask our Team
We have a dedicated staff with decades of collective experience in helping customers just like you purchase parts to repair their products.
Does this fit my product?Questions & Answers for Grooved Ring 16x24x5.3
No questions have been asked yet
Customer Repair Instructions ?
All our customer repair instructions are solicited directly from other customers just like you who have purchased and replaced this exact part.
Pressure washer - no pressure - leaking thru telltales
Heather - March 5, 2019
Tool Type
Pressure Washer
Difficulty
Medium
Time
30-60 minutes
Tools Used
Screwdriver, Socket set, picks, feeler gauges, allen wrenches
Tore it apart
Found bad seals
Replaced bad seals
Reassembled
Washed Deck
Made wife happy
Had conjugal visit
Found bad seals
Replaced bad seals
Reassembled
Washed Deck
Made wife happy
Had conjugal visit
Did you find this story helpful?
Thanks for voting and helping fellow customers!
Pistons spalled, corroded. Seals worn and damaged
Charles - June 27, 2018
Tool Type
Pressure Washer
Difficulty
Medium
Time
More than 2 hours
Tools Used
Socket set, Wrench Set
Pressure control was loading about every second and the spray was pulsating. Checked the unloader/pressure control, it seemed to be OK.
Disassembled to see the pistons and check valves. The top two pistons were spalled on the sides and corroded on the tip.The seals had been worn and damaged by the roughness of the pistons.
Had to file off the raised areas on the sides of the pistons so they would pass through the housing.
Used the long bolts and some spacers to gradually remove the piston guide housing.
The pistons and seals came out easily. The pistons installed easily. The seals were a little more difficult. You have to apply pressure with your thumb and work the lip in with a small screw driver.
Check the check valves by putting water above the valve and see if it leaks through. I blew through the check valves and they started seating good. Put it all back together, added oil, and it worked like new.
Did you find this story helpful?
Thanks for voting and helping fellow customers!
OEM stands for Original Equipment Manufacturer and means the part you’re buying is sourced directly from the manufacturer who made your product. At eReplacementParts, we sell only genuine OEM parts, guaranteeing the part you’re purchasing is of better design and of higher quality than aftermarket parts.
Our product descriptions are a combination of data sourced directly from the manufacturers who made your product as well as content researched and curated by our content & customer service teams. This content is edited and reviewed internally before being made public to customers.
Our customer service team are at the ready daily to answer your part and product questions. We have a dedicated staff with decades of collective experience in helping customers just like you purchase parts to repair their products.
All our part reviews are solicited directly from other customers who have purchased this exact part. While we moderate these reviews for profanity, offensive language or personally identifiable information, these reviews are posted exactly as submitted and no alterations are made by our team.
All our customer repair instructions are solicited directly from other customers just like you who have purchased and replaced this exact part. While we moderate these reviews for profanity, offensive language or personally identifiable information, these reviews are posted exactly as submitted and no alterations are made by our team.
Based on data from past customer purchasing behaviors, these parts are most commonly purchased together along with the part you are viewing. These parts may be necessary or helpful to replace to complete your current repair.
All our installation videos are created and produced in collaboration with our in-house repair technician, Mark Sodja, who has helped millions of eReplacementParts customers over the last 13 years repair their products. Mark has years of experience in selling and repairing both commercial and residential products with a specialty in gas-powered equipment.
This data is collected from customers who submitted a repair instruction after replacing this exact part. Customers can rate how easy the repair was to complete and how long it took. We aggregate this data to provide a repair rating that allows customers to quickly determine the difficulty and time needed to perform their own repair.