eReplacementParts.com
877-346-4814
Makita Parts

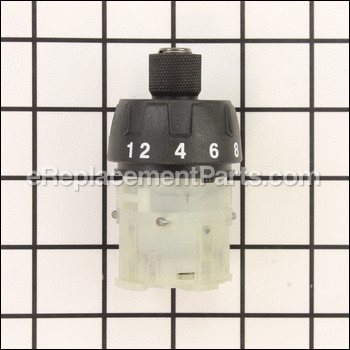
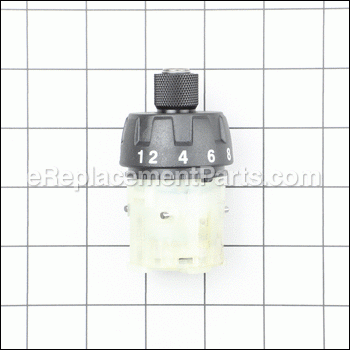
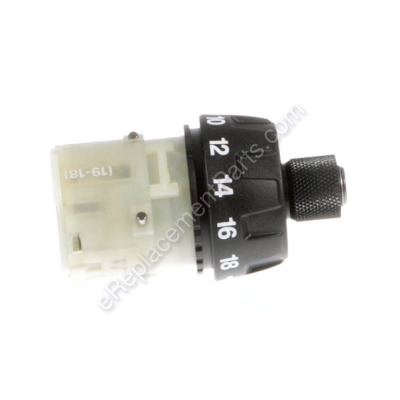
Gear Assy 123504-6

OEM part for: Makita

Part Number: 123504-6


Install
Videos!
Gear Assy - 123504-6:Makita 360 View
Gear Assy - 123504-6:MakitaGear Assy - 123504-6:MakitaGear Assy - 123504-6:MakitaGear Assy - 123504-6:Makita 360 View
In Stock
Order within the next 11 hours and your part ships today!
Easy 15-30 minutes (7 rated repairs)?
OEM: Original Equipment Manufacturer ?
Makita
Does this d-block d-md-none fit my product?

Product Description ?

  • Classification: Part
  • Weight: 0.60 lbs.
  • Shipping: Ships Worldwide

Frequently Purchased Together ?

Compatibility

This part will fit the following 6 machines

Makita

DF030D 10.8V Compact Lithium-Ion Cordless Driver Drill View Diagrams & Manuals
DF030DW 10.8V Cordless 1/4" Hex Driver-Drill View Diagrams & Manuals
FD01W 12V max Lithium-Ion Cordless 1/4" Hex Driver-Drill Kit View Diagrams & Manuals
DF030DWE Screwdriver View Diagrams & Manuals
Show More Compatible Models
Don't see yours? Try searching our site for :

This item works with the following types of products:

  • Cordless Drill Parts
  • Drill Parts

This part replaces obsolete part #: , 125459-1

Customer Part Reviews ?

4.3
Average Rating (out of 5):
3 Reviews
Click to filter by ratings:
5 stars
1
4 stars
2
3 stars
0
2 stars
0
1 stars
0
  • Highest Rating
  • Most Recent
< PREV
  • 1
NEXT >
  • Perfect Part
    Exactly what I needed, and arrived very quickly.
    Guest - October 3, 2023 Verified Purchase
    Saved me money!!
    Instead of replacing my Makita cordless drill for about $100, installed the new part with minimal difficulty for $30 (including shipping).
    Guest - May 7, 2020 Verified Purchase
    Almost perfect
    They had the part I needed. It was fairly straight forward to install the part with the aid of on-line instructions from others. It would be great if they included written instruction, but that's not a deal breaker. First time I ordered this, they sent the wrong part, with wrong part number. Had to send it back, but the return process worked quite well and I was credited for that purchase. Process requires I order it again, so I did, and this time got the correct part. So, the only issue was it took 2 weeks to get my drill back in business instead of just one.
    David - June 20, 2019 Verified Purchase
    t
    t
    t - t days ago Verified Purchase
    eReplacementParts Team
    t

    Questions & Answers ?

    Our customer Service team is at the ready daily to answer your part and product questions.

    photo of team member
    Ask our Team

    We have a dedicated staff with decades of collective experience in helping customers just like you purchase parts to repair their products.

    Does this fit my product?

    Questions & Answers for Gear Assy


    No questions have been asked yet

    Customer Repair Instructions ?

    All our customer repair instructions are solicited directly from other customers just like you who have purchased and replaced this exact part.

    Easy 15-30 minutes (7 rated repairs)?

    Torque setting drive stripped out, rendering drill useless

    Craig - March 27, 2016
    👍 2 of 2 people found this instruction helpful
    Tool Type

    Cordless Drill

    Difficulty

    Easy

    Time

    Less than 15 minutes

    Tools Used

    Screwdriver

    Removed outer case of drill, removed gear drive and reinstall in reverse order
    Did you find this story helpful?
    Thanks for voting and helping fellow customers!

    My clutch went out on my cordless screw driver

    Jacob - April 17, 2018
    👍 1 of 1 people found this instruction helpful
    Tool Type

    Cordless Drill

    Difficulty

    Easy

    Time

    15-30 minutes

    Tools Used

    Screwdriver

    Separated the halves of the screw gun. Removed the old clutch and installed the new one. Pretty straight forward. The only thing to watch is the springs on the speed selector. They popped out on me, but they were easy enough to put back. I'm very pleased, gun works like new.
    Did you find this story helpful?
    Thanks for voting and helping fellow customers!

    drill clutch would not engage

    Maurice - October 13, 2019
    Tool Type

    Cordless Drill

    Difficulty

    Medium

    Time

    30-60 minutes

    Tools Used

    Screwdriver

    Replaced the clutch mechanism
    Did you find this story helpful?
    Thanks for voting and helping fellow customers!

    I stripped out the gear assembly trying to drive a screw without first drilling a pilot hole

    Joe - July 9, 2017
    Tool Type

    Cordless Drill

    Difficulty

    Medium

    Time

    30-60 minutes

    Tools Used

    Screwdriver, Pliers

    I removed the screws holding the two halves of the casing together. The old gear assembly came out fairly easily. Only problem I had was getting the two halves to snap back together. Problem was the speed selector switch wouldn't go back into a little slot. Just kept on trying and it finally snapped back in and went together. I use this tool a lot in my shop and around the house so it was well worth repairing and it only cost about $26.
    Did you find this story helpful?
    Thanks for voting and helping fellow customers!

    Power switch would go in reverse

    ROBIN - June 3, 2017
    Tool Type

    Cordless Drill

    Difficulty

    Medium

    Time

    1-2 hours

    Tools Used

    Screwdriver, Pliers, None

    Removed covers of drill replaced switch and gear assembly at the same time. The tricky part was routing the wiring back in properly to get the drill to fit back together correctly . Pulling the wires off the old connectors was somewhat difficult, I had to use pliers to pull them, was worried I would break them. Routing the wiring for the switch took me a couple of tries.
    Did you find this story helpful?
    Thanks for voting and helping fellow customers!

    Ratchet slipped when under pressure.

    Ned - February 20, 2016
    Tool Type

    Cordless Drill

    Difficulty

    Easy

    Time

    Less than 15 minutes

    Tools Used

    Screwdriver

    Take out screws on the side. Spread apart drill and remove the entire head . Then replace it with the new head in the same way. Reinsert the screws.

    It was very easy and cost a fraction of what a new drill would have.
    Did you find this story helpful?
    Thanks for voting and helping fellow customers!

    The clutch system on my Makita drill driver wore out.

    Gary - February 12, 2016
    👍 1 of 2 people found this instruction helpful
    Tool Type

    Cordless Drill

    Difficulty

    Easy

    Time

    15-30 minutes

    Tools Used

    Screwdriver, Pliers

    Remove the screws from the housing. Remove one half of the housing. Try to keep all of the parts in the other housing half. Take a picture of the parts in the other half. Carefully remove the worn gear assembly from the motor. Then install the new gear assembly.
    Make sure all of the parts are in the correct place. Place the housings together. They should fit tight with no spaces between them. Then screw the housings back together.
    Did you find this story helpful?
    Thanks for voting and helping fellow customers!

    OEM stands for Original Equipment Manufacturer and means the part you’re buying is sourced directly from the manufacturer who made your product. At eReplacementParts, we sell only genuine OEM parts, guaranteeing the part you’re purchasing is of better design and of higher quality than aftermarket parts.

    Our product descriptions are a combination of data sourced directly from the manufacturers who made your product as well as content researched and curated by our content & customer service teams. This content is edited and reviewed internally before being made public to customers.

    Our customer service team are at the ready daily to answer your part and product questions. We have a dedicated staff with decades of collective experience in helping customers just like you purchase parts to repair their products.

    All our part reviews are solicited directly from other customers who have purchased this exact part. While we moderate these reviews for profanity, offensive language or personally identifiable information, these reviews are posted exactly as submitted and no alterations are made by our team.

    All our customer repair instructions are solicited directly from other customers just like you who have purchased and replaced this exact part. While we moderate these reviews for profanity, offensive language or personally identifiable information, these reviews are posted exactly as submitted and no alterations are made by our team.

    Based on data from past customer purchasing behaviors, these parts are most commonly purchased together along with the part you are viewing. These parts may be necessary or helpful to replace to complete your current repair.

    All our installation videos are created and produced in collaboration with our in-house repair technician, Mark Sodja, who has helped millions of eReplacementParts customers over the last 13 years repair their products. Mark has years of experience in selling and repairing both commercial and residential products with a specialty in gas-powered equipment.

    This data is collected from customers who submitted a repair instruction after replacing this exact part. Customers can rate how easy the repair was to complete and how long it took. We aggregate this data to provide a repair rating that allows customers to quickly determine the difficulty and time needed to perform their own repair.

    eReplacementParts.com
    7174 South 400 West
    Suite 5
    Midvale, UT 84047
    visa mastercard discover american express PayPal