


Genuine Makita replacement part, this item i sold individually.
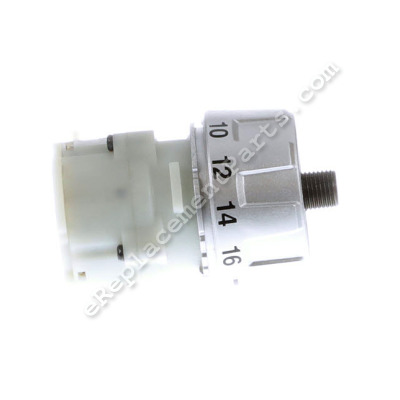
This is the Gear Assembly for the Makita tools listed below.
If the clutch or the gears on you drill go out on you.
this is the part that you will want to replace.
Gear Assembly 125348-0
OEM part for: Makita
Part Number: 125348-0
$40.14
In Stock
Product Description ?
- Classification: Part
- Weight: 0.67 lbs.
- Shipping: Ships Worldwide
Compatibility
This part will fit the following 9 machines
Makita
BDF452HW Drill / Driver View Diagrams & Manuals
BDF452 Cordless 1/2" Driver-Drill View Diagrams & Manuals
BDF452H (Type 1) Drill View Diagrams & Manuals
BDF452H (Type 2) Drill View Diagrams & Manuals
BDF452H (Type 3) Drill View Diagrams & Manuals
BDF452HW (Type 2) Drill View Diagrams & Manuals
BDF452HW (Type 3) Drill View Diagrams & Manuals
BDF452 (Type 2) Drill View Diagrams & Manuals
BDF452 (Type 3) Drill View Diagrams & Manuals
Show More Compatible Models
This item works with the following types of products:
- Drill Parts
- Cordless Drill Parts
Customer Part Reviews ?
Average Rating (out of 5):
Click to filter by ratings:
5 stars
4
4 stars
2
3 stars
0
2 stars
0
1 stars
0
< PREV
- 1
Great part with an easy install, was able to save my favorite drill.
I was able to repair my drill with this quality part. It was delivered on time without any issues.
Guest -
January 5, 2022
Verified Purchase
The part fit great, fixed my drill for way less than a new one!
The part was a great fit, the web site was helpful in the disassembly and reassembly.
Guest -
September 8, 2020
Verified Purchase
great service
Easy website to find parts and the item came quickly and was as advertized
Guest -
May 27, 2020
Verified Purchase
Makita drill gear assembly
Fast delivery same as original part easy to install drill works like brand new
Guest -
April 11, 2020
Verified Purchase
Perfect Fit - Worked Great
I am very happy with the Makita cordless drill gear assembly from eReplacementParts.com. My only regret is that the repair video glossed over a crucial step in the process, hence a 4-star rating instead of 5. The video showed the technician replacing the new gear/motor assembly rather quickly without any mention of the importance of lining up the notch on the motor field in the housing. I struggled with that for an hour before reviewing the repair video for the motor, in which it was noted that the notch must line up with a corresponding "fin" in the housing. I just hope the company will modify their video to clear up that important step in the reassembly. Otherwise, I'm totally happy with my purchase, and I will continue to buy parts from them for my tools and appliances.
Guest -
November 30, 2021
Verified Purchase
More detail
Ordering was easy. Came on time. On line instructions very good but would recommend they add a note/picture showing small slot on motor that has to be engaged to get it well seated
Guest -
July 26, 2021
Verified Purchase
t
t
t -
t days ago
Verified Purchase
eReplacementParts Team
t
Questions & Answers ?
Our customer Service team is at the ready daily to answer your part and product questions.

Ask our Team
We have a dedicated staff with decades of collective experience in helping customers just like you purchase parts to repair their products.
Does this fit my product?Questions & Answers for Gear Assembly
No questions have been asked yet
Customer Repair Instructions ?
All our customer repair instructions are solicited directly from other customers just like you who have purchased and replaced this exact part.
Chuck was jammed in closed position with a square bit in it.
Robert - June 15, 2016
👍 4 of 4 people found this instruction helpful
Tool Type
Cordless Drill
Difficulty
Easy
Time
15-30 minutes
Tools Used
Screwdriver
Had to replace gear box, chuck, and screw (reverse threads) that secures chuck. Recommend only tighten and loosen chuck by hand, do not hold chuck and use motor to tighten chuck. Save yourself some $.
Did you find this story helpful?
Thanks for voting and helping fellow customers!
Slipping drill
John - July 20, 2016
👍 1 of 1 people found this instruction helpful
Tool Type
Cordless Drill
Difficulty
Medium
Time
1-2 hours
Tools Used
Screwdriver
Parts Used
1. Removed screws and opened drill case
2. Removed old gear case with chuck
3. Installed new gear case
4. Closed drill case
2. Removed old gear case with chuck
3. Installed new gear case
4. Closed drill case
Did you find this story helpful?
Thanks for voting and helping fellow customers!
Gears were stripped out.
Joe - April 29, 2020
Tool Type
Cordless Drill
Difficulty
Easy
Time
30-60 minutes
Tools Used
Screwdriver, Impact driver
Parts Used
1. Loosened screw inside the drill chuck, it has reverse threads.
2. Tightened a medium size allen wrench in the chuck.
3. Held the drill tight on the workbench.
4. Hit the allen wrench with a rubber mallet to loosen the chuck from the gear assembly.
5. Unscrewed the chuck completely from the gear assembly.
6. Took all screws out so could take one half of the drill housing off.
7. Slowly lifted up the gear assembly and armature. Be careful not to lose the spring from the speed switch.
8. Carefully pull the gear assembly off.
9. Push the new gear assembly on, attach the speed switch, and push everything back into place.
10. Reassemble in reverse order of taking apart.
Did you find this story helpful?
Thanks for voting and helping fellow customers!
Lost bearing in the process of another repair
Stephen - September 28, 2018
Tool Type
Cordless Drill
Difficulty
Medium
Time
30-60 minutes
Tools Used
Screwdriver
Parts Used
Removed gear assembly and replaced it with a new one. New chuck was required due to my inability to remove the center screw. Repair was easy and quick.
Remember, the chuck screw is fairly easy to remove while still in the intact drill. It is also reverse threaded.
Remember, the chuck screw is fairly easy to remove while still in the intact drill. It is also reverse threaded.
Did you find this story helpful?
Thanks for voting and helping fellow customers!
Would not stay in low gear; plastic ring had the teeth knocked down.
Clint - September 24, 2018
Tool Type
Cordless Drill
Difficulty
Easy
Time
15-30 minutes
Tools Used
Screwdriver
Parts Used
Had already disassembled the gear box to see what was wrong not realizing that I could not order individual gear box pieces so I had to build a tool to split the chuck from the gear box but the short video showing how to remove the chuck with the drill still intact is very helpful! The only piece that wasn't obvious to me as to where it went was the leaf spring and there was also a video showing where that went; other than that just have to pay attention to notches etc. to make sure everything is aligned right.
Did you find this story helpful?
Thanks for voting and helping fellow customers!
Gear box would no longer drive, could stop the chuck by hand
Donald - May 27, 2018
Tool Type
Cordless Drill
Difficulty
Medium
Time
30-60 minutes
Tools Used
Screwdriver
Parts Used
Watched the video, tried to get the chuck off, watched the video again.
Took the sides off the drill and removed the gear box, chuck combo. Watched the video one last time and finally separated the gear box from the chuck.
Removed the chuck.
Assembled new gear box to the chuck.
Tried to install into drill body three times. Note: there are small key slots in both the gear box and chuck.
Installed gear box and chuck, replaced side of drill, tightened 8 screws. Tested drill/ driver. Perfect, works like new.
Did you find this story helpful?
Thanks for voting and helping fellow customers!
Old gear assembly would pop out of gear while under load
Michaekl - April 13, 2018
Tool Type
Cordless Drill
Difficulty
Medium
Time
15-30 minutes
Tools Used
Screwdriver, gloves
Parts Used
1) Disassembled drill by splitting off the two sides
2) Remover chuck with allen wrench
3) Removed motor and old gear assembly
4) Reassembled motor with new brushes and new gear assembly
5) Longest amount of time was spent finding where the alignment keys fit into case (one for motor and one for gear assembly
6) Double checked that the clutch spring was still installed
7) Assembled case and reinstalled chuck
8) Powered up drill to check performance
Did you find this story helpful?
Thanks for voting and helping fellow customers!
Grinding noise and no torque to turn chuck. Sounded like gears were stripped. They were.
Gary - July 26, 2017
Tool Type
Cordless Drill
Difficulty
Medium
Time
15-30 minutes
Tools Used
Screwdriver
Parts Used
1. Followed ereplacementparts YouTube video on how to disassemble my Makita cordless drill. This splits the case and enabled me to remove the armature and gear assembly.
2. Removing the chuck from the defective gear assembly was a challenge. I disassembled the gear assembly and put the shaft in a vice. This allowed me to remove the screw that fastens the chuck to the shaft. LEFT HANDED THREADS! Then I was able to tighten the chuck to a large allen wrench and break if free from the shaft.
3. Replaced the gear assembly with new.
4 Reassembled as per video. Had to play with it a bit to get everything in place to allow for the case to be put back in place and fit correctly. Secured with screws and good to go after screwing on the chuck to the drill, and adding the screw that holds it on.
Did you find this story helpful?
Thanks for voting and helping fellow customers!
My Makita BDF452HW Drill-Dvr had two issues: No electric braking (would "coast" after releasing the switch), & gear assy would "disengage" at times.
Mark - November 2, 2016
Tool Type
Cordless Drill
Difficulty
Medium
Time
30-60 minutes
Tools Used
Screwdriver, Toothbrush (to remove debris/dust from yoke, inner case).
To replace the gear assy, brush set, brush holder assy & switch (AFTER viewing the site's "Replacing the Leaf Spring" video), I
-Removed the rear cover (2 screws outside, 1 screw inside).
-Removed all outside screws from the RH side of the tool's outer case; *kept LH side of the tool lying on the work surface.
-Disengaged the (2) springs holding the brushes in place; separated the brush holder from the yoke.
-Separated the yoke from the gear assy (noting, from the video, that the yoke's "notch" is facing downward!).
-Proceeded to, one-by-one, replace the switch assy, brushes & brush holder, and gear assy.
-Once having all of the (above) parts/assemblies in the positions, re-attached the RH tool case half. This parts MAY require having to "re-work" the yoke into its proper position-- yoke's notch MUST properly seat onto the protrusion on the LH tool case half's.
-Re-attached all of the screws for the RH tool case half.
-Ensured the both brushes were in proper position-- in equal contact with the yoke unit; also ensured that new brushes were properly attached to the brush holder. *Per the Makita Technical Bulletin, the COPPER BRUSH LEADS must be arranged so that they are toward the "OUTSIDE" of the tool.
-Re-attached the rear cover.
Did you find this story helpful?
Thanks for voting and helping fellow customers!
Stripped clutch gear
John - March 14, 2017
👍 0 of 1 people found this instruction helpful
Tool Type
Cordless Drill
Difficulty
Medium
Time
30-60 minutes
Tools Used
Screwdriver, Pliers, Adjustable Wrench
Parts Used
Followed the information provided in your YouTube video and used the schematic diagram. The screw holding the chuck on the old gear assembly could not be removed no matter what was tried. I ended up ordering a new screw and new chuck to assemble onto my drill with the newly installed gear clutch.
Did you find this story helpful?
Thanks for voting and helping fellow customers!
OEM stands for Original Equipment Manufacturer and means the part you’re buying is sourced directly from the manufacturer who made your product. At eReplacementParts, we sell only genuine OEM parts, guaranteeing the part you’re purchasing is of better design and of higher quality than aftermarket parts.
Our product descriptions are a combination of data sourced directly from the manufacturers who made your product as well as content researched and curated by our content & customer service teams. This content is edited and reviewed internally before being made public to customers.
Our customer service team are at the ready daily to answer your part and product questions. We have a dedicated staff with decades of collective experience in helping customers just like you purchase parts to repair their products.
All our part reviews are solicited directly from other customers who have purchased this exact part. While we moderate these reviews for profanity, offensive language or personally identifiable information, these reviews are posted exactly as submitted and no alterations are made by our team.
All our customer repair instructions are solicited directly from other customers just like you who have purchased and replaced this exact part. While we moderate these reviews for profanity, offensive language or personally identifiable information, these reviews are posted exactly as submitted and no alterations are made by our team.
Based on data from past customer purchasing behaviors, these parts are most commonly purchased together along with the part you are viewing. These parts may be necessary or helpful to replace to complete your current repair.
All our installation videos are created and produced in collaboration with our in-house repair technician, Mark Sodja, who has helped millions of eReplacementParts customers over the last 13 years repair their products. Mark has years of experience in selling and repairing both commercial and residential products with a specialty in gas-powered equipment.
This data is collected from customers who submitted a repair instruction after replacing this exact part. Customers can rate how easy the repair was to complete and how long it took. We aggregate this data to provide a repair rating that allows customers to quickly determine the difficulty and time needed to perform their own repair.