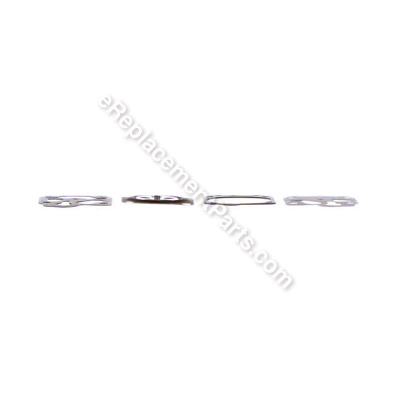


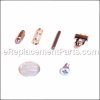
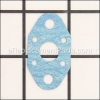
Gasket/diaphragm Kit 99909-159
Part Number: 99909-159
Order within the next 11 hours
and your part ships today!
and your part ships today!
Product Information
Description:
| This is a genuine Shindaiwa replacement part manufactured for outdoor power equipment. This kit is OEM, not an aftermarket imitation. The kit includes the diaphram, and gaskets between the air purge body, and carburetor body. It is recommended to replace the gaskets when reassembling the carburetor after a repair, the kit is sold individually. |
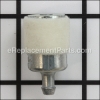
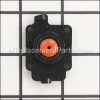
Frequently Purchased With


Compatibility
the 42 compatible machines
This part is compatible with the following machines:
Shindaiwa
AH230 Articulated Hedge Trimmer
AH230 Articulated Hedge Trimmer
AH231 Articulated Hedge Trimmer
AH231 Articulated Hedge Trimmer
DH230 Hedge Trimmer
DH230 Hedge Trimmer
DH231 Hedge Trimmer
DH231 Hedge Trimmer
HT230 Hedge Trimmer
HT230 Hedge Trimmer
HT231 Hedge Trimmer
HT231 Hedge Trimmer
LE230 Lawn Edger
LE231 Lawn Edger
P230 Pole Pruner
P231 Pole Pruner
PB230 Power Broom
C230 Brushcutter
22C Brushcutter
EB240S Blower
EB501 Blower
80280 Multipurpose Tool Carrier
80192 Multipurpose Tool Carrier
61480 Trimmer
TCX230 Trimmer
X230 Trimmer
22F (Before 4100001) Trimmer
22F (After 4100001) Trimmer
M230 Multipurpose Tool
M231 Multipurpose Tool
F230 Trimmer
EB240 Blower
T230 (2000303 and Up) Gas Trimmer
T230X (2000303 and Up) Gas Trimmer
22DH Hedge Trimmer
22DH Hedge Trimmer
HT20 Hedge Trimmer
HT20 Hedge Trimmer
22T Trimmer
T230 Trimmer
C230 (2000303 AND UP) Brushcutters (C)
22F Grass Trimmers (F)
Products Compatibility
This item works with the following types of products:
- • Blower
- • Edger
- • Hedge Trimmer
- • Multi-Tool
- • Pruner
- • Trimmer
Repair Guides
![]()

Articles:
|
Filthy Filters? This article will show you how to install a filter kit on an Echo SRM-225 trimmer....
May 27, 2015
|

Questions & Answers for Gasket/diaphragm Kit
No questions have been asked yet
Repair Instructions: Submitted by Customers Like You
1 of 1 people found this instruction helpful
Tool Type:
Blower
Parts Used:
Repair Difficulty:
Easy
Time Spent Repairing:
30-60 minutes
Tools Used:
Screwdriver, Pliers
Carburetor diaphragm bad
Removed the carburetor and removed the diaphragm and replaced it and the gaskets. Runs great now.
Did you find this story helpful?
Thanks for voting and helping fellow customers!
1 of 1 people found this instruction helpful
Tool Type:
Trimmer
Parts Used:
Repair Difficulty:
Medium
Time Spent Repairing:
15-30 minutes
Tools Used:
Screwdriver
Carburetor dirty
I found the video on you tube that you have on cleaning two cycle carburetors. I was able to get my trimmer running like it was new again. Thank you
Did you find this story helpful?
Thanks for voting and helping fellow customers!
Tool Type:
Hedge Trimmer
Repair Difficulty:
Easy
Time Spent Repairing:
1-2 hours
Tools Used:
Screwdriver, Socket set, Nutdriver, carb. pressure tester for gasket leaks
older hedge trimmer, had been out of service for awhile. would start, but would not stay running.
did a leak down test, found head gasket leaking. opened up crankcase, removed old gasket, old seals, cleaned parts, & installed new parts. rebuilt carburetor, installed new gas tank / fuel lines & filter. made minor adjustments. installed new gas, primed carb, two pulls on starter rope, ZOOM running fine!! thanks Replacement Parts!
Did you find this story helpful?
Thanks for voting and helping fellow customers!
Tool Type:
Trimmer
Repair Difficulty:
Medium
Time Spent Repairing:
15-30 minutes
Tools Used:
Screwdriver
would not start.... bogging down the season before
rebuilt carburetor with kit, changed fuel filter...28 year old weed eater runs like new! very powerful.... great step by step instructions on the video ...a monkey can do this job.... the website helped me out again... thanks
Did you find this story helpful?
Thanks for voting and helping fellow customers!
Tool Type:
Trimmer
Repair Difficulty:
Easy
Time Spent Repairing:
Less than 15 minutes
Tools Used:
Screwdriver
Carb gaskets old and dry, same with primer bulb.
Removed carb and disambled. Sprayed parts with carb cleaner and put in new parts. put carb back on engine pumped primer and engine started right up.
Did you find this story helpful?
Thanks for voting and helping fellow customers!
Tool Type:
Trimmer
Repair Difficulty:
Medium
Time Spent Repairing:
15-30 minutes
Tools Used:
Screwdriver
The engine was getting flooded the spark plug would be soaked with fuel .
I removed the carburetor the two screws behind the air filter and two fuel lines also tilt the carb to disconnect the throttle cable .Put the fuel lines back in same location when you reassemble.I disassembled the carb the four screws that holds the prime bulb and discovered the fuel pump diaphragm was hard and brittle. The diaphragm was holding the needle open causing the engine to flood. I reassembled the carburetor installing a new Gasket/ Diaphragm Kit. The trimmer runs Great !
Did you find this story helpful?
Thanks for voting and helping fellow customers!
Tool Type:
Hedge Trimmer
Parts Used:
Repair Difficulty:
Medium
Time Spent Repairing:
15-30 minutes
Tools Used:
Screwdriver, Scraper
Wouldn't run.
1. Remove Carb
2. Take apart
3. Clean, Scrape off any old gasket material.
4. Replace diaphragm and gaskets and remount carb.
5. Start and test
2. Take apart
3. Clean, Scrape off any old gasket material.
4. Replace diaphragm and gaskets and remount carb.
5. Start and test
Did you find this story helpful?
Thanks for voting and helping fellow customers!
Tool Type:
Trimmer
Parts Used:
Repair Difficulty:
Easy
Time Spent Repairing:
30-60 minutes
Tools Used:
Screwdriver, Air compressor
Unit would not accelerate
Removed carburator, disassembled and found two small holes in diaphram. Replaced diaphram and reassembled. Unit runs fine now.
Did you find this story helpful?
Thanks for voting and helping fellow customers!
0 of 1 people found this instruction helpful
Tool Type:
Trimmer
Repair Difficulty:
Medium
Time Spent Repairing:
30-60 minutes
Tools Used:
Screwdriver, Pliers, Socket set, Compression tester, WD40, penetrating oil, apexes.
Shindaiwa T22 Trimmer, will not start.
First off, I am not a certified mechanic, I, am a small engine enthusiast, and my advise is given freely, from my personal experience of repairing my own equipment. I too, continue to learn more and accept advice, thank you, and here is mine..
1. Upon trouble-shooting diagnosis, suspicion was confirmed that there was a lack of compression to the unit.(55psi) note: you need at least a minimum of 70-75psi or better, for proper compression to start the unit. In some cases, it is still possible that 70psi "may", not be sufficient. If you, do not own or have a compression tester, you, may still be able to tell if you have a compression problem simply by just on pulling the starter rope, if it pulls too freely, and with little to no resistance, chances are that is the cause, but it is always best to use a compression tester.
2. Ordered all parts through ereplacement.com!
Replacement of any internal parts on small engines is not an easy task for those who are not familiar or mechanically inclined. But it can be done. Tip: before disassembling, it is not a bad idea to take several pictures, or video, during this process. Thank me later.
3. Remove spark plug, and housing.
4. Remove carburetor and associated components.
5. Remove muffler, and ignition coil.(before removal, and since the unit was an older model, I, optioned to spray penetrating oil, onto to all bolts, nuts, etc. before putting torque into them, nothing worse than adding stripped screws n bolts during the process, but sh__ happens.
6. Removed cylinder, evidence of heat discoloration, and scarring on exhaust port side, plus piston ring had forged with piston confirmed diagnose.
7. Inspected crank and piston rod, clean out all possible debris that may have fallen inside the cavity. Blast of compressed air works very well. Advise: my opinion, should you have to replace these parts as well, it is probably better off, to just buy a new unit.
8. Removed and replaced piston(and associated components) note: rubbed piston with 2cy oil to help with cylinder installation.
9. Carefully, slide new cylinder, onto the piston, with special attention not to damage piston ring.(the top of the piston has an arrow, make sure this is pointing to the exhaust side of the cylinder). Secure cylinder to casing.
10. Attach muffler(this would be a good time to inspect and clean the spark arrestor screen, over time, they clog from improper oil mixtures and will bog the unit preventing full power), attach ignition coil(with proper gap setting, use your manual, or a business card works great).
11. Reattach carburetor and components. Note: since the unit was not used for an extended period of time, it was my option to include a carb rebuild kit into the repair.
12. Rechecked unit with compression tester, 95psi! Reassembled housing, installed spark plug. Note: prior to connecting spark plug wire, and I'm not sure whether it matters or not, but I, decided to pull the starter rope slowly(about 10 cranks), just to feel the compression and for the piston and cylinder to lube and bond.
13. Fresh gas added, and she ran like new.
Good day! I, hope this helped, and best of luck in your repairs.
Did you find this story helpful?
Thanks for voting and helping fellow customers!
Reviews
4 Reviews
Average Rating (out of 5):
Click to filter by ratings:
5 stars
3
4 stars
1
3 stars
0
2 stars
0
1 stars
0
< PREV
- 1
repairs went as i hoped, hedge trimmer running fine
as always parts fit great, arrived in good shape
Guest -
July 9, 2023
Verified Purchase
Repair
Prompt, got me exactly what I needed to get my machine running properly and efficiently. Very easy to deal with.
Guest -
July 16, 2020
Verified Purchase
They have the right parts for the job your doing.
I go to them when I need something because usually no one else has it.
Guest -
March 11, 2020
Verified Purchase
Great parts list, easy repair.
I ordered 4 parts for my weed wackier, a gas filter, fuel cap gasket, a primer bulb and gasket set for my carburetor, which I had to return with no trouble, because the gaskets were different than the parts for my carburetor, 3 of 4 parts worked perfectly. Easy free return!
Guest -
September 10, 2021
Verified Purchase
Verified Purchase
eReplacementParts Team
< PREV
- 1
Product Information
Repair Guides
![]()
Articles:
|
Filthy Filters? This article will show you how to install a filter kit on an Echo SRM-225 trimmer....
May 27, 2015
|