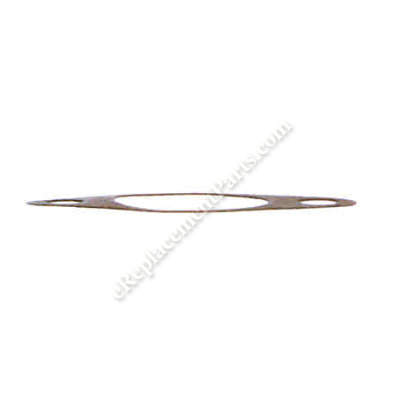


It is an authentic manufacturer sourced replacement part designed for use with Subaru / Robin engines. This carburetor gasket provides an air tight seal between the carburetor and the insulator. Over time gaskets tend to deteriorate and crack eventually requiring replacement. It is made from high quality composite material and it is sold individually.
Gasket2(insulator) 279-35903-J3
OEM part for: Subaru / Robin
Part Number: 279-35903-J3
$4.99
In Stock
Jump To:
Frequently Purchased Together ?


Compatibility
This part will fit the following 67 machines
Subaru / Robin
EX270D10190 Engine View Diagrams & Manuals
EX270D10200 Engine View Diagrams & Manuals
EX270D20091 Engine View Diagrams & Manuals
EX270D20330 Engine View Diagrams & Manuals
EX270D20351 Engine View Diagrams & Manuals
EX270D40034 Engine View Diagrams & Manuals
EX270D40140 Engine View Diagrams & Manuals
EX270D41010 Engine View Diagrams & Manuals
EX270D50103 Engine View Diagrams & Manuals
EX270D50280 Engine View Diagrams & Manuals
EX270D50290 Engine View Diagrams & Manuals
EX270D50310 Engine View Diagrams & Manuals
EX270D50370 Engine View Diagrams & Manuals
EX270D52340 Engine View Diagrams & Manuals
EX270D52350 Engine View Diagrams & Manuals
EX270D52360 Engine View Diagrams & Manuals
EX270D52370 Engine View Diagrams & Manuals
EX270D52380 Engine View Diagrams & Manuals
EX270D52390 Engine View Diagrams & Manuals
EX270D52400 Engine View Diagrams & Manuals
EX270D52440 Engine View Diagrams & Manuals
EX270D52480 Engine View Diagrams & Manuals
EX270D53030 Engine View Diagrams & Manuals
EX270D53040 Engine View Diagrams & Manuals
EX270D70030 Engine View Diagrams & Manuals
EX270D70051 Engine View Diagrams & Manuals
EX270D80010 Engine View Diagrams & Manuals
EX270DS0240 Engine View Diagrams & Manuals
EX270DS1030 Engine View Diagrams & Manuals
EX270DS2120 Engine View Diagrams & Manuals
EX270DS2140 Engine View Diagrams & Manuals
EX270DS2150 Engine View Diagrams & Manuals
EX270DS2220 Engine View Diagrams & Manuals
EX270DS5310 Engine View Diagrams & Manuals
EX270DS5510 Engine View Diagrams & Manuals
EX270DS6240 Engine View Diagrams & Manuals
EX270DS6250 Engine View Diagrams & Manuals
EX270DS6260 Engine View Diagrams & Manuals
EX270DS6270 Engine View Diagrams & Manuals
EX270DS6280 Engine View Diagrams & Manuals
EX270DS7030 Engine View Diagrams & Manuals
EX300D20030 Engine View Diagrams & Manuals
EX300D20040 Engine View Diagrams & Manuals
EX300D20050 Engine View Diagrams & Manuals
EX300D20061 Engine View Diagrams & Manuals
EX300D20072 Engine View Diagrams & Manuals
EX300D20090 Engine View Diagrams & Manuals
EX300D20100 Engine View Diagrams & Manuals
EX300D20110 Engine View Diagrams & Manuals
EX300D52011 Engine View Diagrams & Manuals
EX300D52040 Engine View Diagrams & Manuals
EX300D52080 Engine View Diagrams & Manuals
EX300DE5230 Engine View Diagrams & Manuals
EX300DS2011 Engine View Diagrams & Manuals
EX300DS2022 Engine View Diagrams & Manuals
EX300D52080 EX Series Small Engine View Diagrams & Manuals
EX300D52010 Small Engine View Diagrams & Manuals
EX300DE5220 Generator View Diagrams & Manuals
EE300DS5010 Snow Blower/Thrower Engine View Diagrams & Manuals
RAS43023544 Air-Cooled,4-Stroke,ohc Inverter Generator View Diagrams & Manuals
RAS43023600 Air-Cooled,4-Stroke,ohc Inverter Generator View Diagrams & Manuals
RGH50053000 4900-Watt Commercial Generator View Diagrams & Manuals
RGR50023020 4900-Watt Commercial Generator View Diagrams & Manuals
PKX301T0380 Self PrimingTrash Pump Engine View Diagrams & Manuals
PKX40100370 Self PrimingTrash Pump Engine View Diagrams & Manuals
RAS43023510 Air-Cooled,4-Stroke,ohc Inverter Generator View Diagrams & Manuals
RAS43023514 Air-Cooled,4-Stroke,ohc Inverter Generator View Diagrams & Manuals
Show More Compatible Models
This item works with the following types of products:
- Engine Parts
- Generator Parts
Questions & Answers ?
Our customer Service team is at the ready daily to answer your part and product questions.

Ask our Team
We have a dedicated staff with decades of collective experience in helping customers just like you purchase parts to repair their products.
Does this fit my product?Questions & Answers for Gasket2(insulator)
No questions have been asked yet
Customer Repair Instructions ?
All our customer repair instructions are solicited directly from other customers just like you who have purchased and replaced this exact part.
engine would run for short time then stop
Daniel - December 16, 2021
Tool Type
Engine
Difficulty
Medium
Time
30-60 minutes
Tools Used
Pliers, Socket set, Nutdriver
removed carburetor and cleaned twice. replaced gaskets and fuel bowl o ring. replaced spark plug. runs now
Did you find this story helpful?
Thanks for voting and helping fellow customers!
The gaskets on my generator where torn by the previous owner.
AJ - August 22, 2017
Tool Type
Engine
Difficulty
Easy
Time
15-30 minutes
Tools Used
Socket set, Razor blade scraper
1. Remove the air filter cover and the filter.
2. Remove two 10mm nuts from the inside.
3. Replaced the gaskets.
4. Reassembled and tested.
2. Remove two 10mm nuts from the inside.
3. Replaced the gaskets.
4. Reassembled and tested.
Did you find this story helpful?
Thanks for voting and helping fellow customers!
Defective gaskets and air filter
Bruce - April 19, 2017
Tool Type
Engine
Difficulty
Easy
Time
15-30 minutes
Tools Used
Screwdriver, Pliers, Socket set, None
Removed air cleaner box and removed carb. Replaced gasket on each side of carb and then reinstalled. Replaced air filter element with new one after soaking it in oil.
Did you find this story helpful?
Thanks for voting and helping fellow customers!
Generator sat for a couple years and needed to clean the carburetor.
Joe - February 15, 2017
Tool Type
Engine
Difficulty
Easy
Time
15-30 minutes
Tools Used
Wrench Set
1. Removed air filter.
2. Removed carburetor and gaskets.
3. Took carburetor apart and soaked in carburetor cleaner.
4. Put carburetor together and installed with new gaskets and oring.
5. Put new gasoline in tank and started engine.
2. Removed carburetor and gaskets.
3. Took carburetor apart and soaked in carburetor cleaner.
4. Put carburetor together and installed with new gaskets and oring.
5. Put new gasoline in tank and started engine.
Did you find this story helpful?
Thanks for voting and helping fellow customers!
OEM stands for Original Equipment Manufacturer and means the part you’re buying is sourced directly from the manufacturer who made your product. At eReplacementParts, we sell only genuine OEM parts, guaranteeing the part you’re purchasing is of better design and of higher quality than aftermarket parts.
Our product descriptions are a combination of data sourced directly from the manufacturers who made your product as well as content researched and curated by our content & customer service teams. This content is edited and reviewed internally before being made public to customers.
Our customer service team are at the ready daily to answer your part and product questions. We have a dedicated staff with decades of collective experience in helping customers just like you purchase parts to repair their products.
All our part reviews are solicited directly from other customers who have purchased this exact part. While we moderate these reviews for profanity, offensive language or personally identifiable information, these reviews are posted exactly as submitted and no alterations are made by our team.
All our customer repair instructions are solicited directly from other customers just like you who have purchased and replaced this exact part. While we moderate these reviews for profanity, offensive language or personally identifiable information, these reviews are posted exactly as submitted and no alterations are made by our team.
Based on data from past customer purchasing behaviors, these parts are most commonly purchased together along with the part you are viewing. These parts may be necessary or helpful to replace to complete your current repair.
All our installation videos are created and produced in collaboration with our in-house repair technician, Mark Sodja, who has helped millions of eReplacementParts customers over the last 13 years repair their products. Mark has years of experience in selling and repairing both commercial and residential products with a specialty in gas-powered equipment.
This data is collected from customers who submitted a repair instruction after replacing this exact part. Customers can rate how easy the repair was to complete and how long it took. We aggregate this data to provide a repair rating that allows customers to quickly determine the difficulty and time needed to perform their own repair.