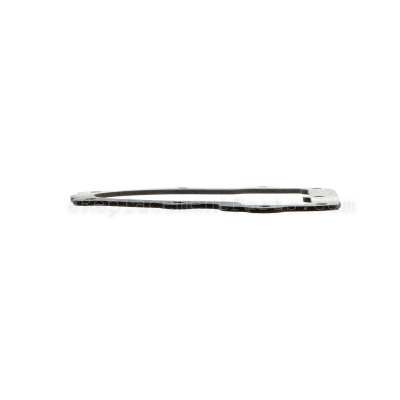


This replacement gasket is an authentic OEM item that is specially designed for Ryobi lawn and garden equipment. This gasket provides an air-tight seal for the oil pan. Over time gaskets tend to shrink, become brittle and crack eventually requiring a replacement. It is made from high quality composite material and it is sold individually.
Gasket 570709002
OEM part for: Ryobi
Part Number: 570709002
$5.19
In Stock
Jump To:
Frequently Purchased Together ?


Compatibility
This part will fit the following 33 machines
Ryobi
RY13010 4 Cycle Wheeled Trimmer View Diagrams & Manuals
RY13050 4 Cycle Wheeled Edger View Diagrams & Manuals
RY13050A 4 Cycle Wheeled Edger View Diagrams & Manuals
RY34000 4 Cycle Gas Powerhead View Diagrams & Manuals
RY34420 Gas String Trimmer View Diagrams & Manuals
RY34421 4 Cycle Gas String Trimmer View Diagrams & Manuals
RY34440 (S430) Gas String Trimmer View Diagrams & Manuals
RY34441 4 Cycle Gas String Trimmer View Diagrams & Manuals
RY64400 4 Cycle Cultivator View Diagrams & Manuals
RY34001 4 Cycle Gas Powerhead Trimmer View Diagrams & Manuals
RY34442 Gas Trimmer View Diagrams & Manuals
RY34005 30cc Power Head View Diagrams & Manuals
RY34426 30cc String Trimmers View Diagrams & Manuals
RY34446 30cc String Trimmers View Diagrams & Manuals
RY34006 30cc Power Head Trimmer View Diagrams & Manuals
RY13015 30cc 4-Cycle Wheeled Trimmer View Diagrams & Manuals
RY34425 String Trimmer View Diagrams & Manuals
RY34445 String Trimmer View Diagrams & Manuals
RY13016 4-Cycle Wheeled Trimmer View Diagrams & Manuals
RY34007 30CC Power Head Trimmer View Diagrams & Manuals
RY34427 30CC String Trimmer View Diagrams & Manuals
RY34447 30CC String Trimmer View Diagrams & Manuals
RY34007 (RY34427)(RY34447)(090432017)(090432018)(090432019) 30cc String Trimmers View Diagrams & Manuals
RY4CPH (090432025) 30cc String Trimmers View Diagrams & Manuals
RY34007 (RY34427)(RY34447)(090432020)(090432021)(090432022) 30cc String Trimmers View Diagrams & Manuals
RY4CPH (090432034) 30cc String Trimmers View Diagrams & Manuals
RY34440 30cc String Trimmer View Diagrams & Manuals
RY4CPH (090432031) 30cc String Trimmers View Diagrams & Manuals
RY34007 (RY34427)(RY34447)(090432018) Ry34007, Ry34427, Ry34447 30cc String Trimmers Mfg. No. 090432017, 090432018, And 090432019 View Diagrams & Manuals
RY4CCS Ry4ccs 30cc String Trimmers Mfg. No. 090432041 9-23-20 (Rev:01) View Diagrams & Manuals
RY4CCSVNM Ry4ccsvnm 30cc String Trimmer Mfg. No. 095432104 3-9-21 (Rev:03) View Diagrams & Manuals
RY4CSS Ry4css 30cc String Trimmers Mfg. No. 090432040 9-23-20 (Rev:01) View Diagrams & Manuals
RY4CSSVNM Ry4cssvnm 30cc String Trimmer Mfg. No. 095432103 3-9-21 (Rev:03) View Diagrams & Manuals
Show More Compatible Models
This item works with the following types of products:
- Trimmer Parts
- Edger Parts
- Cultivator Parts
Customer Part Reviews ?
Average Rating (out of 5):
Click to filter by ratings:
5 stars
5
4 stars
0
3 stars
0
2 stars
0
1 stars
0
< PREV
- 1
Fast, easy and effective service.
The part I ordered was perfect. I had no problem at all replacing this item and the trimmer is working great!
Thank you for your fast service!
Margaret Martell -
April 27, 2023
Verified Purchase
replacement oil pan gasket
part came as expected, by using available diagrams it was easy to replace and works great.
Guest -
June 10, 2022
Verified Purchase
Great place to shop for small engine parts
The oil pan gasket is exactly what I needed for my Ryobi 430s grass trimmer. Part arrived undamaged and when expected. Ereplacement's parts diagram was invaluable.
Guest -
May 5, 2022
Verified Purchase
Easy repair
Everything in good condition, easy to repair - put in place, cover, tighten down!
Guest -
January 28, 2022
Verified Purchase
Excelente
Exelente parte
Ivan -
June 12, 2019
Verified Purchase
t
t
t -
t days ago
Verified Purchase
eReplacementParts Team
t
Questions & Answers ?
Our customer Service team is at the ready daily to answer your part and product questions.

Ask our Team
We have a dedicated staff with decades of collective experience in helping customers just like you purchase parts to repair their products.
Does this fit my product?Questions & Answers for Gasket
No questions have been asked yet
Customer Repair Instructions ?
All our customer repair instructions are solicited directly from other customers just like you who have purchased and replaced this exact part.
Oil leak due to crack in a plastic oil pan
Aleksey - June 2, 2016
👍 1 of 1 people found this instruction helpful
Tool Type
Trimmer
Difficulty
Easy
Time
15-30 minutes
Tools Used
Screwdriver
Parts Used
Drain the oil. Remove the screws from the oil pan, then the gasket. Clean the area where the gasket sits. Place the new gasket then the new oil pan, make sure all of the screw holes are all lined up, then insert the screws.
Did you find this story helpful?
Thanks for voting and helping fellow customers!
It was leaking oil
Martin - May 5, 2022
Tool Type
Trimmer
Difficulty
Easy
Time
Less than 15 minutes
Tools Used
Screwdriver
Parts Used
1. Remove the screw that holds the top and bottom cover and the two small screw that holds the bottom cover.
2. Empty the oil
3. Remove all the screws around the oil pan cover.
4. Remove the old gasket and install the new one.
5. Install all the screws back in place but don't tie it too hard.
6. Place bottom cover first and then the top.
7. Fill with new oil
8. Start the engine and check fio leaks.
2. Empty the oil
3. Remove all the screws around the oil pan cover.
4. Remove the old gasket and install the new one.
5. Install all the screws back in place but don't tie it too hard.
6. Place bottom cover first and then the top.
7. Fill with new oil
8. Start the engine and check fio leaks.
Did you find this story helpful?
Thanks for voting and helping fellow customers!
Oil leaking at oil pan
Deryk - March 10, 2018
Tool Type
Trimmer
Difficulty
Easy
Time
Less than 15 minutes
Tools Used
Screwdriver, Torx 25
Parts Used
Remove oil fill plug and drain oil into a drain pan.
Remove the 2 screws with a philips screwdriver at bottom of head unit that hold the plastic trim together.
Remove the single screw at rear of unit that passes through both trim pieces.
Remove the top and bottom trim pieces from head unit.
Remove the 3 torx screws on gas canister.
Remove the 9 torx screws holding the oil pan.
Remove old gasket and clean off any material that may have stuck to surface.
Install new gasket and tighten 9 torx screws in a radial pattern.
Install remaining in reverse.
Fill with proper amount of oil.
Start unit and let warm up.
You may want to recheck the 9 oil pan screws and tighten as needed.
Did you find this story helpful?
Thanks for voting and helping fellow customers!
Leaking oil.
John - September 20, 2017
Tool Type
Trimmer
Difficulty
Medium
Time
30-60 minutes
Tools Used
Socket set, Wrench Set, Nutdriver, Star torques
Parts Used
1. Removed the plastic cover.
2. Drained the oil.
3. Removed the valve cover.
4. Replaced the gasket.
5. Reassembled the unit and added oil, no leaks.
2. Drained the oil.
3. Removed the valve cover.
4. Replaced the gasket.
5. Reassembled the unit and added oil, no leaks.
Did you find this story helpful?
Thanks for voting and helping fellow customers!
OEM stands for Original Equipment Manufacturer and means the part you’re buying is sourced directly from the manufacturer who made your product. At eReplacementParts, we sell only genuine OEM parts, guaranteeing the part you’re purchasing is of better design and of higher quality than aftermarket parts.
Our product descriptions are a combination of data sourced directly from the manufacturers who made your product as well as content researched and curated by our content & customer service teams. This content is edited and reviewed internally before being made public to customers.
Our customer service team are at the ready daily to answer your part and product questions. We have a dedicated staff with decades of collective experience in helping customers just like you purchase parts to repair their products.
All our part reviews are solicited directly from other customers who have purchased this exact part. While we moderate these reviews for profanity, offensive language or personally identifiable information, these reviews are posted exactly as submitted and no alterations are made by our team.
All our customer repair instructions are solicited directly from other customers just like you who have purchased and replaced this exact part. While we moderate these reviews for profanity, offensive language or personally identifiable information, these reviews are posted exactly as submitted and no alterations are made by our team.
Based on data from past customer purchasing behaviors, these parts are most commonly purchased together along with the part you are viewing. These parts may be necessary or helpful to replace to complete your current repair.
All our installation videos are created and produced in collaboration with our in-house repair technician, Mark Sodja, who has helped millions of eReplacementParts customers over the last 13 years repair their products. Mark has years of experience in selling and repairing both commercial and residential products with a specialty in gas-powered equipment.
This data is collected from customers who submitted a repair instruction after replacing this exact part. Customers can rate how easy the repair was to complete and how long it took. We aggregate this data to provide a repair rating that allows customers to quickly determine the difficulty and time needed to perform their own repair.