


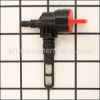
This is an authentic part which is supplied by the original manufacturer for use with Generac portable generators. It is utilized to secure and provide a tight fit for the fuel tank valve. This is a high-quality replacement for a damaged or a missing hardware that was installed on a new unit. To ensure the correct location and application of this part, refer to the appropriate diagrams of your model. It is made of durable rubber and is sold individually. You may need pliers to remove and secure the bushing.
Bushing Tank Dextor G078299
OEM part for: Generac
Part Number: G078299
$4.99
In Stock
Jump To:
Frequently Purchased Together ?

Compatibility
This part will fit the following 203 machines
Generac
005734 (GP15000) Portable Generator View Diagrams & Manuals
4000XL (9777-1) Portable Generator View Diagrams & Manuals
1470-0 EXL Portable Generator View Diagrams & Manuals
7000EXL Portable AC Generator View Diagrams & Manuals
0057351 (GP17500) 120/240V Portable Generator View Diagrams & Manuals
0045820 (3517028 - 36917985) )(2016) Portable Generator View Diagrams & Manuals
0045820 (3542434 - 3632298) )(2002) Portable Generator View Diagrams & Manuals
0045823 (5144316 - 5206581) )(2008) Portable Generator View Diagrams & Manuals
0045831 (5172719 - 5274838) )(2009) Portable Generator View Diagrams & Manuals
0049860 (3791301 - 4635532) )(2006) Centurian Portable Generator View Diagrams & Manuals
0049870 (3791326 - 4429812) )(2006) Centurian Portable Generator View Diagrams & Manuals
0049871 (4450380 - 4865530) )(2007) Centurian Portable Generator View Diagrams & Manuals
0049872 (5150586 - 5265073) )(2009) Centurian Portable Generator View Diagrams & Manuals
0052090 (4203966 - 4376590) )(2006) Portable Generator View Diagrams & Manuals
0053080 (4410831 - 4507259) )(2006) Portable Generator View Diagrams & Manuals
0053081 (5174286 - 5204915) )(2008) Portable Generator View Diagrams & Manuals
0053960 (4831278 - 5265133) )(2009) Centurian Portable Generator View Diagrams & Manuals
0633-0 4150 Watt Portable Generator View Diagrams & Manuals
1006-1 Megaforce 6500 Watt Portable Generator View Diagrams & Manuals
1013-0 7500 Watt Portable Generator View Diagrams & Manuals
1021-0 Megaforce 6500 Watt Portable Generator View Diagrams & Manuals
1277-0 7200 Watt Portable Generator View Diagrams & Manuals
1313-0 3500 Watt Portable Generator (Lowes) View Diagrams & Manuals
1313-1 3500 Watt Portable Generator View Diagrams & Manuals
1314-0 Xl 5500 Watt Portable Generator (Lowes) View Diagrams & Manuals
1315-0 Exl 7500 Watt Portable Generator View Diagrams & Manuals
1338-1 9000 Watt Portable Generator View Diagrams & Manuals
1415-0 10000 Watt Ac Portable Generator View Diagrams & Manuals
1576-0 3600 Watt Portable Generator View Diagrams & Manuals
1577-0 5000/6250 Watt Portable Generator View Diagrams & Manuals
1N168 (9862-0) 8000 Watt Portable Generator View Diagrams & Manuals
3500CCG (9412-0) 3500 Watt Portable Generator View Diagrams & Manuals
3500XL (9441-5)(1996-06) 3500 Watt Portable Generator View Diagrams & Manuals
3W741B (9580-1) 4000 Watt Portable Generator View Diagrams & Manuals
3W742 (9436-0) 5000 Watt Portable Generator View Diagrams & Manuals
3W796W (9579-1) 5000 Watt Portable Generator View Diagrams & Manuals
9335-0 4000 Watt Portable Generator View Diagrams & Manuals
9396-0 Dayton 4000 Watt Portable Generator View Diagrams & Manuals
9397-0 5000 Watt Portable Generator View Diagrams & Manuals
9551-0 Xl 2200 Watt Portable Generator View Diagrams & Manuals
9586-0 3500 Watt Portable Generator View Diagrams & Manuals
9753-0 Xl 4000 Watt Portable Generator View Diagrams & Manuals
9777-0 Xl 4000 Watt Portable Generator View Diagrams & Manuals
9777-1 Xl 4000 Watt Portable Generator View Diagrams & Manuals
9777-2 Xl 4000 Watt Portable Generator View Diagrams & Manuals
9778-0 Xl 5500 Watt Portable Generator View Diagrams & Manuals
9778-1 Xl 5500 Watt Portable Generator View Diagrams & Manuals
9778-2 Xl 5500 Watt Portable Generator View Diagrams & Manuals
9778-3 Xl 5500 Watt Portable Generator View Diagrams & Manuals
9778-4 Xl 5500 Watt Portable Generator View Diagrams & Manuals
9778-5 Xl 5500 Watt Portable Generator View Diagrams & Manuals
9778-6 Xl 5500 Watt Portable Generator View Diagrams & Manuals
9778-7 Xl 5500 Watt Portable Generator View Diagrams & Manuals
9779-0 Xl 6500 Watt Portable Generator View Diagrams & Manuals
9779-1 Xl 6500 Watt Portable Generator View Diagrams & Manuals
9779-2 Xl 6500 Watt Portable Generator View Diagrams & Manuals
9780-0 Xl 8000 Watt Portable Generator View Diagrams & Manuals
9780-1 Xl 8000 Watt Portable Generator View Diagrams & Manuals
9781-0 Xl 10000 Watt Portable Generator View Diagrams & Manuals
9794-0 Xe 3250 Watt Portable Generator View Diagrams & Manuals
9795-0 Xep 5500 Watt Portable Generator View Diagrams & Manuals
9797-0 (1995-10) Exl 5500 Watt Portable Generator Rev 2 View Diagrams & Manuals
9797-1 Exl 5500 Watt Portable Generator View Diagrams & Manuals
9797-2 Exl 5500 Watt Portable Generator View Diagrams & Manuals
9797-3 Exl 5500 Watt Portable Generator View Diagrams & Manuals
9797-4 Exl 5500 Watt Portable Generator View Diagrams & Manuals
9798-0 (Rev 0) (1994-01) Exl 6500 Watt Portable Generator Rev 0 View Diagrams & Manuals
9798-0 (Rev 1) (1995-10) Exl 6500 Watt Portable Generator Rev 1 View Diagrams & Manuals
9798-1 Exl 6500 Watt Portable Generator View Diagrams & Manuals
9798-2 Exl 6500 Watt Portable Generator View Diagrams & Manuals
9800-0 Exl 8000 Watt Portable Generator View Diagrams & Manuals
9801-0 Exl 10000 Watt Portable Generator View Diagrams & Manuals
9801-1 Exl 10000 Watt Portable Generator View Diagrams & Manuals
9801-2 Exl 10000 Watt Portable Generator View Diagrams & Manuals
9801-3 Exl 10000 Watt Portable Generator View Diagrams & Manuals
9801-4 Exl 10000 Watt Portable Generator View Diagrams & Manuals
9801-5 Exl 10000 Watt Portable Generator View Diagrams & Manuals
9830-0 G-Force 4200 Watt Portable Generator View Diagrams & Manuals
9830-1 G-Force 4200 Watt Portable Generator View Diagrams & Manuals
9831-0 G-Force 5000 Watt Portable Generator View Diagrams & Manuals
9831-1 G-Force 5000 Watt Portable Generator View Diagrams & Manuals
9855-0 Home And Away 1850 Watt Portable Generator View Diagrams & Manuals
9855-1 Home And Away 1850 Watt Portable Generator View Diagrams & Manuals
9856-0 Powerplus 5000 Watt Portable Generator View Diagrams & Manuals
9860-0 5500 Watt Portable Generator View Diagrams & Manuals
9878-1 (1996-11) Xl 4000 Watt Portable Generator View Diagrams & Manuals
9879-0 Home And Away 1850 Watt Portable Generator View Diagrams & Manuals
9885-0 (1995-07) Xl 5500 Watt Portable Generator Rev 0 View Diagrams & Manuals
9885-1 Xl 5500 Watt Portable Generator View Diagrams & Manuals
9885-2 Xl 5500 Watt Portable Generator View Diagrams & Manuals
9885-3 Xl 5500 Watt Portable Generator View Diagrams & Manuals
9886-0 (1995-12) Xl 8000 Watt Portable Generator Rev 0 View Diagrams & Manuals
9898-0 4000 Watt Portable Generator View Diagrams & Manuals
9903-0 (1994-12) Xl 6500 Watt Portable Generator Rev 0 View Diagrams & Manuals
9903-1 Xl 6500 Watt Portable Generator View Diagrams & Manuals
9904-0 Exl 10000 Watt Portable Generator View Diagrams & Manuals
C4000 (5541-1) 4000 Watt Portable Generator View Diagrams & Manuals
C4000 (9423-0) 4000 Watt Portable Generator View Diagrams & Manuals
C4000 (9423-1) 4000 Watt Portable Generator View Diagrams & Manuals
C4018 (5541-0) 4000 Watt Portable Generator View Diagrams & Manuals
C4019 (5542-0) 4000 Watt Portable Generator View Diagrams & Manuals
C4019 (5542-1) 4000 Watt Portable Generator View Diagrams & Manuals
C4020 (5543-0) 4000 Watt Portable Generator View Diagrams & Manuals
C4021 (5544-0) 4000 Watt Portable Generator View Diagrams & Manuals
C4022 (5546-0) 4000 Watt Portable Generator View Diagrams & Manuals
C4023 (5547-0) 4000 Watt Portable Generator View Diagrams & Manuals
C4024 (5548-0) 4000 Watt Portable Generator View Diagrams & Manuals
C4025 (5549-0) 4000 Watt Portable Generator View Diagrams & Manuals
C4028 (5552-0) 4000 Watt Portable Generator View Diagrams & Manuals
C4029 (5553-0) 4000 Watt Portable Generator View Diagrams & Manuals
C4032 (5556-0) 4000 Watt Portable Generator View Diagrams & Manuals
C4033 (5557-0) 4000 Watt Portable Generator View Diagrams & Manuals
C5000 (9429-1) 5000 Watt Portable Generator View Diagrams & Manuals
C5000 (9430-0) 5000 Watt Portable Generator View Diagrams & Manuals
C5010 (5559-0) 5000 Watt Portable Generator View Diagrams & Manuals
C5011 (5560-0) 5000 Watt Portable Generator View Diagrams & Manuals
C5012 (5561-0) 5000 Watt Portable Generator View Diagrams & Manuals
GN11003E (0496-0) Portable Generator View Diagrams & Manuals
GN14003E (0497-0) Portable Generator View Diagrams & Manuals
GN3800 (0486-0) 3800 Watt Portable Generator View Diagrams & Manuals
GN4500 (0487-0) 4500 Watt Portable Generator View Diagrams & Manuals
GN8000E (0493-0) 5000 Watt Portable Generator View Diagrams & Manuals
MC10000 (9809-0) Portable Generator View Diagrams & Manuals
MC10000 (9809-2) Portable Generator View Diagrams & Manuals
MC4000 (9802-0) Portable Generator View Diagrams & Manuals
MC4000 (9802-1) Portable Generator View Diagrams & Manuals
MC5500 (9803-0) Portable Generator View Diagrams & Manuals
MC5500 (9803-1) Portable Generator View Diagrams & Manuals
MC5500 (9803-2) Portable Generator View Diagrams & Manuals
MC5500 (9803-3) Portable Generator View Diagrams & Manuals
MC6500 (9805-0) Portable Generator View Diagrams & Manuals
MC6500 (9805-1) Portable Generator View Diagrams & Manuals
MC7500 (1017-0) Portable Generator View Diagrams & Manuals
MC8000 (9807-0) Portable Generator View Diagrams & Manuals
MC8000 (9807-1)(1995-05) Portable Generator Rev 0 View Diagrams & Manuals
MC8000 (9807-2) Portable Generator View Diagrams & Manuals
S4000 (5567-1) 4000 Watt Portable Generator View Diagrams & Manuals
S4000 (9421-0) 4000 Watt Portable Generator View Diagrams & Manuals
S4000 (9676-0) 4000 Watt Portable Generator View Diagrams & Manuals
S4012 (5511-0) 4000 Watt Portable Generator View Diagrams & Manuals
S4013 (5512-0) 4000 Watt Portable Generator View Diagrams & Manuals
S4014 (5513-0) 4000 Watt Portable Generator View Diagrams & Manuals
S4015 (5514-0) 4000 Watt Portable Generator View Diagrams & Manuals
S4015F (5522-0) 4000 Watt Portable Generator View Diagrams & Manuals
S4016 (5516-0) 4000 Watt Portable Generator View Diagrams & Manuals
S4016F (5523-0) 4000 Watt Portable Generator View Diagrams & Manuals
S4017 (5517-0) 4000 Watt Portable Generator View Diagrams & Manuals
S4017F (5524-0) 4000 Watt Portable Generator View Diagrams & Manuals
S4018F (5568-0) 4000 Watt Portable Generator View Diagrams & Manuals
S4023 (5567-0) 4000 Watt Portable Generator View Diagrams & Manuals
S4029 (5518-0) 4000 Watt Portable Generator View Diagrams & Manuals
S4029F (5525-0) 4000 Watt Portable Generator View Diagrams & Manuals
S5019F (5519-0) 5000 Watt Portable Generator View Diagrams & Manuals
S5019F (5526-0) 5000 Watt Portable Generator View Diagrams & Manuals
S5020F (5520-0) 5000 Watt Portable Generator View Diagrams & Manuals
S5020F (5527-0) 5000 Watt Portable Generator View Diagrams & Manuals
S5021F (5521-0) 5000 Watt Portable Generator View Diagrams & Manuals
S5021F (5528-0) 5000 Watt Portable Generator View Diagrams & Manuals
SE10000 (1339-0) 10000 Watt Portable Generator View Diagrams & Manuals
SE5000 (1329-0) 5000 Watt Portable Generator View Diagrams & Manuals
SVP4800 (1278-0) 4800 Watt Portable Generator View Diagrams & Manuals
SVP5000 (9719-0) 5000 Watt Portable Generator View Diagrams & Manuals
SVP5000T (1312-0) 5000 Watt Portable Generator (Lowes) View Diagrams & Manuals
SVT5000 (9720-0) 5000 Watt Portable Generator View Diagrams & Manuals
T4000 (5502-2) 4000 Watt Portable Generator View Diagrams & Manuals
T4012 (5502-0) 4000 Watt Portable Generator View Diagrams & Manuals
T4013 (5503-0) 4000 Watt Portable Generator View Diagrams & Manuals
T4014 (5504-0) 4000 Watt Portable Generator View Diagrams & Manuals
T4015 (5505-0) 4000 Watt Portable Generator View Diagrams & Manuals
T4016 (5506-0) 4000 Watt Portable Generator View Diagrams & Manuals
T4017 (5507-0) 4000 Watt Portable Generator View Diagrams & Manuals
T4019 (5508-0) 4000 Watt Portable Generator View Diagrams & Manuals
0606-0 12000 Psi Pressure Washer View Diagrams & Manuals
9585-0 Cp 6600 Psi Pressure Washer View Diagrams & Manuals
9585-1 Cp 6600 Psi Pressure Washer View Diagrams & Manuals
9585-2 Cp 6600 Psi Pressure Washer View Diagrams & Manuals
9585-3 Cp 6600 Psi Pressure Washer View Diagrams & Manuals
9585-4 Cp 6600 Psi Pressure Washer View Diagrams & Manuals
9617-0 Cp 6600 Psi Pressure Washer View Diagrams & Manuals
9617-1 Cp 6600 Psi Pressure Washer View Diagrams & Manuals
9617-2 Cp 6600 Psi Pressure Washer View Diagrams & Manuals
9674-0 Master Contractor 6600 Psi Pressure Washer View Diagrams & Manuals
9674-1 Master Contractor 6600 Psi Pressure Washer View Diagrams & Manuals
9674-2 Master Contractor 6600 Psi Pressure Washer View Diagrams & Manuals
9728-0 Cp 12000 Psi Pressure Washer View Diagrams & Manuals
9761-0 Cp 6000 Psi Pressure Washer View Diagrams & Manuals
9765-0 Master Contractor 12000 Psi Pressure Washer View Diagrams & Manuals
9858-0 Cp 6000 Psi Pressure Washer View Diagrams & Manuals
9858-1 Cp 6000 Psi Pressure Washer View Diagrams & Manuals
0044510 (3561963 - 4419564)(2016) Obs 12.5 Gt760 120/240v Guard -05-09 Generator View Diagrams & Manuals
0044510 (3610449 - 3716023)(2003) Obs 12.5 Gt760 120/240v Guard -02-21 Generator View Diagrams & Manuals
0045821 (365649 - 44196612)(2016) Obs Gt990 120/240v Port Guard -05-09 Generator View Diagrams & Manuals
0045821 (3773633 - 4295859)(2015) Obs Gt990 120/240v Port Guard -12-31 Generator View Diagrams & Manuals
0045822 (4444217 - 4881739)(2007) 15.0 Gt990 120/240v Port Guard -08-29 Generator View Diagrams & Manuals
0045830 (4392004 - 4885047)(2007) 17.5kw Gt990 Guardian Portable -09-05 Generator View Diagrams & Manuals
004583R0 (4488235)(2016) 17.5kw Gt990 Guardian Portable -05-09 Generator View Diagrams & Manuals
0057340 (5284005 - 6199316)(2010) Gp15000 Gt990 120/240v Portabl -12-14 Generator View Diagrams & Manuals
0057341 (6325498 - 9297305)(2014) Gp15000 Gt990 120/240v Portabl -11-11 Generator View Diagrams & Manuals
0057341 (9366550 - 50069417)(2015) Gp15000 Gt990 120/240v Portabl -12-18 Generator View Diagrams & Manuals
0057350 (5284015 - 6202656)(2010) Gp17500 Gt990 120/240v Portabl -12-15 Generator View Diagrams & Manuals
0057351 (6330218 - 9281764)(2014) Gp17500 Gt990 120/240v Portabl -10-31 Generator View Diagrams & Manuals
0057351 (9366230 - 50058641)(2015) Gp17500 Gt990 120/240v Portabl -12-10 Generator View Diagrams & Manuals
0057351 (9715888)(2015) Gp17500 Gt990 120/240v Portabl -11-20 Generator View Diagrams & Manuals
Show More Compatible Models
This item works with the following types of products:
- Generator Parts
This part replaces obsolete part #: 078299, 78299
Customer Part Reviews ?
Average Rating (out of 5):
Click to filter by ratings:
5 stars
7
4 stars
1
3 stars
0
2 stars
0
1 stars
0
< PREV
- 1
Wrong part
Even though the diagram called for this part, it didn't fit. The return was effortless and the refund was prompt.
KENNETH -
May 2, 2023
Verified Purchase
Everything was good as usual you guys are
Everything was great every time I order something from you it works out just fine thank you
Guest -
October 19, 2022
Verified Purchase
Factory part less than Generac dealership
Fuel tank bushing
Guest -
October 25, 2019
Verified Purchase
Generator
It was a perfect fit
Guest -
September 17, 2019
Verified Purchase
quick and easy
the bushing was an exact fit wet it and it slid fight in , same with the valve no leaks and worked great
Guest -
July 31, 2019
Verified Purchase
I have saved so much time and money putting back in service my stuff, out dated at that can'nt wait for my next break down
Make sure you review all Serial and model on your equipment your part will show up when they say, and on time and always the correct parts
Rusty -
July 23, 2019
Verified Purchase
Generac 4000 Generator parts
Received the exact parts needed to get my generator running again. Very pleased.
Guest -
May 28, 2019
Verified Purchase
Hard-to-find part.
Works GREAT! Easily installed.
Guest -
February 2, 2022
Verified Purchase
t
t
t -
t days ago
Verified Purchase
eReplacementParts Team
t
Questions & Answers ?
Our customer Service team is at the ready daily to answer your part and product questions.

Ask our Team
We have a dedicated staff with decades of collective experience in helping customers just like you purchase parts to repair their products.
Does this fit my product?Questions & Answers for Bushing Tank Dextor
No questions have been asked yet
Customer Repair Instructions ?
All our customer repair instructions are solicited directly from other customers just like you who have purchased and replaced this exact part.
Replacing the fuel valve and tank bushing
Don - November 27, 2015
👍 12 of 13 people found this instruction helpful
Tool Type
Generator
Difficulty
Easy
Time
Less than 15 minutes
Tools Used
Pliers
Simple job. Removed fuel cut off valve and bushing after completely emptying the gas from the tank. Inserted new bushing into tank and pressed the new cut off valve into the bushing. Installed fuel line to the valve. Installed securing clip with a pair of pliers. Can't beat the price.
Did you find this story helpful?
Thanks for voting and helping fellow customers!
Grommet was bad on petcock for fuel line.
Christine - October 5, 2017
👍 5 of 5 people found this instruction helpful
Tool Type
Generator
Difficulty
Easy
Time
15-30 minutes
Tools Used
Screwdriver
Drained the fuel from the tank
Removed the fuel line from the valve
Removed the old valve and the old tank bushing
Put a little oil on the new bushing and inserted it into the tank
Put a little oil on the valve and inserted it into the bushing
Installed the fuel line on the valve
Removed the fuel line from the valve
Removed the old valve and the old tank bushing
Put a little oil on the new bushing and inserted it into the tank
Put a little oil on the valve and inserted it into the bushing
Installed the fuel line on the valve
Did you find this story helpful?
Thanks for voting and helping fellow customers!
Fuel leak at the bottom of the tank
Rosa - December 9, 2017
👍 2 of 2 people found this instruction helpful
Tool Type
Generator
Difficulty
Easy
Time
30-60 minutes
Tools Used
Screwdriver, Wrench Set
Parts Used
1.Check the possible cause for the leak.
2. Empty the fuel tank.
3. Disconnect the tank hoses and
remove tank from the holding base.
4. Unplug the bushing and insert the new part.
5. Reinstall tank.
6. Be careful to ensure you completely emptied the tank and no remaining of fuel are inside.
The diagrams available in the web page were very helpful and friendly to use. The selection of parts can be done easily . Great for us. I definitively will recommend the web page to all my friends.
Did you find this story helpful?
Thanks for voting and helping fellow customers!
Shutoff valve leaked, and gasket leaked
RUSSELL - September 29, 2017
👍 2 of 2 people found this instruction helpful
Tool Type
Generator
Difficulty
Easy
Time
30-60 minutes
Tools Used
Socket set
1. Remove hose from shutoff valve
2. Remove remnants of bushing & shutoff valve
3. Push new the bushing into tank
4. Lube inside of bushing with a very small amount of oil.
5. Push shutoff valve into the bushing until it snaps into place. This is easiest to do if tank has been removed, but it is not necessary if you have small enough hands to work under the gas tank.
6. Loosen all vibration mounts.
7. Lift each corner, remove old mount, replace with new mount, go to next corner until all four are replace. I used a piece of wood to hold up the generator between the frame and generator to remove the vibration mount.
8. Retighten each corner mount, operate generator and check for vibration
Did you find this story helpful?
Thanks for voting and helping fellow customers!
the seal and gas shut off valve were old and cracked
john - November 5, 2021
Tool Type
Generator
Difficulty
Easy
Time
15-30 minutes
Tools Used
Screwdriver, Pliers
removed the gas line from the gas tank and replaced the seal and valve
Did you find this story helpful?
Thanks for voting and helping fellow customers!
Fuel tank grommet was leaking due to old age
Norman - September 28, 2020
Tool Type
Generator
Difficulty
Easy
Time
30-60 minutes
Tools Used
Screwdriver, Pliers, Socket set, Wrench Set
Parts Used
Unbolted and removed 4 gas tank mounting bolts disconnected fuel line at carburetor after verifying fuel shut off valve was in the off position drain fuel from tank removed fuel shut off valve and petcock from tank removed and replaced rubber tank grommet and reversed process to reinstall
Did you find this story helpful?
Thanks for voting and helping fellow customers!
Fuel was leaking from the bushing
Greg - December 31, 2019
Tool Type
Generator
Difficulty
Easy
Time
Less than 15 minutes
Tools Used
Pliers, I piece of 2x4 to push the bushing and fuel valve into the n
Parts Used
Did you find this story helpful?
Thanks for voting and helping fellow customers!
Gravity fuel valve broken.
gary - October 29, 2019
Tool Type
Generator
Difficulty
Easy
Time
1-2 hours
Tools Used
Screwdriver, Pliers, Simple tools. Simple job.
Parts Used
Generac 7,000 watt generator with Briggs Stratton motor. Disconnected fuel line. Removed tank from unit. Removed old valve & installed new valve & rubber grommet into tank. Reinstalled tank & fuel line. Gassed up. Started right up. Good to go. Unit comes into play here in communist Kalifornia mountains between Yosemite & Lake Tahoe.
Did you find this story helpful?
Thanks for voting and helping fellow customers!
On/off switch was bad , fuel shut off valve and tank grommet was leaking fuel
Vic - September 19, 2019
Tool Type
Generator
Difficulty
Medium
Time
15-30 minutes
Tools Used
Screwdriver, Pliers, Socket set, Small pry bar
Removed housing that the on off switch was in depressed the ends of the switch with flat head screwdriver and pushed it out.
Put wires on new switch in proper order and snaplocked back into place.
Tilted unit gas tank to put fuel away from the valve end , removed gas line, pulled and wiggled the gas valve out of grommet.
Pried grommet out of tank with small pry bar, pressed new grommet , pressed valve into grommet
Put wires on new switch in proper order and snaplocked back into place.
Tilted unit gas tank to put fuel away from the valve end , removed gas line, pulled and wiggled the gas valve out of grommet.
Pried grommet out of tank with small pry bar, pressed new grommet , pressed valve into grommet
Did you find this story helpful?
Thanks for voting and helping fellow customers!
Fuel tank bushing had began to leak from dry rot.
Jeff - May 3, 2019
Tool Type
Generator
Difficulty
Medium
Time
30-60 minutes
Tools Used
Screwdriver, Pliers
Parts Used
Drain fuel tank
Remove fuel line and remove tank
Replace bushing
Reverse order
Use
Remove fuel line and remove tank
Replace bushing
Reverse order
Use
Did you find this story helpful?
Thanks for voting and helping fellow customers!
Load More Install Stories
OEM stands for Original Equipment Manufacturer and means the part you’re buying is sourced directly from the manufacturer who made your product. At eReplacementParts, we sell only genuine OEM parts, guaranteeing the part you’re purchasing is of better design and of higher quality than aftermarket parts.
Our product descriptions are a combination of data sourced directly from the manufacturers who made your product as well as content researched and curated by our content & customer service teams. This content is edited and reviewed internally before being made public to customers.
Our customer service team are at the ready daily to answer your part and product questions. We have a dedicated staff with decades of collective experience in helping customers just like you purchase parts to repair their products.
All our part reviews are solicited directly from other customers who have purchased this exact part. While we moderate these reviews for profanity, offensive language or personally identifiable information, these reviews are posted exactly as submitted and no alterations are made by our team.
All our customer repair instructions are solicited directly from other customers just like you who have purchased and replaced this exact part. While we moderate these reviews for profanity, offensive language or personally identifiable information, these reviews are posted exactly as submitted and no alterations are made by our team.
Based on data from past customer purchasing behaviors, these parts are most commonly purchased together along with the part you are viewing. These parts may be necessary or helpful to replace to complete your current repair.
All our installation videos are created and produced in collaboration with our in-house repair technician, Mark Sodja, who has helped millions of eReplacementParts customers over the last 13 years repair their products. Mark has years of experience in selling and repairing both commercial and residential products with a specialty in gas-powered equipment.
This data is collected from customers who submitted a repair instruction after replacing this exact part. Customers can rate how easy the repair was to complete and how long it took. We aggregate this data to provide a repair rating that allows customers to quickly determine the difficulty and time needed to perform their own repair.