eReplacementParts.com
877-346-4814
Ryobi Parts
Repair Parts Home
  
Lawn Equipment Parts
  
Ryobi Parts
  791-182352 Fuel Return Line

Fuel Return Line 791-182352

OEM part for: Ryobi, MTD, Troy-Bilt, Yard Man, Bolens, Cub Cadet

Part Number: 791-182352


Install
Videos!
Fuel Return Line - 791-182352:Ryobi 360 View
Fuel Return Line - 791-182352:RyobiFuel Return Line - 791-182352:RyobiFuel Return Line - 791-182352:Ryobi 360 View
In Stock
Ships within 1 business day
Easy 15-30 minutes (23 rated repairs)?
OEM: Original Equipment Manufacturer ?
RyobiMTDTroy-BiltYard ManBolensCub Cadet
Does this d-block d-md-none fit my product?

Product Description ?

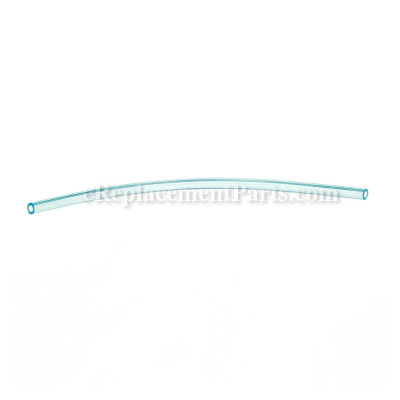
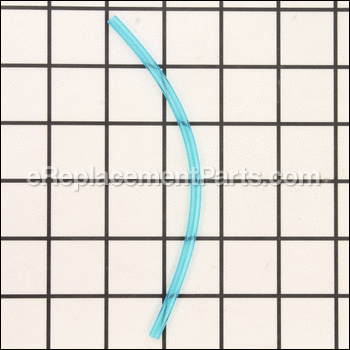
The purpose of the 791-182352 Fuel Return Tube is to return the excess fuel back into the fuel tank, after the primer bulb has been pressed and has primed the carburetor to start.

Over time the Fuel Return Line will become brittle and crack and will need to be replaced.

  • Classification: Part
  • Weight: 0.01 lbs.
  • Also Known As: Fuel Return Tube, Fuel System, Fuel Return Pipe, Fuel Line
  • Shipping: Ships Worldwide

Frequently Purchased Together ?

Compatibility

This part will fit the following 104 machines

Ryobi

510r (21AK510G034) Tiller View Diagrams & Manuals
510r (21BK515G034) Tiller View Diagrams & Manuals
650r (41AN650G034) Handheld Trimmer View Diagrams & Manuals
825r (41AD825A034) Handheld Trimmer View Diagrams & Manuals
825r (41AD825A734) Handheld Trimmer View Diagrams & Manuals
825r (41CD825A034) Handheld Trimmer View Diagrams & Manuals
875r (41AD875A034) Handheld Trimmer View Diagrams & Manuals
875r (41AD875A734) Handheld Trimmer View Diagrams & Manuals
875r (41BD875A034) Handheld Trimmer View Diagrams & Manuals
875r (41CD875A034) Handheld Trimmer View Diagrams & Manuals
890 (41CD890A034) Handheld Trimmer View Diagrams & Manuals
890r (41AD890A034) Handheld Trimmer View Diagrams & Manuals
890r (41AD890A734) Handheld Trimmer View Diagrams & Manuals
890r (41BD890A034) Handheld Trimmer View Diagrams & Manuals
890r (41CD890A034) Handheld Trimmer View Diagrams & Manuals
890r (41CD890G034) Handheld Trimmer View Diagrams & Manuals
825RA (41CD825C038) 4-Cycle Gas Trimmer View Diagrams & Manuals

MTD

MP425 (41AD425C095) String Trimmer View Diagrams & Manuals
MP425 (41BD425C995) String Trimmer View Diagrams & Manuals
MP426CS (41AD426G995) String Trimmer View Diagrams & Manuals
MP475 (41AD475C095) String Trimmer View Diagrams & Manuals
41AD26OG900 Handheld Trimmer View Diagrams & Manuals
41AD26SC900 Handheld Trimmer View Diagrams & Manuals
875R (2004) Gas Trimmer 41AD875A734 View Diagrams & Manuals
650R (41AN650G034) Trimmer View Diagrams & Manuals
825R (41AD825A034) Trimmer View Diagrams & Manuals
825R (41AD825A734 2004) Trimmer View Diagrams & Manuals
825R (41CD825A034) Trimmer View Diagrams & Manuals
875R (41AD875A034) Trimmer View Diagrams & Manuals
875R (41CD875A034) Trimmer View Diagrams & Manuals
875R (41BD875A034) Trimmer View Diagrams & Manuals
890 (41CD890A034 2004) Trimmer View Diagrams & Manuals
890R (41AD890A034) Trimmer View Diagrams & Manuals
890R (41AD890A734 2004) Trimmer View Diagrams & Manuals
890R (41BD890A034) Trimmer View Diagrams & Manuals
890R (41CD890A034) Trimmer View Diagrams & Manuals
890R (41CD890G034) Trimmer View Diagrams & Manuals

Troy-Bilt

21AT144R766 (2004) Tiller/Edger View Diagrams & Manuals
21AT144R766 (2005) Tiller/Edger View Diagrams & Manuals
21AT144R966 (2005) Tiller/Edger View Diagrams & Manuals
21BA144R966 (2007) TB144 Cultivator View Diagrams & Manuals
21BA144R966 (2008) TB144 Cultivator View Diagrams & Manuals
21AA144R966 (2006) TB144 Cultivator View Diagrams & Manuals
TB25CS (41ADT25C063) Gas Trimmer View Diagrams & Manuals
TB25CS (41ADT25C763) Gas Trimmer View Diagrams & Manuals
TB26CO (41AD26OG966) Gas Trimmer View Diagrams & Manuals
TB26TB (41ADT2BC066) Gas Trimmer View Diagrams & Manuals
TB26TB (41ADT2BC966) Gas Trimmer View Diagrams & Manuals
TB415CS (41ADT41C711) Gas Trimmer View Diagrams & Manuals
TB25ET (41ADT2EC063) Gas Trimmer View Diagrams & Manuals
TB415CS (41BDT41G966) Gas Trimmer View Diagrams & Manuals
TB475SS (41ADT47C711) Gas Trimmer View Diagrams & Manuals
TB475SS (41ADT47C766) Gas Trimmer View Diagrams & Manuals
TB475SS (41ADT47C966) Gas Trimmer View Diagrams & Manuals
TB475SS (41BDT47C063) Gas Trimmer View Diagrams & Manuals
TB490BC (41ADT49C063) Gas Trimmer View Diagrams & Manuals
TB490BC (41ADT49C711) Gas Trimmer View Diagrams & Manuals
TB490BC (41ADT49C966) Gas Trimmer View Diagrams & Manuals
TB490BC (41BDT49C063) Gas Trimmer View Diagrams & Manuals
TB75SS (41ADT75C763) Trimmer View Diagrams & Manuals
TB75SS (41BDT75C063) Trimmer View Diagrams & Manuals
TB490BC (41BDT49C966) Gas Trimmer View Diagrams & Manuals
TB415CS (Super Bronco)(41ADT41C966) Gas Trimmer View Diagrams & Manuals
TB425CS (41ADT42C063) Gas Trimmer View Diagrams & Manuals
TB425CS (41ADT42C711) Gas Trimmer View Diagrams & Manuals
TB425CS (41ADT42C766) Gas Trimmer View Diagrams & Manuals
TB425CS (41ADT42C966) Gas Trimmer View Diagrams & Manuals
TB465SS (41ADT46C711) Gas Trimmer View Diagrams & Manuals
TB465SS (Pony)(41ADT46C966) Gas Trimmer View Diagrams & Manuals
TB475SS (41ADT47C063) Gas Trimmer View Diagrams & Manuals
21BA144R966 (TB144) (2009) Cultivator View Diagrams & Manuals
41ADT41C966 (TB415CS) Super Bronco Super Bronco Handheld Gas Trimmer View Diagrams & Manuals
41ADT46C966 (TB465SS) Pony Pony Handheld Gas Trimmer View Diagrams & Manuals

Yard Man

YM141 (21A-141R901) Tiller View Diagrams & Manuals
YM21SS (41AD26SC701) Trimmer View Diagrams & Manuals
YM25 (41ADY25C401) Trimmer View Diagrams & Manuals
YM26CO (41AD26OG701) Trimmer View Diagrams & Manuals
YM26SS (41AD26SC401) Trimmer View Diagrams & Manuals
YM26SS (41AD26SC901) Trimmer View Diagrams & Manuals
YM26BC (41AD26BC401) Trimmer View Diagrams & Manuals
YM26BC (41AD26BC701) Trimmer View Diagrams & Manuals
YM26BC (41AD26BC901) Trimmer View Diagrams & Manuals
YM26CO (41AD26OG401) Trimmer View Diagrams & Manuals
YM26CO (41AD26OG901) Trimmer View Diagrams & Manuals
YM26CS (41AD26CC401) Trimmer View Diagrams & Manuals
YM26CS (41AD26CC701) Trimmer View Diagrams & Manuals
YM26CS (41AD26CC901) Trimmer View Diagrams & Manuals
YM75 (41ADY75C401) Trimmer View Diagrams & Manuals
YM21SS 41ad26sc701 Gas String Trimmer View Diagrams & Manuals
YM25 41ady25c401 Gas String Trimmer View Diagrams & Manuals
YM260CO 41ad26og701 Gas String Trimmer View Diagrams & Manuals
YM75 41ady75c401 Gas String Trimmer View Diagrams & Manuals
YM141 21a-141r901 Tiller View Diagrams & Manuals

Bolens

BL26BC 41AD26BC965 Gas String Trimmer View Diagrams & Manuals
BL26CO 41AD02OG965 Gas String Trimmer View Diagrams & Manuals
BL26CO 41AD26OG965 Gas String Trimmer View Diagrams & Manuals
BL26SS 41AD26SC965 Gas String Trimmer View Diagrams & Manuals

Cub Cadet

CC4025 (41ADC42C712) (2005) Gas String Trimmer View Diagrams & Manuals
CC4075 (41ADC47C712) Gas String Trimmer View Diagrams & Manuals
CC4090 (41ADC49C712) (2005) Gas String Trimmer View Diagrams & Manuals
CC4025 (41ADC42C712) (2006) Gas String Trimmer View Diagrams & Manuals
CC4065SS (41AD465C910) (2006) Gas String Trimmer View Diagrams & Manuals
CC4065SS (41AD465C910) (2007) Gas String Trimmer View Diagrams & Manuals
CC4065SS (41AD465C910) (2008) Gas String Trimmer View Diagrams & Manuals
Show More Compatible Models
Don't see yours? Try searching our site for :

This item works with the following types of products:

  • Cultivator Parts
  • Trimmer Parts
  • Edger Parts

Customer Part Reviews ?

5
Average Rating (out of 5):
7 Reviews
Click to filter by ratings:
5 stars
7
4 stars
0
3 stars
0
2 stars
0
1 stars
0
  • Highest Rating
  • Most Recent
< PREV
  • 1
NEXT >
  • Excellent description of part. Fit perfectly!
    Arrived quickly and fit perfectly. I also liked that your website had a YouTube of how to install on my tiller. Thank you.
    Guest - April 26, 2022 Verified Purchase
    Worked as expected
    Fit perfectly
    Guest - November 2, 2021 Verified Purchase
    Perfect part
    Just as advertised, fast and easy.
    Danny - August 21, 2019 Verified Purchase
    Easy repair - just like original
    Easy install, love the parts list for easy ID of the correct replacement part. The trimmer is now 19 years old and still running strong. Most parts are still replaceable. Ryobi 875R
    Tom - July 30, 2019 Verified Purchase
    Exactly what I needed .... exact fit!
    Fuel return line was an exact fit.
    James - July 8, 2019 Verified Purchase
    It worked!
    The part was installed in less than 10 minutes, and the trimmer started first time.
    Guest - June 29, 2019 Verified Purchase
    Fuel line
    It was the right part great to do business with you!
    Guest - May 18, 2019 Verified Purchase
    t
    t
    t - t days ago Verified Purchase
    eReplacementParts Team
    t

    Questions & Answers ?

    Our customer Service team is at the ready daily to answer your part and product questions.

    photo of team member
    Ask our Team

    We have a dedicated staff with decades of collective experience in helping customers just like you purchase parts to repair their products.

    Does this fit my product?

    Questions & Answers for Fuel Return Line


    No questions have been asked yet

    Customer Repair Instructions ?

    All our customer repair instructions are solicited directly from other customers just like you who have purchased and replaced this exact part.

    Easy 15-30 minutes (23 rated repairs)?

    The fuel filter needs to come un-attached to the line. There is no way to feed the line up from within the fuel tank

    Greg - March 6, 2017
    👍 4 of 4 people found this instruction helpful
    Tool Type

    Trimmer

    Difficulty

    Easy

    Time

    15-30 minutes

    Tools Used

    Screwdriver, knife

    As others have stated, you need to cut the filter off the line. Then cut one of the ends at a sharp angle and feed it into the hole in the tank. With a piece of wire, fish the line up the filler neck, grab the line cut the end square, and re-attach the filter.

    Attaching the fuel pick up line and return line to the back of the carb took a few minutes, because the inside diameter of the line isn't much bigger than the metal fitting it attaches to.

    Did you find this story helpful?
    Thanks for voting and helping fellow customers!

    Fuel line should have not had filter pre-installed

    todd - May 2, 2016
    👍 5 of 6 people found this instruction helpful
    Tool Type

    Trimmer

    Difficulty

    Easy

    Time

    Less than 15 minutes

    Tools Used

    , Piece of wire

    Kit came with the filter installed on fuel line, Cut off at the nipple of fuel filter and run line from the outside of tank down thru tank. Use a small piece of wire that you turn into a U at the end of wire, (About 3/8" shaped U) with some needle nose pliers)! As you push line down from outside of tank about 3 to 4 inches. Stop there and stick 3/8" U shaped wire down thru fuel neck and (feed fuel line) downward and grab with inserted wire through fuel neck and work the line up to fuel filler neck. Grab line and install filter and pull line down until fuel filter lays on bottom of inside of tank! Pretty easy if you can visualize and use common sense!
    Did you find this story helpful?
    Thanks for voting and helping fellow customers!

    Cracked due to age

    Sean - November 14, 2015
    👍 3 of 3 people found this instruction helpful
    Tool Type

    Trimmer

    Difficulty

    Easy

    Time

    Less than 15 minutes

    Tools Used

    Pliers

    All that has to be done is to push the fuel line onto the carb port & then into the tank.
    Did you find this story helpful?
    Thanks for voting and helping fellow customers!

    Broken fuel pick-up and fuel return lines on a Troy-Built TB475SS string trimmer.

    Philip - April 23, 2018
    👍 2 of 2 people found this instruction helpful
    Tool Type

    Trimmer

    Difficulty

    Easy

    Time

    Less than 15 minutes

    Tools Used

    , Torx driver, and razor blade

    First and most important "You DON'T cut off fuel filter from the fuel pick-up line"... cut a piece of clothes hanger wire about 10"-11" long from the bottom of a clothes hanger and form a half circle approximately 4-3/4" diameter. then cut about a 1/4" taper to the end of the fuel pick up assembly line.

    Draw diagram of fuel tank and fuel line location, Clear fuel line with attached fuel filter connects to end of carburetor and inters thru the forward outside hole in top of tank... the Blue-Green return line connects to the top of carburetor and inters thru the inside rear hole in top of tank.

    Not necessary but makes it easier to remove the one torx screw and then remove tank and place in bench vise lightly to hold while inserting fuel line, also makes it easier to clean out any debris in tank.

    Remove the cap from the fuel tank, run the wire down into the hole in the top of the tank formed for the fuel line and out through the tanks fill opening, placing the tapered end of fuel line on end of wire (which is just a really loose slip on fit) work them together back into tank and started out the small hole in top of tank... once tapered cut end starts to protrude from the tank grab end of fuel line with fingers and pull thru until filter rest on bottom of tank at about a 45 degree angle.

    Then do the exact same thing with the fuel return line.

    Reinstall tank and attach fuel and return lines to carburetor.

    Sounds intimidating but it really isn't... hardest part is actually cleaning off the old broken fuel lines from the barbs on the carburetor, requires being really gentle and patient to keep from damaging the barbs or possibly breaking them. This is where a razor blade or the blade of a small knife comes in handy.

    Whole thing takes about 10 to 15 minutes.
    Did you find this story helpful?
    Thanks for voting and helping fellow customers!

    OEM fuel lines dried out and broke

    Kenneth - September 6, 2018
    👍 1 of 1 people found this instruction helpful
    Tool Type

    Trimmer

    Difficulty

    Medium

    Time

    30-60 minutes

    Tools Used

    Screwdriver, Pliers

    1. Removed fuel tank
    2. Inserted fuel return line through hole in tank
    3. Figured out how to fish fuel line with strainer through hole in tank
    4. Connected both to trimmer carburetor
    Did you find this story helpful?
    Thanks for voting and helping fellow customers!

    Lines were old and leaking

    Robert - April 26, 2018
    👍 1 of 1 people found this instruction helpful
    Tool Type

    Trimmer

    Difficulty

    Easy

    Time

    30-60 minutes

    Tools Used

    Pliers, hair dryer, knife

    1. Removed the existing fuel return and pick up lines with needle nose pliers and used a hair dryer on high heat to soften the hose around the fitting.
    2. Had to cut off the filter off the new fuel line in order to get the line into the fuel tank. It simply shortened the line by 0.5 in, no issues.
    3. Fed the lines into fuel lines into the tank.
    4. Used a bent wire coat hanger to get the end of the line out of the fuel tank
    5. Used a hair dryer on high heat to soften the ends of the lines and used needle nose pliers to slide the lines onto the engine plugs.
    6. Reinstalled fuel filter.
    Did you find this story helpful?
    Thanks for voting and helping fellow customers!

    Cracked lines.

    Robert - November 5, 2017
    Tool Type

    Trimmer

    Difficulty

    Easy

    Time

    30-60 minutes

    Tools Used

    Pliers

    Removed the old and connected the new ones.
    Did you find this story helpful?
    Thanks for voting and helping fellow customers!

    Fuel ethanol, swelling of the lines caused fuel starved .

    Stephen - November 2, 2017
    Tool Type

    Trimmer

    Difficulty

    Easy

    Time

    15-30 minutes

    Tools Used

    Screwdriver, Pliers, Wire to get the new line through the tank

    Removed the old lines, took the filter off the new line and feed it through the hole in tank. Feed it enough so I could pull through the fill so I could put filter back on. Place the other fuel line and hooked up to the carb. Fill with fuel no ethanol this time.
    Did you find this story helpful?
    Thanks for voting and helping fellow customers!

    Fuel lines of grass trimmer were deteriorated and required replacement

    Jose - October 10, 2017
    Tool Type

    Trimmer

    Difficulty

    Easy

    Time

    Less than 15 minutes

    Tools Used

    Screwdriver, Pliers, Piece of wire; scissors

    1. Using screwdriver, removed fuel tank from trimmer
    2. Turned over fuel tank to empty all debris
    3. Removed old and deteriorated fuel lines from fuel tank
    4. Used screwdriver to clean holes for fuel lines
    5. Inserted fuel return line into one of the holes in the fuel tank
    6. Removed fuel filter from fuel pick-up line
    7. Inserted fuel pick-up line into open hole in the fuel tank
    8. Used an opened wire hanger to fish the fuel pick-up line through the spout of fuel tank
    9. Inserted fuel filter into fuel pick-up line, end that was fished through the spout
    10. Pushed fuel filter and fuel pick-up line into fuel tank through the spout
    11. Replaced fuel tank back on the trimmer
    12. Pulled both fuel lines from fuel tank to ensure that they can be connected to fuel tank
    13. Inserted fuel return line onto right-hand line connector on trimmer motor
    14. Made sure that the fuel filter laid at bottom inside of fuel tank
    15. Inserted fuel pick-up line onto left-hand line connector on trimmer motor
    16. Poured gasoline into fuel tank and covered spout with cover
    Did you find this story helpful?
    Thanks for voting and helping fellow customers!

    Trimmer would start and run for a little while then quit

    Dennis - August 27, 2017
    Tool Type

    Trimmer

    Difficulty

    Easy

    Time

    15-30 minutes

    Tools Used

    Pliers

    1. Removed gas cap
    2. Pulled old pickup line , filter, and return line off
    3. Took filter off new pickup line
    4. Pushed pickup line and return line into gas tank
    5. Reattached pickup line to filter
    6. Attached both lines to carburetor
    Did you find this story helpful?
    Thanks for voting and helping fellow customers!

    OEM stands for Original Equipment Manufacturer and means the part you’re buying is sourced directly from the manufacturer who made your product. At eReplacementParts, we sell only genuine OEM parts, guaranteeing the part you’re purchasing is of better design and of higher quality than aftermarket parts.

    Our product descriptions are a combination of data sourced directly from the manufacturers who made your product as well as content researched and curated by our content & customer service teams. This content is edited and reviewed internally before being made public to customers.

    Our customer service team are at the ready daily to answer your part and product questions. We have a dedicated staff with decades of collective experience in helping customers just like you purchase parts to repair their products.

    All our part reviews are solicited directly from other customers who have purchased this exact part. While we moderate these reviews for profanity, offensive language or personally identifiable information, these reviews are posted exactly as submitted and no alterations are made by our team.

    All our customer repair instructions are solicited directly from other customers just like you who have purchased and replaced this exact part. While we moderate these reviews for profanity, offensive language or personally identifiable information, these reviews are posted exactly as submitted and no alterations are made by our team.

    Based on data from past customer purchasing behaviors, these parts are most commonly purchased together along with the part you are viewing. These parts may be necessary or helpful to replace to complete your current repair.

    All our installation videos are created and produced in collaboration with our in-house repair technician, Mark Sodja, who has helped millions of eReplacementParts customers over the last 13 years repair their products. Mark has years of experience in selling and repairing both commercial and residential products with a specialty in gas-powered equipment.

    This data is collected from customers who submitted a repair instruction after replacing this exact part. Customers can rate how easy the repair was to complete and how long it took. We aggregate this data to provide a repair rating that allows customers to quickly determine the difficulty and time needed to perform their own repair.

    eReplacementParts.com
    7174 South 400 West
    Suite 5
    Midvale, UT 84047
    visa mastercard discover american express PayPal