eReplacementParts.com
877-346-4814
Metabo HPT (Hitachi) Parts

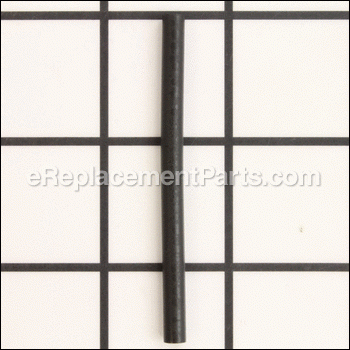
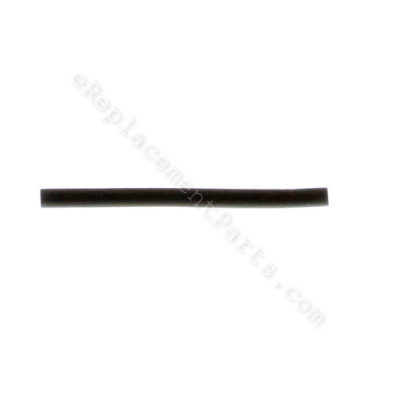
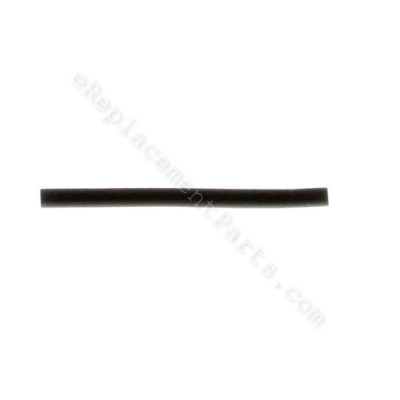
Fuel Pipe 6698720

OEM part for: Metabo HPT (Hitachi), Tanaka

Part Number: 6698720


Install
Videos!
Fuel Pipe - 6698720:Metabo HPT (Hitachi) 360 View
Fuel Pipe - 6698720:Metabo HPT (Hitachi)Fuel Pipe - 6698720:Metabo HPT (Hitachi)Fuel Pipe - 6698720:Metabo HPT (Hitachi) 360 View
In Stock
Ships within 1 business day
Medium 15-30 minutes (8 rated repairs)?
OEM: Original Equipment Manufacturer ?
Metabo HPT (Hitachi)Tanaka
Does this d-block d-md-none fit my product?

Product Description ?

This is an authentic OEM replacement fuel pipe. It is specially made for use with gas trimmers/cutters. The purpose of a fuel line is to deliver the fuel from the tank to the carburetor. Over time rubber material will become brittle and may crack allowing for leaks. At this point the line/pipe should be replaced.

  • Classification: Part
  • Weight: 0.01 lbs.
  • Shipping: Ships Worldwide

Compatibility

This part will fit the following 6 machines

Metabo HPT (Hitachi)

CG22EADSLP 21.1cc Split Shaft Grass Trimmer View Diagrams & Manuals
CG22EASSLP 21.1 cc Straight Shaft Grass Trimmer View Diagrams & Manuals
CG22EABSLP Grass Trimmer View Diagrams & Manuals
CG24EASP Engine Brush Cutter View Diagrams & Manuals

Tanaka

TCG-22EAB Grass Trimmer View Diagrams & Manuals
TCG-22EAS Brush Cutter View Diagrams & Manuals
Show More Compatible Models
Don't see yours? Try searching our site for :

This item works with the following types of products:

  • Grass Trimmer Parts
  • Trimmer Parts

This part replaces obsolete part #: 6696962, 669-6962

Customer Part Reviews ?

4.8
Average Rating (out of 5):
4 Reviews
Click to filter by ratings:
5 stars
3
4 stars
1
3 stars
0
2 stars
0
1 stars
0
  • Highest Rating
  • Most Recent
< PREV
  • 1
NEXT >
  • Works as expected
    Arrived in a timely manner and fixed my leaking trimmer
    Denver - June 23, 2023 Verified Purchase
    Easy , diagrams, the right stuff
    Arrived quickly. Great freakin quality! Ereplacement parts never miss
    Tomas - September 26, 2022 Verified Purchase
    Repair parts fit... easy to get my trimmer back up and running...
    Ordered several parts to replace the fuel system lines on my Hitachi trimmer... all parts fit perfectly and I was up and running in no time!
    Guest - September 12, 2022 Verified Purchase
    Easy repair, fast shipping
    the original sleeve has a spring inside and this one did not bring it. The difference is that the sleeve is slightly bent. But work!!
    Guest - May 5, 2020 Verified Purchase
    t
    t
    t - t days ago Verified Purchase
    eReplacementParts Team
    t

    Questions & Answers ?

    Our customer Service team is at the ready daily to answer your part and product questions.

    photo of team member
    Ask our Team

    We have a dedicated staff with decades of collective experience in helping customers just like you purchase parts to repair their products.

    Does this fit my product?

    Questions & Answers for Fuel Pipe


    I need to replace all 3 tubes going to the carburetor. One tube popped off and I am not sure where it goes. Please inform me of the position of all 3. Thanks
    Sandra for model number CG 22EAS (SLP) asked on 2022-04-23
    Hi Sandra, Thank you for your question. Here is a link to one of our YouTube videos that you may reference on how to install a carburetor on a trimmer, https://www.youtube.com/watch?v=gPbEHC-j6uw. The trimmer in the video may appear different from yours, but it will give you a general idea on how to install the carburetor and the fuel lines. If you have any questions, please let us know. We are open 7 days a week. We look forward to hearing from you!
    eReplacementParts Team April 23, 2022

    Customer Repair Instructions ?

    All our customer repair instructions are solicited directly from other customers just like you who have purchased and replaced this exact part.

    Medium 15-30 minutes (8 rated repairs)?

    Gas priming bulb was leaking and decided to change all gas lines

    Brian - December 15, 2016
    👍 3 of 3 people found this instruction helpful
    Tool Type

    Blower

    Difficulty

    Medium

    Time

    30-60 minutes

    Tools Used

    Screwdriver, Pliers

    Removed air filter housing to get to housing/carburetor attached fuel lines. The fuel priming bulb just snaps in place. The pink line attaches to the housing and proceeds through a grommet in the gas tank. The shorter black line goes from the housing to the carburetor. You will need to remove the other rubber grommet that seals the longer black fuel line going into the gas tank to feed the new line through it. You will also have to reach into fuel tank with a wire hook to retrieve the filter attached to the black line to remove it and attach new line since the grommet opening is not large enough to pull the filter through. The filter housing/carburetor screws are then put back in place and re-tightened.
    Did you find this story helpful?
    Thanks for voting and helping fellow customers!

    Tubing affected by gasoline. Dirty filter element.

    James - April 23, 2017
    👍 1 of 1 people found this instruction helpful
    Tool Type

    Blower

    Difficulty

    Easy

    Time

    15-30 minutes

    Tools Used

    Pliers, Wire

    Needle nose pliers are helpful to change the tubing. A piece of wire is necessary to pull the tubing and filter from the gas tank.
    Did you find this story helpful?
    Thanks for voting and helping fellow customers!

    Ethanol ate the rubber and gas was leaking.

    Brad - November 9, 2016
    👍 1 of 1 people found this instruction helpful
    Tool Type

    Blower

    Difficulty

    Medium

    Time

    15-30 minutes

    Tools Used

    Screwdriver, Pliers

    Removed the old parts by pulling them off with needle nose pliers. Worked the new parts into place, more easily than expected.
    Just keep track of what goes where, and it's pretty easy. Should be good to go for awhile until the gas eats the rubber again.
    Did you find this story helpful?
    Thanks for voting and helping fellow customers!

    Fuel line correded and broke to pieces, primer bulb was starting to get stiff from age, both needed replacing

    Andy - August 26, 2016
    👍 1 of 1 people found this instruction helpful
    Tool Type

    Blower

    Difficulty

    Easy

    Time

    15-30 minutes

    Tools Used

    Screwdriver, Pliers

    1. Opened the housing using a flathead.
    2. Removed the filter
    3. Unscrewed two screws holding the carburetor block
    4. Getting access to the fuel lines, I unhooked the pink/see-through line that was damaged.
    5. Replaced with new part.
    6. Replaced the priming bulb and reattached the fuel line and fuel pipe to it.
    7. Hooked everything back up.
    8. Primed 3 times, cranked twice and she started purring.
    Did you find this story helpful?
    Thanks for voting and helping fellow customers!

    Fuel supply

    Raymond - August 10, 2016
    👍 1 of 1 people found this instruction helpful
    Tool Type

    Blower

    Difficulty

    Medium

    Time

    15-30 minutes

    Tools Used

    Screwdriver, Pliers

    1. Remove fuel for safety.
    2. Clean the general parts area.
    3. Replace parts one at a time.
    4. Works
    Did you find this story helpful?
    Thanks for voting and helping fellow customers!

    Old fuel line broken.

    Sidney - July 10, 2016
    👍 1 of 1 people found this instruction helpful
    Tool Type

    Trimmer

    Difficulty

    Easy

    Time

    Less than 15 minutes

    Tools Used

    Screwdriver

    Removed the air filter assembly and replaced the fuel line.
    Did you find this story helpful?
    Thanks for voting and helping fellow customers!

    Leaky fuel pipe due to dried out hose

    Alan - June 20, 2016
    👍 1 of 1 people found this instruction helpful
    Tool Type

    Trimmer

    Difficulty

    Medium

    Time

    15-30 minutes

    Tools Used

    Screwdriver, needle nose pliers

    Took the outside cover off the air filter assembly and removed air filter. Then used small regular screwdriver to depress clips holding priming bulb to bracket. Pulled bulb out of housing slightly and removed old fuel pipe. Used screwdriver to pry old grommet up from fuel tank and needle nose pliers to remove it. Got new grommet and fuel pipe out and used dishwashing detergent to lubricate fuel pipe going into grommet on outside. Threaded fuel pipe into grommet and then fed pipe and grommet through priming bulb housing and plugged into priming bulb. Then pressed grommet with fuel pipe into place and snapped priming bulb into place. Installed air filter and snapped outside of air filter housing back into place and closed it up and locked it in place.
    Did you find this story helpful?
    Thanks for voting and helping fellow customers!

    Both the fuel line and the fuel pipe had broken where they enter the fuel tank on my Hitachi string trimmer

    Scott - June 15, 2016
    👍 1 of 1 people found this instruction helpful
    Tool Type

    Trimmer

    Difficulty

    Medium

    Time

    15-30 minutes

    Tools Used

    Screwdriver, Pliers

    I removed the fuel tank, and the remnants of the old fuel line and fuel pipe. Then I used a pair of long needle-nosed pliers to reach into the fuel tank and removed the fuel line with filter attached. I then routed the new fuel line from the carb through the grommet into the tank, once again reaching in with the pliers to pull the end of the fuel like from the tank. I installed the fuel filter on the new line and secured with the spring clamp, then reinserted it into the fuel tank. Afterward, I routed the new fuel pipe into its respective grommet in the fuel tank and attached the other end to the primer body. I reattached the fuel tank to the trimmer, then primed and started the string trimmer. After adjusting the idle, the trimmer performed flawlessly.
    Did you find this story helpful?
    Thanks for voting and helping fellow customers!

    OEM stands for Original Equipment Manufacturer and means the part you’re buying is sourced directly from the manufacturer who made your product. At eReplacementParts, we sell only genuine OEM parts, guaranteeing the part you’re purchasing is of better design and of higher quality than aftermarket parts.

    Our product descriptions are a combination of data sourced directly from the manufacturers who made your product as well as content researched and curated by our content & customer service teams. This content is edited and reviewed internally before being made public to customers.

    Our customer service team are at the ready daily to answer your part and product questions. We have a dedicated staff with decades of collective experience in helping customers just like you purchase parts to repair their products.

    All our part reviews are solicited directly from other customers who have purchased this exact part. While we moderate these reviews for profanity, offensive language or personally identifiable information, these reviews are posted exactly as submitted and no alterations are made by our team.

    All our customer repair instructions are solicited directly from other customers just like you who have purchased and replaced this exact part. While we moderate these reviews for profanity, offensive language or personally identifiable information, these reviews are posted exactly as submitted and no alterations are made by our team.

    Based on data from past customer purchasing behaviors, these parts are most commonly purchased together along with the part you are viewing. These parts may be necessary or helpful to replace to complete your current repair.

    All our installation videos are created and produced in collaboration with our in-house repair technician, Mark Sodja, who has helped millions of eReplacementParts customers over the last 13 years repair their products. Mark has years of experience in selling and repairing both commercial and residential products with a specialty in gas-powered equipment.

    This data is collected from customers who submitted a repair instruction after replacing this exact part. Customers can rate how easy the repair was to complete and how long it took. We aggregate this data to provide a repair rating that allows customers to quickly determine the difficulty and time needed to perform their own repair.

    eReplacementParts.com
    7174 South 400 West
    Suite 5
    Midvale, UT 84047
    visa mastercard discover american express PayPal